|
New
Translations here
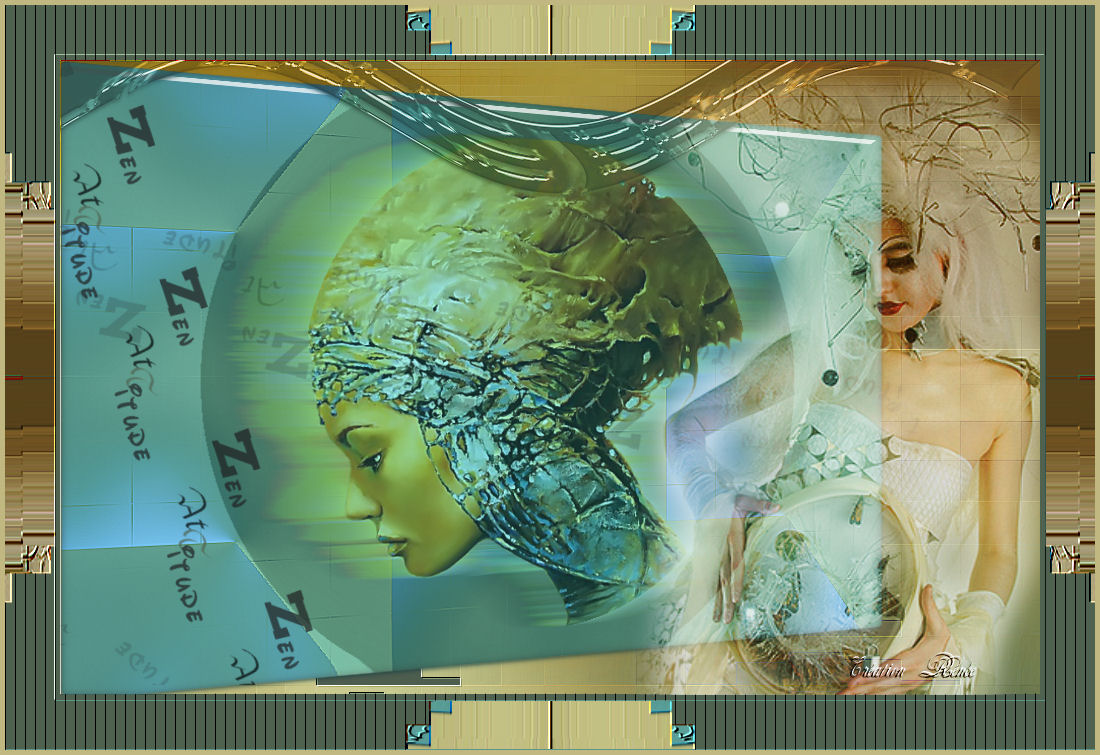
ZEN ATTITUDE
These Plugins are used for this Tutorial L and K /Kaintlyn EyeCandy 5 impact Factor Gallery V/picture chopper FMTile Tools /blend emboss Mura'sMeister /Copies AP Lines Silverling You can find my filters here : http://www.reneegraphisme.fr/filtres/Mes filtres.html ****************** Tube are of
If it is your intention to share these tubes or these lessons in a group,club or forum please ask permission to the owner . The tube may not be send without the lesson . Please do not make changes to the tube, because this tube was made for this lesson only. It is forbidden to share this tutorial without a link to the original lesson. Thank you very much Renée * * These tubes were received from tubeurs sharing groups Or found by me searsching on the net. I Am grateful to have been given permission these beautiful tubes so please use any copyright information as needed. If one of these tubes is yours? Contact me. so I can make a link to your site or remove it. Thank you very much Renée
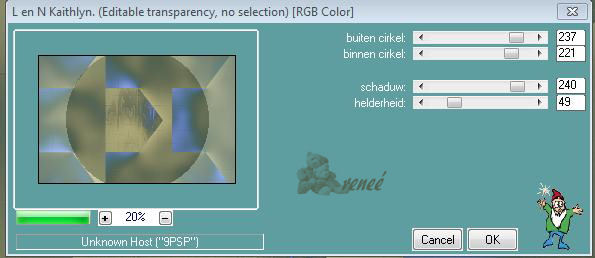
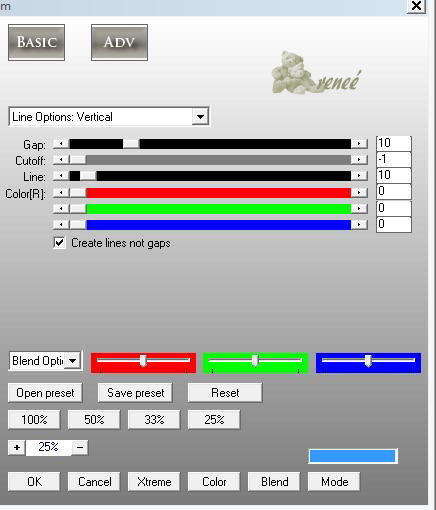
Let's start the lesson. 1. Color-palette:Set your foreground color to color #c0b781 - Set your background color to color #4f6250 2. File-Open a new transparent image of 980 x 635 pixels 3. Activate Flood Fill Tool and fill the layer with the background color 4. Layers- New Raster Layer 5. Color Palette:Set your foreground to gradient 'Foreground-background' -Sunburst- repeat = 0 / invert unchecked 6. Selections / select all (do not add a new layer!) 7. Open the tube "background-zen attitude" Edit -Copy- Edit Paste into selection 8. Effects - Edge effects- Enhance/ Selections - Deselect All 9. Effects- Plugins -L and K's /kaithlyn use settings below
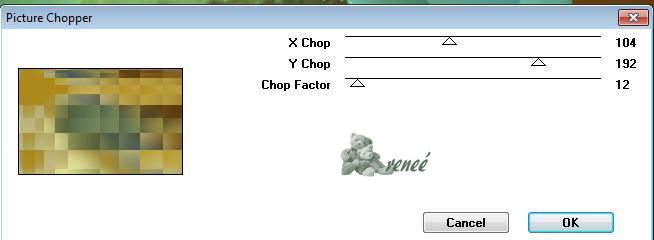
10. Selections –load/save selection –load selection from disc and choose my selection: "@renee-zenattitude1" 11. Layers- New Raster Layer ! Open the tube « etrange-'tubed-by-thafs3 « Edit -Copy- Edit Paste into selection 12. Selections - Deselect All 13. Layers- Duplicate 14. Effects-Distortion Effects-Wind/Winddirection From Right 100 15. Effects-Distortion Effects-Wind/Winddirection From Left 100 16. Layers - Arrange - Move Down 17. Close the bottom layer in the layer palette /Activate an open layer in the layer palette/Layers-Merge-Merge Visible 18. Stay on the Merged Layer 19. Effects- Plugins -Andromeda/perspective /Side walls / It schift 20. Effects- Plugins-Eyecandy5 Impact /Glass/Setting using the default settings 21. Open the bottom layer of the stack and activate the layer 22. Layers- New Raster Layer 23. Selections- Select All 24. Open the tube « image 2 » Edit -Copy- Edit Paste into selection 25. Selections- Deselect All 26. Effects- Plugins-Factory Gallery V /Picture chopper
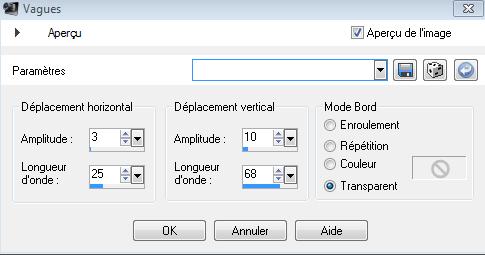
27. Effects- Plugins - FMTileTools /blend emboss using the default settings / apply twice /Double click on this Layer and set the Blend Mode to" Hard Light " 28. Activate the top of the layer palette 29. Open the tube "bordure zen" Edit/ Copy-Edit - Paste as new layer on your working image- Effects- Image Effects- Offset with these settings: H= 0 and V = 278 30.Effects- Distortion Effects- Wave use settings below
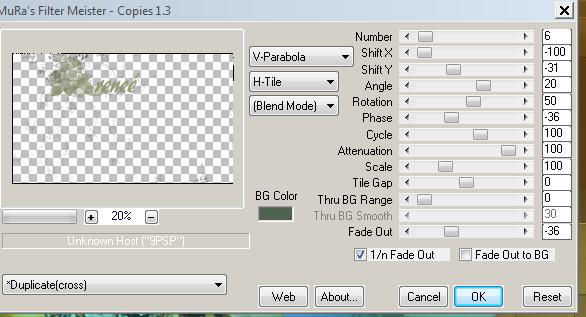
Double click on this Layer and set the Blend Mode to "luminance" 31. Open the tube "texte « zen attitude «" Edit/ Copy-Edit - Paste as new layer on your working image -- Choose a good place - then merge down the three text layers into one Layer and move 32. Effects- Plugins- Mura's Meister / copies use settings below
33. Open the tube ''0138bdyb ''Edit/ Copy-Edit - Paste as new layer on your working image and move to the right side 34. Double click on this Layer and set the Blend Mode to "Hard Light "-Set the layer opacity of this layer to 81% 35. Layers- Merge- Merge Visible 36. Image - Add borders-Symmetric checked: 5 pixels background color 37. Image - Add borders-Symmetric checked: 50 pixels with the contrasting color 38. Activate the Magic Wand and select the border of 50 pixels 39. Open the tube ''cadre'' Edit -Copy- Edit Paste into selection 40. Selections- Deselect All 41. Activate the Magic Wand and select the four green edges of your frame 42.Selections- Promote selection to Layer 43. Effects- Plugins- AP01 - Lines /Silverling use settings below
44. Selections- Deselect All 45. Image - Add borders-Symmetric checked: 5 pixels foregroundcolor. Save as JPEG
I am part of the Tutorial Writers Inc. My tutorials are registered regularly . ReneeGraphisme_All rights reserved
*
|
 Translations