|
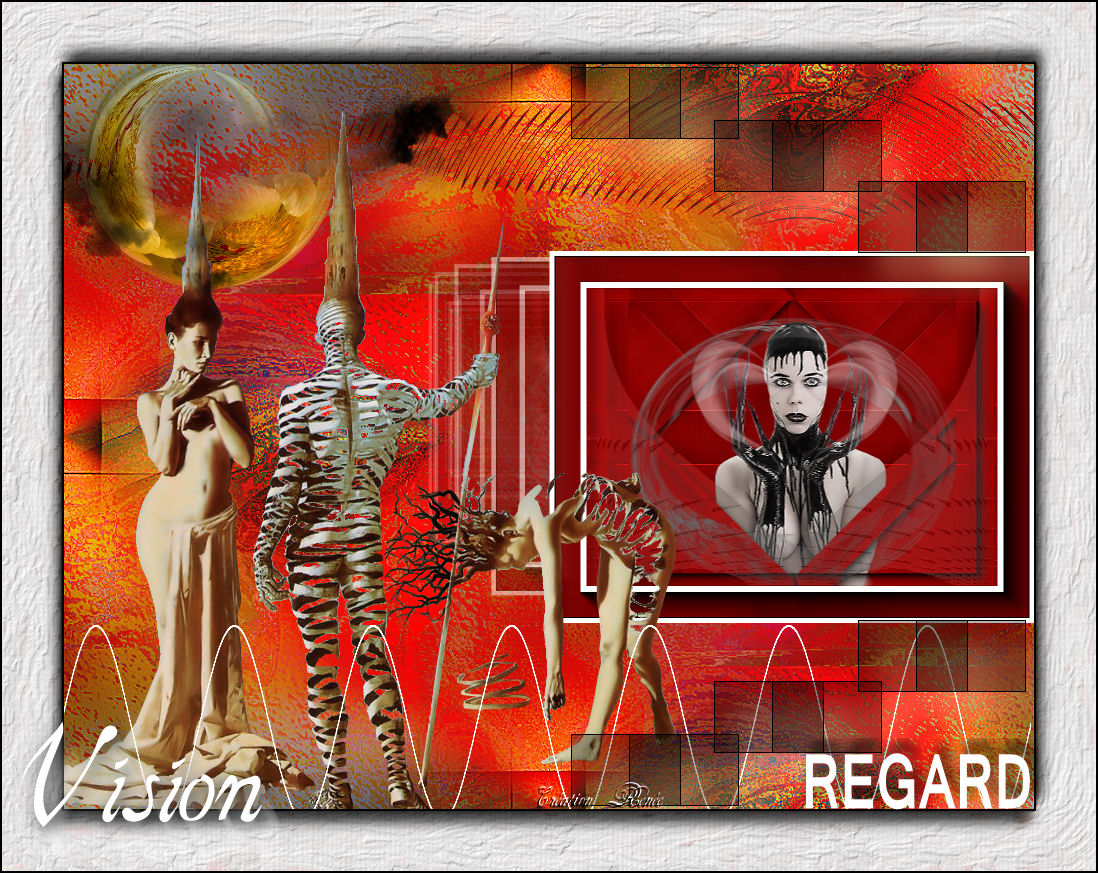
Vision - Regard
New
**********
Let's start the lesson.
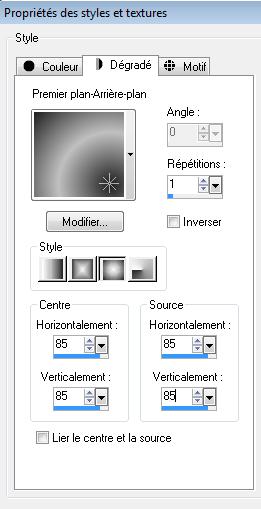
1. Open a transparent image of 950 x725pixels 2. Set your foreground color to #202020- Set your background color to #c1c0c1 3. Set your foreground to gradient 'Foreground-background' -Sunburst with settings below
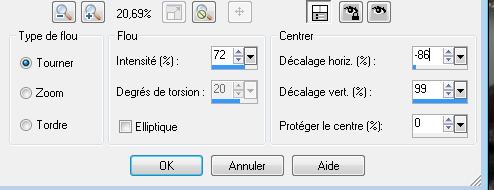
4. Flood Fill Tool: Fill the layer with the gradient 5. Layers- New raster layer 6.Selections-Select All-/Open the tube ''woman_581_exclusif_bycrealine2012'' Edit/copy- Edit/ paste into selection 7. Selections-Deselect All 8. Effects-Image Effects-Seamless Tiling using the default settings 9. Adjust-Blur-Radial Blur with settings below
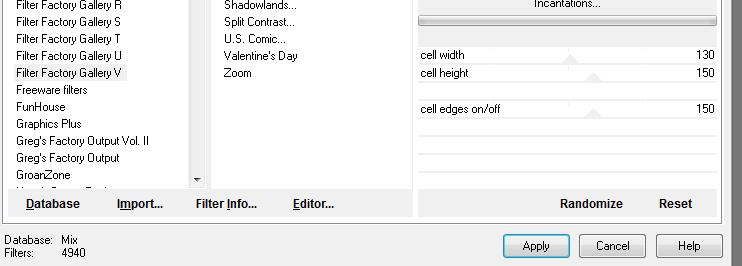
10. Effects-Plugins - Unlimited - Filter Gallery Factory V/Incantations
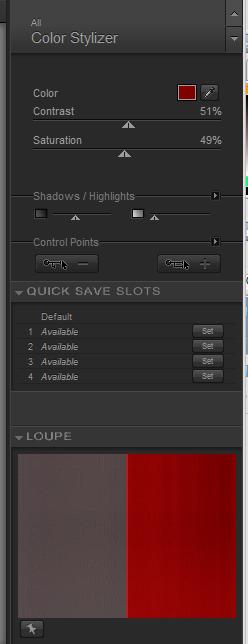
11. Effects-Plugins - Simple 4 Way average 12. Effects-Edge Effects-Enhance More 13. Layers-Merge-Merge Visible 14. Effects-Plugins -Nick Color effex Pro.3 color #800000 *With the Eyedropper you can chose to pick a color that also matches your tube.See what is best for you !
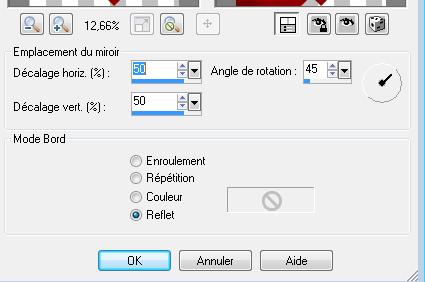
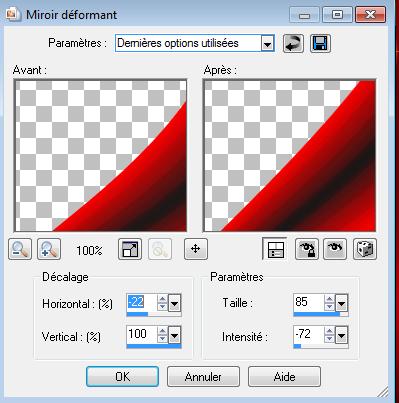
15. Layers-Duplicate 16. Image Free Rotate 45° to the right 17. Effects-Reflection Effects -Rotating-Mirror with settings below
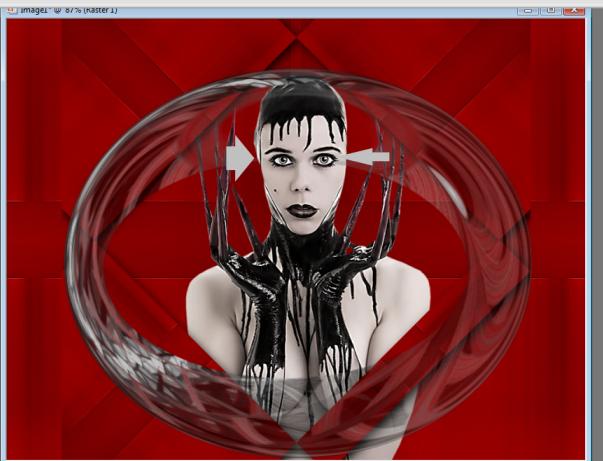
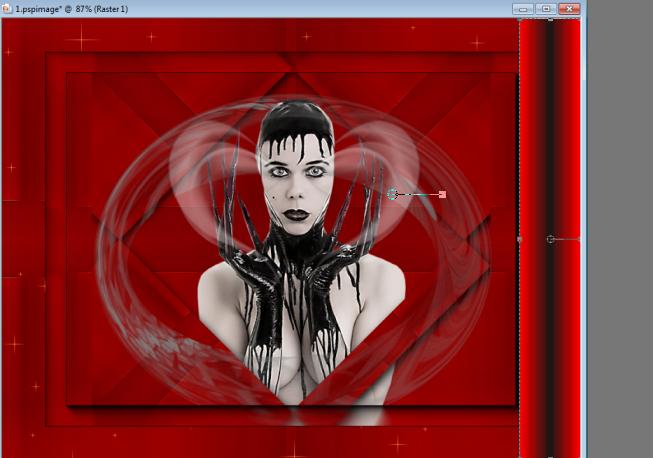
18. Effects-Plugins - Eye Candy5 Impact /perpective shadow-tab Settings/User settings choose my preset: ''renee-regard'' 19. Image Resize with 65% resize all layers not checked - Activate the top of the layer- palette 20. Open the tube ''beauty_woman_107-_tubed_by_thafs''/ Image Resize with 80% --Edit/copy- Edit/ paste as new layer on your working area-(do not move it is in the right place) 21. Layers-Arrange -Move Down - Activate the top of the layer- palette 22. Open the tube ''renee-regard-circles '' Edit/copy- Edit/ paste as new layer on your working area -Place the tube at the right place as shown in the example below
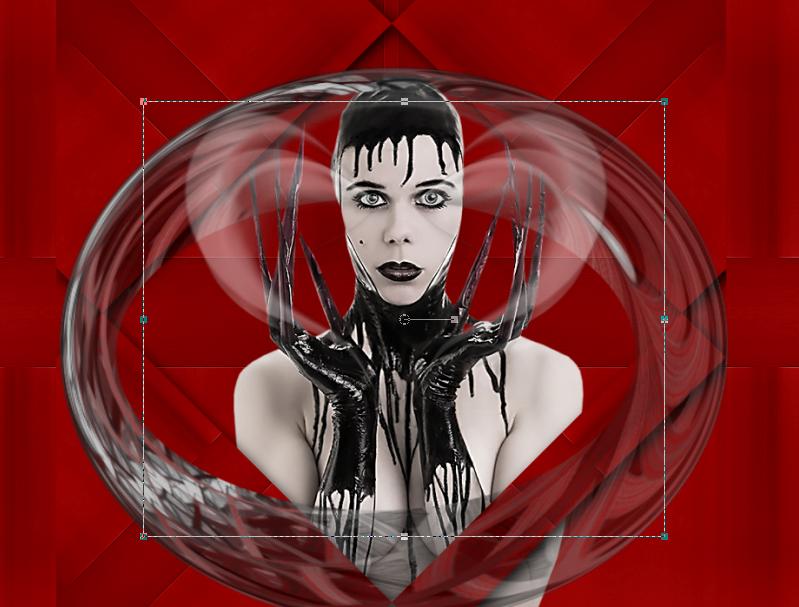
23.Layer Palette -Double click on this layer and set the Blendmode to Normal and set the layer opacity of this layer to 97% 24. Open the tube ''renee-regard-effet blanc'' -Edit/copy- Edit/ paste as new layer on your working area -Place the tube at the right place as shown in the example below
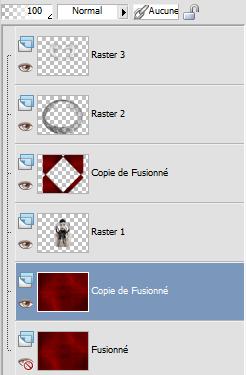
25. Set the layer opacity of this layer to 46% 26. Activate the bottom of the layer-palette = (Merged layer) Layers-Duplicate .Close bottom layer /The Result
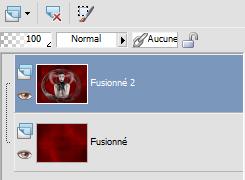
27. Keep top layer active /Layers-Merge-Merge Visible- Rename this layer (merged 2) Open bottom layer again as shown below
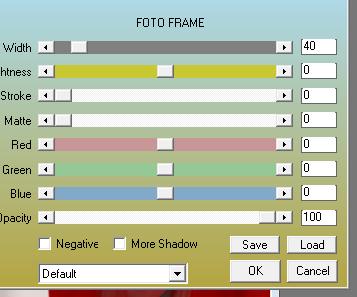
- Activate the top of the layer-palette ( merged 2 ) 28. Effects-Plugins -AAA Foto Frame/Foto Frame
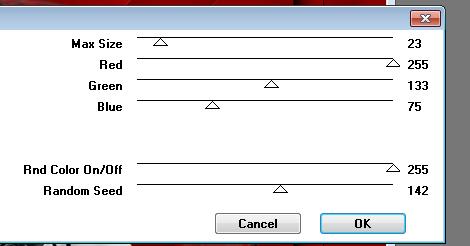
29. Selections-Select All / Selections-Modify- Contract 5 pixels /Selections-Invert 30. Layers-New raster layer-Activate Flood Fill Tool: fill the selection with color white 31. Selections-Deselect All 32.Layers-Merge-Merge-Down 33. Image Resize with 85% resize all layers not checked - Activate the bottom of the layer-palette 34. Effects- VM Natural /Sparkles with these settings
35. Layers- New raster layer 36. Set your foreground color to #202020 Set your background color to #ff0000 37. Set your foreground to gradient 'Foreground-background' - Linear - Angle 90 - Repeats 1 Invert checked. 38. Flood Fill Tool: Fill the layer with the gradient 39. Effects-Plugins -Unlimited / &<Bkg Designer sf III/ SE Watercolor TUT
40.Activate your Pick Tool (K) Mode Scale- Pull the left node to the right side as shown below-Hit the M key of your Keyboard to remove the Nodes
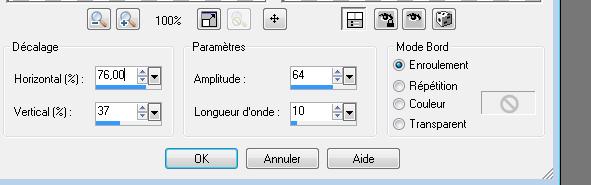
41. Effects-Distortion Effects-Warp with these settings
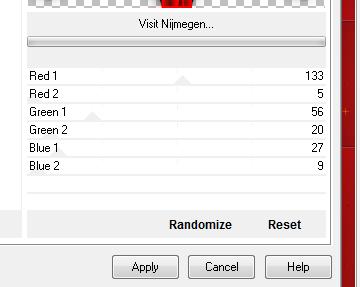
42. Effects-Plugins -Unlimited - Andrews Filtre 12/ Visit Nijmegen
43. Effects-Plugins -
Eyecandy 5 Impact
- perspective shadow 44. Layers-Duplicate /Image Mirror 45. Layers-Merged-Merged-Down - Layer Palette -Double click on this layer and set the Blendmode to Luminance-Legacy and set the layer opacity of this layer to 51% 46. Effects-Plugins - AAA Frame - Foto Frame
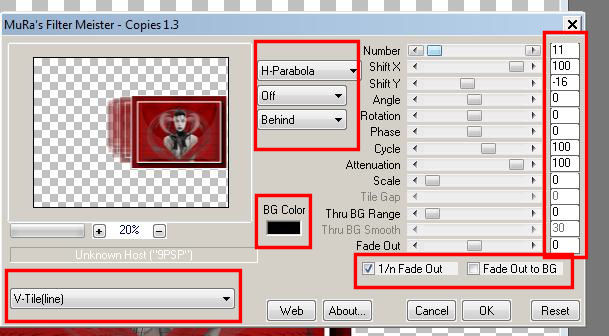
47.Image - Add borders-Symmetric checked: 10 pixels white - Promote Background Layer 48. Image Resize 50% resize all layers not checked 49. Effects-Plugins - Mura's Meister / Copies with these settings
50. Layers- Merge-Merge-Visible 51. Selections-Select All 52. Open the tube ''renee-regard-fond2 '' Edit/copy- Edit/ paste into selection /Selections-Deselect All 53. Image Mirror 54. Layers-Arrange-Move Down 55. Open the tube ''renee-regard-lunaire'' Edit/copy-Edit paste as a new layer. With your move tool place it to the upper top left corner 56. Layers- New raster layer 57. Selections - load/save selection - load selection from disk and choose my selection:''renee-regard1'' 58. Material Properties: Set your foreground color to #202020 Set your background color to #ff0000 - Set your foreground to gradient 'Foreground-background' - Linear - Angle 90 - Repeats 1 -Invert not checked. Activate Flood Fill Tool and fill the selection with the gradient - Selections Deselect All 59. Effects-Distortion Effects-Ripple with these settings
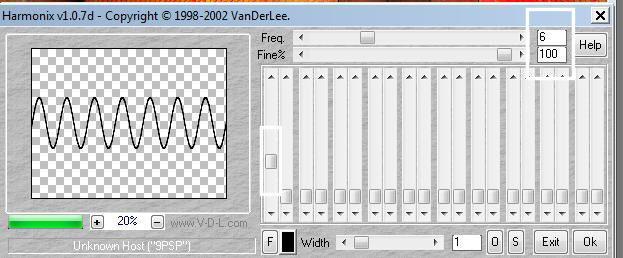
60. Open the tube ''Claudia-Viza-fantaisy 111 '' -Edit/copy- Edit/ paste as new layer on your working area- Move tool / place your tube on the bottom left side of your image 61. Layers-New raster layer 62. Effects-Plugins - VDL Adrenaline Harmonix/with these settings //to change the size, smaller or larger, take the left slider !!In this example you can see the black wave, so that you can see it better, but it must be white. Links at the bottom of the corner you can change the color!!
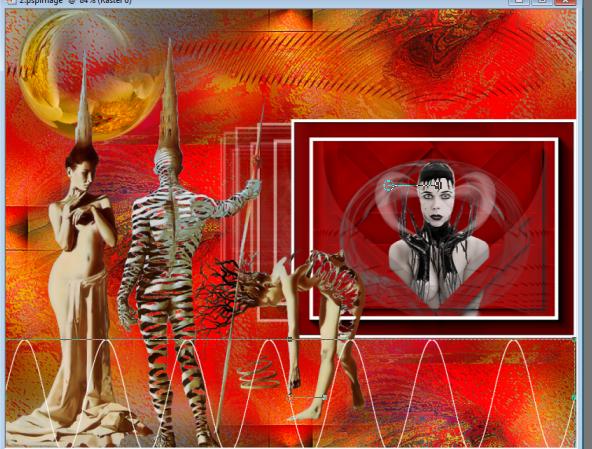
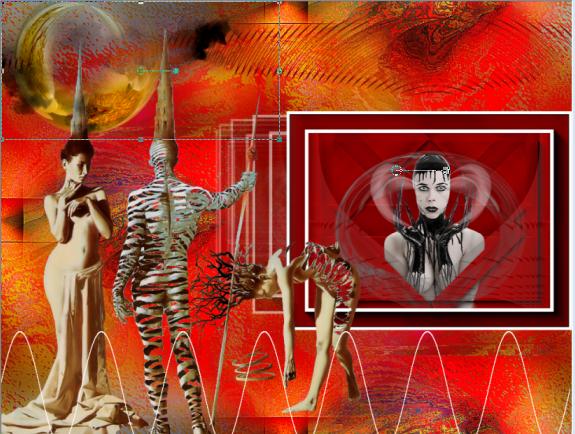
- Activate the Pick Tool/Deformation tool (K)Mode Scale- Pull the Top Node down as shown in the example below -Hit the M key of your Keyboard to remove the Nodes - Place it in the right place as shown below - Attention to the hand of the girl
63. Open the Brushtube ''pinceau nuage -regard '' in your psp '' - File- Export -Custom Brush- Give it a name "pinceau nuage -regard" //Set the foregroundcolor to color black -/Activate Brush Tool and select my file: "pinceau nuage -regard" Stamp your brush in the upper left corner by using your foreground color
64.Open the tube ''renee-regard-rectangle'' Edit/copy- Edit/ paste as new layer on your working area 65. Effects-Image Effects-Offset with these settingsn: H = 250 and V = 0/ Transparent 66. Effects-Plugins
- Eyecandy5 Impact
/perspective 67. Layers-Merge-Merge Visible 68. Image - Add borders-Symmetric checked: 2 pixels color black 69.Image - Add borders-Symmetric checked: 60 pixels color white 70. Activate the Magic Wand:select the border of 60 pixels 71. Effects-Plugins - Alien Skin Snap art/Impasto-tab Settings/User settings choose my preset: ''renee-regard-impasto '' 72. Selections-Invert 73. Effects-3D Effects-Drop Shadow with these settings
- Repeat : Effects-3D Effects-Drop Shadow V= -12 and H = 6 74. Image - Add borders-Symmetric checked: 2 pixels color black 75. Open the tube ''titre ''–Edit/copy-Edit paste as a new layer on your working area and move Save as JPG
I hope you enjoyed this tutorial . Renée This lesson was written by Renée edited and update on 2012 *
Any resemblance with an existing lesson is merely a coincidence * * Don't forget to thank the people who work for us and with us. I named the tubeurs - Testers and the translators. Thanks Renée. *
I am part of Tutorial Writers Inc. My tutorials are regularly recorded ReneeGraphisme_All rights reserved
*
|
 Translations