|
New
Translations here
Symphonie en sous-sol
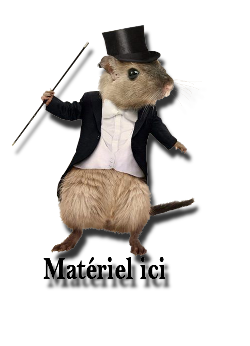
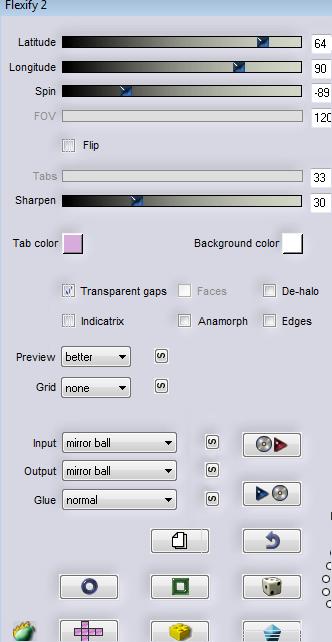
Let's start the lesson. 1. Open the image ''renée -symphonie en sous sol-fond1''Window - Duplicate (or shift+D) - Close the original and proceed on the copy -Promote Background Layer =Raster 1 2. Layers-Duplicate 3. Effects-Plugins - Toadies -What are you 46/46 4. Effects-Plugins - Flaming pear -flexify2 -repeat twice with the same settings
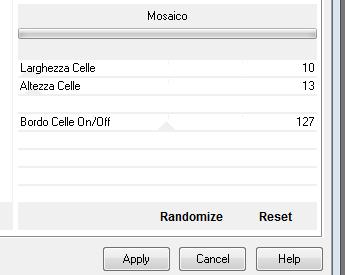
5. Effects-Plugins -Italian Editor effect/mozaico with these settings
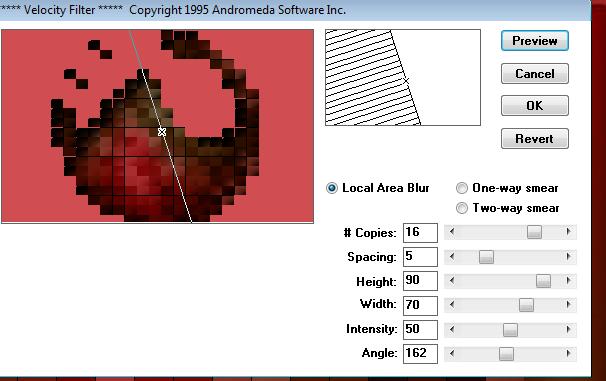
6. Effects-Plugins -Andromeda velocity with these settings
7. Layers-Duplicate - Layer-Palette: Rename the layers raster 1 /raster 2/raster 3 - Layer palette look like this now
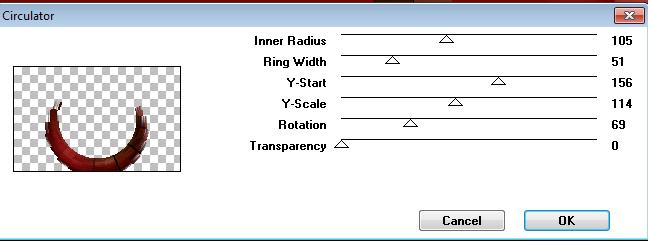
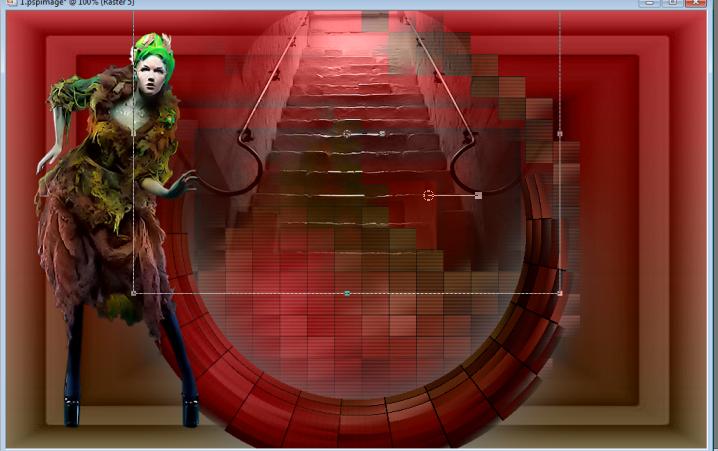
8. Layer-Palette: make raster 3 aktive 9. Effects-Plugins -Deformation -Circulator with these settings or take this filter: VM Distort /circulator
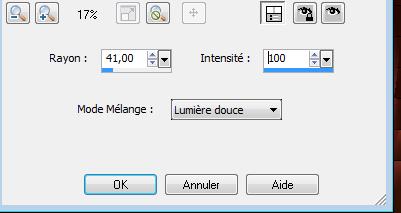
10. Adjust-High Pass Sharpen with these settings
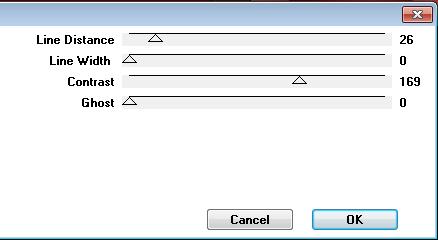
- Layer-Palette: make raster 2 aktive 11. Effects-Plugins - Pentacom /VTR2 with these settings
12. Open the tube ''woman_681_tubed_by_thafs''/Image Resize 85 % - Edit-/copy–Edit - paste as new layer on your working area. With your move tool -move to the left side as shown below 13. Open the tube de Nikita ''1247994740'' / Edit-/copy–Edit - paste as new layer on your working area./With your pick tool (K) -move as shown in the example below
- Double click on this layer and set the Blendmode to Luminance Legacy '' 14. Open the tube ''@ann_010606_boxwood '' Edit-/copy–Edit - paste as new layer on your working area. 15. Effects-Image Effects-Offset with these settings
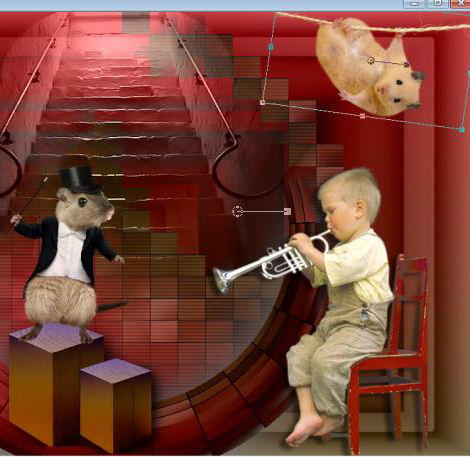
16. Layers-Duplicate/ Image Resize 75% -resize all layers not checked -Layers-Arrange-Move Down 17. Opend the tube de Mist ''1247-concert-LB TUBES '' -Freehand selection-Lasso- select the little boy - Edit-/copy–Edit - paste as new layer on your working area. With your move tool place it in the right place 18. Open the tube ''a12f2350.png'' / Image Resize 55% Edit-/copy–Edit - paste as new layer on your working area. /With your move tool place it in the right place 19. Open the tube de Jet ''jet-animals-mousse-september-2008 '' Image Resize 2 x 55% Edit-/copy–Edit - paste as new layer on your working area.With your move tool place it in the right place as shown below
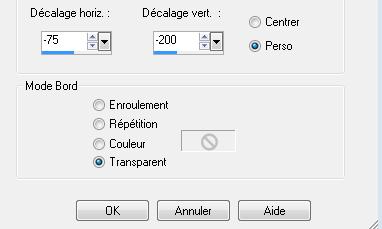
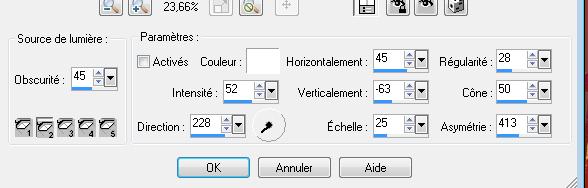
20. Open the tube ''tatoo-poes'' -Edit-/copy–Edit - paste as new layer on your working area.-With your move tool place it in the right place 21.Open the tube de Lupa '' LU_GD_Mice1_2'' - Image Resize 25% -Edit-/copy–Edit - paste as new layer on your working area.With your move tool place it in the right place as shown below 22. Open the tube ''renee-brillant ''Edit-/copy–Edit - paste as new layer on your working area. Do not move ! 23. Layers-Duplicate-Layers-Merge Merge Down 24. Open the tube ''renee-lanterne'' Edit-/copy–Edit - paste as new layer on your working area. 25. Effects-Image Effects-Offset with these settings H= 233 and V = 268 transparent 26. Effects-Illumination Effects-Lights with these settings
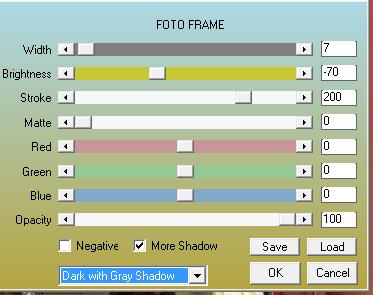
27. Layers-Merge-Merge-Visible 28.Effects-Plugins -AAA Frame - Foto Frame with these settings
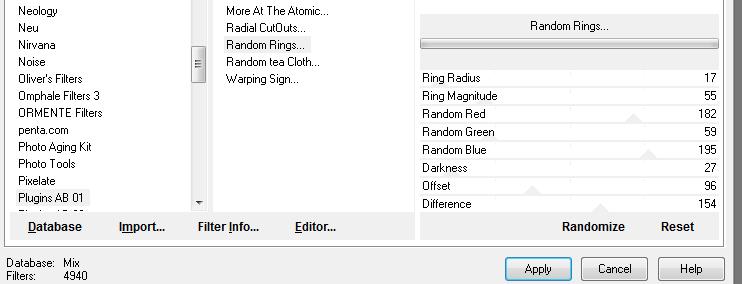
29. Image - Add borders-Symmetric checked:15 pixels #830f0f 30. Image - Add borders-Symmetric checked:30 pixels #aaa9a7 31.With the magic wand select the border of 30 pixels 32. Effects-Plugins -Unlimited - Plugins AB 01 / Random Rings..with these settings.
33. Selections-Deselect All 33. Image - Add borders-Symmetric checked:5 pixels #830f0f 34. Open the tube ''titre ''–Edit/copy-Edit paste as a new layer on your working area and move Activate Text Tool-Font " fournie" Write your text Save as JPG
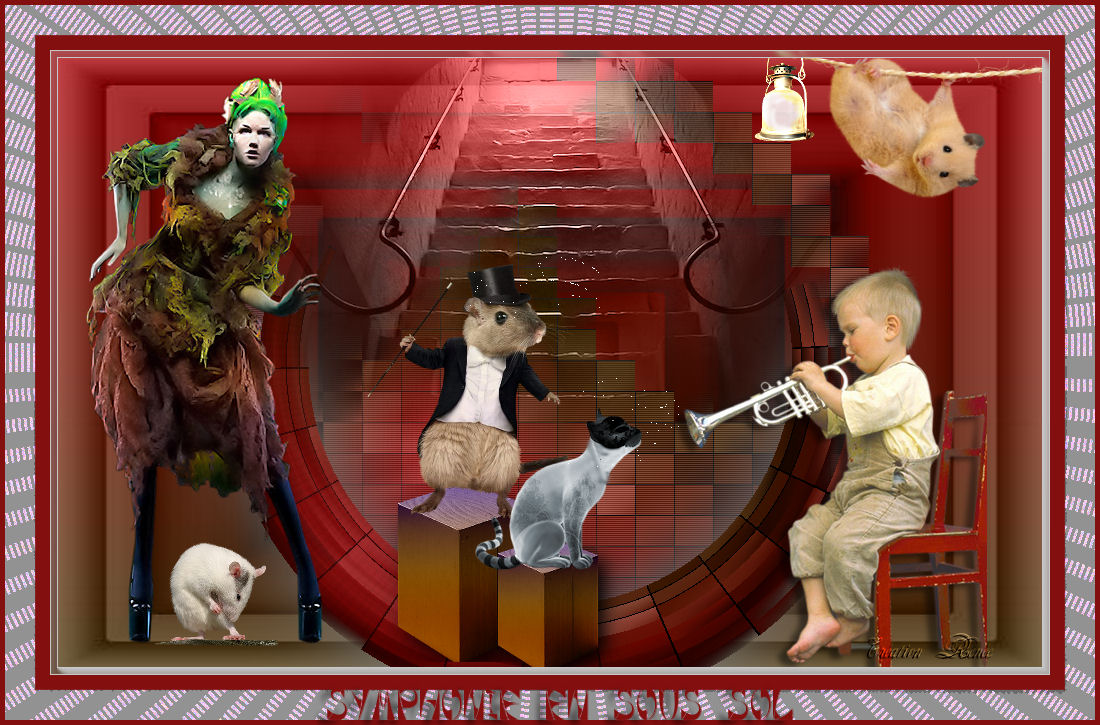
I hope you enjoyed this lesson Renée This lesson was written by Renée Edited and Update 2011 *
Any resemblance with an existing lesson is merely a coincidence * * Don't forget to thank the people who work for us and with us. I named the tubeurs - Testers and the translators. Thanks Renée. * *
I am part of Tutorial Writers Inc. My tutorials are regularly recorded ReneeGraphisme_All rights reserved
*
|
 Translations