|
Let's start the lesson .
- Material Properties: Foreground color to this color #ffffff (white) Background color to this color : #768fb6
1. Open a new transparent image of 1025 x 675 pixels
- Activate Flood Fill Tool and fill the layer with the background color
2. Activate the tube ''
steampunk_21_image_1''- Edit/copy-Edit paste as a new layer (do not move it is in the right place)
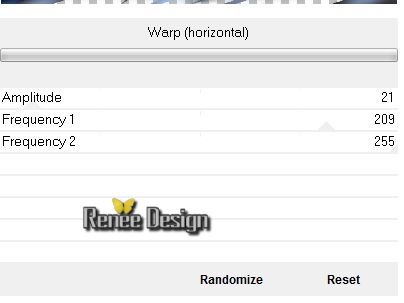
3. Effects -Plugins - Unlimited 2.0 -
Distorsion Filters/ Warp (Horizontal)
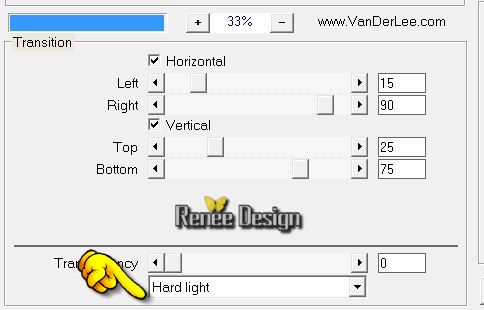
4. Effects-Plugins - Vanderlee Unplugged X- Transition
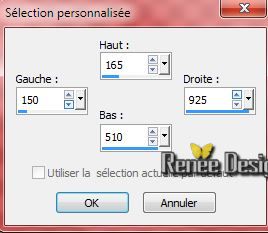
5. Selection Tool ( S ) Custom selection use settings below
6. Selections-Promote selection to layer
Selections-Deselect All
Activate the layer underneath(Raster 2)
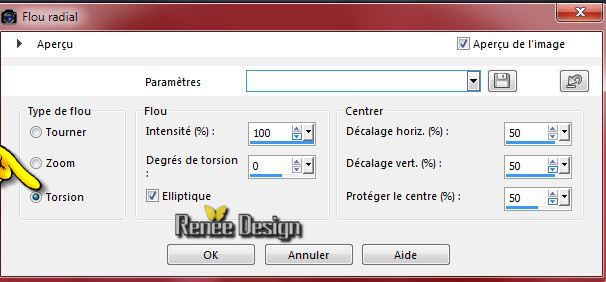
7. Adjust-Blur-Radial Blur with these settings
8. Effects-Plugins - Unlimited 2.0
- Sapphire Filters 03 - Sapphire Plugin-0298 default settings
- Activate the top of the Layer-Palette (promoted selection)
9. Effects-Plugins - VM Distorsion - Smallpox /
152/116/172
10. Effects-Plugins - Muras's Meister - Perspective Tilling
11. Effects-Distortion Effects-Twirl degrees 185
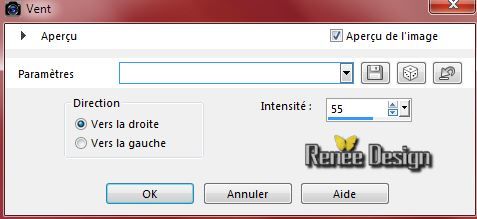
12. Effects-Distotions Effects-Wind 55 to the Right
Layer Palette : activate raster 2
13. Layers- New Raster layer- Flood Fill Tool: fill the layer with color white
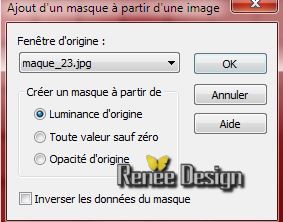
14. Layers-New Mask Layer From Image and choose Mask: ''maque_23.jpg"
- Layers-Duplicate
- Image Mirror
15. Layers- Merge- Merge Group
16. Effects-Image Effects-Enhance More
17. Effects - 3D Effects - Drop shadow default settings
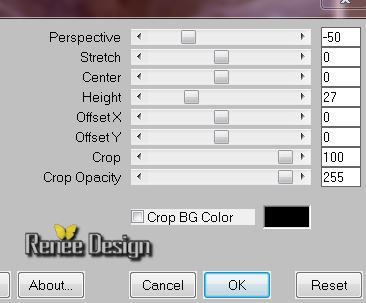
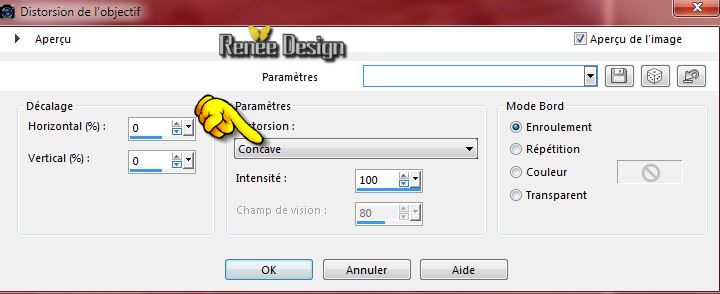
18. Effects-Distortion Effects-Lens Distortion-Pincushion use settings below
19. Effects-User Defined Filter - Emboss 3 default settings
20. Activate the tube "
steampunk_21_image_2.pspimage''/ Edit-copy-Edit paste as a new layer on your working aera
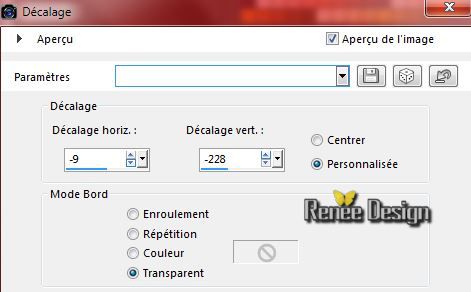
21. Effects- Image Effects-Offset with these settings:
22. Layer Palette -Double click on this Layer and set the Blend Mode to "Luminance-Legacy "
- Layer Palette : activate Raster 2
23. Activate the tube ''
calguismistedlandscape02082012.pspimage'' Activate "mist 2" of the tube
- Edit/copy-Edit paste as a new layer (do not move it is in the right place)
-Layer Palette -Double click on this Layer and set the Blend Mode to "Luminance-Legacy "
24. Effects-Plugins - FM Tile Tools - Blend Emboss default settings
- Activate the top of the Layer-Palette
25.Layers- New Raster layer
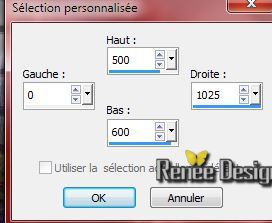
26. Selection Tool ( S ) Custom selection use settings below

--Flood Fill Tool: fill the selection with color white
Selections-Deselect All
27. Effects-Distotions Effects-Wind 100 Right
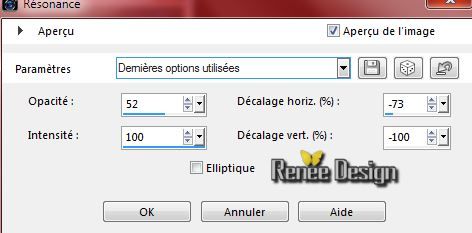
28. Effects-Reflection Effects-Feedback use settings below
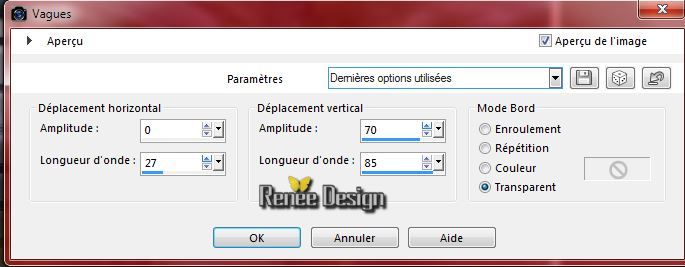
29. Effects-Distortions Effects-Wave use settings below
30. Effects - 3D Effects - Drop shadow with these settings: 3/4/50/8 black
31. Layers-Duplicate-
Image Mirror
32.Layers- Merge- Merge Down
33. Activate the tube ''
the_key_by_kelso_san-.pspimage'' / Edit/copy-Edit paste as a new layer on your working area .With your move tool move to the bottom right (erase the watermark)
34.Layer Palette -Double click on this Layer and set the Blend Mode to "Luminance-Legacy "
35. Activate the tube ''
cover_heavy_rubber_by_ophelia_overdose_tubed_by_thafs.psp''
Image Resize 65%
-
Edit/copy-Edit paste as a new layer on your working area
-
Activate Pick Tool (K) move to the left place like this
36.
Layer Palette -Double click on this Layer and set the Blend Mode to"Soft Light " Reduce the opacity of this layer to
77%
37.
Layers- New Raster layer
38.
Selection Tool ( S ) Custom selection use settings below
39.
Pot of Paint opacity 25% /Activate Flood fill tool and fill the selection with the FG-Color
Selections-Deselect All
40. Effects-Plugins - Unlimited 2.0
- I@alian editors -Effeto Fantasma 41/41
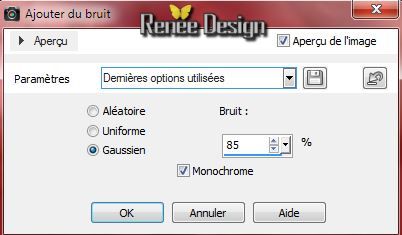
41.
Adjust-Add/Remove Noise-Add Noise Gaussian
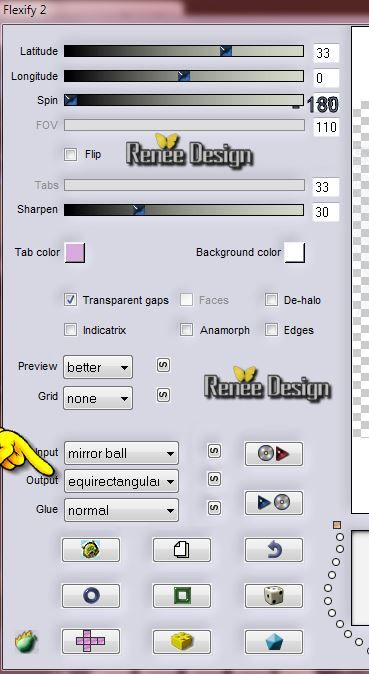
42.
Effects-Plugins - Flaming Pear - Flexify 2
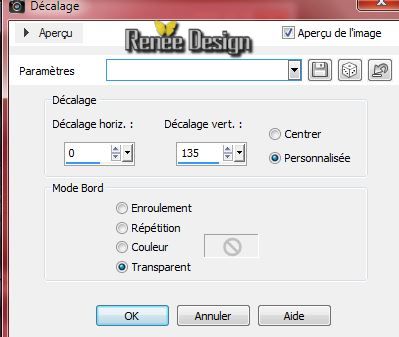
43.
Effects- Image Effects-Offset with these settings:
44.
Effects - 3D Effects - Drop shadow with these settings: 5/5/80/28 color #75130b
45.
Layers- New Raster layer
46.
Selections - load/save selection - load selection from disk and choose my selection: '' steampunk_21_1''
47.
Pot of Paint opacity:25% --Flood Fill Tool: fill the selection with color white
Selections-Deselect All
48.
Layers- New Raster layer
49.
Selections - load/save selection - load selection from disk and choose my selection: "steampunk_21_2"
50.
Activate the tube "AD_Voyage (38).pspimage'' - Edit/copy-Edit paste into selection
Selections-Deselect All
51.
Activate the tube '' steampunk_21_image_1.pspimageroues''- Edit/copy-Edit paste as a new layer on your working area. With your move tool move to the left
-
Layer Palette -Double click on this Layer and set the Blend Mode to "Luminance"
52.
Layers- Merge-Merge Visible
53.
Image - Add borders-Symmetric checked: 1 pixel black
54.
Image - Add borders-Symmetric checked: 70 pixels white
55.
Aktivate the cadre '' cadre_2'' - Edit/copy-Edit paste as a new layer (do not move it is in the right place)
56.
Aktivate the tube ''TP_SteelChain_01''- Edit/copy-Edit paste as a new layer (do not move it is in the right place)
57.
Image - Add borders-Symmetric checked: 1 pixel black
58.
Open the tube ''steampunk-21-titre'' Edit - Copy -Edit - Paste as new layer on your working area and move .Ore write your own text
Layer Palette -Double click on this Layer and set the Blend Mode to "Luminance-Legacy "
59.
Layers- Merge-Merge All
60.
Image - Add borders-Symmetric checked: 1 pixel black
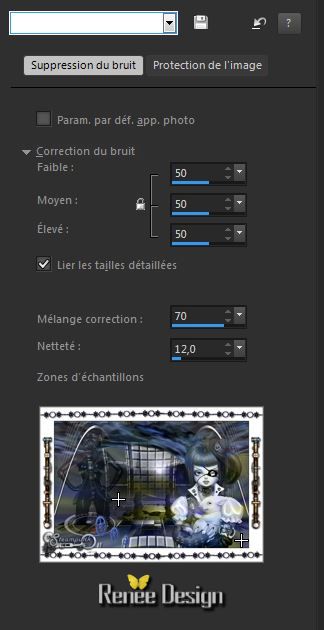
61.
Adjust-Digital Noise Removal with these settings
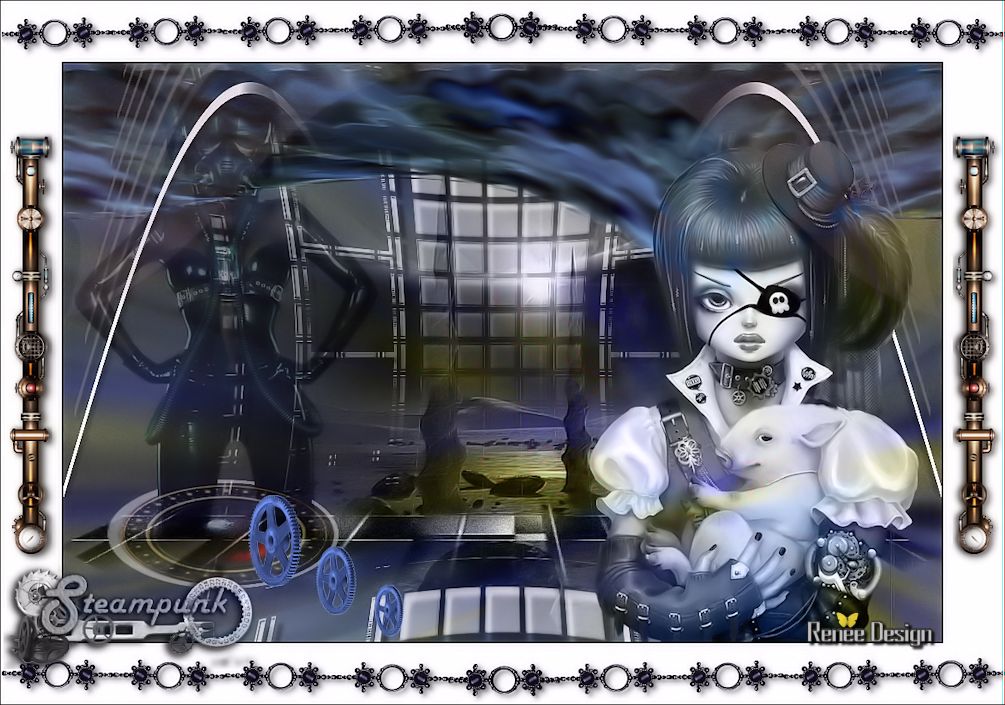
62.
Image Resize 1005 pixels Width
Save as JPG
I hope you enjoyed this lesson
Renée
This lesson was written by Renée 4/09/2014
Created the
09/2014
*
Any resemblance with an existing lesson is merely a coincidence *
* Don't forget to thank the people who work for us and with us.
I named the tubeurs - Testers and the translators.
Thanks Renée. |
 Translations


 All rights reserved