|
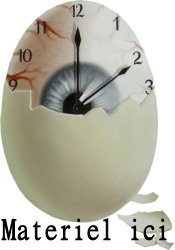
Sous verre New
Translations
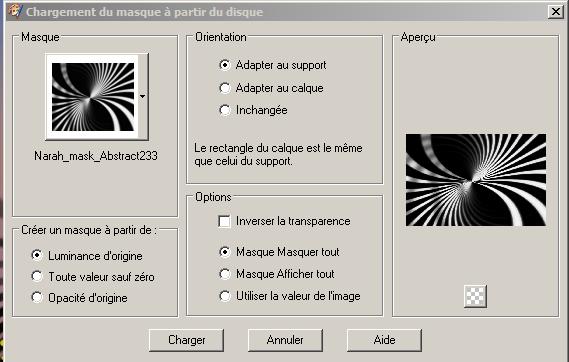
Let's start the lesson. 1. Open the Background image ''renee-sous-verre-fond1''/Window Duplicate -Promote Background Layer =Raster 1'' 2. Layers - New raster layer 3. Activate Flood Fill Tool and fill the layer with color black 4.Layers-Maske- Load/Save Mask -Load Mask From Disk and choose''Narah_mask_abstrackt233''
5. Layers- Merge- Merge Group 6. Effects- Plugins - EyeCandy 6 /-Water -drop-/setting Tour(fixed Scaling)-Small Drop :Blood-Blood,Arterial-Color - #ded10c Image included into the zipfile
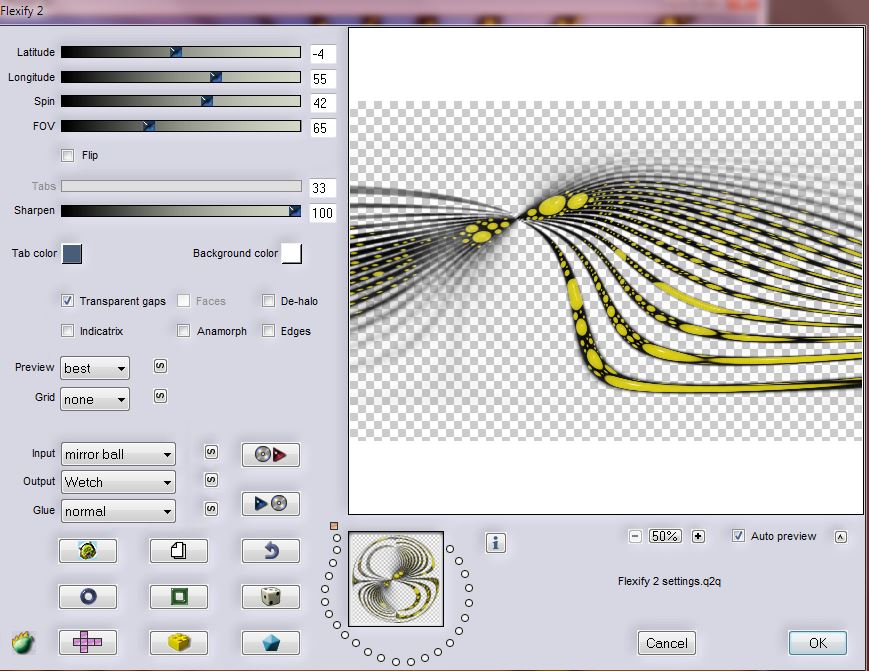
7. Effects- Plugins - Flaming pear /Flexify2 with these settings
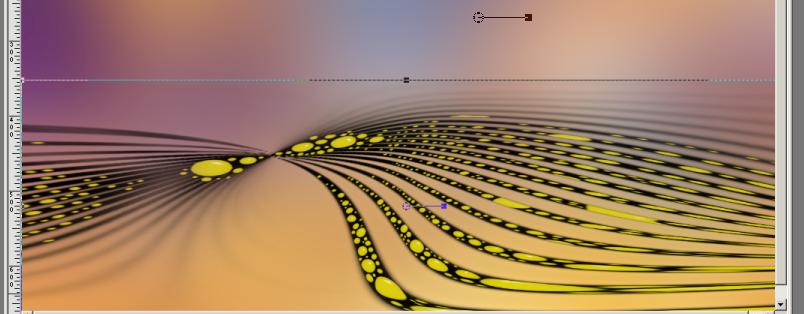
8. Activate the Pick Tool/Deformation tool (K)Mode Scale Pull the Top Node down to 350 highas shown in the example below - Hit the M key of your Keyboard to remove the Nodes
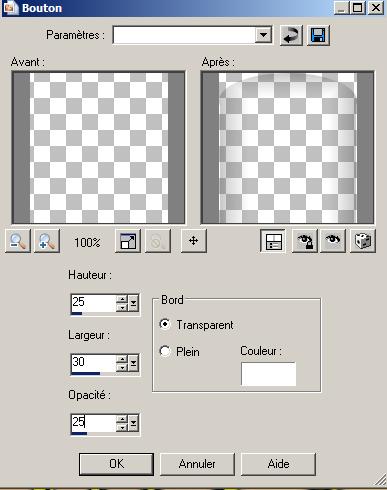
9. Layers - New raster layer 10. Selections - load/save selection - load selection from disk and select my file: ''renee-sous verre-select1'' 11. Effects- 3 D Effects- Buttonize with these settings
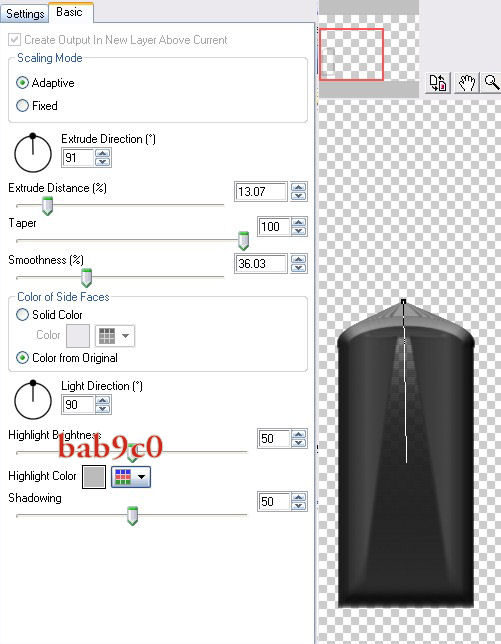
Selections- Deselect All 12. Effects- Plugins - EyeCandy 6 - Extrude-Tab- Settings-Preset / above-taper to point
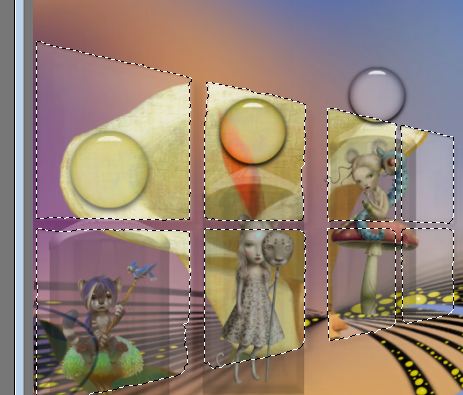
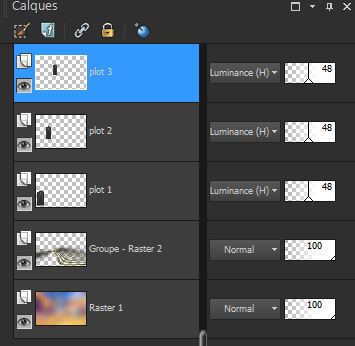
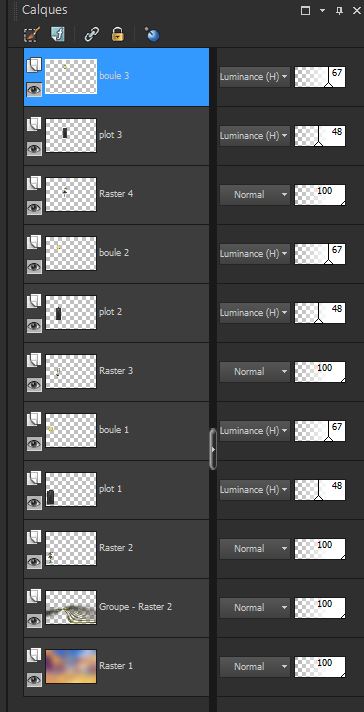
13.Double click on this layer and set the Blendmode to Luminance Legacy and set the layer opacity of this layer to 48% 14. Layers- Duplicate-Image Resize with 85%-(Resize all the layers not checked) 15. Layers- Duplicate-Image Resize with 85%-(Resize all the layers not checked) - To place the image with the plots on this exact location and rename the layers-plot 1 /plot 2 and plot 3
- In the layer palette-activate plot1 16. Activate the tube ''renee-sous-verre-boule'' 17.Edit/copy-Edit paste as a new layer on your working area and move /Double click on this layer and set the Blendmode to Luminance -Legacy and set the layer opacity of this layer to opacité 67% -Name the layer- Boule 1 18. Layers- Duplicate - Image Resize with 85%-(Resize all the layers not checked) - Layers- Arrange- Move up ( above layer plot2) - Name the layer Boule 2 19. Layers- Duplicate - Image Resize with 85%-(Resize all the layers not checked) - Layers- Arrange- Move up ( above layer plot 3) Layer Palette look like this now-You should have this result
. In the layer palette-activate layer plot 1 20. Activate the tube ''SVB -Tygerdernoirby''/Image Resize with 32% - Edit/copy-Edit paste as a new layer on your working area and move - Layers- Arrange- Move Down -In the layer palette-activate layer plot 2 21. Activate the tube ''Jhanna_145_C.Nicolleta_060409'' / Image Resize with 32% - Edit/copy-Edit paste as a new layer on your working area and move - Layers- Arrange- Move Down - In the layer palette-activate layer plot 3 22. Activate the tube ''Jhanna_143_nicoletta-tube_270309''/ Image Resize with 35% - Edit/copy-Edit paste as a new layer on your working area and move - Layers- Arrange- Move Down - Layer Palette look like this now-You should have this result
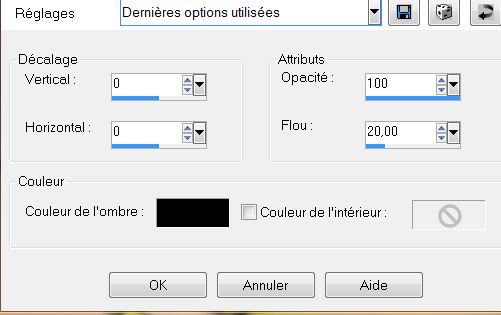
- Activate the top of the Layer-Palette 23. Activate the tube ''rene-sous verre -fenetre '' -Edit/copy-Edit paste as a new layer on your working area and move to the left side 24. Effects - 3D Effects - Drop shadow with these settings 10/10/50/25 black 25. Open the tube ''renee-sous-verre-cadre'' Edit/copy-Edit paste as a new layer on your working area and move to the upper right corner as shown in the example below
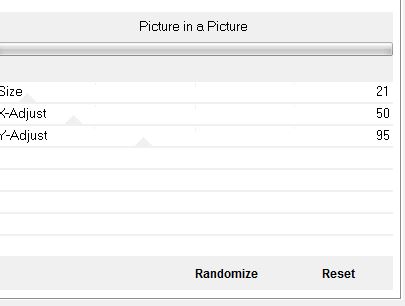
26. Effet -Modules Externes - EyeCandy5 /Extrude -Tab-Settings-User Settings and choose my Preset ''renee-sous-verre-extrude'' 27. Double click on this layer and set the Blendmode to - Palette des couleurs Avant plan le noir - Mettre en arrière plan la couleur #ffff00 28. Effects- Plugins - VM Extravanga /Picture in a Picture
29.Double click on this layer and set the Blendmode to Overlay and set the layer opacity of this layer to 63% 30. Effects- Plugins - EyeCandy 5 -Glass- Tab-Settings-User Settings and choose my Preset ''renee-sous verre -glass'' If you have any problems with it(Preset is included into the zipfile) and paste as a new layer on your working area - - Activate your Magic Wand with these settings
31.Select inside the frame 32. Layers - New raster layer 33. Activate the tube ''nicole-oeuf-Egg-by-Mihai82000 '' - Edit/copy-edit paste into selection 34. Layers - New raster layer 35.Effects- 3D Efects- Cutout with these settings
- Selections- Deselect All - Layers- Merge- Merge Visible 37. Activate the tube ''m&c_Ninaconcometa'' -Edit/copy-Edit paste as a new layer on your working area and move to the bottom right side 38. Layers - New raster layer 39. Selections - load/save selection - load selection from disk and select my file: ''renee-sous-verre selec2'' Properties foreground: Foregroundcolor to color white -Prepare a linear "Fading foreground" gradient configured like this.
40. Activate Flood fill tool and fill the selection with the gradient 41. Selections- Deselect All 42. Double click on this layer and set the Blendmode to Hard Light and set the layer opacity of this layer to 59% 43. Layers - New raster layer 44. Selections - load/save selection - load selection from disk and select my file: ''renee-sous-verre-selec3'' 45. Change foreground material into a linear gradient and select :''vbs24''-with these settings O/O invert not checked -Activate Flood fill tool and fill the selection with the gradient 46. Selections- Deselect All 47. Set the layer opacity of this layer to 59% 48. Layers - New raster layer 49. Selections - load/save selection - load selection from disk and select my file: ''renee-sous-verre-selec4'' 50.Activate Flood fill tool and fill the selection with this color #8495ce 51. Selections- Deselect All 52. Layers- Duplicate 53. Effects- Plugins - Simple – Left Right wrap - Double click on this layer and set the Blendmode to Multiply 54. Activate the tube "renee-sous verre -fenetre" - Edit/copy-Edit paste as a new layer on your working area and move -Double click on this layer and set the Blendmode to Luminance Legacy and set the layer opacity of this layer to 26 % 55. Effects- Plugins - Eyecandy 5 / Perspective shadow / Tab-Settings-User Settings and choose my Preset ''renee_sous verre-glass 2'' - Activate your Magic Wand with these settings
- With the magic wand -select the different frames like this ( ore take your lasso point to point)
- Layers - New raster layer 56. Activate the tube ''calguiscallas03062012'' - Edit/copy-Edit paste into selection Selections- Deselect All 57. Layers- Arrange-Move Down 58. Double click on this layer and set the Blendmode to Soft Light and set the layer opacity of this layer to 32% 59. Adjust-Sharpness-Sharpen - Activate the top of the Layer-Palette 60. Activate the tube ''by_stirner_bambu'' - Edit/copy-Edit paste as a new layer on your working area and move to the upper left side – Double click on this layer and set the Blendmode to Overlay and set the layer opacity of this layer to 87% 61. Activate the tube ''renee-sous-verre-gouttes nuageuses'' -Edit/copy-Edit paste as a new layer on your working area and move - Double click on this layer and set the Blendmode to Overlay 62. Activate the tube de ''ampoule'' -Edit/copy-Edit paste as a new layer on your working area and move 63. Layers- Merge- Merge Visible 64. Edit/copy-!!!! 65. Image - Add borders-Symmetric checked:5 pixels #8495ce 66. Image - Add borders-Symmetric checked:50 pixels white - Activate the magic wand and select the white border of 50 pixels 67. Layers- New raster layer 68. Edit - Paste into Selection (Image is still in your PSP memory) 69. Adjust-Blur-Gaussian Blur: Radius 45% 70. Selections- Invert 71. Effects- Plugins - Eyecandy5 - Perspective shadow-Preset - ''drop shadow blury'' 72. Selections- Deselect All 73. Open the tube Text / Edit/copy-Edit paste as a new layer on your working area 74. Write your own text -Font ''Milano -Material Properties-FG-Color to color : #8495ce Backgroundcolor to #ffff00 75. Effects- Plugins - Eyecandy5 - Perspective shadow-Tab- Settings-Preset - ''drop shadow blury'' 76. Image - Add borders-Symmetric checked: 5 pixels FG-Color #8495ce Save as JPG
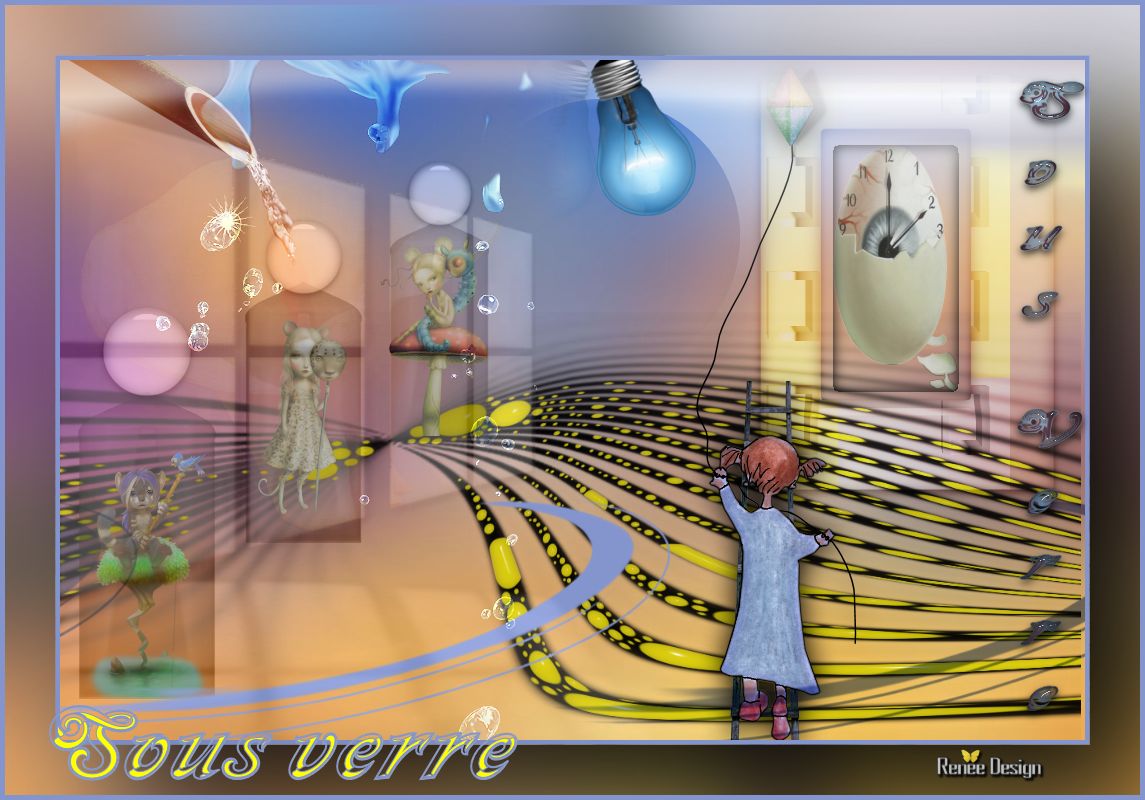
I hope you enjoyed this lesson This lesson was written by Renée 11 September 2012 Thanks Renée *
Any resemblance with an existing lesson is merely a coincidence * * Don't forget to thank the people who work for us and with us. I named the tubeurs - Testers and the translators. Thanks Renée.
I am part of Tutorial Writers Inc. My tutorials are regularly recorded ReneeGraphisme_All rights reserved
*
|
 Translations


 -
-