|
New
Translations here
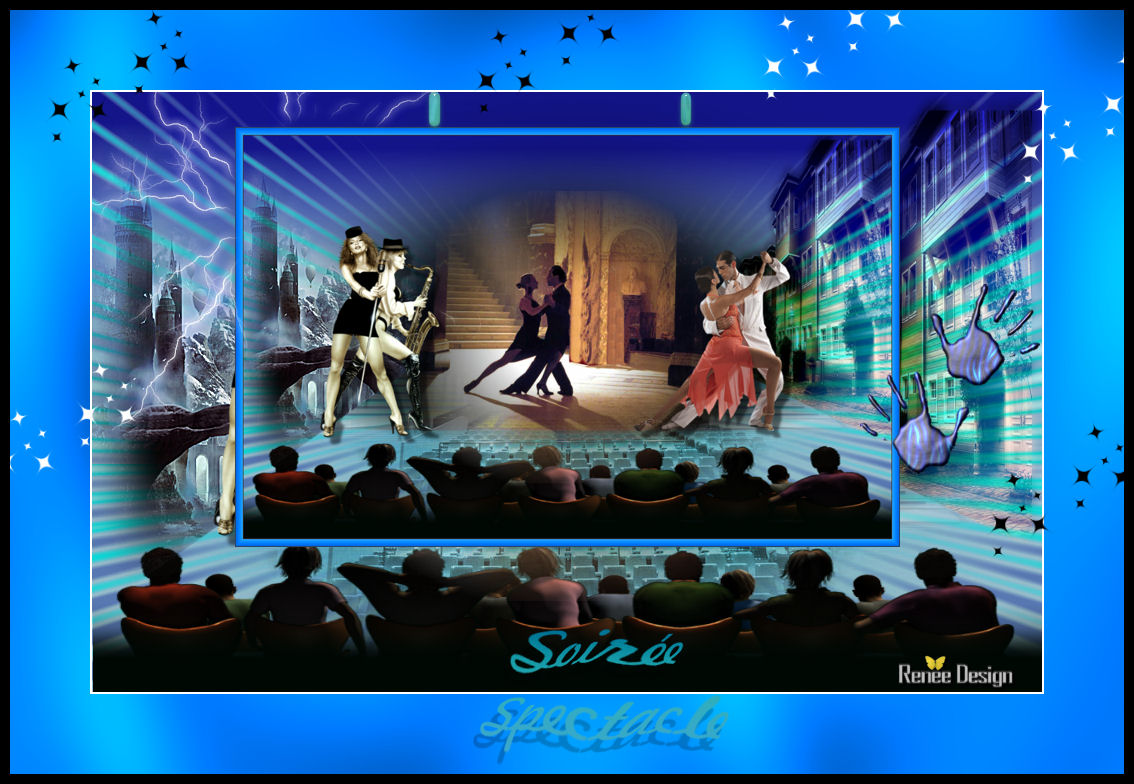
Soirée Spectacle
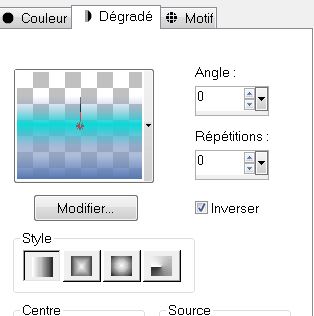
Let's start the lesson. 1. File - New - Open a new transparent image 950 x600 pixels 2. Color-palette:Set your foreground color to a Linear gradient and select gradient « océan2 « configured like this.
3. Selections- Select All 4. Open the image "fond1 " Edit/ Copy-Edit - Paste into selection 5. Selections- Deselect All 6. Layers- New Raster Layer /Activate Flood Fill Tool and fill the layer with the gradient 7. Effects- Distortion Effects- Spiky Halo with these settings
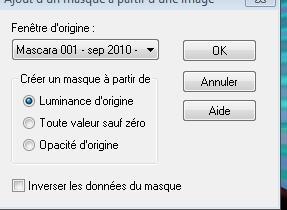
8. Layers- New Raster Layer 9. Selections –load/save selection –load selection from disc and choose: '' @renee-cinema1 '' 10. Open the tube « cool « / Edit/ Copy-Edit - Paste into selection 11. Selections- Deselect All 12. Open the tube "spectateur" « -Edit/ Copy-Edit - Paste as new layer on your working image Activate Move Tool (M) move to the bottom 13. Layers- New Raster Layer //Activate Flood Fill Tool and fill the layer with color black 14. Layers- New Mask layer from Image and choose Mask: «mascara001-sep-2010 »
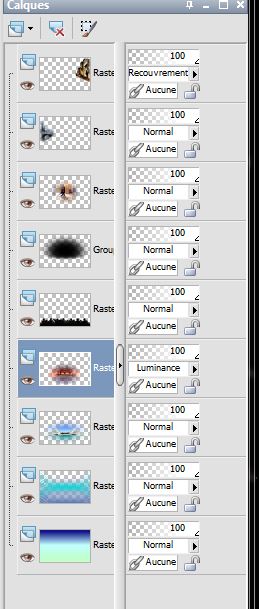
15. Layers- Merge- Merge Group 16. Open the tube "TD-tango dancers "//Edit/copy- Edit/ paste as new layer (do not move it is in the right place) 17. Layers- New Raster Layer 18. Selections –load/save selection –load selection from disc and choose: '' @renee-cinema2'' 19. Open the tube «chrismist-fractal-art-18 « Edit/ Copy-Edit - Paste into selection 20. Selections- Deselect All 21. Adjust- Sharpness-Sharpen More 22. Layers- New Raster Layer 23. Selections –load/save selection –load selection from disc and choose: '' @renee-cinema3 '' 24. Open the tube «3057dtube» Edit/ Copy-Edit - Paste into selection -Double click on this Layer and set the Blend Mode to "Overlay" 25. Selections- Deselect All 26. Stay on this layer 27. Open the tube ''bioscoop'' -Edit/ Copy-Edit - Paste as new layer on your working image 28. Effects- Image Effects-Offset with these settings: H = 0 and V = -65 29. Double click on this Layer and set the Blend Mode to " Luminance " - You should have this result as shown in the print screen below
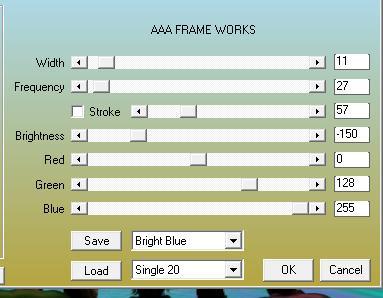
30. Activate top layer in the Layer palette 31. Open the tube « sf dancer55 »/Image Resize to 80%/ Edit/Copy -Edit paste as new layer on your working image and move 32. Effects- 3 D Effects- Drop Shadow using the default settings 33. Open the tube « dyveke-music » / Image Resize to 40% / Edit/Copy -Edit paste as new layer on your working image and move 34. Effects- 3 D Effects- Drop Shadow using the default settings 35.Layers- Merge- Merge Visible 36. Layers- Duplicate 37. Effects- Plugins - Modules externes AAA Frame - Frame Works use settings below
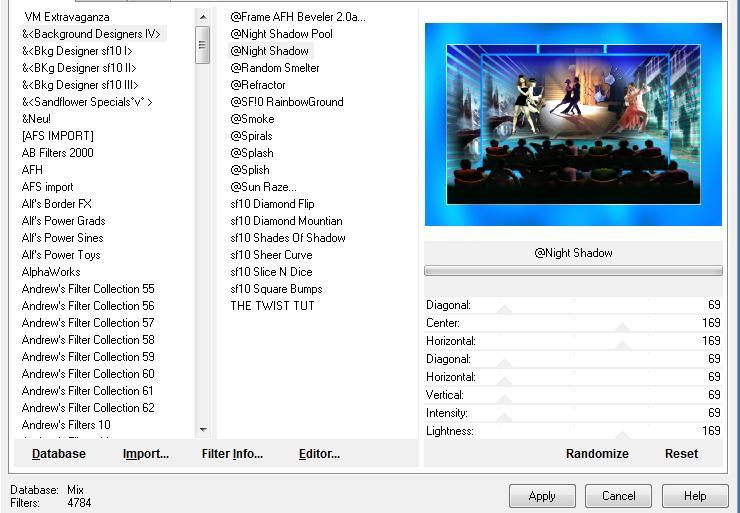
38. Image Resize to 70 % resize all layers not checked 39. Effects- Image Effects-Offset with these settings: H = 0 and V = 55 transparent 40. Open the tube « attaches « / Edit/Copy -Edit paste as new layer on your working image and move 41. Effects- Plugins- EyeCandy 5 Impact Glass - Preste ''Aqua with reflexion'' 42. Layers- Merge- Merge Visible 43. Open the tube « Mainstop »/ Edit/Copy -Edit paste as new layer on your working image and move 44. Open the tube ''eclairs'' -Edit/Copy -Edit paste as new layer on your working image 45. Image Resize to 75% resize all layers not checked /and move 46. Image - Add borders-Symmetric checked: 2 pixels #fffffff 47. Image - Add borders-Symmetric checked: 80 pixels #007aff 48. Activate the Magic Wand and select the border of 80 pixels 49. Effects- Plugins - Unlimited - &<Background DesignersIV /@night shadow use settings below
50. Selections- Deselect All 51. Open the Brush image " etoiles "in your PSP / File- Export Custom Brush (Give it a name) -Activate Brush Tool and select my file in the list " etoiles " with these settings--Set FG-Color to #ffffff-Set BG-Color to #000000 //Stamp your brush with the foreground/backgroundcolor (see finished image)
52. Image - Add borders-Symmetric checked: 10 pixels color black 53. Open the tube " texte"- Edit/Copy -Edit paste as new layer on your working image and move -Ore write your own text 54. Layers- Merge- Merge All -Save as JPEG
I am part of the Tutorial Writers Inc. My tutorials are registered regularly ReneeGraphisme_All rights reserved
*
|
 Translations