|
New
Translations here
Du rouge rien que du rouge hommage and Luz crista
Let's start the lesson.
2. File: Open a New Image – Transparent - 1000 x 550 Color Palette: Set your Foregroundcolor to gradient- Prepare a linear gradient with these settings 0/1 Invert not checked. - Activate Flood Fill Tool and fill the layer with the gradient 3. Layers- Duplicate 4. Make toolbar Script actif - (Image - Toolbars - Scripts checked) -Activate toolbar Script and select my script in the list: -Script-rojo-artMila /Click on the arrow and let the script run.
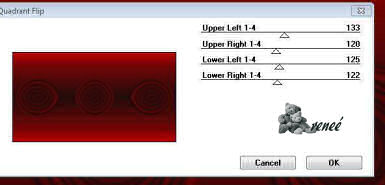
5. Layers- Duplicate 6.Effects- Plugins -Mirror rave /quadrant flip use settings below
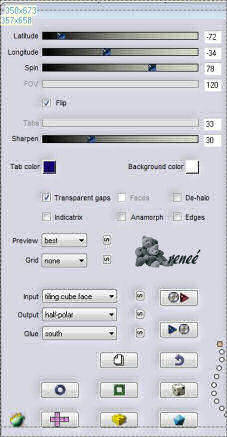
7. Image Resize to 65% all layers not checked On this Layer !!!!!!!!!! 8. Effects-Plugins -Flaming pear flexify2 use settings below
9. Image Flip /Activate the Pick Tool/Deformation tool (K) Mode Scale Pull the bottom Node up to 300 high as shown in the example below
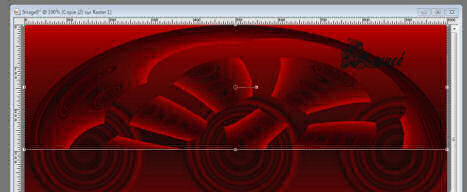
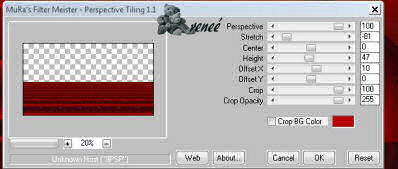
10. Effects- 3 D Effects- Drop Shadow with these settings: 6/6/100/12/black Make copy of raster 1 active 11. Effects- Plugins - Mura's Meister perspective tilling use settings below
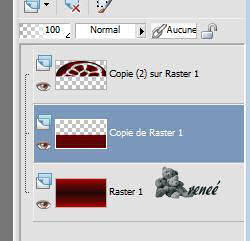
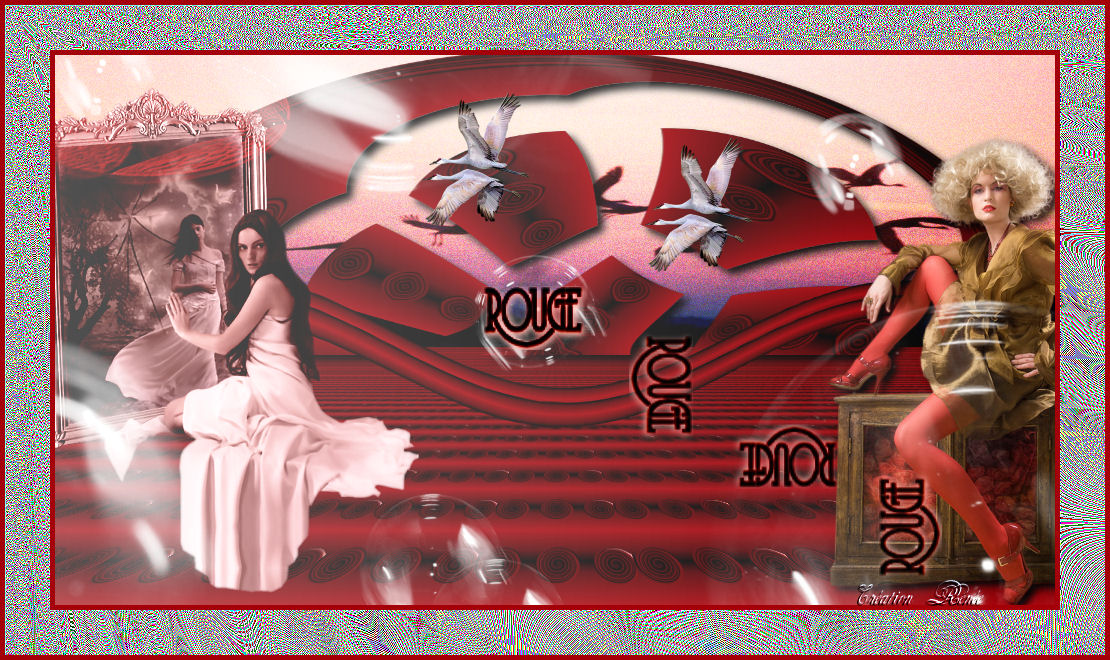
*Layer Palette look like this now-You should have this result
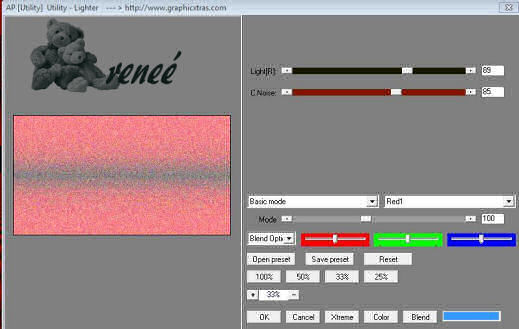
- Activate the bottom of the layer palette= raster 1 12. Effects- Plugins - Ap utility use settings below
((If you do not have it apply one of these 2 below) AP 13/Utility-lighter/150 AP 05/Noise Fuzzy / 17-4-14-50-0-0-255
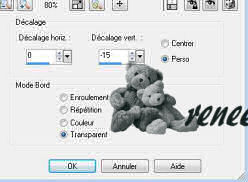
Activate copy of raster 1 13. Activate the Magic Wand and select the transparent top part 14. Layers- New Raster Layer 15. Open the tube ''oiseaux '' Edit/ Copy-Edit - Paste into selection 16. Selections- Deselect All Layer Palette -double click on this layer and set the Blendmode to " Hard Light " To replace the top of the layers palette 17. Layers- New Raster Layer -Activate Flood Fill Tool and fill the layer with the gradient 0/1 /Invert checked!!!! 18. Effects- Geometric Effects /Perspective Horizontal 98 / transparent 19. Image Mirror Repeat: Effects- Geometric Effects /Perspective Horizontal 98 / transparent 20. Layers -Duplicate 21. Effects- Image Effects- Offset with these settings H 0 and V -15 transparent
22. Layers- Merge- Merge Layers Down Repeat: Effects- Image Effects- Offset with the same settings 23. Effects- Distortion Effects- Wave use settings below
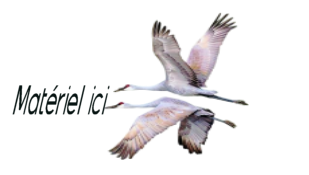
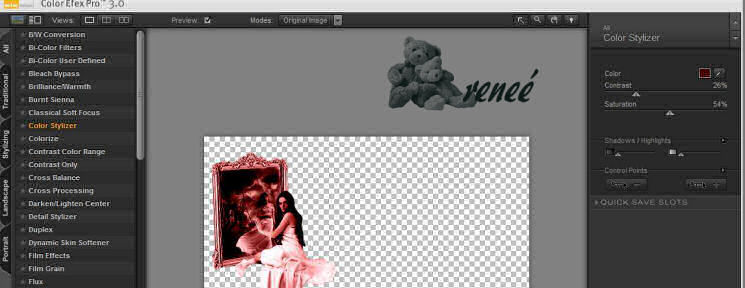
24. Open the tube « en el espejo » / Image Resize to 75% Edit/ Copy-Edit - Paste as new layer on your working image and move to the left 25. Effects- Plugins Nick Color Pro effex 3 Color Stylizer- use settings below- Color #460808/
Edit/ Copy-Edit - Paste as new layer on your working image /Image Mirror /and move to the bottom right 27. Effects- 3 D Effects- Drop Shadow with these settings: 5/6/100/10 black 28. Open the ''image 10'' Edit/ Copy-Edit - Paste as new layer on your working image and move to the top left corner Layer Palette -double click on this layer and set the Blendmode to "Screen " 29. Open the tube « bulles « / Edit/ Copy-Edit - Paste as new layer on your working image /Image Mirror 30. Layers- New Raster Layer -Change foreground material into a "fading foreground" linear gradient with these settings 275/ 0 -Activate Flood Fill Tool and fill the layer with the gradient
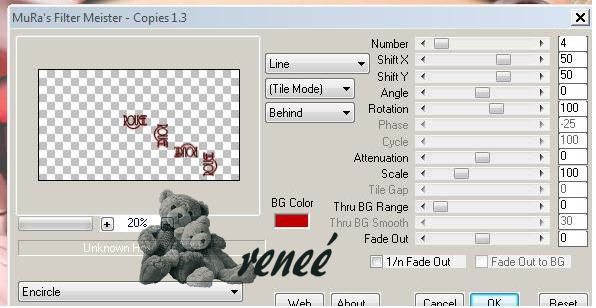
31. Open the Maske « mask1 » Layers- New Mask layer from Image and choose Mask: « mask1 » Layers- Merge- Merge Group Layer Palette -double click on this layer and set the Blendmode to "Normal "Set the layer opacity of this layer to 32% 32. Layers- Merge - Merge Layers Visible 33. Open the tube « texte rouge » Edit/ Copy-Edit - Paste as new layer on your working image and place in the center of the bubble 34. Layers- Duplicate 35. Effects- Plugins - Mura's meister - Copies use settings below
36. Layers- Merge - Merge Layers All 37. Image - Add Borders - Symmetric checked 5 pixels foreground color #a40007 38. Image - Add Borders - Symmetric checked 45 pixels #fffafd 39. Image - Add Borders - Symmetric checked 5 pixels #250c0c 40. Open the tube " oies " Edit/ Copy-Edit - Paste as new layer on your working image and move Layers Duplicate and move 41. Layers- Merge - Merge Layers All 42. Activate the Magic Wand and select the border of 45 pixels
44. Effects- Edge Effects- Enhance 45. Selections- Deselect All Save as JPEG
I am part of the Tutorial Writers Inc. My tutorials are registered regularly ReneeGraphisme_All rights reserved
*
|
 Translations