|
New
Translations here
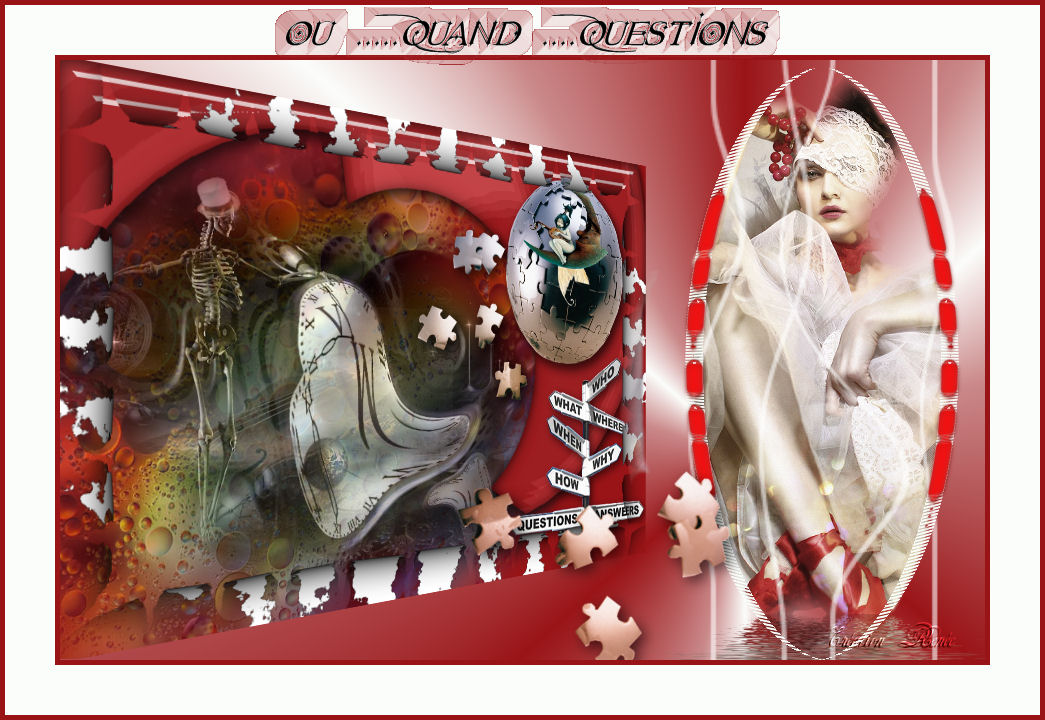
Ou........Quand....Questions? Plugins l & K's / Kaithlyn Vm Extravanga/James bondage Eye Candy5 /Glass Alien Skin Xenofex2/Rip Open Flaming pear /flood You can find my filters http://espace-gigi.com/filtres/mesfiltres.htm
Let's start the lesson.
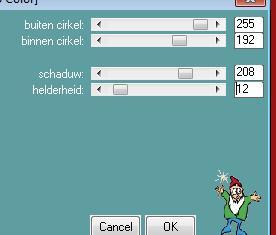
1. File-new. Open a new image – transparent –925 x 600 pixels - Material Properties:Set your foreground color to: #991417-Activate Flood Fill Tool and fill the layer with the Foreground color #991417 2. Selections - Load/save selections - Load selection from disk and select my file: " @renee menue" 3.Selections- Promote selection to Layer -Keep Selected 4. Effects-Plugins- L and K 's - Kaithlyn use settings shown below
5. Selections- Modify-Contract 15 pixels 6. Effects-Plugins - L and K 's - Kaithlyn/ same settings 8. Selections- Modify-Contract 15 pixels Repeat 9. Effects- Plugins- L and K 's - Kaithlyn/ same settings 10. Selections- Modify-Contract 15 pixels -Repeat 11. Effects -Plugins -L and K 's- Kaithlyn/ same settings 12. Selections- Modify-Contract 15 pixels
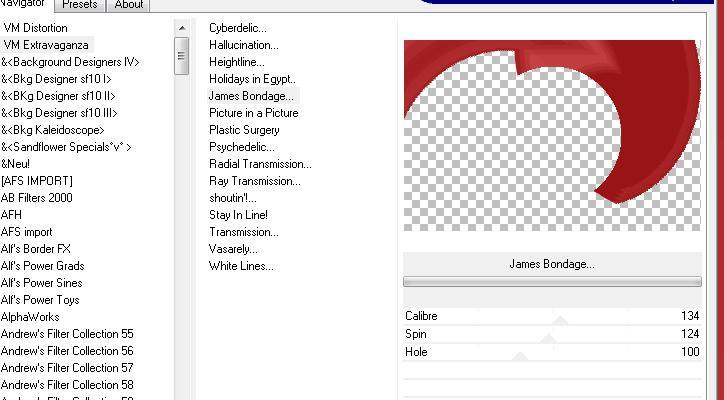
13. Selections- Deselect All 14. Effects- Plugins - VM Extravanga/james bondage use settings shown below
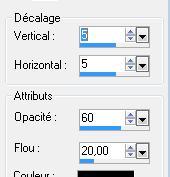
15. Effects- Plugins - Eycandy 5 /glass /-tab Settings/User settings choose my preset: ''renee-menue'' 16. Effects- 3 D Effects- Drop Shadow use settings shown below
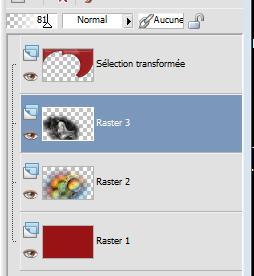
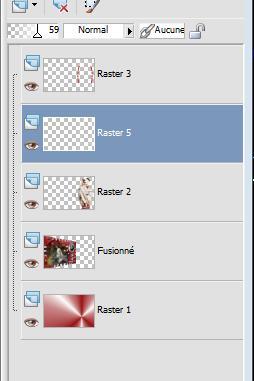
17. Open the tube « bulles de couleur « / Edit/ Copy –Edit/ paste as new layer on your working image and move -Double click on this Layer and set the Blend Mode to "Overlay" 18. Effects-Image Effects-Offset with these settings: H = -180 and V = -41 19. Layers- Arrange- Move Down 20. Open the tube « guismo wasteyourtime17102011 » /Edit/ Copy –Edit/ paste as new layer on your working image and move/-Set the layer opacity of this layer to 83% --Layer Palette look like this now-You should have this result
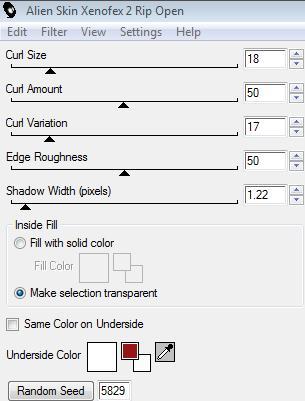
21. Open the tube'' claudia viza terre puzzle ''Edit/ Copy –Edit/ paste as new layer on your working image and move Effects- 3 D Effects- Drop Shadow with the same settings 21. Open the tube "mix35 "/ Edit/ Copy –Edit/ paste as new layer on your working image/ Image Resize to 75% resize all layers not checked -Effects- 3 D Effects- Drop Shadow with the same settings 22. Layers- Merge- Merge Visible 23. Layers- Duplicate 24. Effects- Plugins - Alien skin -Xenofex2 /Rip open use settings shown below
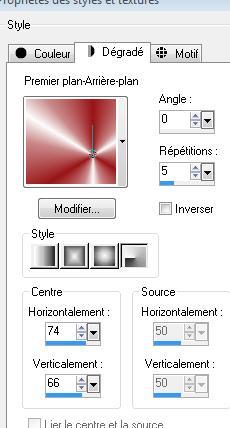
25. Layers- Merge- Merge Visible 26. Effects- Plugins - Andromeda perspective /it open centered 27. Layers- New Raster Layer Layers- Arrange- Move Down 28.Material Properties:Set your foreground color to: #991417- Set your background color to:#ffffff -Put your foreground on the radial gradient with settings below -Activate Flood Fill Tool and fill the layer with the gradient
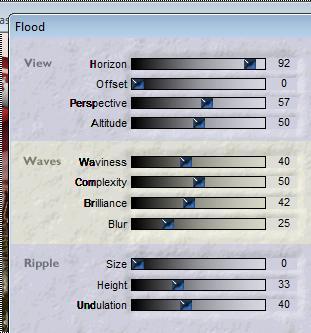
29. Open the tube ''renee '' -Edit/ Copy –Edit/ paste as new layer on your working image and move to the right side 30. Open the tube « karine-ladymist13 »Edit/ Copy –Edit/ paste as new layer on your working image / Image Resize to 65% resize all layers not checked -Activate your Move Tool (M) place it to the right side (see finished image) 31. Effects- Plugins-Flaming pear/ flood use settings shown below
32. Open the tube « arc « Edit/ Copy –Edit/ paste as new layer on your working image and move -Set the layer opacity of this layer to 59%-Layer Palette look like this now-You should have this result
33. Open the tube "puzzle "Edit/ Copy –Edit/ paste as new layer on your working image and move 34. Image Flip/ Image Resize to 70% resize all layers not checked 35. Adjust-Hue and Saturation-Colorize with these settings 10/122 36. Effects- 3 D Effects- Drop Shadow with the same settings 37. Image - Add borders-Symmetric checked: 5 pixels #991417 38. Image - Add borders-Symmetric checked: 50 pixels #ffffff 39. Open the tube "text " Edit/ Copy-Edit - Paste as new layer on your working image/ or write your own text 40. Image - Add borders-Symmetric checked: 5 pixels #991417 Save as JPG
I am part of Tutorial Writers Inc. My tutorials are regularly recordedt ReneeGraphisme_All rights reserved
*
|
 Translations