|
New
Transaltions here
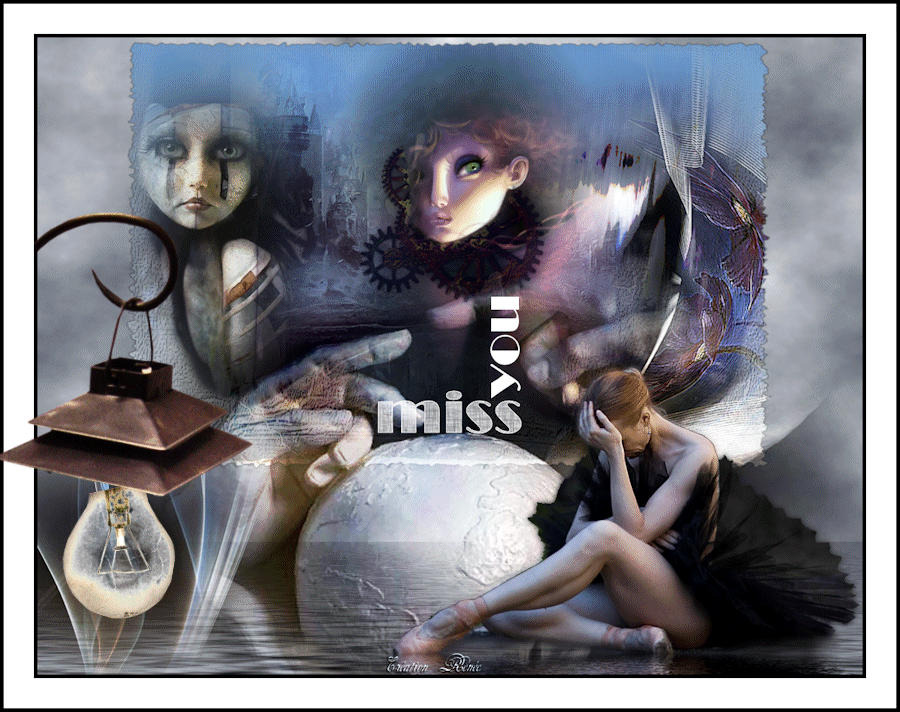
MISS YOU
Let's start the lesson. 1.File: Open a new transparent image 900 x 600 pixels 2. Color-palette:Set your foreground color to color #7293bf -Set your background color to color #eeeee7 3. Color-palette: Set your Foregroundcolor to forground-background linear gradient, with these settings
4. Activate Flood Fill Tool and fill the layer with the gradient 5. Open the tube « 010 -guismo» Edit/ Copy-Edit - Paste as new layer on your working image do not move it is in the right place 6. Layers- Duplicate 7. Adjust- Hue and Saturation-Colorize 159/83 8. Layers- Arrange- Move Down 9. Your work and Layer Palette look like this now - Activate the top of the layer palette - Set the layer opacity of this layer to 44%
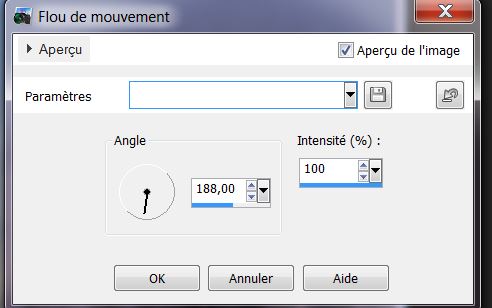
10. Layers- Merge- Merge Layers Visible 11. Ajust- Blur- Motion Blur use settings below
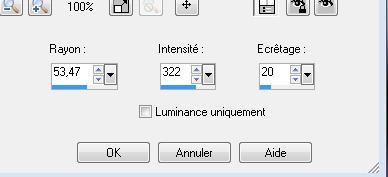
12. Adjust- Sharpness- Unsharp Mask use settings below
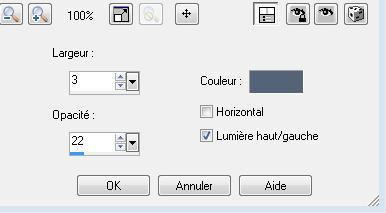
13.Layers- Duplicate -Double click on this Layer and set the Blend Mode to "Hard Light " Set the layer opacity of this layer to 44% 14.Effects- Texture Effects- Blinds use settings below- Color #546376
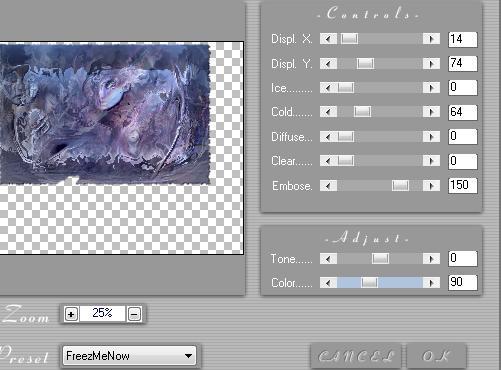
15. Adjust- Sharpness-Sharpen More 16. Open the tube « 6083-féerie « Edit/ Copy-Edit - Paste as new layer on your working image and do not move!! 17. Effects- Plugins /mannekenein /Mezzo-force-ice/
(
If your filter Mezzo force Ice does not give the same result -The effect is included with the material-(mezzo
force.png )and Paste as a new Layer on your working image
18. Layers- Duplicate 19. Open the tube « yaka misted faces girlie 11090 » Edit/ Copy-Edit - Paste as new layer on your working image - Move to the left 20.Open the tube « fleur bleue « Edit/ Copy-Edit - Paste as new layer on your working image - Move to the right Your work look like this now
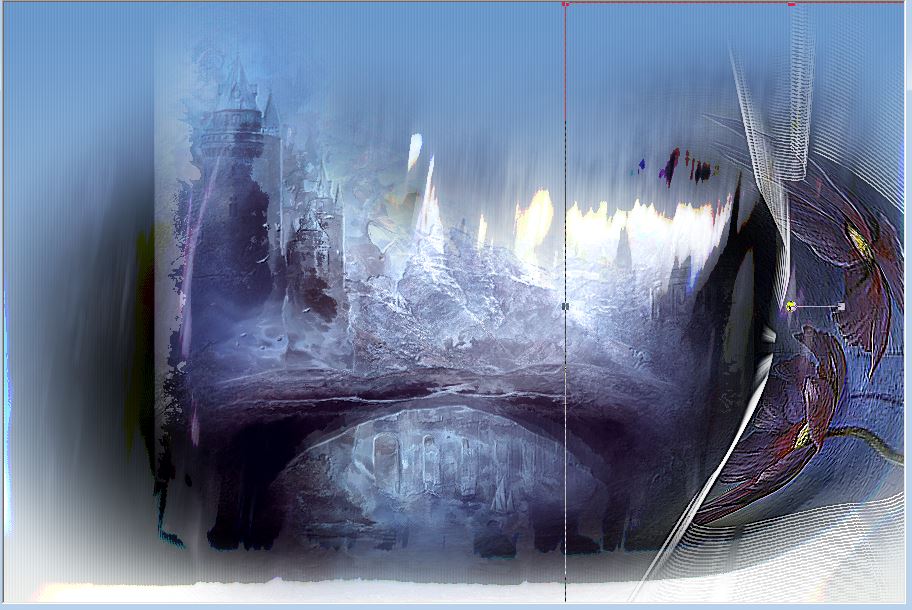
21. Effects- Plugins- Eyecandy 5 Impact - blacklight-tab Settings/User settings choose my Preset ''@illusionrenee'' 22. Effects- Edge Effects- Enhance More 23. Open the tube « 758 feerie « Edit/ Copy-Edit - Paste as new layer on your working image and move in the middle - Open the tube « demi roue Edit/ Copy-Edit - Paste as new layer on your working image and do not move /Set the layer opacity of this layer to 75 % -Effects- Plugins -mezzo force with the same settings if you do not have this Mezzo force tube ''demi roue''png -Effects- Plugins -Alien Snap Art with these settings-Double click on this Layer and set the Blend Mode to "Luminance-Legacy "
24. Layers- Merge- Merge Visible 25. Image- Resize to 1024 pixels de large
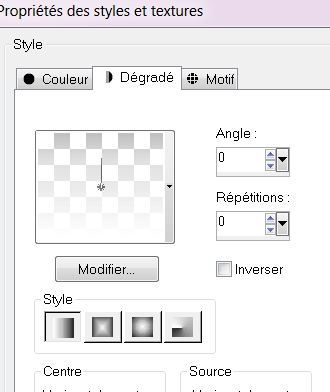
26. Layers- New Raster Layer 27. Properties Forground; Set your Foregroundcolor to color white -Prepare a linear "Fading foreground" gradient configured like this. Activate Flood Fill Tool and fill the layer with the gradient
28. Layers- New Mask layer from Image and choose Mask:« masque 3 » attention Invert mask data
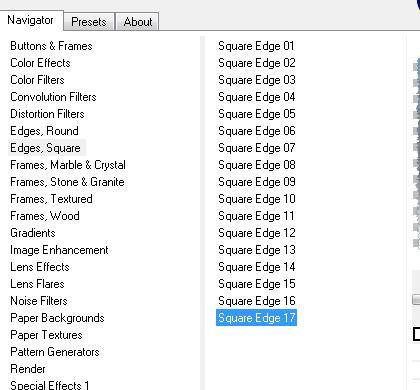
29. Layers- Merge- Merge Group 30. Layers- Merge- Merge- Layers Visible 31. Effects- Plugins-Icnet Filters /Edges Square - Square Edge 17
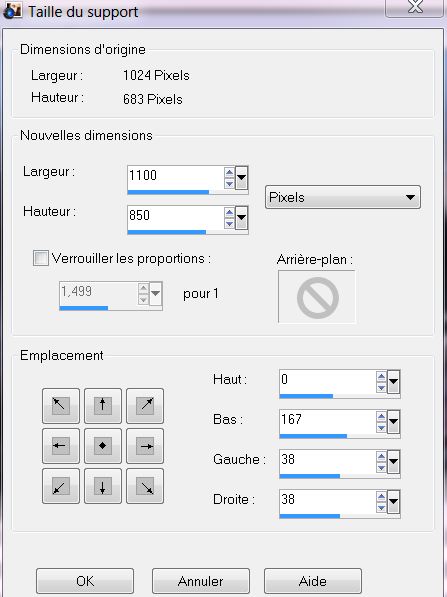
32. Image- Resize to 80% All layers not checked 33. Image Image- Canvas Size 1100 /850 pixels
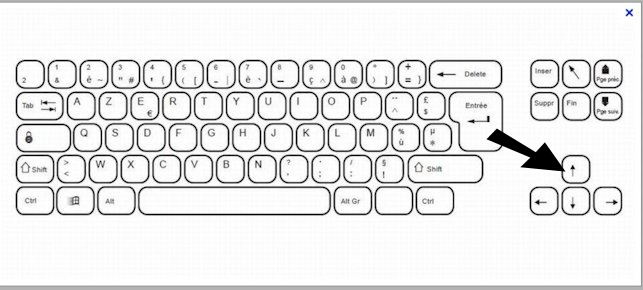
33. With your arrow keys on the keyboard upwards until it abuts against the edge
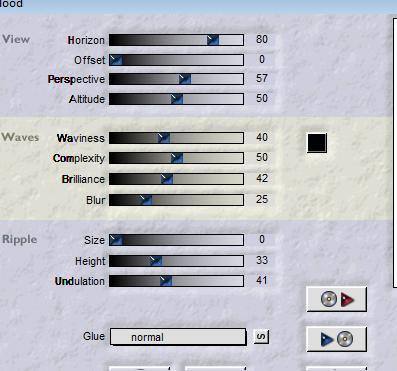
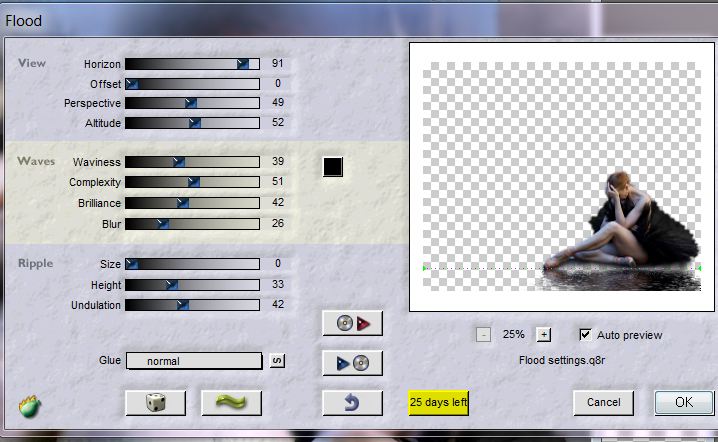
34. Layers- New Raster Layer 35. Color-palette:Set your foreground color to color #383f4f -Set your background color to color #f9faff 36. Effects- Plugins - Mura's Meister /Clouds using the default settings /(Click to reset to get a darker result) 37. Open the tube « terre 159 » Edit/ Copy-Edit - Paste as new layer on your working image and move to the bottom - Double click on this Layer and set the Blend Mode to " Hard Light " 38. Activate the bottom of the Layers Palette 39. Effects- Plugins-Flaming pear /flood use settings below
40. Activate top layer in the Layer palette= 2 as shown in the example below
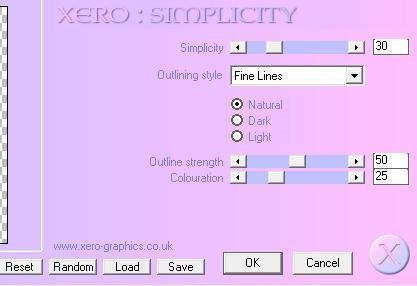
41. Layers- Duplicate 42. Effects- Plugins- Xero - simplicity use settings below
43. Double click on this Layer and set the Blend Mode to " Hard Light " Set the layer opacity of this layer to 26% - Attention: There is something white on the fingers of right- erase white which overlaps part of the small picture 44. Open the tube text «png-missyou » Edit/ Copy-Edit - Paste as new layer on your working image and move 45. Open the tube «pspcybergtube-dance 1-001 »Edit/ Copy-Edit - Paste as new layer on your working image and move to the right 46. Effects- Plugins- Flaming pear /flood use settings below
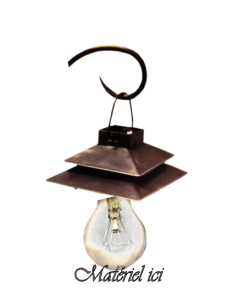
47. Open the tube « sinedot16-06-2007 « Edit/ Copy-Edit - Paste as new layer on your working image and move to the bottom left 48. Double click on this Layer and set the Blend Mode to " Soft Light " 49. Image - Add borders-Symmetric checked:5 pixels black 50. Image - Add borders-Symmetric checked:40 pixels white 51. Image - Add borders-Symmetric checked: 5 pixels black 52. Image- Resize to 900 pixels width - Layers- Merge- Merge All ( Flatten) add your watermark The animation:
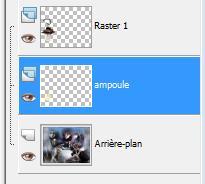
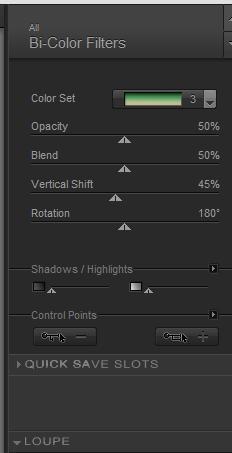
- On this Bulb-Layer - Effects- Plugins -Nick color effex 3/ bicolor use settings below
Edit - Copy special - Copy merged. To AS: Edit - Paste - As a new animation.
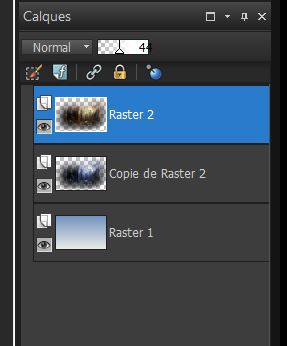
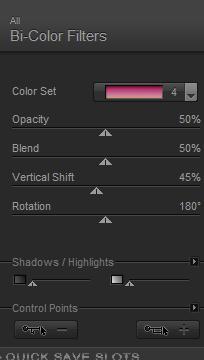
- Back to PSP. Activate Raster 2 (light bulb) Repeat: Effects- Plugins-bicolor 4
Edit - Copy special - Copy merged. To AS: Edit - Paste - After current frame Click in frame 1 - Edit - Select all. Animation - Frame properties what you like Save your crea as a gif file and you're done!
I am part of the Tutorial Writers Inc. My tutorials are registered regularly ReneeGraphisme_All rights reserved
*
|
 Translations