|
For my dear Maggie on Christmas Eve 2013 New
Translations here
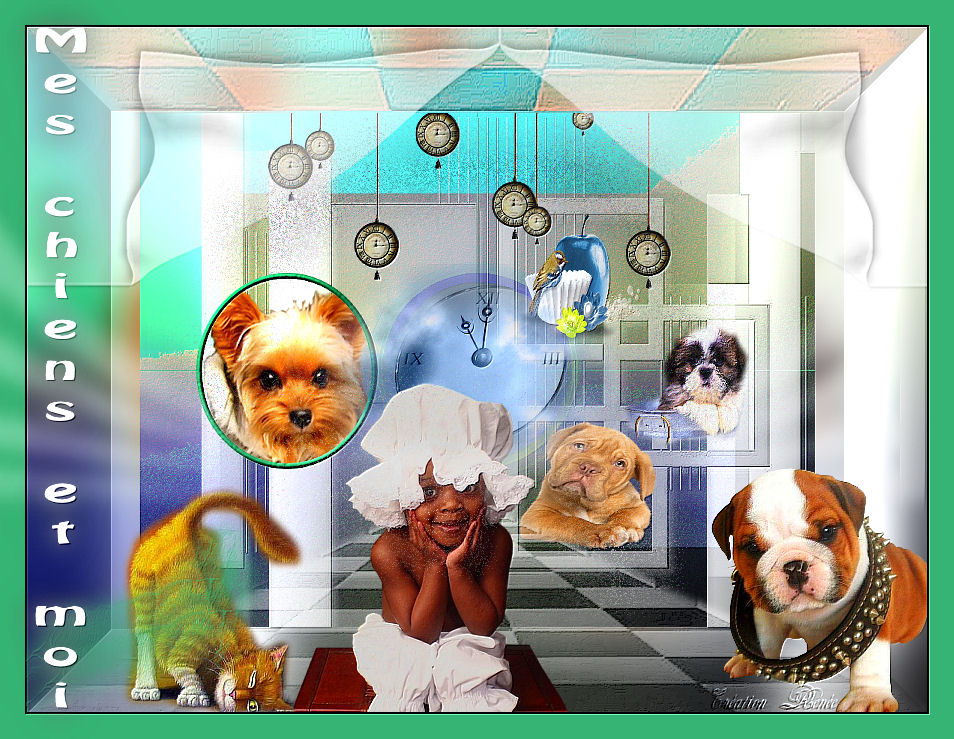
Mes chiens et moi
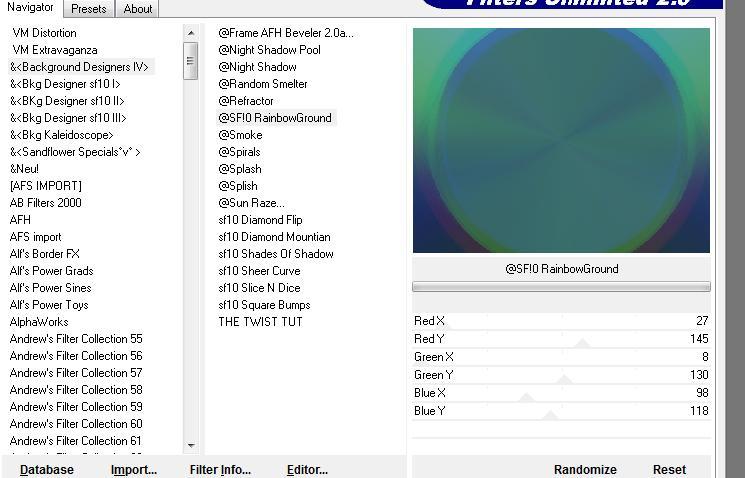
Let's start the lesson. 1. Open the backgroundimage . "fond" Window - Duplicate (or shift+D) - Close the original and proceed on the copy -Promote Background Layer =Raster 1 2. Effects- Edge Effects- Enhance 3. Effects- Plugins -Unlimted &< Background designersIV use settings below
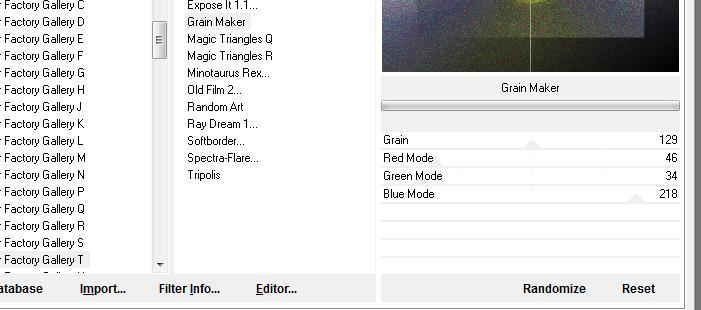
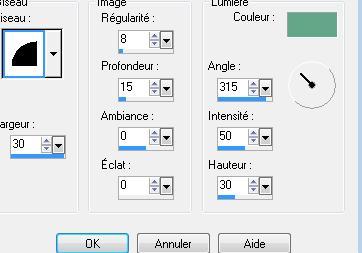
4. Effects- Plugins -Mock/bevel / 61 5. Layers- New Raster Layer /Properties Foreground: Set your foreground color to: #54a37f -Activate Flood Fill Tool and fill the layer with the foreground color #54a37f -Stay on this Layer 6. Effects- Plugins-Unlimited - Factory Gallery T /Grain maker use settings below
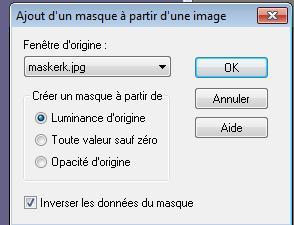
7. Layers- New Raster Layer /Properties Foreground: Set your foreground color to:#ffffff- Pot of Paint: Change the opacity of the color at 65%-Activate Flood Fill Tool and fill the layer with the foreground color #ffffff 8. Layers- New Mask layer from Image and choose Mask: ''maskerk.jpg"
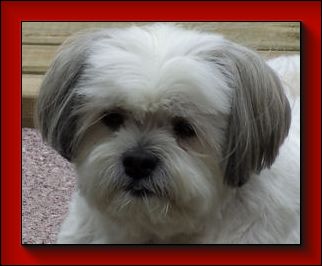
-Layers- Merge- Merge Group 9. Effects- Edge Effects- Enhance 10. Layers- New Raster Layer 11. Selections –load/save selection –load selection from disc and choose my selection: '' @renee voilà '' 12. Open the tube « chien «-Edit/ Copy-Edit - Paste into selection-Selections- Deselect All 13. Selections-Modify-Select Selection Borders with 4 pixels -Out Side 14. Material Properties:Set your foreground color to:#54a37f-Activate Flood Fill Tool and fill the selection with the foreground color #54a37f 15. Effects- 3 D Effects- Inner Bevel use settings below FG-Color #54a37f
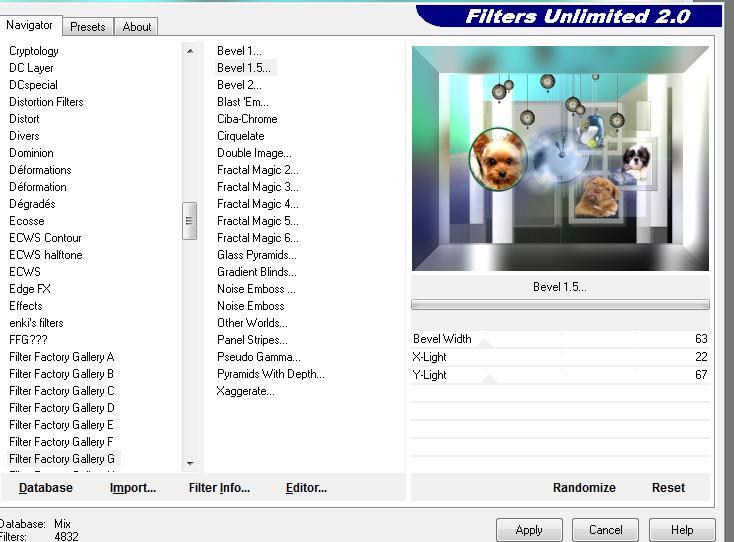
16. Selections- Deselect All 17. Effects- Image Effects- Offset with these settings: H= -250 and V =0 18. Open the tube « effet de bordure « /Edit/Copy -Edit paste as new layer on your working image **Double click on this Layer and set the Blend Mode to "Dodge " -Set the layer opacity of this layer to 30% 19. Layers- New Raster Layer 20. Selections –load/save selection –load selection from disc and choose my selection:"@renee voilà 2" 21. Open the tube « florju » -Edit/ Copy-Edit - Paste into selection-Selections- Deselect All 22. Layers- New Raster Layer 23. Selections –load/save selection –load selection from disc and choose my selection: @renee voila3 » 24. Open the tube « maggy bain « - Edit/ Copy-Edit - Paste into selection-Selections- Deselect All 25. Layers- New Raster Layer 26. Selections –load/save selection –load selection from disc and choose my selection:'' @renee voilà 4 ''e 27. Open the tube « grace's TLC puppy '' -Edit/ Copy-Edit - Paste into selection-Selections- Deselect All 28. Open the tube « heure brillante « /Edit/Copy -Edit paste as new layer on your working image -Activate Move Tool (M) move it the right place (see finished image) 29. Open the tube « horloge bleue « -Edit/Copy -Edit paste as new layer on your working image -Activate Move Tool (M) move it the right place (see finished image) 30. Layers- Merge- Merge Visible 31. Layers- Duplicate Image Resize to 75% resize all layers not checked -Activate the bottom of the layer palette 32. Adjust- Blur- Gaussian Blur : Radius: 25% 33. Layers- Merge- Merge Visible 34. Effects-Plugins - Unlimited filter FactoryG /bevel1.5 use settings below
36. Open the tube « podbor49 « Edit/Copy -Edit paste as new layer on your working image -Image Resize to 45 % 37. Open the tube "plafond "-Edit/Copy -Edit paste as new layer on your working image and move /Double click on this Layer and set the Blend Mode to "Hard Light " 38. Open the tube '' MMDesign 214-220909'' / Image Resize to 75% -Edit/Copy -Edit paste as new layer on your working image and move 39. Open the tube « voilage «-Edit/Copy -Edit paste as new layer on your working image and move /Set the layer opacity of this layer to 83% 40. Open the tube « purple magic'' / Edit/Copy -Edit paste as new layer on your working image and move -Image Resize to 75% resize all layers not checked 41. Image - Add borders-Symmetric checked:2 pixels black 42. Image - Add borders-Symmetric checked:25 pixels #4e9a73 43. Open the Brush "pinceau dog" in your PSP /File- Export Custom Brush (Give it a name "pinceau dog") Layers- New Raster Layer /Activate the Brush-Tool and choose the brush "pinceau dog" -stamp the brush on the bottom left with color white 44. Selections –load/save selection –load selection from disc and choose my selection:''@renee voilà 6 ''/Activate Flood Fill Tool and fill the selection with color white 45. Selections- Deselect All /-Double click on this Layer and set the Blend Mode to "Soft Light " -Set the layer opacity of this layer to 81% 46. Open the tube " texte"- Edit/Copy -Edit paste as new layer on your working image and move 47. Effects- Plugins - FMTile tools /saturation emboss using the default settings 48. Open the tube « arc d'eau « Edit/Copy -Edit paste as new layer on your working image (do not move it is in the right place) Save as JPG
I am part of Tutorial Writers Inc. My tutorials are regularly recordedt ReneeGraphisme_All rights reserved
*
|
 Translations