|
Let's start the lesson.
1. File - New - New Image 1025 x
615 pixels color black
2.
Activate the image ''Premade_background_12_by_flina"/
Edit-Copy-Edit Paste as a new layer
Effects-Image Effects-Offset :H = -246 and V = 0/
transparent
3.
Layers- New Raster layer/ Activate flood fill tool and fill the layer with color white
4.
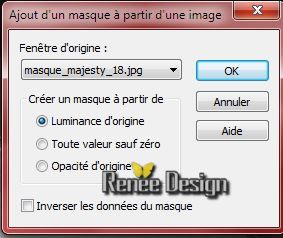
Layers-New Mask Layer From Image and choose Mask
''masque _majesty_18''
-
Layers- Merge -Merge Group
5.
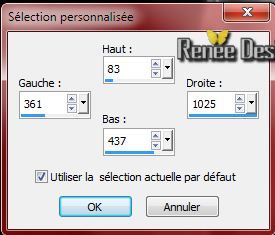
Selection Tool ( S ) Custom selection use settings below
6.
Edit-Cut-Edit-Paste as a new layer
Keep Selected
7.
Layer palette: activate the layer underneath (Group-Raster2)
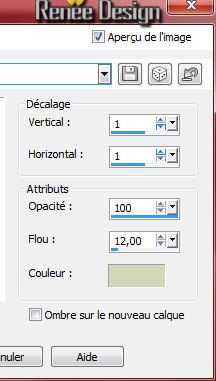
8. Effects- 3D Effects-Drop Shadow:/color
# b4bf8b
Selections- Deselect All
9.
Activate the top of the layer-Palette (raster 2)
10.
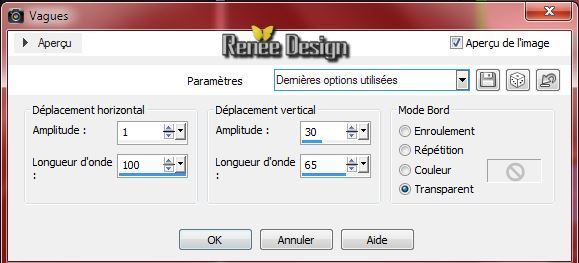
Effects- Distortion Effects-Wave use settings below
11.
Effects-Image Effects-Offset use settings below
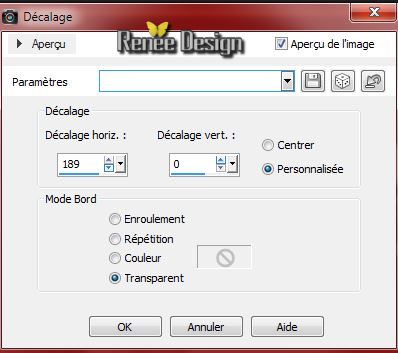
12.
Selection Tool ( S ) Custom selection use settings below
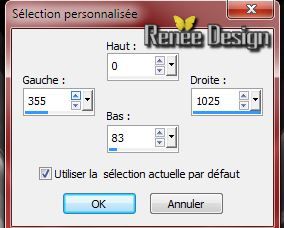
DELETE

Selections- Deselect All
13.
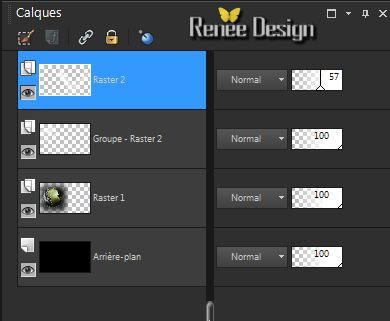
Layer Palette :Double click on this layer and set the layer opacity of this layer to 57%
Your Layer Palette look like this now:
14.
Layers- New raster layer
15.
Selection Tool ( S ) Custom selection use settings below
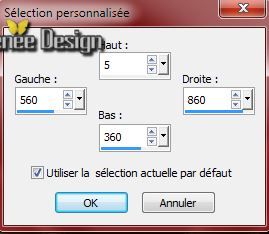
-Material Properties: Foreground color to color:
#b4bf8b Background color to color black
-
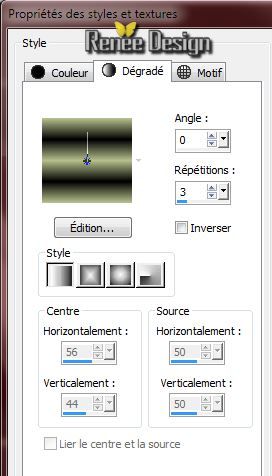
Prepare a linear gradient configured like this.
16.
Activate Flood Fill Tool and fill selection with the gradient
17.
Effects- Plugins Icnet Filters - Unlimited - Convolution Filters
- Emboss (strong) /229
Selections- Deselect All( !!Good deselect otherwise you get a white border)
18.
Effects-Edge Effects-Enhance More
19.
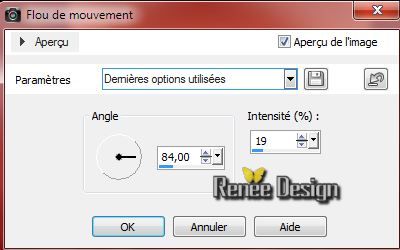
Adjust-Blur-Motion Blur use settings below
20.
Selection Tool ( S ) Custom selection use settings below

21.Selections- Modify-Contract:10 pixels
22.
Activate the tube "Trizia Tube_Majesty'' /Edit-Copy-Edit Paste into selection
23.
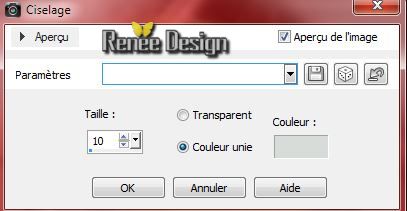
Effects- 3D Effects-Chisel-Color#d8dcd9
Selections- Deselect All
24.
Layers- Duplicate
25.
Effects- Distortion Effects - Pixelate / 12
Symmetric checked
26.
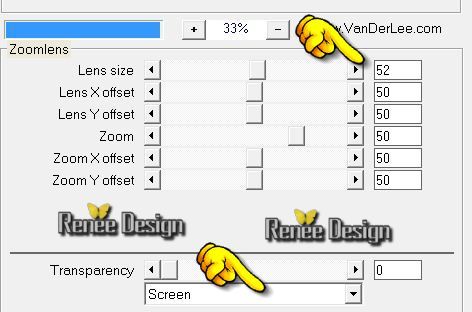
Effects- Plugins - Vanderlee - Unplugged X /
Zoomlens
27.
Effects- 3D Effects-Drop Shadow: 1/1/100/25 color black
28.
Effects-Image Effects-Offset : H= 36 and V = 0
Layer Palette :double click on this layer and set the layer opacity of this layer to 67%
29.
Layers- New Raster layer
30.Selections - load/save selection - load selection from disk and select my file ''majesty_1" / Activate flood fill tool and fill the selection with foreground color #b4bf8b
Selections- Deselect All
31.
Effects- Plugins- Vanderlee- Unplugged X /
Defocus
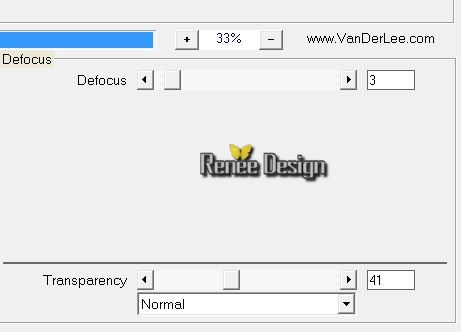
32.
Effects- 3D Effects-Inner Bevel use settings below
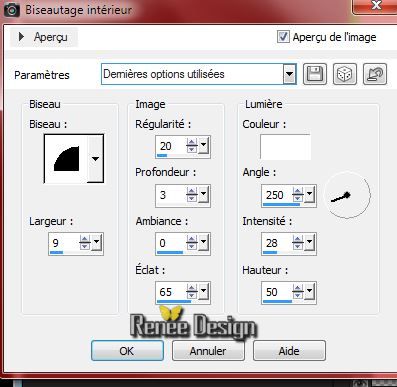
33.
Effects-Edge Effects-Enhance
34.
Layers- New raster layer
35.Selections - load/save selection - load selection from disk and select my file ''majesty_2" /Activate flood fill tool and fill the selection with color #b4bf8b
Selections- Deselect All
36.
Layers- Duplicate
37.
Effects- Distortion Effects - Wave use settings below
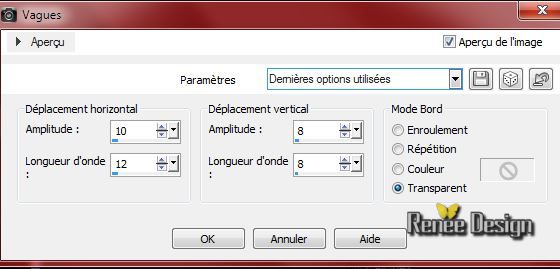
38.
Image - Mirror
39.
Effects- 3D Effects-Drop Shadow/color white
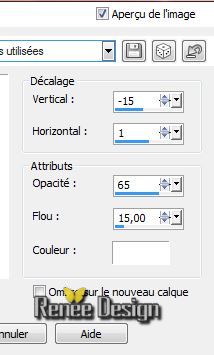
40.Selections - load/save selection - load selection from disk and select my file ''majesty_5"/Activate flood fill tool and fill the selection with foreground color
Selections- Deselect All
41.
Prepare a linear gradient configured like this.
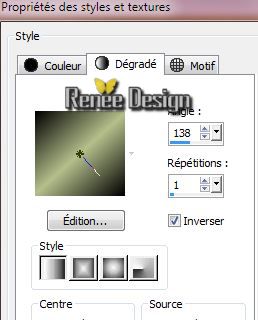
- Activate the bottom of the layer-palette (background layer )
41.
Layers- New Raster layer/Activate flood fill tool and fill the layer with the gradient
42.
Effects- Distortion Effects- Polar Coordinates use settings below
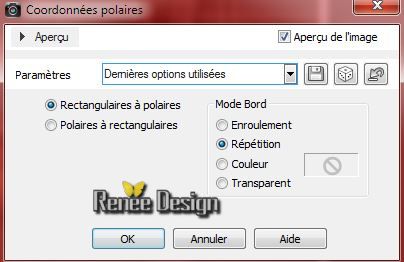
43 .
Effects- Distortion Effects - Twirl 85
44.
Layers- Duplicate/Image Mirror - Image Flip
Layer Palette -double click on this layer and set the Blendmode to "Soft Light "
45.
Layers- Merge- Merge-Down
46.
Effects- Plugins Simple /4 Way average
47.
Effects-Edge Effects-Enhance More
48.
Effects- Plugins Icnet Filters-Unlimited - Special Effect 1
/Plastic surface
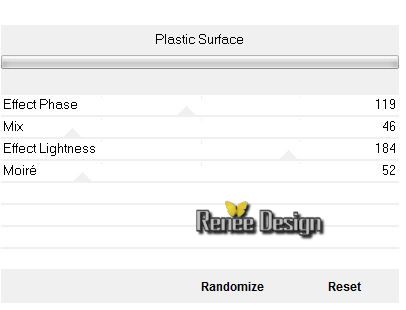
49.
Layers-Merge-Merge Visible
50. Effects- Plugins- Nick Color Effex Pro3/Brilliance Warmth
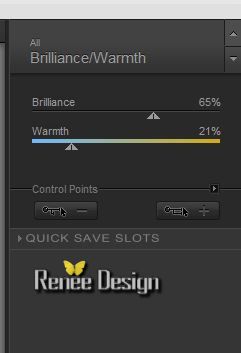
51.
Activate the tube''majesty_fleurs"/Edit-Copy-Edit Paste as a new layer. With your move tool place it in the right place
51.
Layers- New Raster layer
52.Selections - load/save selection - load selection from disk and select my file ''majesty_3''/ Activate foreground color #b4bf8b
53.
Effects- Plugins- VM Experimental/ Magnetic
Detection
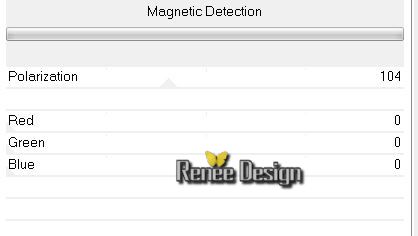
54.
Effects- Edge Effects -Enhance
55.
Selections - Modify - select selection borders use settings below
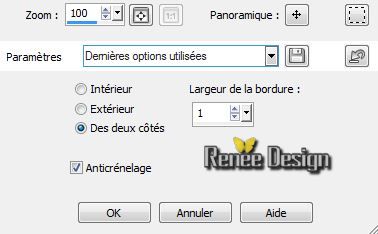
Activate flood fill tool and fill the selection with color black
Selections- Deselect All
56.
Effects- 3D Effects-Drop Shadow: 0/1/75/15 color white
-
Prepare a Linear Gradient as configured
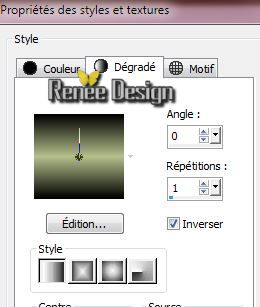
57.
Layers- New raster layer
58.Selections - load/save selection - load selection from disk and select my file ''majesty_4''
- Pot of Paint: reduce the opacity down to 60% -Activate Flood Fill Tool and fill selection with the gradient
-
Effects-Edge Effects-Enhance
Selections- Deselect All
-Replace the tube of the flower in the center of this selection (see complete)
59.
Activate Text Tool- Font"
A&S Sarsaparnila " -
Write text ''majesty''/With your move tool move to the right side
60.
Effects- 3D Effects-Drop Shadow Default
62.
Layers-Merge-Merge Visible
63.
Image - Add borders-Symmetric checked 1 pixel color black
64.
Selections-Selections All
65.
Image - Add borders-Symmetric checked 45 pixels color #b4bf8b
66.
Effects- 3D Effects-Drop Shadow: 1/1/100/18 color black
Selections- Deselect All
67.
Image - Add borders-Symmetric checked 1 pixel color black
68.
Image - Add borders-Symmetric checked 10 pixels color #b4bf8b
69.
Image - Add borders-Symmetric checked 1 pixel color black
70.Activate the tube tube ''majesty_deco''Edit/copy-Edit paste as a new layer.( do not move )
71.Open your Preset Shape Tool /activate this form''checks1213041''
Draw a line with these settings

-
Convert to raster layer
72.
Layers- Duplicate /Image Flip
-
Layers- Merge- Merge Down/ Layer Palette -double click on this layer and set the Blendmode to "Soft Light"
73.
Layers-Merge-Merge Visible
74.Image - Add borders-Symmetric checked de 1 pixel color black
75. Image - Add borders-Symmetric checked 10 pixel color: # 7f8f4c
76.
Image Resize 1015 pixels Width
I hope you enjoyed this lesson
Renée
This lesson was written by Renée the 10/07/2014
Created the
07/2014
*
Any resemblance with an existing lesson is merely a coincidence *
* Don't forget to thank the people who work for us and with us. I named the tubeurs - Testers and the translators.
Thanks Renée. |