|
Translations here
The curious empire
New
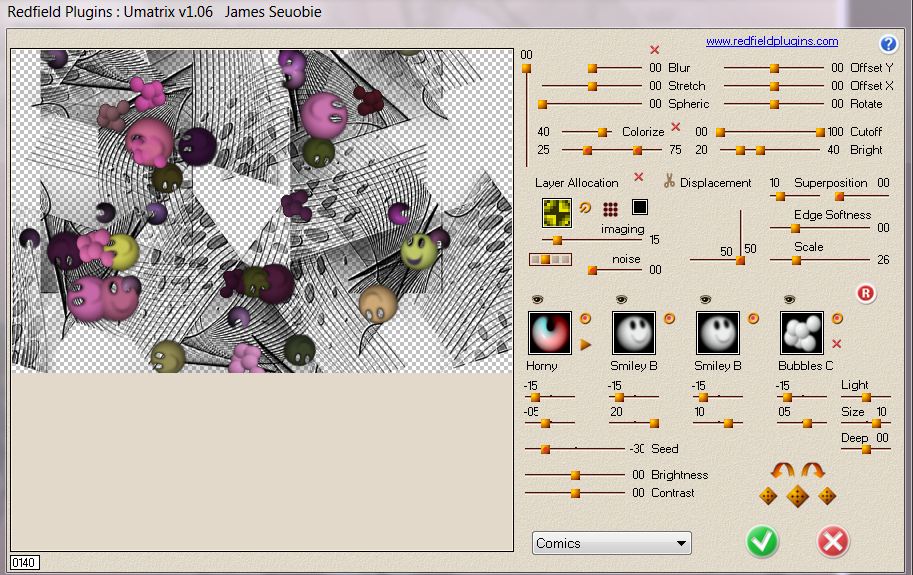
Let's start the lesson. 1. File - New - New transparent Image: 965 x 625 pixels 2. Material Properties: Foreground color to #d2d4c7- Background color to #878380 - Prepare a linear Gradient with these settings 0/0 invert checked 3. Activate Flood Fill Tool and fill the layer with the gradient 4. Open the tube ''renee-royaume-etrange-image1''/ Edit/copy-Edit paste as a new layer on your working area/Do not move 5. Effects- Plugins -Redfield-Umatrix-comics with these settings-as shown in the example below
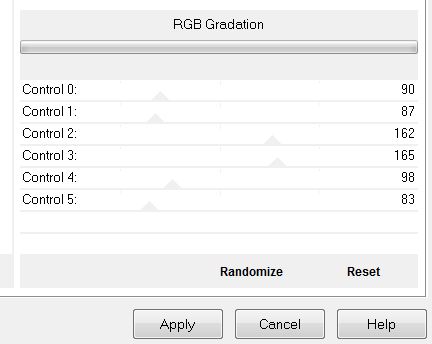
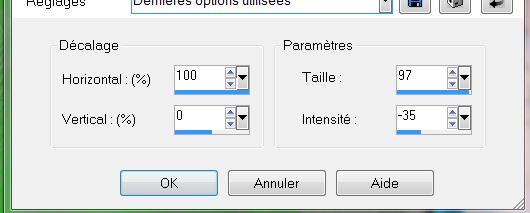
- Your choice of smileys can be different /it does not matter 6. Effects- Plugins -Unlimited- Scribe -RGB Gradation with these settings
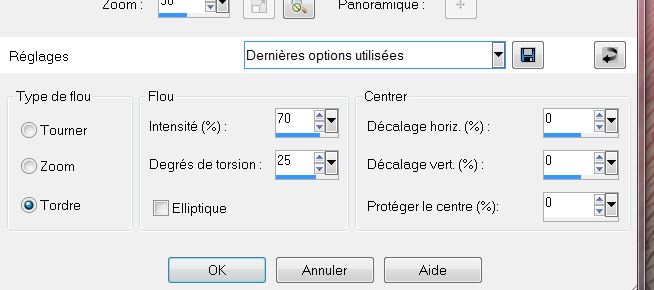
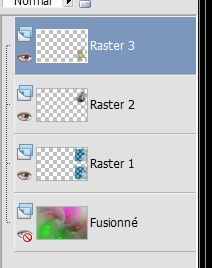
7. Layer Palette -Double click on this layer and set the Blendmode to Overlay and set the layer opacity of this layer to 57% 8. Layers- Duplicate 9. Adjust- Blur- Radial blur with these settings
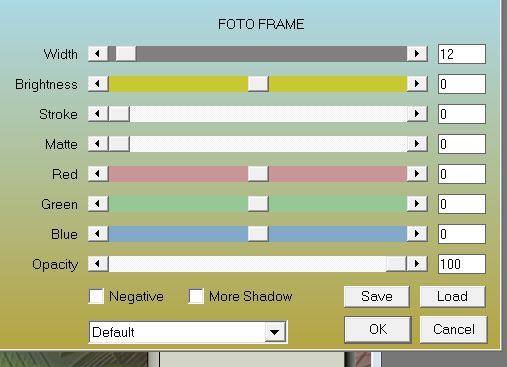
10. Layer Palette -Double click on this layer and set the Blendmode to Hard Light and set the layer opacity of this layer to 73% 11. Layers- Merge- Merge Visible 12. Layers-New raster layer 13. Selections - load/save selection - load selection from disk and choose my selection: ''renee-royaume-etrange-1'' - Activate Flood Fill Tool : fill the selection with the FG-Color - Keep Selected 14. Effects- Plugins - AAA Frame - Foto - Frame with these settings
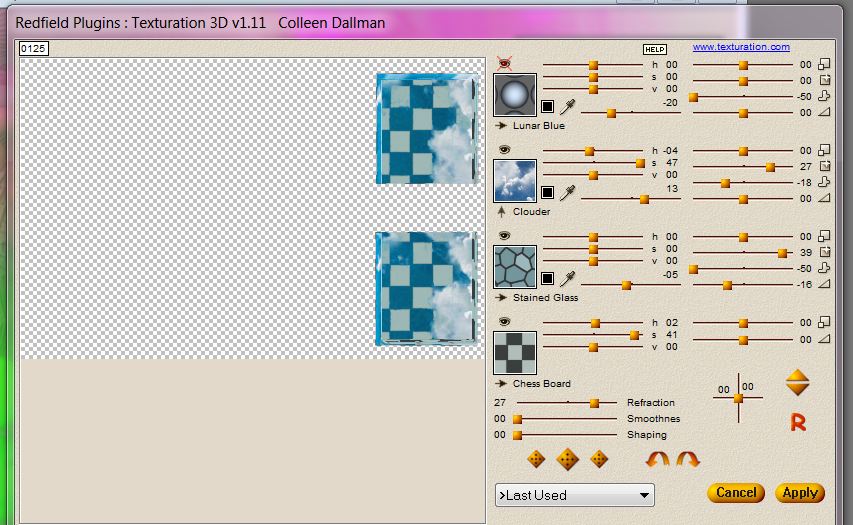
- Keep Selected 15. Effects- Plugins - Effet Redfield -Texturation 3Dv1.11 with these settings as shown in the example below
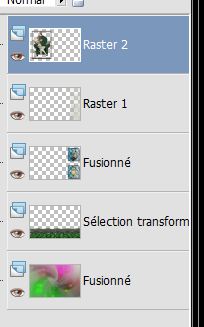
16. Activate Selection Tool (S)-Rectangle (S) - Select the first frame 17. Activate the top of the layer palette /Layers-New raster layer 18. Open the tube ''tubes_0_027 de Krila_andela'' 19. Edit/copy-Edit Paste into selection 20. Selections- Deselect All 21. Adjust-Sharpness- Sharpen 22. Layers- New raster layer 23. Open the tube ''tubtatie-monster_smoking331''4 24. Edit/Copy- Edit Paste into selection 25. Selections- Deselect All - This is what you've got:
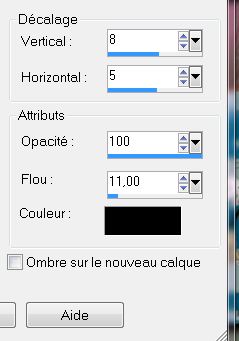
26. Layer palette: close the bottom layer /Activate the top of the layer palette/ Layers- Merge- Merge Visible 27. Layer palette: activate the merged layer 28. Effects- 3D Effects- Drop Shadow with these settings
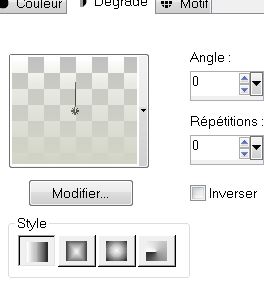
- Repeat: Effects- 3D Effects- Drop Shadow with these settings -8 et -5 29. Open the bottom layer - Activate the top of the layer palette 30. Layers- New raster layer 31. Selections - load/save selection - load selection from disk and choose my selection: ''renee-royaume-etrange-2'' 32. Properties Foreground: FG-Color to #d2d4c7 -Prepare a linear "Fading foreground" gradient configured like this. Activate Flood Fill Tool and fill the selection with the fading foreground gradient
33. Effects- Plugins -Unlimited - Filter Factory Gallery N / Flip chop radial 141/128 34. Selections- Deselect All 35.Effects- Distortion Effects- Warp with these settings
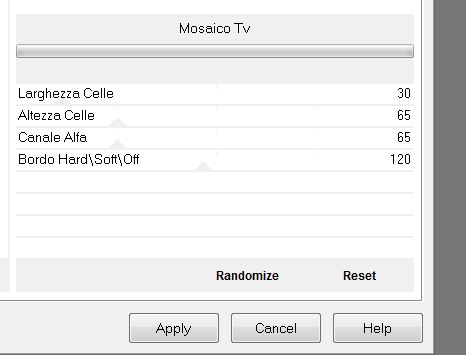
36. Effects- Plugins - Ulimited -Italian Editor -Fantasma- 21/17 - Layer Palette -Double click on this layer and set the Blendmode to Screen and set the layer opacity of this layer to 89% - Activate the bottom layer of the layer palette 37. Selections - load/save selection - load selection from disk and choose my selection: ''renee-royaume-etrange3'' 38. Selections- Promote selection to layer 39. Selections- Deselect All 40. Effects- Plugins - Italien Editor Effect - Mosaic TV
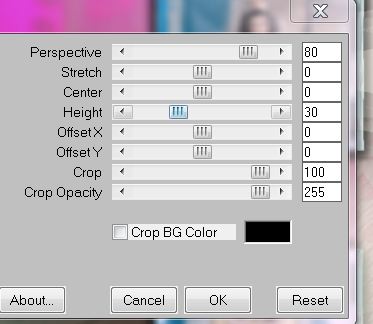
41. Effects- Plugins- Mura's Meister -Perspective Tilling
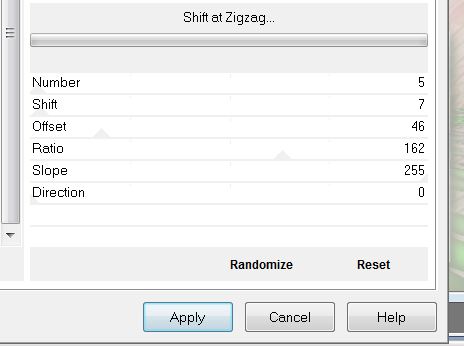
42. Effects- Plugins -Mura's Seamless- Shift a zigzag
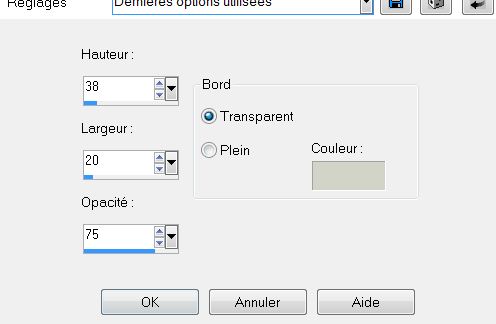
43. Effects- Plugins - Eyecandy 5 Impact - perspective shadow –Tab- Settings- Preset / Drop shadow blury using the default settings - Activate the top of the layer palette 44. Selections - load/save selection - load selection from disk and choose my selection: ''renee-royaume-etrange4'' 45. Effects- 3D Effects- Buttonize with these settings - Foreground color
46. Layers-New raster layer 47. Open the tube ''tubes_0_0178_12082012de Krilo -andela '' / Edit/copy-Edit Paste into selection 48. Effects- 3D Effects- Buttonize with the same settings-Background color 48. Selections- Deselect All 49. Layers- Merge- Merge Down - This is what you've got:
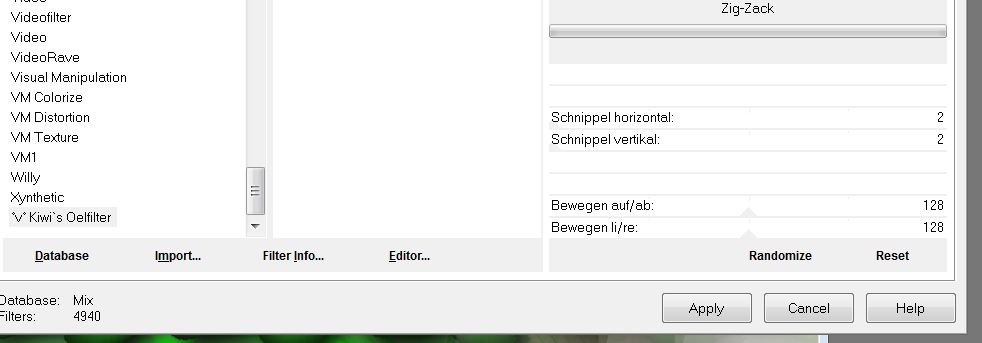
50. Open the tube ''lune'' Edit/copy-Edit paste as a new layer on your working area and move 51. Layers-New raster layer 52. Selections - load/save selection - load selection from disk and choose my selection: ''renee-royaume-etrange-5'' 53. Open the tube ''renee-royaume-etrange-image2''/ Edit/copy-Edit Paste into selection-Selections- Deselect All 54. Layer Palette -Double click on this layer and set the Blendmode to Screen and set the layer opacity of this layer to 90% 55. Effects- Plugins - Unlimited- Kiwi'sOelfilter -Zigzag with these settings
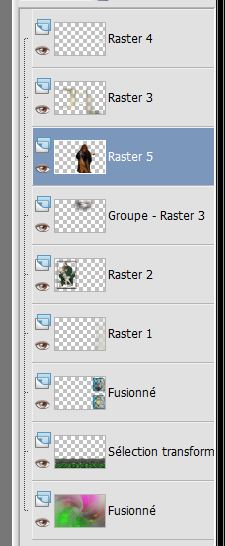
56. Open the tube ''renee-royaume-etrange-image3 ''Edit/copy-Edit paste as a new layer on your working area and move - Layer Palette -Double click on this layer and set the Blendmode to Hard Light and set the layer opacity of this layer to 85% 57. Open the tube ''Senga_halloween_03_10_2011'' Image Resize with 65 % Edit/copy-Edit paste as a new layer on your working area and move Layers- Arrange- Move 2x Down - This is what you've got:
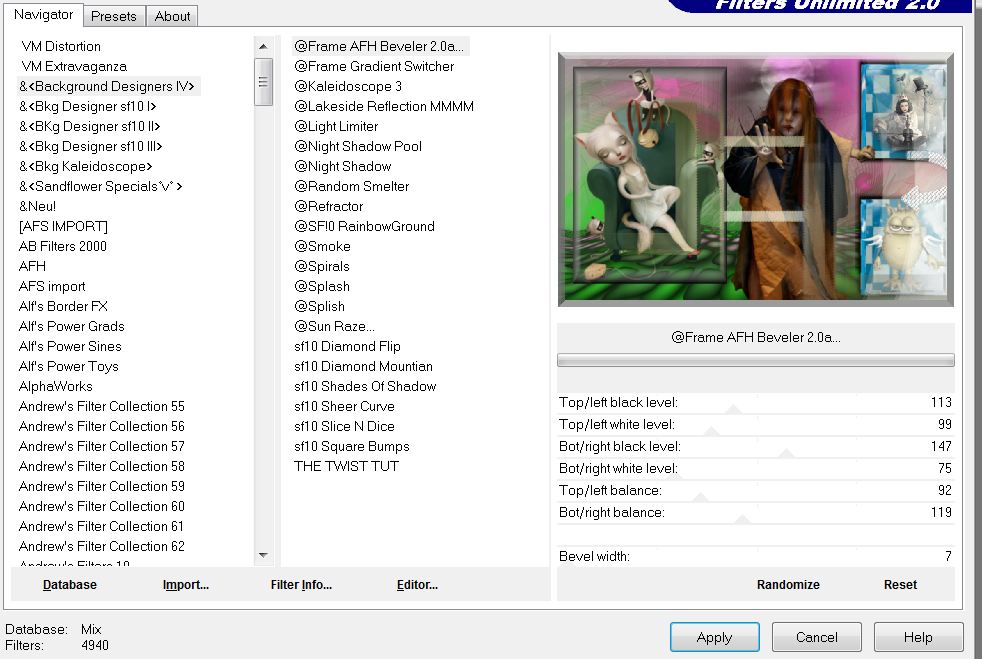
58. Layers- Merge- Merge All 59. Effects- Plugins Unlimited &<BkjDesigner IV-@-Frame AFH Beveler 2.0 *(the preset is into the zipfile)
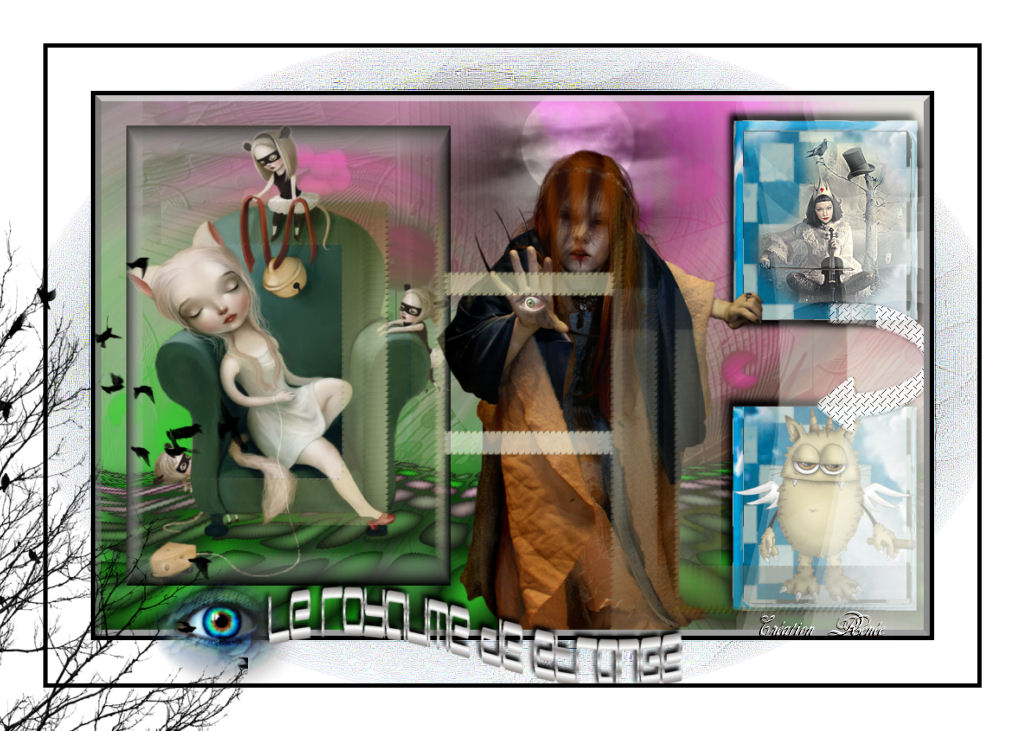
60. Image - Add borders-Symmetric checked: 5 pixels black 61. Image - Add borders-Symmetric checked: 50 pixels white 62. Activate Magic Wand and click in the white border of 50 pixels 63. Open the tube ''cadre royaume etrange ''edit/Copy-Edit Paste into selection 64. Selections- Deselect All 65. Open the tube ''renee-royaume-etrange-titre''Edit/copy-Edit paste as a new layer on your working area and move 66. Image - Add borders-Symmetric checked: 5 pixels black 67. Image - Add borders-Symmetric checked: 50 pixels white 68. Open the tube ''calguisvectorhiver 4119'' Edit/copy-Edit paste as a new layer on your working area and move to the left Save as JPG * I hope you enjoyed this lesson Renée This lesson was written by Renée Placed at 19/10/2012 *
Any resemblance with an existing lesson is merely a coincidence * * Don't forget to thank the people who work for us and with us. I named the tubeurs - Testers and the translators. Thanks Renée.
* I am part of Tutorial Writers Inc. My tutorials are regularly recorded. ReneeGraphisme_All rights reserved
*
|
 Translations