|
New
Translations here
Le Livre de mon Monde
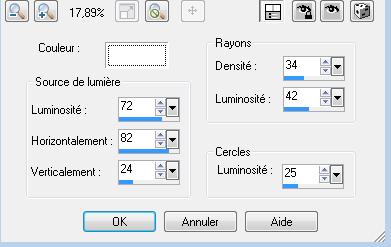
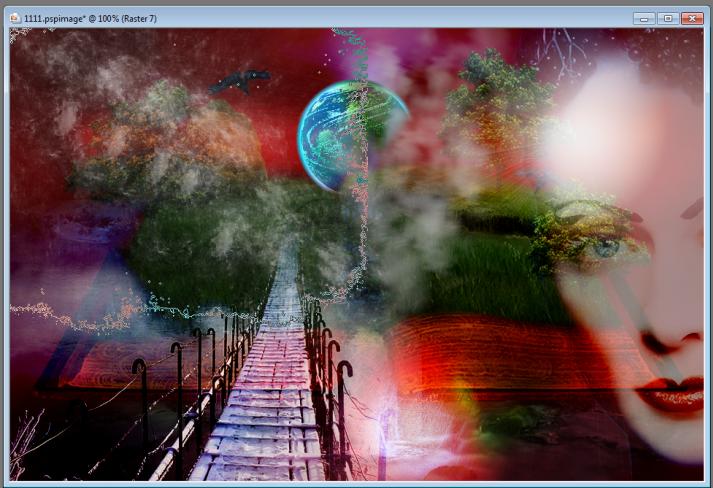
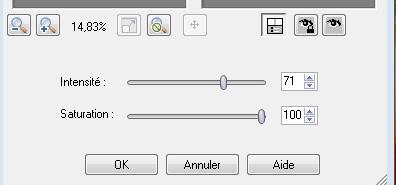
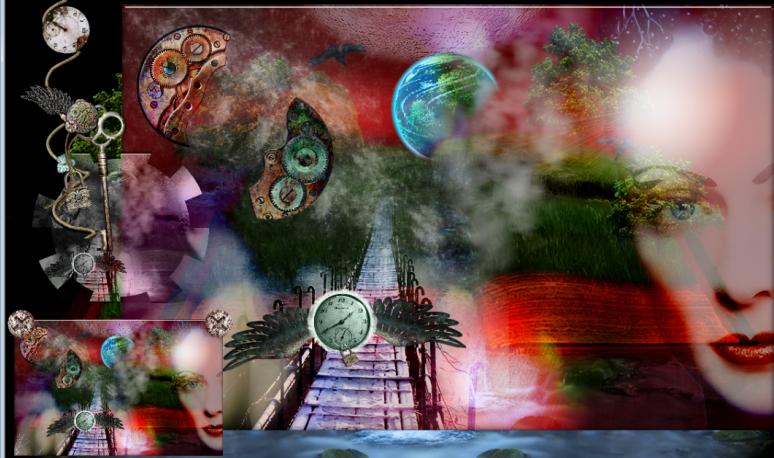
Let's begin 1. File: Open Image ''fond1/mon livre -ma terre''/ Promote to background layer Raster 1 2. Layers-Duplicate/Image Flip 3.Adjust-Blur-Gaussian Blur: Radius:15 - Layer Properties: change the Blend Mode to "Hard Light"and lower the opacity down 82% Stay on this layer 4.- Effects - Illumination Effects-Sunburst/use settings below/color white
5. Layers - New raster Layer 6. Effects - Plugins Flaming pear /lunar cell-use settings below
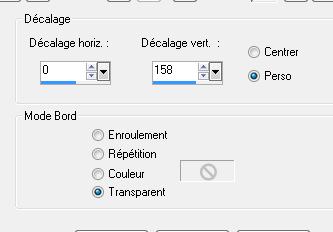
7. Image Resize 35% Alle layers not checked 8. Effects-Image effects-Offset/use settings below
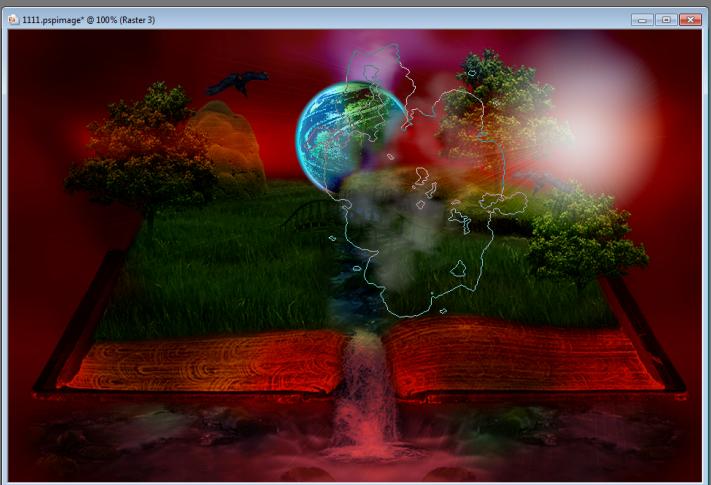
9. Layer Properties: change your Blend Mode to :"Difference" 10.Open the l'image'' nuage gris'' /File-Export-Custom Brush enter a name 11. Layers- New Raster Layer - Activate Brush Tool and select my file " nuage gris'' : use settings below/Layers - Properties :foreground color : #ffffff/'/Stamp with the foreground color see print screen
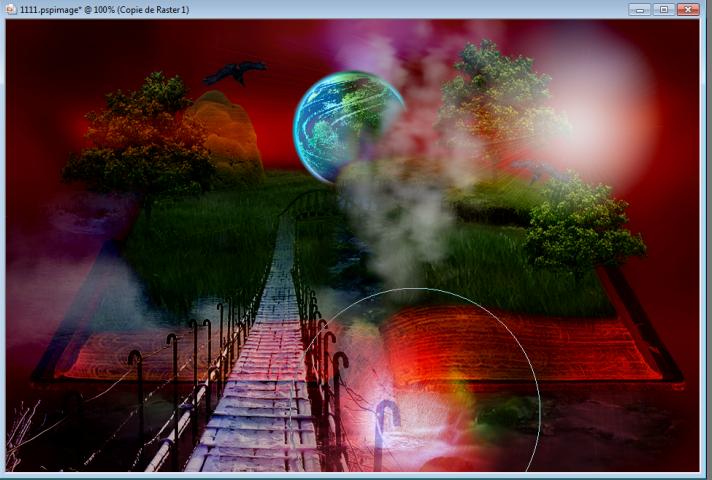
- Repeat: stamp the brush slightly higher 12. 0pen the tube ''aclis_bridge_01_18_06_2011''/Image Mirror 13. Edit/copy-Edit paste as a new layer Layers - Properties: change the Blend Mode to "Hard Light" and lower the opacity down to 81% 14. Activate: Lighten/Darken Brush (L) on your keyboard >>>use settings below
15. Material Properties: Foreground color : #ffffff activate layer -copie de raster 1 and apply here / several times to get a result like this
16. Open the tube ''Macha_1908_portrait,png'' Edit/copy-Edit/paste as a new Layer - Layers - Properties: change the Blend Mode to "Hard Light" and lower the opacity down to 53% - On this tube /Effects - Illumination Effects-Sunburst/color white/with the same setting 17. Layers - New raster Layer - Open the l'image '' tache grise'' /File-Export-Custom Brush enter a name - Activate Brush Tool and select my file ''tache grise '' Size 500 /opacity 50/Blend Mode =Normal - Apply several times to create effect as below
18. Open the tube ''callas'' Edit/copy-Edit/paste as a new Layer and place left /Lower the opacity down to 65% 19.Adjust-Fill Flash use settings below
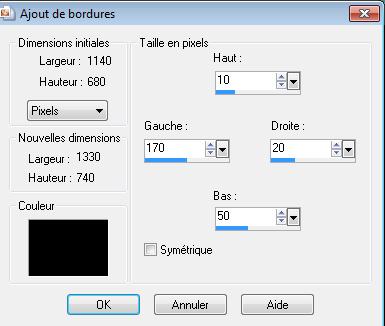
20. Effects - Edge Effects- Enhance 21. Open the tube ''tiktak 8'' Image Resize 50% Edit/copy-Edit/paste as a new layer and place 22. Open the tube ''tiktak-t2 '' se placer sur -* (activate tube raster 1 ) Edit/copy-Edit/paste as a new layer /Layers - Properties: change the Blend Mode to "Hard Light" *- (activate tube raster 2 ) -Edit/copy-Edit/paste as a new layer/Layers - Properties: change the Blend Mode to "Difference" 23. Layers-Merge-Merge Visible 24. Window-Duplicate - (Change the name- image 1 and image 2) - Activate image 1 - Selections-Select All 25. Image -Add borders -Asymmetric black use settings below
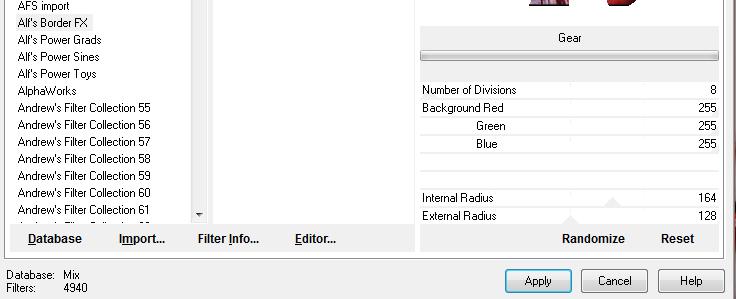
26. Selections- Invert 27. Layers - New Raster Layer 28. Activate the tube ''blueFayTubes -FantasticDreamsbook''/ Edit/copy-Edit/paste into selection 29. Selections - Invert 30. Effects -Plugins EyeCandy5 Impact /Glass/and choose my preset - ''renee le livre de mon monde'' 31. Selections - Invert /Edit/copy- blueFayTubes -FantasticDreamsbook'' Edit/paste into selection (for a better effect of the tube) 32. Selections -Deselect all Layers- Merge-Merge- Visible - Reopen image 2 33. Effects -Plugins EyeCandy5 Impact /Glass/and choose my preset - ''renee le livre de mon monde''/ Windows Duplicate (Change the name image 3) 34. Back to Image 2 Image Resize 32% /Edit/copy-Edit/paste as a new layer 35. Open Image 3 36. Effects- Plugins Alf's Border FX/ Gear use settings below
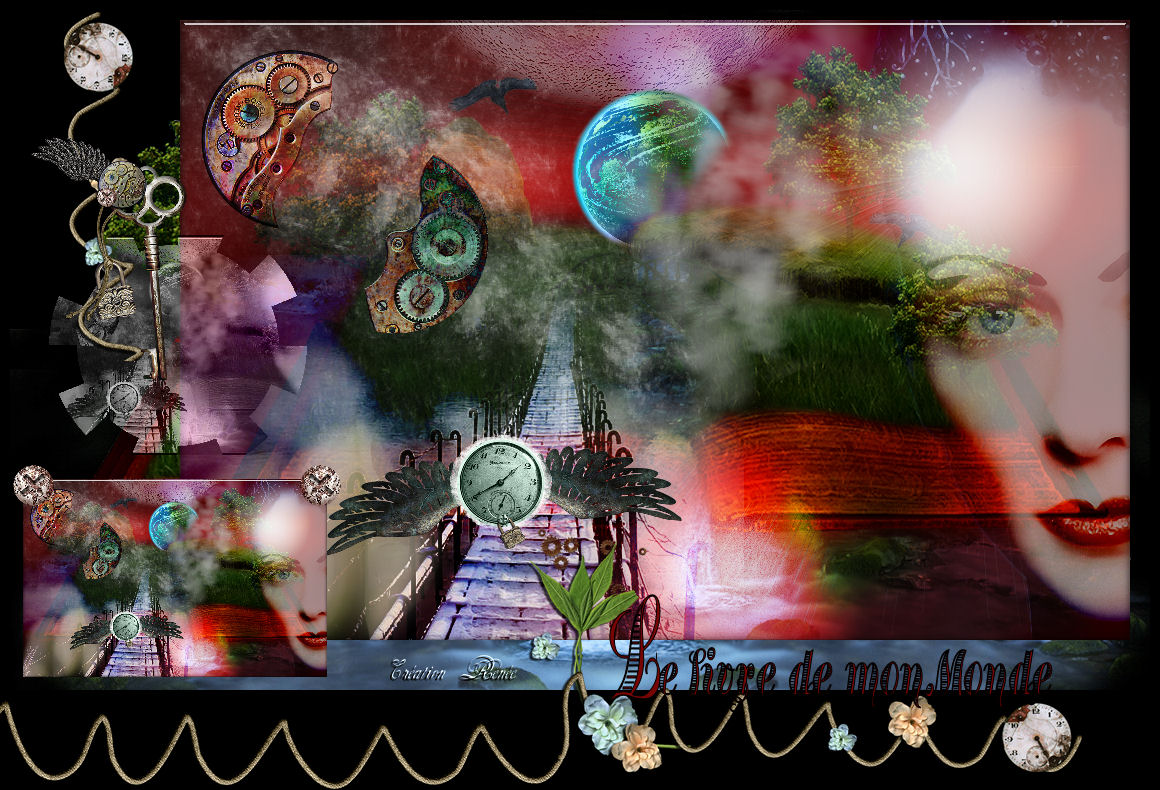
37. With the magic wand click in the white part /Delete 38. Effects -Plugins Alf's Border Fx/ Border Circulare Fade>> to 173/255 39. Image Resize 35 % 40. Edit/copy-Edit/paste as a new layer. Layers Properties: change the Blend Mode to "Luminance-Legacy" and lower the opacity down to 81% and place 41. Activate the tube ''tik-takclef5 and tik tak 8 '' - Edit/copy-Edit/paste as a new Layer and place 42. Activate the tube ''tiktak-vis ''/ Edit/copy-Edit/paste as a new layer/Layers Duplicate .Put it in place like below This is the result
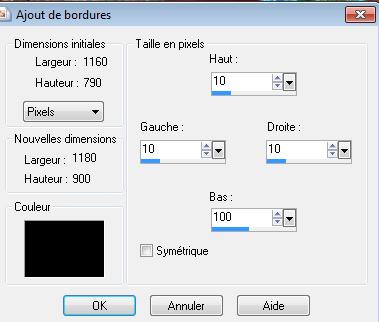
43. Layers-Merge-Merge All 44. Image - Add Borders asymmetric black
*Text Tool; Font: "treasury gold alt" /write your own text 45. Open the tube " texte" and string. Edit/copy-Edit paste as a new layer and place 46.Layers-Merge-Merge All I hope you enjoyed this lesson Renée This lesson was written by Renée in 2010 Created the in 2010 *
Any resemblance with an existing lesson is merely a coincidence * Don't forget to thank the people who work for us and with us. I named the tubeurs - Testers and the translators. Thanks Renée
I am part of Tutorial Writers Inc. My tutorials are regularly recorded
*
|
 Translations