|
New
The temptation
-
Let's start the lesson.
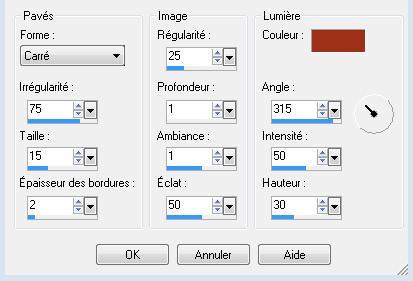
1. File - New - New Transparent Image: 1120 x 700 pixels 2.Material Properties: Foreground color to this color: #64b082 -Background color to this color: #808080 3. Activate Flood fill tool and fill the layer with the foreground color #64b082 4. Layers- New raster layer 5. Selections - load/save selection - load selection from disk and choose my selection: '' @renee-octo1'' 6. Prepare a Sunburst Gradient as configured
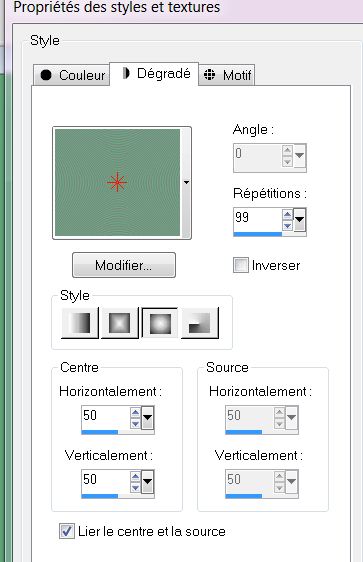
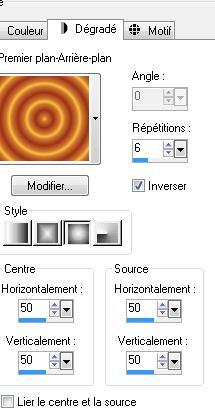
7. Activate Flood Fill Tool and fill the selection with the sunburst gradient 8. Effects- Image Effects Page Curl with these settings- Corner-Curl upper left corner (at 4 corners)
- Repeat - Effects- Image Effects Page Curl with these settings- Corner-Curl upper right corner
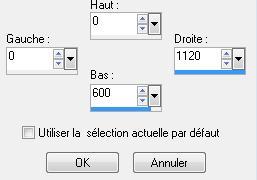
Repeat: Effects- Image Effects Page -Corner-Curl lower right corner/ after that-Corner-Curl- lower left corner and OK 9. Selections- Deselect All 10. Image Resize at 80% resize all Layers not checked 11. Effects - 3D Effects - Drop shadow with these settings
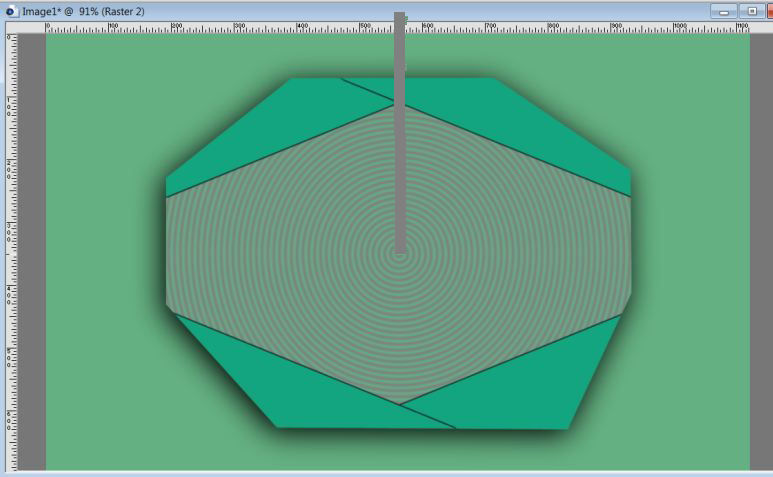
12. With your move tool move in the the center as shown in screen below
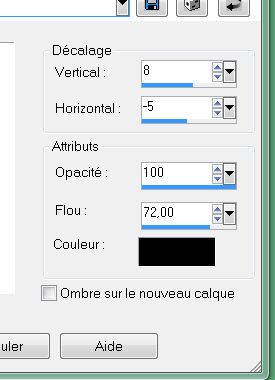
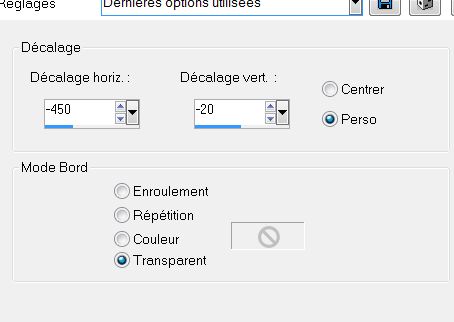
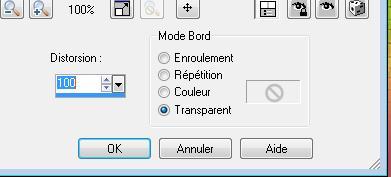
13.Layers- Duplicate / Image Free rotate 90°to the left 14. Effects- Image Effects-Offset use settings below
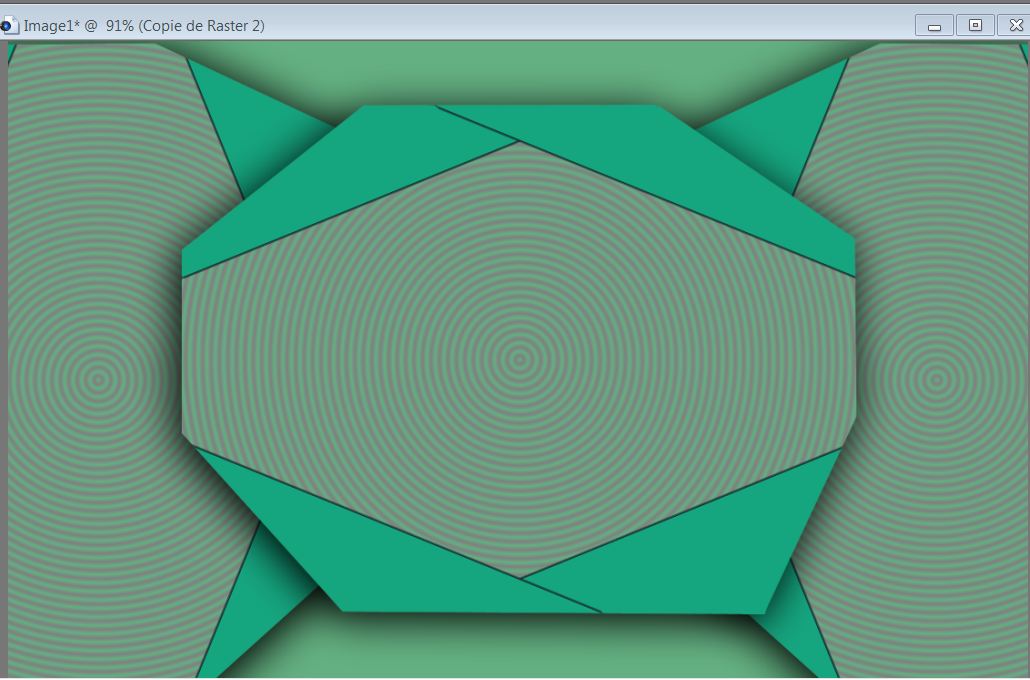
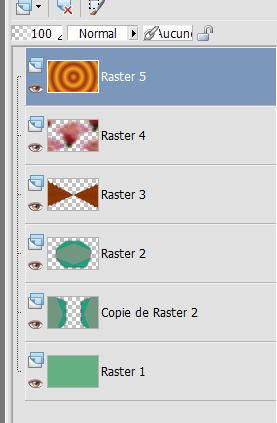
15. Layers- Duplicate 16. Image Mirror - Layers- Merge- Merge Down - Layers- Arrange-Move Down-The result
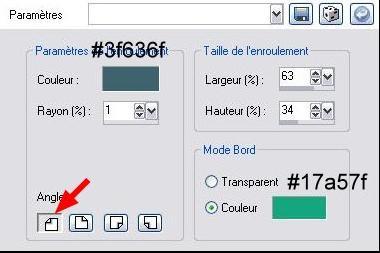
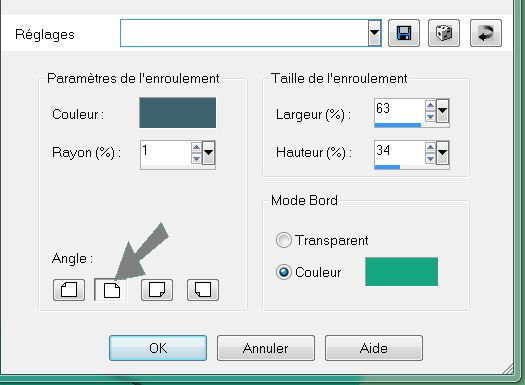
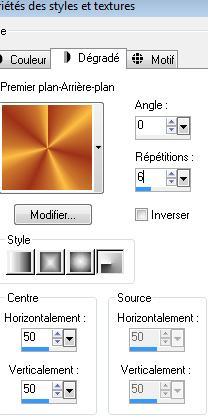
17. Activate the top of the layer Palette 18. Layers- New raster layer 19. Material Properties: Foreground color to this color: #9d3119 -Background color to this color: =#f4a91a 20. Prepare a radial gradient configured like this.
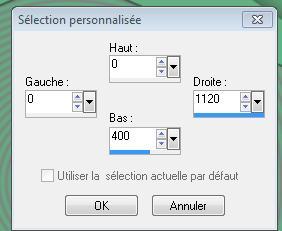
21. Selection Tool ( S ) Custom selection use settings below
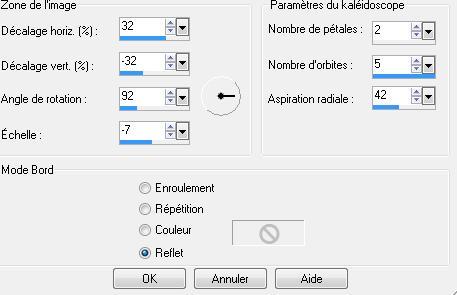
22. Activate Flood Fill Tool and fill the selection with the radial gradient 23. Selections- Deselect All 24. Effects- Reflection Effects- Kaleidoscop with these settings 25. Layer-Palette: Change the Blend Mode to Luminance Legacy and set the layer opacity of this layer to 46%
26. Effects- Texture Effects- Tiles with these settings-FG-Color #9d3119 27. Layer-New raster layer 28.Activate Selection Tool - Custom selection with these settings
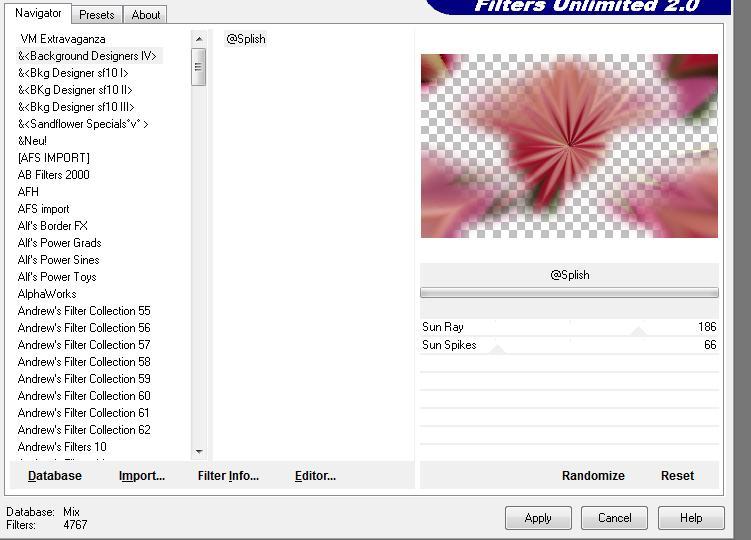
29. Open the tube « calguisbaby27109 »Edit/Copy-Edit paste into selection 30. Selections- Deselect All 31. Effects-Image Effects-Seamless Tiling using the default settings 32. Adjust-Blur -Gaussian Blur : Radius 25% 33. Effects- Plugins -Unlimited 2.0 -&< Background designers IV/@splish
34. Layers- New raster layer 35. Properties Foreground-Change the gradient into a sunburst gradient with the same colors-Flood Fill Tool fill the layer with the gradient
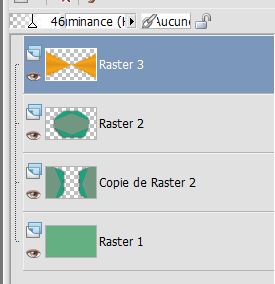
- Layer palette look like this now
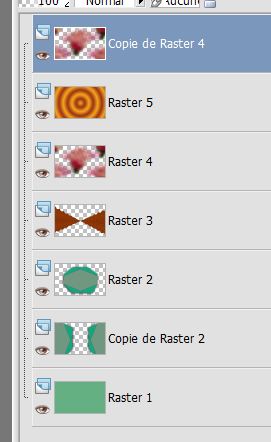
36. Layer Palette-activate Raster 5 -Layer-Palette: Change the Blend Mode to Overlay 37. Activate the top of the layer Palette= Raster 4 38. Layers- Duplicate /Layers- Arrange- Bring to Top
39.Layer palette: activate Raster 4 40. Effects- Geometric Effects-Perspective-Vertical with these settings
41. Layers- Duplicate /Image Flip -Repeat-Effects- Geometric Effects-Perspective-Vertical with the same settings (point 40) 42.With your Move Tool place (the line)it to the left side to 100 pixels like this
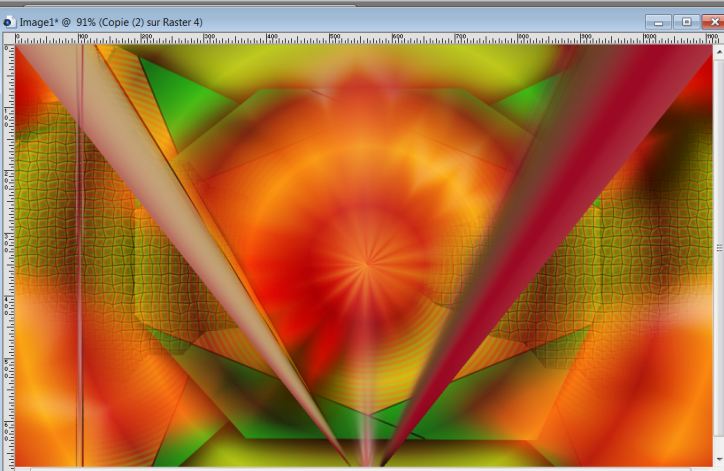
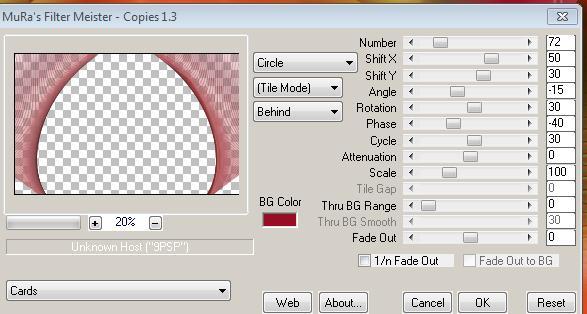
43. Layers- Duplicate / Image Mirror ( lines) 44. Layers- Merge- Merge Down 45. Effects- Plugins -Mura's meister- copies with these settings (This filter needs time)
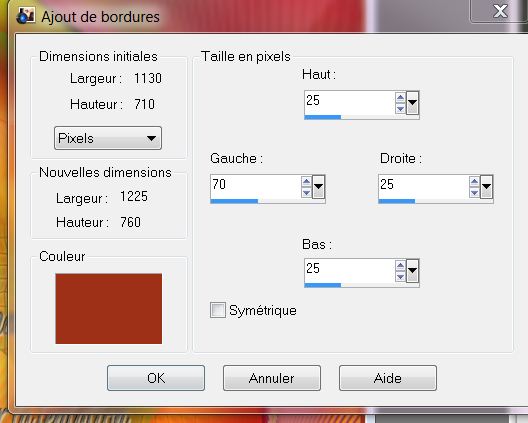
47. Open the tube »macha-hommealarose-070309 » Edit-Copy-Edit-Paste as a new layer. Do not move it is in the right place 48. Open the tube « texte « Edit-Copy-Edit-Paste as a new layer area and move to the right side 49. Layers- Merge- Merge Visible 50. Image - Add borders-Asymmetric checked with these settings -FG-Color #9d3119
51. With the magic wand select the border /Activate Flood fill tool and fill the selection with the gradient
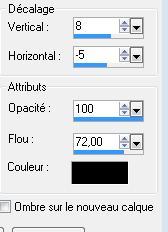
52. Selections- Promote selection to layer 53. Selections- Deselect All 54. Effects - 3D Effects - Drop shadow with these settings
55. Effects-Distortion Effects- Wave with these settings
56. Open the tube « jet woman2 2009 » Image resize 85%- Edit-Copy-Edit-Paste as a new layer area and move to the left side 57. Open the tube '' déco 140 ''/Image Resize 85% -Edit-Copy-Edit-Paste as a new layer area and move to the right side Layer-Palette: Change the Blend Mode to Screen and set the layer opacity of this layer to 97% 58. Layers- Merge- Merge All (flatten) Save as JPG I hope you enjoyed this lesson This lesson was written by Renée 2008
Any resemblance with an existing lesson is merely a coincidence *
* Don't forget to thank the people who work for us and with us. I named the tubeurs - Testers and the translators.
Thanks Renée.
I am part of Tutorial Writers Inc My tutorials are regularly recorded. ReneeGraphisme_All rights reserved
*
|
 Translations