|
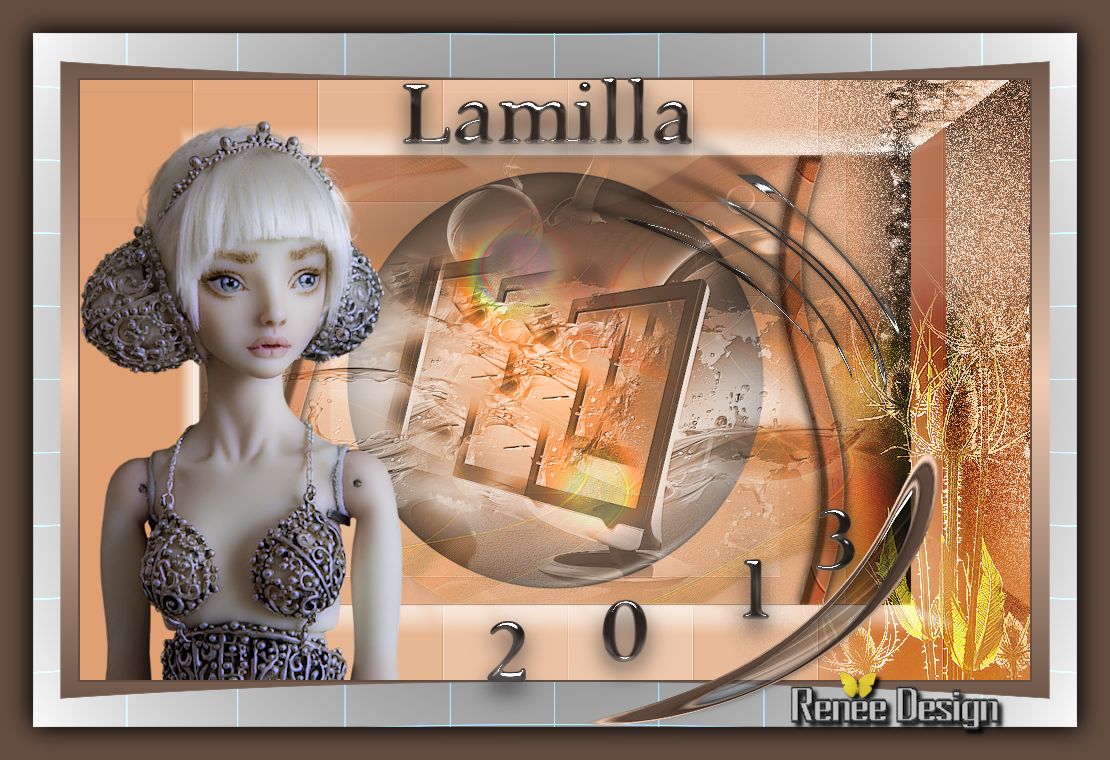
Lamilla 2013
New
*
*
Let's begin
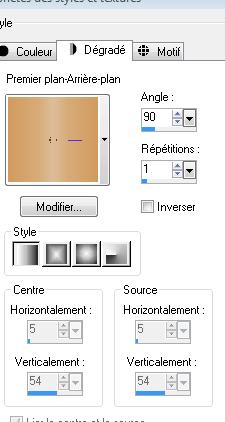
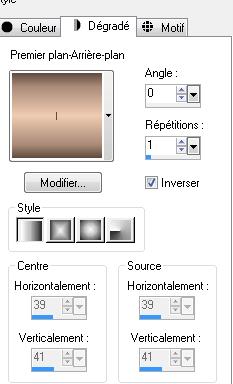
1. Open a transparent image of 950 x 600 pixels 2. Colour palette: Foregroundcolor: #de9e70 Backgroundcolor: #efcbb1 3. Prepare a linear gradient configured like this
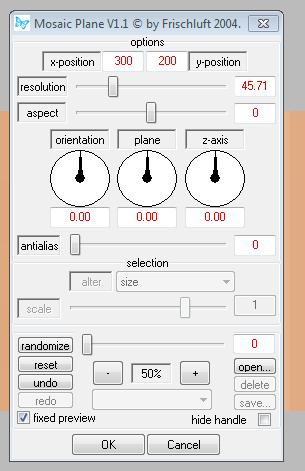
4. Flood fill your transparent layer with your gradient 5. Effects -Plugins Neology /Vasalery mosaic at 79 6. Effects - Plugins Frischluft - Mosaic Plane V1.1
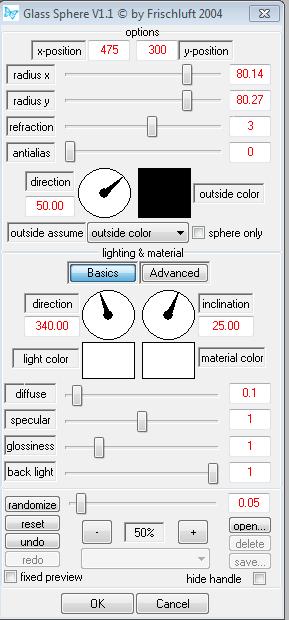
7. Effects -Edge effects-Enhance More 8. Layers / Duplicate. 9. Effects -Plugins Frischluft the same parameters 10. Effects - Edge effects-Enhance More 11. Image -Free Rotate Free 90° Right 12. Effects -Plugins Frischluft /Glass sphere V1.1 black
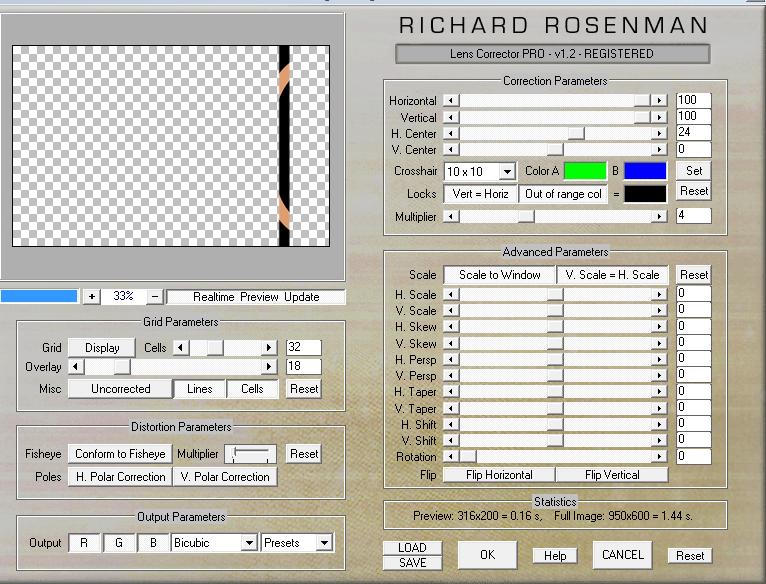
13.Layers - new raster layer 14. Selections - load/save selection - load selection from disk and choose '' @renee lamilla''/ Flood fill your layer with your foreground colour 15. Selections - select none /Blend Mode of this layer "Multiply" 16. Effects - Plugins Richard Rosenman - Lens Corrector Pro
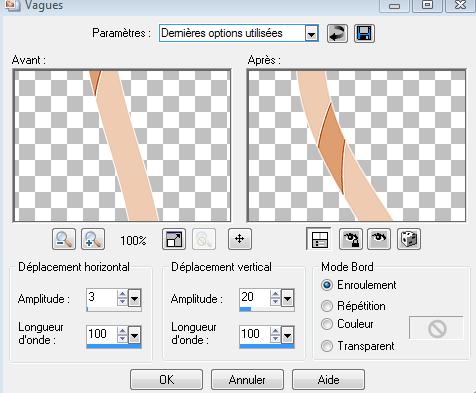
17. Effects - Edge effects-Enhance More 18. Effects - Distortion Effects- Wave
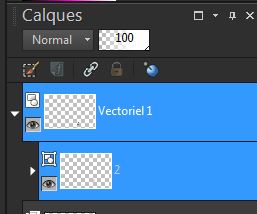
19. Layers / Duplicate. / Image mirror/ Layers-Merge-Merge Down 20. Selections - Select all- Select Float- Select-Defloat 21. Layers - New Raster Layer 22. Effects - 3D Effects - Cutout
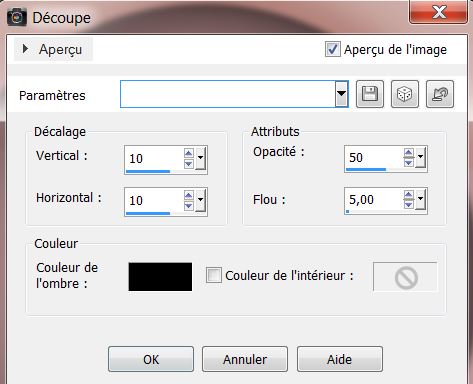
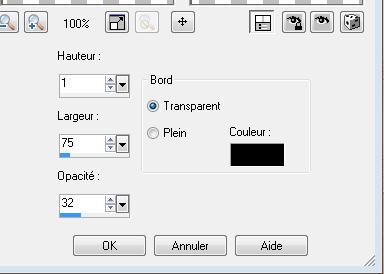
23. Selections - select none - Layers-Merge-Merge Down 24. Effects - 3D Effects / dropshadow , with these settings 0/0/50/20 black 25. Effects - 3D Effects - Butonnize
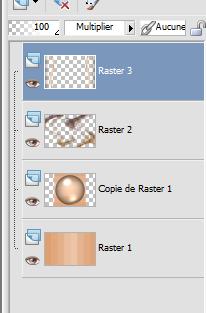
26. Stay on top of the layer in your layer palette 27. Open the tube " lamilla-effet1"/ Edit/ copy- Edit/ paste as new layer 28. Blend Mode of this layer "Hard Light" and the opacity to 38% 29. Layers-Arrange-Move Down -This is the result
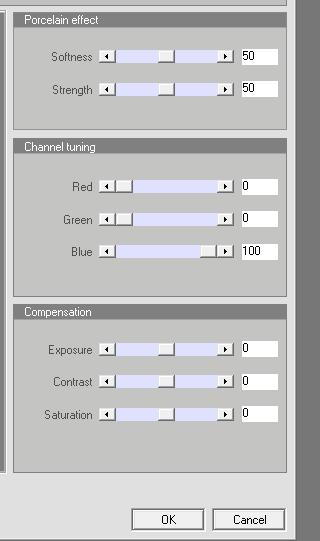
30. Open the tube ''blue planet modifié '' Edit/ copy- Edit/ paste as new layer (it is the right place) 31. Blend Mode of this layer "Luminance" /and the opacity to 77 % 32. Effects-Plugins FMTiles Tools /Blend emboss default 33. Activate your bottom layer in your layer palette ( raster 1 ) Layers-Duplicate/ closing eye raster 1 be placed on another layer 34. Layers-Merge-Merge Visible Open your layer again 35. Be placed on the merged layer. Image resize 75% . Resize all the layers NOT checked 36. Effects - Plugins Eye candy 5 Impact /Black light - Preset '' lamilla _1" 37. Open the tube "JHanna_153_tube_220503 "/ Image resize 82 % Edit/ copy- Edit/ paste as new layer 38. Effects -Plugins Xero XL- Porcelaine effects
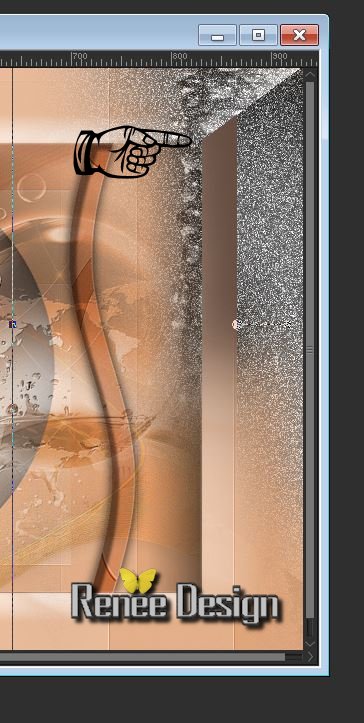
39. Open the tube ''lamilla coin droit'' .Edit/ copy- Edit/ paste as new layer /Move on the line, see example
Blend Mode on this layer: "Luminance (Legacy) 40.Open the tube ''soleil 25040071757 '' Edit/ copy- Edit/ paste as new layer -place at the bottom right 41. Blend Mode on this layer "Overlay" and the opacity to 87% 42. Effects -Edge effects-Enhance 43. Properties foreground: Foregroundcolor to #efcbb1 and Backgroundcolor #634c40 44. Layers-Merge-Merge Visible 45. Image - add borders symmetric 2 pixels backgroundcolor: #634c40 46. Image - add borders symmetric 45 pixels foregroundcolor: #efcbb1 47. Image - add borders symmetric 3 pixels backgroundcolor 48. Prepare a linear gradient configured like this
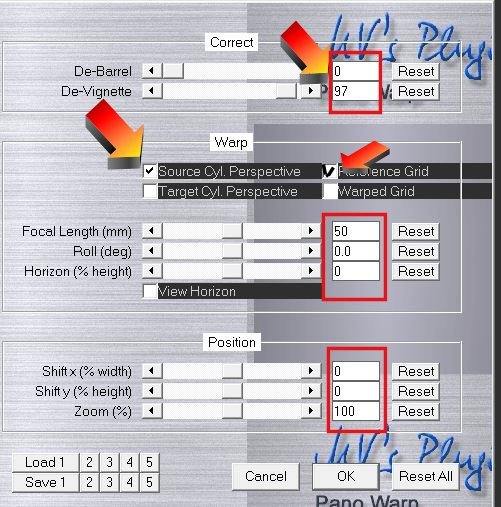
49. Magic wand Click with your magic wand in the 45 pixels .Flood Fill Tool: Fill the selection with your gradient 50. Selections-Promote selection To layer 51. Effects - Plugins MV's Plugin/ Pano Warp/ (if problems with this filter I added you in the effect of the frame tube folder)
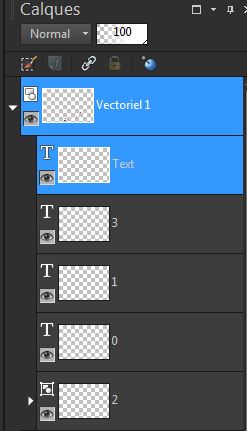
Selections-Select none If trouble to write the tube is in png file 52. Text Tool: Font Apollo size 100 pixels and Stroke Wigth 3 Write text ''Lamilla '' Effects - Plugins EyeCandy 5 Impact -Preset ''lamilla_glass" Attention'' - Text Tool: Font Apollo/ size 85 -thickness - Create as Vector Write 2 on this layer (go to the top menu of your psp ) - Objects >Convert Text to Curvers>choose= As single shape well back in your layers palette>Click on the Vector Layer(V Click to open the Writing menu) Write the numbers for 2013 you get this in writing 2
then click on the layer number 2 then write 0 and so on for 2013
53. Convert to raster layer 54. Effects-Plugins Eye candy 5 glass /Preset ''lamilla_glass"t 55. Layers / Duplicate. 56. Effects- Distortion Effects /Twirl ad 500 57. Image Mirror-Image Flip 58. Layers-Merge-Merge Visible 59. Open the tube ''lamilla_effet2 '' Edit/ copy- Edit/ paste as new layer and place 60. Image - add borders symmetric 30 pixels backgroundcolor 61. Magic wand Click with your magic wand in the 30 pixels /Selections-Invert 62. Effects - 3D Effects / dropshadow , with these settings 3/5/75/35black repeat in negative -3/-5 63. Selections-select none That's it !! You've done it ! This lesson was written by Renée! Write the 5/2012 Created the 2/11/2013
I am part of tutorial writers inc. My tutorials are regularly recorded
* Any resemblance with an existing lesson is merely a coincidence Don't forget to thank the people who work for us and with us. I named the tubeurs - Testers and the translators Thank you
|
 Translation