|
New
Translations here
Just ... music!
Let's start the lesson. 1. Open the image ''fond départ" Window - Duplicate (or shift+D) - Close the original and proceed on the copy -Promote Background Layer =Raster 1 2. Open the tube ''image 1.pspimage ''/ Edit - Copy -Edit - Paste as new layer on your working area. With your move tool move to the right side
3. Open the tube ''42-ben_goossens'' Edit/copy-Edit paste as a new layer on your working aera and move as shown in the example below
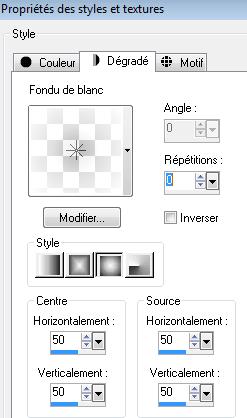
4. Layers- Arrange-Move Down under Raster 2 - Activate the top of the layer-Palette 5. Layers- New raster layer 6. Selections - load/save selection - load selection from disk and select my file: ''renee-juste-ça '' 7. Material of the foreground: Prepare a sunburst "Fading foreground" gradient configured like this.
8. Activate Flood Fill Tool and fill the selection with the gradient 9. Selections- Deselect All /Set the layer opacity of this layer to 63% 10. Activate the bottom of the layer-Palette /Open the tube ''sol juste ça'' /Edit/copy-Edit paste as a new layer. With your move tool move to down against the edge - Double click on this layer and set the Blendmode to Multiply and set the layer opacity of this layer to 51% 11. Open the ''image3-juste-ça '' - Edit/copy-Edit paste as a new layer. With your move tool move to down against the edge 12. Open the tube ''lettres -bronze '' Edit/copy-Edit paste as a new layer. With your move tool move to the right side 13. Layers- New raster layer 14. Selections - load/save selection - load selection from disk and select my file : ''renee-juste-ça2 ''Activate Flood Fill Tool and fill the selection with this color #767970 15. Effects- Plugins - Eyecandy5 Impact -extrude -Tab Settings/User settings choose my preset: ''renee-juste-ça'' 16. Effects- Texture Effects- Blinds with these settings
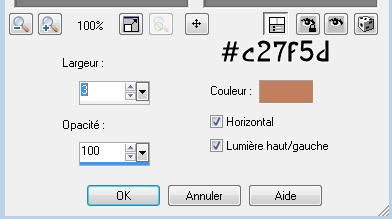
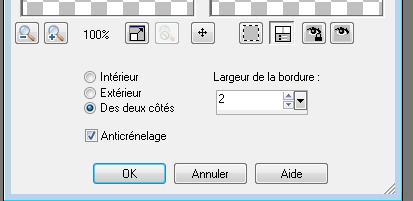
17. Selections-Modify-Select-Selection Borders with 2 pixels-Both side -Activate Flood Fill Tool and fill the selection with color black
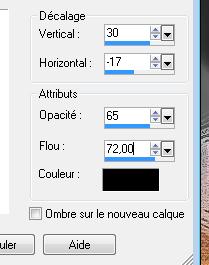
18. Selections- Deselect All 19. Effects-3D effects-Drop Shadow with these settings:
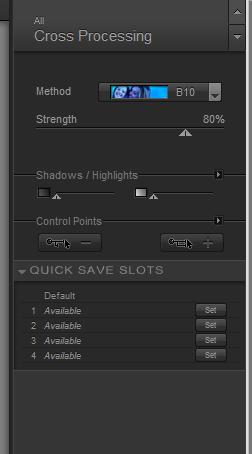
- Rename that layer "PLOT" 20. Open the tube ''catballerinas-mistye'' / Image redimensionner a 70% Edit/copy-Edit paste as a new layer. With your move tool move on the PLOT 21. Effects- Plugins - Nick colorPro.3 /cross Processing / Method B10
22. In the layer palette activate raster layer PLOT 23. Layers- Duplicate 24. Image Resize with 70%- With your move tool move to the right side Layers- Duplicate /With your move tool move to the left side 25. Open the tube ''Kikker 1 and Kikker 2 / Edit /copy -Edit - Paste as new layer on your working area and move on the plots 26. Open the tube ''nicole-main ''/Image Mirror /Edit/copy -Edit - Paste as new layer on your working area .. With the move tool, move it in the upper left corner 27. With the clone brush (C)/How do we proceed: Open the Tool – size not larger than 47- Make your shape using this tool . Place the brush on the spot you want to create (arm ) and push on your right mouse button- Layers- New raster layer- Go to the spot where you want to apply your shape and push your left mouse button to apply.
28. Open the tube '' image 4-juste-ça''/ Edit/copy-Edit paste as a new layer on your working area do not move !!! Double click on this layer and set the Blendmode to Soft Light and set the layer opacity of this layer to 79% 29. Open the tube '' @ matou goeland / Edit/copy-Edit paste as a new layer on your working area -With the move tool, move it in the upper right corner 30. Open the tube ''Benice fleur /Edit - Copy -Edit - Paste as new layer on your working area .. With the move tool, move to the bottom left side 31. Open the tube texte /Edit - Copy -Edit - Paste as new layer on your working area .. With the move tool, move to the left side 32. Layers- Merge- Merge All 33. Image - Add borders-Symmetric checked: 5 pixels black 34. Image - Add borders-Symmetric checked: 55 pixels #3b4bac 35. With the Magic Wand select the border of 55 pixels 36. Effects- Plugins -Unlimited - Sapphire filters 13/ SapphirePlugin_1262
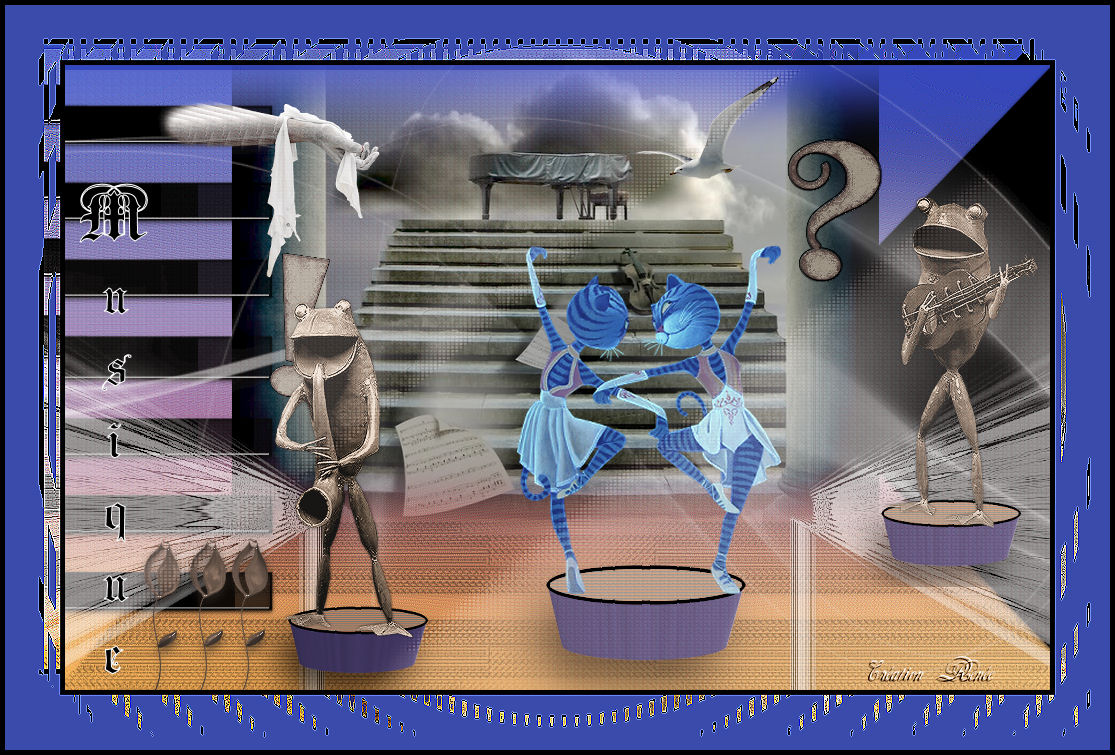
37. Selections- Deselect All 38. Image - Add borders-Symmetric checked: 5 pixels black Save as JPG I hope you enjoyed this lesson Renée This lesson was written by Renée 19/12/2014 Created March 2011 Any resemblance with an existing lesson is merely a coincidence * * Don't forget to thank the people who work for us and with us. I named the tubeurs - Testers and the translators. Thanks Renée.
I am part of Tutorial Writers Inc. My tutorials are regularly recorded ReneeGraphisme_All rights reserved
*
|
 Translations