|
New
Translations here
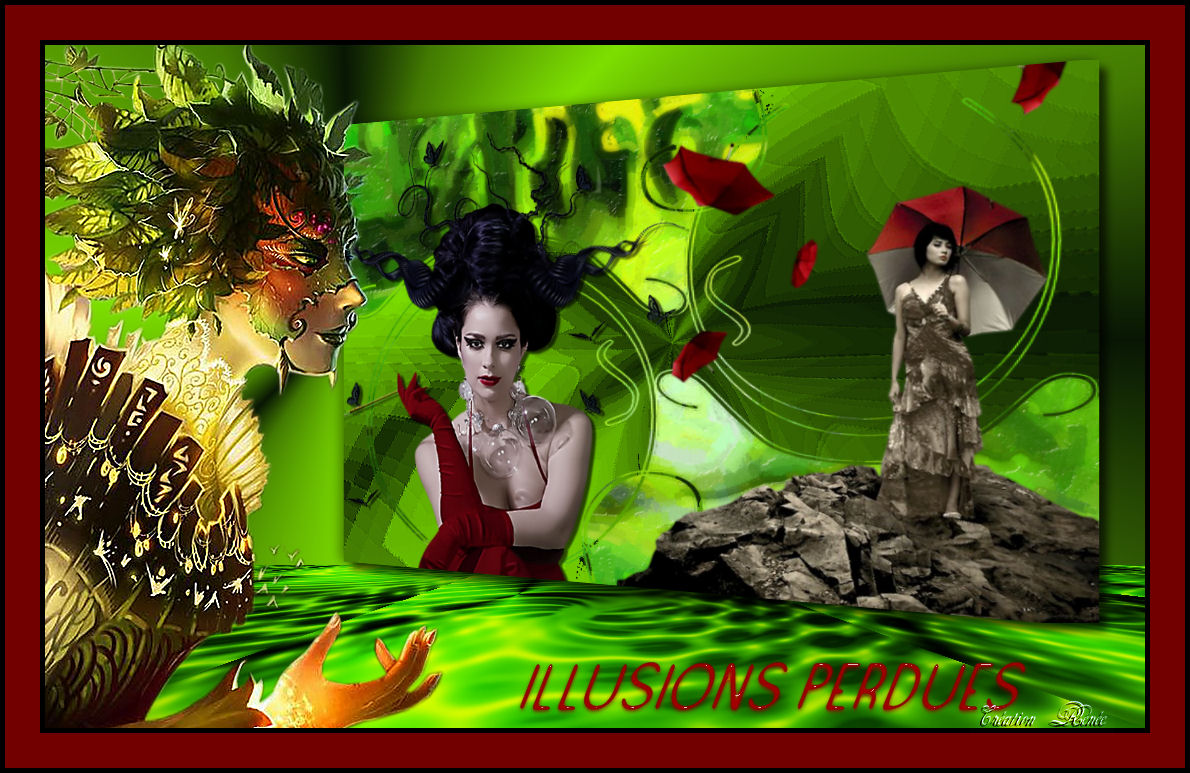
ILLUSIONS PERDUES
Let's start the lesson.
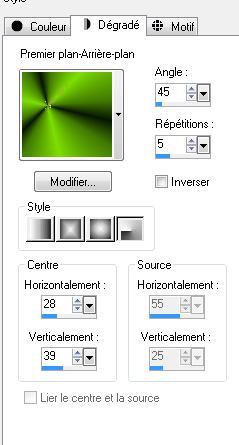
Properties Forground; Set your Foregroundcolor to foreground-background radial gradient, with these settings
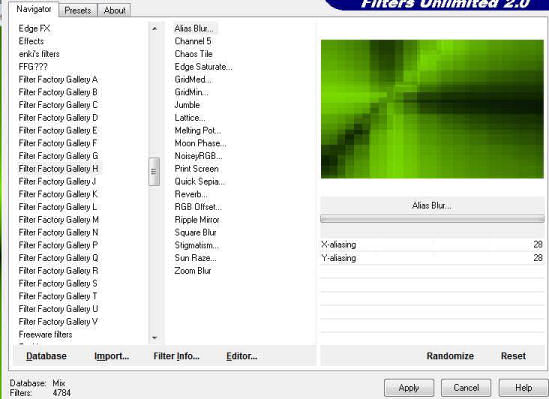
3. Layers- New Raster Layer -Activate Flood Fill Tool and fill the layer with the gradient 4. Effects- Plugins -Unlimited 2.0- Gallery Factory H /Alias Blur
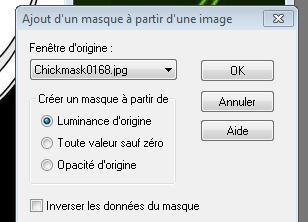
5. Open the Maske "Chickmask0168.jpg" in your Psp Layers- New Mask layer from Image and choose Mask:"Chickmask0168.jpg"
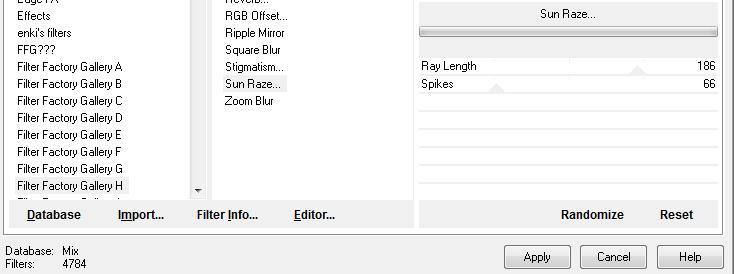
- Layers- Merge- Merge Group 6. Layers- Duplicate 7. Effects- Plugins -Unlimited 2.0 - Factory H/Sun Raze
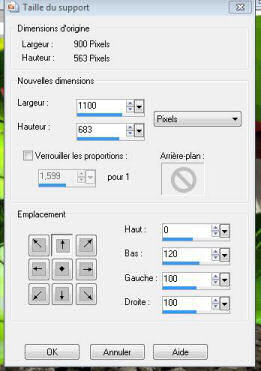
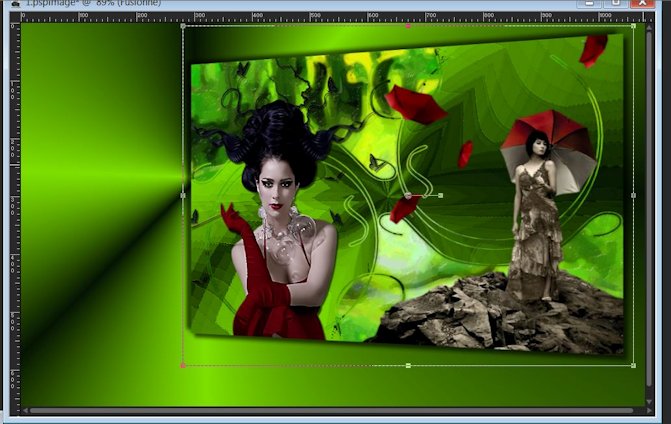
8. Effects- Plugins - Mac's /remove white 9. Open the tube « sephygarpht-tube-femme-falaise» /Edit/ Copy-Edit - Paste as new layer on your working image - move to the bottom right side 10. Open the tube « chevelure-aux-papillons-tube-by-thafs » Image Resize to 85%/ Edit/ Copy-Edit - Paste as new layer on your working image - Move to the left 11. Effects- 3 D Effects- Drop Shadow with these settings 3/5/65/2 black 12. Layers- Merge- Merge Visible 13. Image- Canvas Size L 1100 and H 683
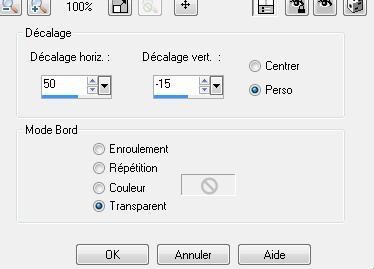
14. Effects- Image Effects- Offset with these settings
15. Layers- New Raster Layer -Activate Flood Fill Tool and fill the layer with the gradient layers-Arrange- Move Down - Activate the top in the layer palette (Merged Layer) 16. Effects- 3 D Effects- Drop Shadow with these settings
-Repeat: -Effects- 3 D Effects- Drop Shadow with these settings -8/-12 /65/12 black 17. Effects- Geometric Effects - Perspective Horizontal -20 Transparent - Activate your Pick Tool /-Deformation Tool (K) - Mode Scale -push inside-to 280 px as shown in the example below
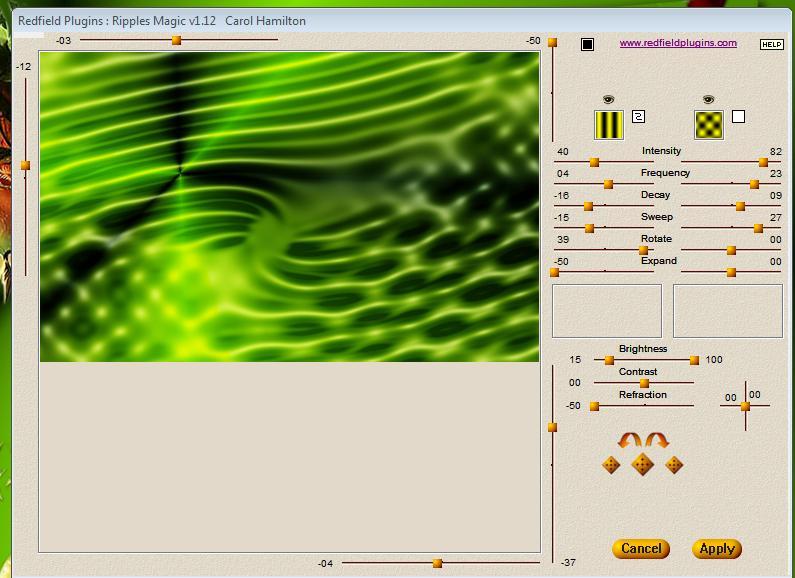
-Activate the bottom of the layer palette = Raster 1 18. Layers- Duplicate 19. Effects- Plugins -Redfield plugins /Ripples magic v1.12 use settings below
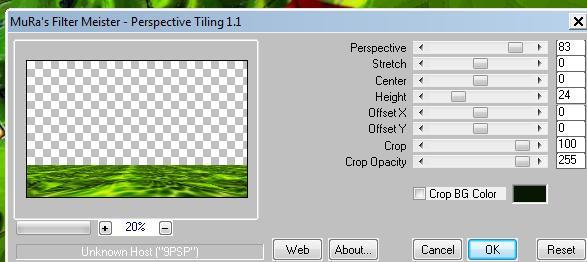
20. Effects- Plugins -Mura's Meister /Perspective Tilling use settings below
21. Open the tube ''157145 _tubed_by_thafs'' 'Edit/ Copy-Edit - Paste as new layer on your working image and move to the left side 22. Layers- Merge- Merge Layers All 23. Image - Add borders-Symmetric checked: 5 pixels black 24. Image - Add borders-Symmetric checked: 35 pixels #720000 25. Image - Add borders-Symmetric checked: 5 pixels black 26. Open the tube "texte" Edit/ Copy-Edit - Paste as new layer on your working image and move to the bottom Save as JPEG
Renée
I am part of the Tutorial Writers Inc. My tutorials are registered regularly ReneeGraphisme_All rights reserved
*
|
 Translations


.png)