|
- Let's start the lesson. Open the Color -Palette
1. Open the Background image:
''fond_gothique_5''/ Promote Background to Layer= Raster 1
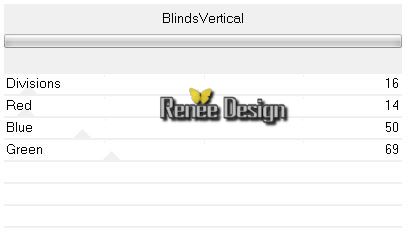
2. Effects- Plugins - Unlimited 2.0 /
&BKg Designer sf10I> Blinds Vertical
3.
Activate the tube ''DEAD SCAREY MDZ MIST"/ Image
Resize 80%
4.
Edit - Copy -Edit - Paste as new layer on your working area
-
Move to the left
-
Layer Palette -double click on this Layer and set the Blend Mode to "Screen"
5.
Layers- New Raster layer
-
Properties Foreground: FG-Color:
#a52c5a -Properties Background: BG-Color:Black
6.
Selection Tool ( S ) Custom selection use settings below
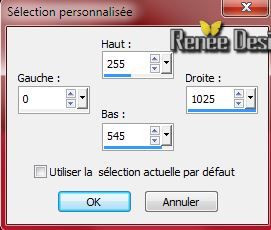
- Activate Flood fill tool and fill the selection with the FG-Color
Selections- Deselect All
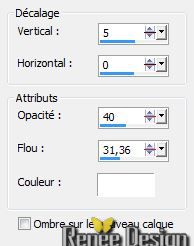
7.Effects - 3D Effects - Drop shadow with these settings-color white
-
Repeat -Effects - 3D Effects - Drop shadow: V = -5 (remainder identicalle )
8.
Selections - load/save selection - load selection from disk and choose my selection 1 ''gothique_5_1'' /Press the delete button on your key board
Selections- Deselect All
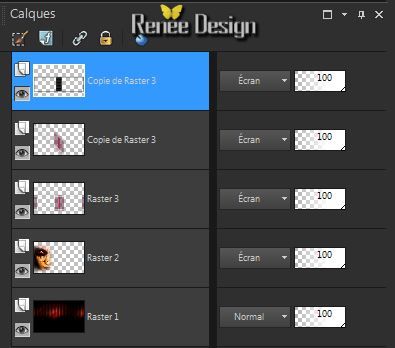
9.Layers- Duplicate
-
Layer Palette : activate Raster 3
10. Effects- Plugins - Unlimited 2.0
&<BKG Designer sf10I / Cruncher settings at 20/20
11.
Layer Palette -double click on this Layer and set the Blend Mode to "Screen "
12.
Activate the top of the layer-Palette= (Copy Raster 3)
13. Effects-Plugins -Unlimited 2.0 /
&<BKg Designer sf10 I/ Convergence at 87/131
-
Layer Palette -double click on this Layer and set the Blend Mode to "Screen"
14.
Layer Palette: activate Raster 3 - Layers- Duplicate
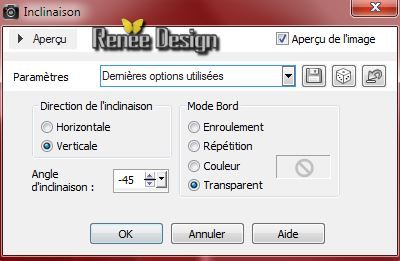
15.
Effects- Geomtric Effects- Skew use settings below
16.
Activate the top of the layer-Palette = ( Copy Raster
3) like this
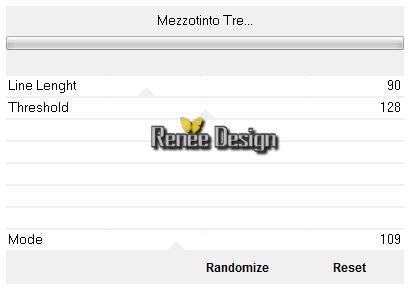
17.Effects- Plugins - VM Toolbox - Mezzotino Tre
-
Properties Foreground: FG-Color: #643c6e
18.
Layers- New raster layer
19.
Selection Tool ( S ) Selections-Custom Selections use settings below
20.
Flood fill tool opacity 55% - Activate Flood fill tool and fill the selection with the FG-Color
Selections- Deselect All
21.Effects- Plugins - VM Toolbox -Trimosaic settings at :
84/171
22.
Selection Tool:Rectangle (S) - Select this part
-
Push the Delete Key of your Keyboard
Selections- Deselect All
23.
Effects- Edge Effects-Enhance More
24.
Layers- Duplicate
25. Effects- Plugins -Toadies -What are you 20/20
-
Layer Palette -double click on this Layer and set the Blend Mode to "Screen "
26.
Image Flip
27.
Layers- New Raster layer
28.
Selections - load/save selection - load selection from disk and choose my selection 2 ''gothique_5_2""
29.
Flood fill tool opacity: 100% Activate Flood fill tool and fill the selection with color white
Selections- Deselect All
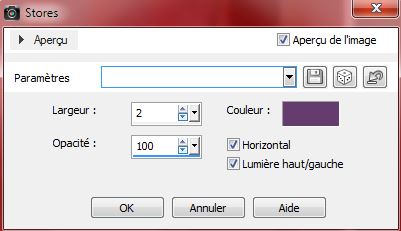
30.
Effects- Texture Effects-Blinds use settings below -FG Color
31.
Layer Palette -double click on this Layer and set the Blend Mode to "Hard Light "
32.
Effects- Edge Effects-Enhance More
33.
Layers- New Raster layer
34.Selections - load/save selection - load selection from disk and choose my selection 3 ''
gothique_5_3''
-
Properties Foreground: FG-Color:White
- Properties Background: BG-Color:#df1b1f
35.
Activate Flood fill tool and fill the selection with the BG-Color
36. Effects- Plugins -Unlimited2.0 /&BKG
Designer sf10I> Cruncher settings at 20/20
Selections- Deselect All
37. Layer Palette -double click on this Layer and set the Blend Mode to "Soft Light "
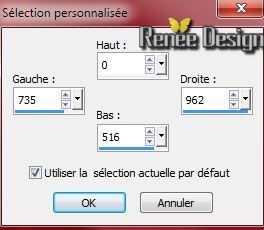
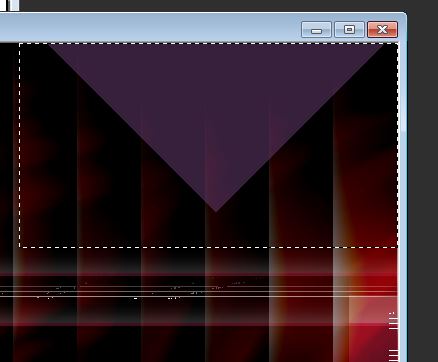
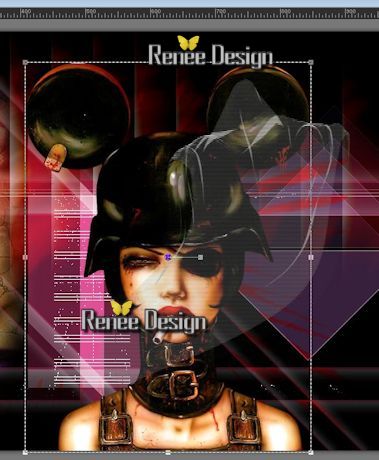
38. Selection Tool ( S ) Custom selection use settings below

39. Edit Cut-Edit-Paste as a new layer
Selections- Deselect All
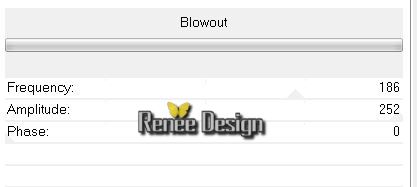
40. Effects- Plugins - Unlimited 2.0
- Filter Factory Greg's Output Vol. 1/ Blowout
41. Layer Palette -double click on this Layer and set the Blend Mode to "Hard Light " Opacity down 81%
42. Layers- Arrange- Move Down and Repeat under (Raster 5)
43. Activate the tube ''Dirtyland
BMV-tubed by devil''/ Image- Resize 80%
- Edit - Copy -Edit - Paste as new layer on your working area
-With your move tool move a litte to the right
-
Activate the top of the layer-Palette
44. Activate the tube ''11 8
8 pacha 1.pspimage'' /erase the signature
-Edit - Copy -Edit - Paste as new layer on your working area and move to the bottom right side
45. Layers- New raster layer
46. Selections - load/save selection - load selection from disk and choose my selection 4''gothique_5_4" / Activate Flood fill tool and fill the selection with color white
Selections- Deselect All
47. Effects- Plugins - Toadies- What are you at 20/20
48. Effects- Plugins -Unlimited 2.0 -
Greg's Factory Output Vol 2 - Waffle settings at 34/35
49. Layer Palette -double click on this Layer and set the Blend Mode to "Luminance -Legacy "
50. Layers- Duplicate
51. Effects- Distortion Effects- Warp use settings below

52. Image - Mirror
53. Activate the tube
''gothique_5_effet_1'' / Edit - Copy -Edit - Paste as new layer on your working area
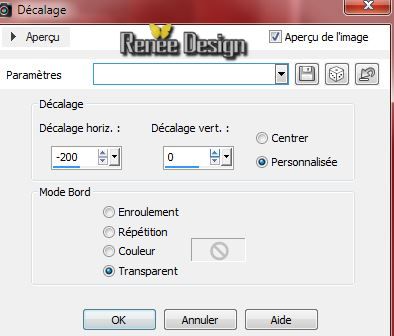
54. Effects- Image Effects-Offset use settings below
55. Layers- Merge- Merge Visible
56. Image - Add borders-Symmetric checked: 1 pixel color black
57. Image - Add borders-Symmetric checked: 60 pixels color white
58. Image - Add borders-Symmetric checked: 1 pixele color black
59. Image - Add borders-Symmetric checked: 10 pixels color white
60. Image - Add borders-Symmetric checked: 1 pixel color black
61.Activate tube "Titre"( two layers of the tube''titre'' ) activate first raster 1
Edit - Copy -Edit - Paste as new layer on your working area and move to the bottom left side.
Activate raster 2 of this tube: Edit - Copy -Edit - Paste as new layer on your working area and move to the bottom left side.
Ore write your own text- font is included into the zip file.
''police bastion
''utilsée
62. Image Resize
995 pixels Width
I hope you enjoyed this lesson
Renée
This lesson was written by Renée 19/08/2014
Created the
01/09/2014
*
Any resemblance with an existing lesson is merely a coincidence
* Don't forget to thank the people who work for us and with us. I named the tubeurs - Testers and the translators.
Thanks Renée.
|

 Translations


 All rights reserved