|
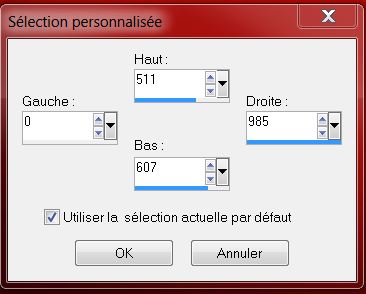
Let's start the lesson. 1. Open the Background image ''fond Noel'' 2. Selections-Custom Selection with these settings
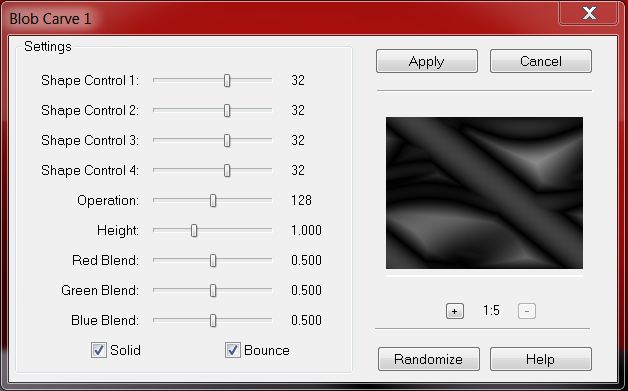
3. Selections - Promote selection to layer Selections- Deselect All 4. Effects- Plugins - FM Tile Tools- Blob Carve1 with these settings
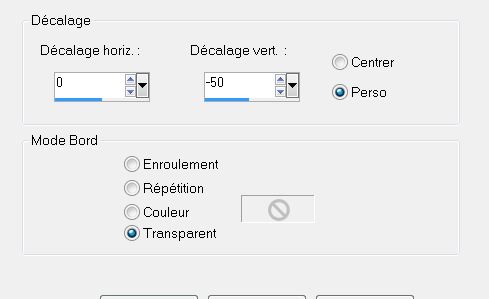
5. Effects- Distortion Effects- Twirl 125 6. Layers- Duplicate 7. Effects - Images Effects - Offset with these settings
8.Layers- Duplicate 9.Effects - Images Effects - Offset with these settings
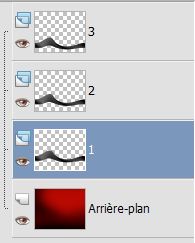
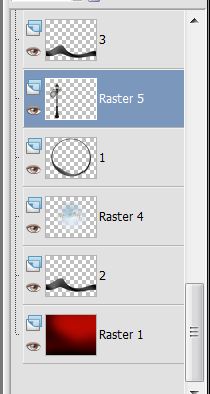
- Rename these layers 1 up to 3 starting with the bottom layer.
ATTENTION Please - Layer 1 : set Blend Mode to Lighten - Layer 2: set the Blend Mode to Luminance Legacy
-Layer 3: set the Blend Mode to Luminance Legacy
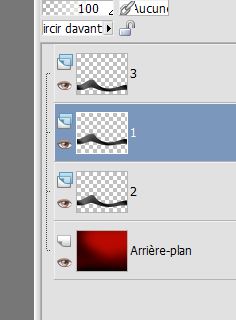
10. In the layer Palette activate raster 1 11. Layers- Arrange- Move up - You should have this result:
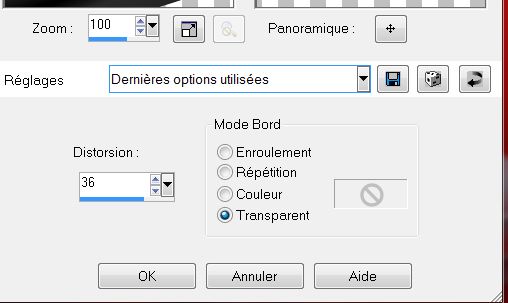
12. In the layer Palette activate raster 2 13. Effects- Plugins - Eyecandy 5 Impact– Glass -Tab- Settings -Preset /clear 14. In the layer Palette activate raster 3 15. Effects- Plugins -Eyecandy 5 – Glass -tab Settings/User settings choose my-Preset /"renee _ 2013-glass''- 16.In the layer Palette activate raster 1 17. Image Mirror 18. Effects- Geometric Effects- Perspective Horizontal with these settings
19. Effects- Plugins - Flaming Pear – Flexify 2 with these settings
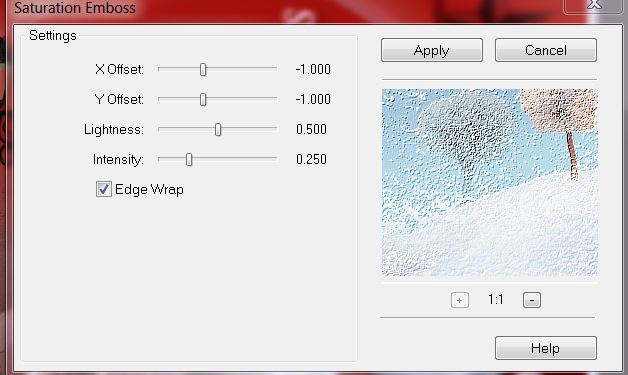
20. Effects- Plugins - Eye Candy5 Impact -Black light -tab Settings/User settings choose my-Preset _''renee_noel black light'' - The bottom is finished - We will now place the tubes 21. In the layer Palette activate raster 2 22. Open the tube ''immagine paesaggio'' - Edit/copy-Edit paste as a new layer on your working area 23. Effects- Plugins -FM Tile Tools /Saturation Emboss with these settings
24. Activate the top of the layer-Palette 25. Open the tube ''ee12.png'' -Edit/Copy -Edit - Paste as new layer on your working area With the move tool, move it to the left - Layers- Arrange- Move Down /underneath layer 3 (see example )
We continue to place the tubes 26.Activate the top of the layer-Palette 27. Open the tube ''image 4''- Edit - Copy -Edit - Paste as new layer on your working area. With your move tool move to the right side -
Open the tube
''nnw_Ibw_shootingsrar" Edit/copt-Edit paste as new layer /With the move tool, move it in the upper right corner - Open the tube''13206013504_noel_nikita ''-Edit/Copy -Edit - Paste as new layer on your working area. With your move tool move to the left Set the Blend Mode to Luminance Legacy - Open the tube ''image_3 '' Edit/Copy -Edit - Paste as new layer on your working area. With your move tool move to left . Set the Blend Mode to Hard Light - Open the tube 'image _5 » »Edit/Copy -Edit - Paste as new layer on your working area. With your move tool move to left - Open the tube ''image _2''neige du bas -Edit/Copy -Edit - Paste as new layer on your working area. With your move tool move to left Set the Blend Mode to Lighten and reduce the opacity of this layer down to 89% - Layers- Duplicate /Image Mirror - Layer Palette - Double click on this layer and set the Blendmode to "Exclusion " and set the layer opacity of this layer to 62% - Creating Text On a Curve//Open the tube vecteur Edit/copy-edit paste as a new layer - To create text : Click on your text tool: Make as : Vector Go with the cursor to the line of your oval=>until you see the Text symbol +A) and click /Type your text in the window: click on apply
(-curved text cursor) Having problems than take my text into the zip file 28. Take my text, continue at point 30 29. Effects- Plugins - EyeCandy 5 - Perspective shadow - Tab-Settings - preset drop shadow blurry 30. Activer le tube ''trace dans neige ''- Edit/copy-Edit paste as a new layer on your working area 31. Open the tube '122866900039-animaux_nikita'' - Image Resize 45% - Edit/Copy -Edit - Paste as new layer on your working area and place on the snow 32. Open the tube ''image_1 '' - Edit/copy-Edit paste as a new layer on your working area .With your move tool move to the right - Activate Selection Tool-Rectangle (S) ore Freehand Selection=Lasso -Select the number 2 /Edit/copy-Edit paste as a new layer on your working area and place /Select the number 3 -Edit/copy-Edit paste as a new layer on your working area and place - Place a bit under the previous number 33. Open the tube ''hiboux de reverie ''- Edit/copy-Edit paste as a new layer on your working area and place - Everything is in place? If you want to add an animation to your work, skip this and go to animation 34. Layers- Merge-Merge All 35. Image - Add borders-Symmetric checked: 20 pixels color white 36. Image - Add borders-Symmetric checked: 5 pixels color #9a0f06 37. Image - Add borders-Symmetric checked: 20 pixels color white 38. Image - Add borders-Symmetric checked: 5 pixels color #9a0f06 Save as JPG If you want to add an animation to your work, proceed as follows
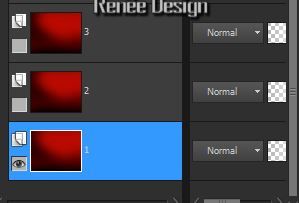
- Activate the bottom of the layer-Palette =Raster 1 - Layers -Duplicate twice (You should have 3 layers) - - Rename these Background layers 1 up to 3 starting with the bottom layer.
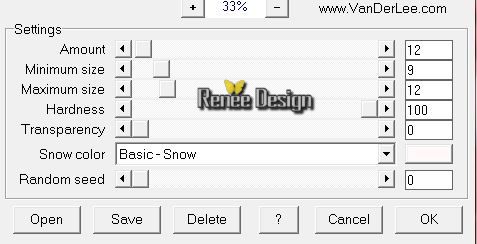
- Close Background layers 2 and 3, - Highlight Background layer 1 - Selections - load/save selection - load selection from disk and choose my selection: "selection_cercle_animation_2013" - Effects- Plugins - Vanderlee- Snowflakes use settings below
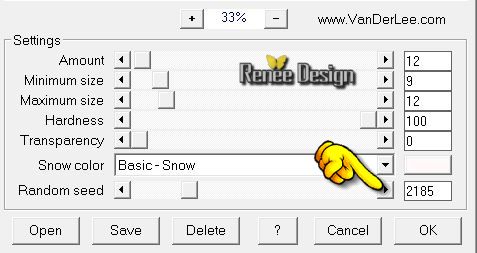
Keep selected - Close Background layer 1 - Highlight Background layer 2 open the little eye - Effects- Plugins - Vanderlee- Snowflakes change random seed only . Done Ok
Keep selected - Close Background layer 2 - Highlight Background layer 3 open the little eye - Effects- Plugins - Vanderlee- Snowflakes change random seed only . Done Ok
Selections Deselect All - I propose a second animation glitter on the cats feet. We will need the plugin Alien Skin Xenofex 2 – Constellations (Bling Bling). - Highlight layer - Raster 12 for me = the tube with the pieces of snow under the cat ok . - Layer - Duplicate twice. So you have 3 layers snow now - rename them as we did before 1- 2 and 3 starting with the lowest one. - With the freehand selection tool selection type « Lasso » -mode Replace (see print screen) Draw small shapes on the snow on the edges of the cats's paws - or take my selection ''patte du chat'' in the map
- Close Snow layers 2 and 3, - Highlight Snow layer 1 open the little eye. -Effects- Plugins Alien Skin Xenofex 2>>> Settings >>Bling Bling/Attention « Keep original image » checked. Tic ok
- Close Snow layer 1, - Highlight Snow layer 2, open the little eye - Alien Skin Xenofex 2>>> Settings >>Bling Bling/ settings are still in memory. Tic random seed without changing the other values. Tic ok. - Close Snow layer 2 - Highlight Snow layer 3 open the little eye - Alien Skin Xenofex 2>>> Settings >>Bling Bling/ settings are still in memory.Tic random seed again (settings will adapt themselves).ok. The animations are done - Now we have to concentrate on the order of the layers. Selections- Deselect All Highlight top layer/layers - new raster layer - add your water mark - Open Animation shop - Go back to PSP - Close Background layers 2 and 3 and close Snow layers 2 and 3 - Open Background layer 1 and Snow layer 1 - Edit/Copy Special-Copy Merged - Back to Animation shop Edit/ Paste as new animation. - Go back to Psp - Close Background layer 1 and Snow layer 1 - Open Background layer 2 and Snow layer 2 - Edit/Copy Special-Copy Merged Back to Animation shop - Edit/ Paste after active image. - Go back to Psp - Close Background layer 2 and Snow layer 2 - Open Background layer 3 and Snow layer 3 - Edit/Copy Special-Copy Merged Back to Animation shop - Edit/ paste after active image.
-
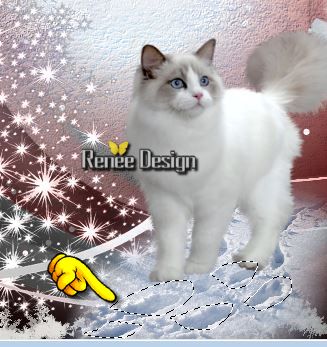
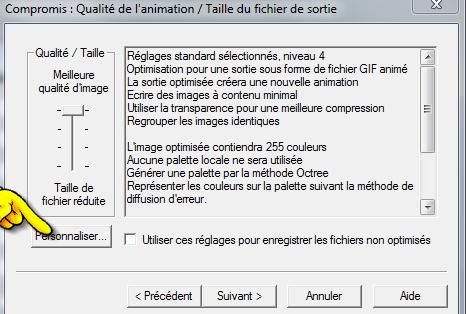
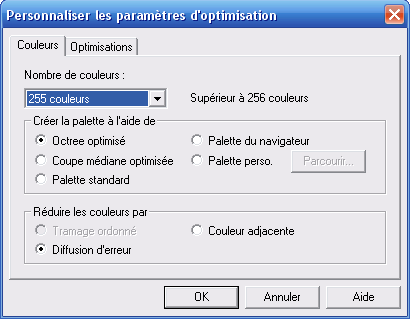
- - View animation and adjust the speed to your liking - If you are sattisfied, save as GIF file and your done! The Result
I hope you enjoyed this lesson Renée
Created 25/12/2012 Any resemblance with an existing lesson is merely a coincidence * * Don't forget to thank the people who work for us and with us. I named the tubeurs - Testers and the translators. Thanks Renée. *
I am part of Tutorial Writers Inc. My tutorials are regularly recorded. ReneeGraphisme_All rights reserved
*
|