|
New
Translations here
Feelings
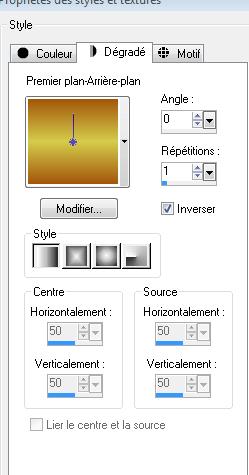
Let's start the lesson. 1. Open the Background image : ''fond '' Size = 965 x 650 pixels 2. Layers- New raster layer 3. Set your foreground color to #d5cc4b -Set your background color to #a2560b 4. Set your foreground to gradient 'Foreground-background' - Linear - with these settings
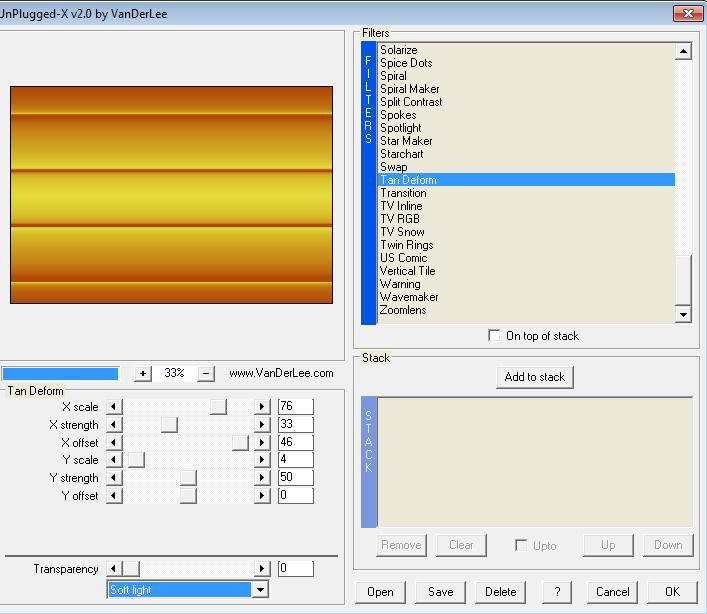
5. Flood fill the layer with your gradient 6. Effects- Plugins- Vanderlee Unplugged X v.2 / Tan Deform with these settings
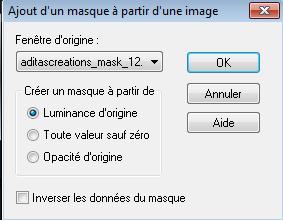
7. Layers- New Mask layer from Image and select Mask ''eadistascreations_mask_12 ''
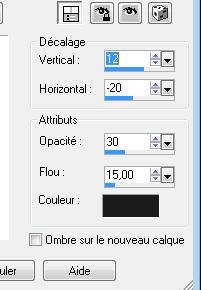
8. Layers- Merge- Merge Group 9. Effects - 3D Effects - Drop shadow with these settings -Color #1A1A1A
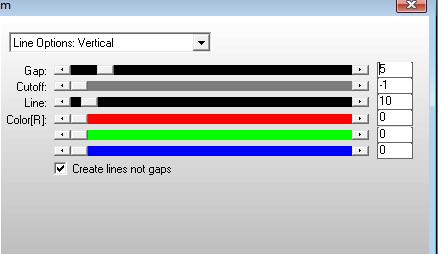
- Repeat: Effects -3D Effects - Drop shadow with these settings V=-12 and H = 20 10. Effects- Plugins - AP01(Innovation ) Lines Silverling /Lines options vertical
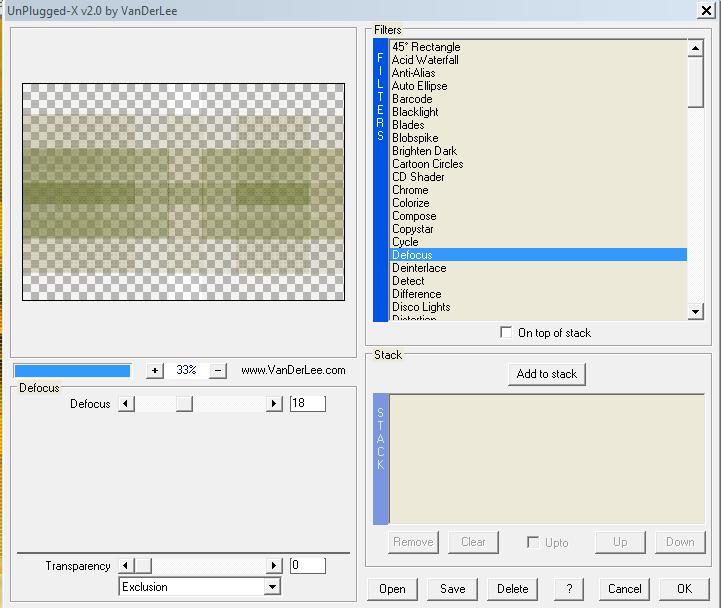
11. Layers- New raster layer 12. Selections - load/save selection - load selection from disk and select my file ''renee-feelings'' 13. Open the tube ''nicole-mist-paysage-21-2012 '' - Edit/ Copy-Edit - Paste into selection 14. Layers- New raster layer /Activate Flood Fill Tool and fill the selection with the backgroundcolor #a2560b 15. Selections- Deselect All 16. Effects- Plugins - Vanderlee /Unplugged X v.2 / Defocus with these settings
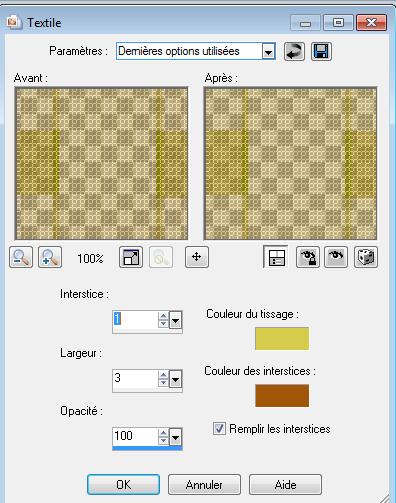
- Double click on this layer and set the Blendmode to Hard Light 17. Effects-Textur Effects-Weave with these settings-Foreground/backgroundcolor
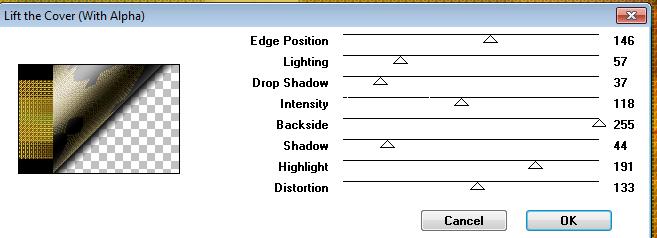
18. Effects-Plugins - VM Toolbox / Lift the cover with these settings (with alpha)
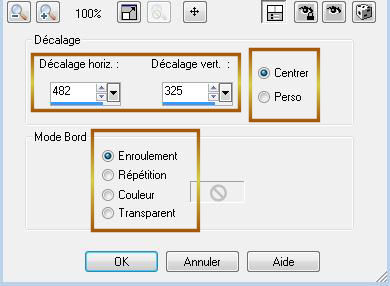
19. Effects-Image Effects-Offset with these settings
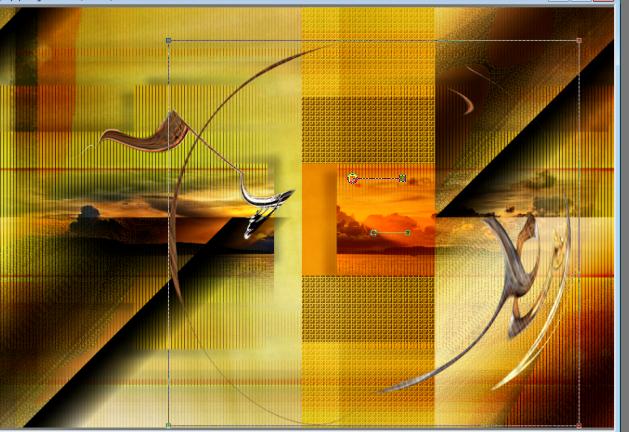
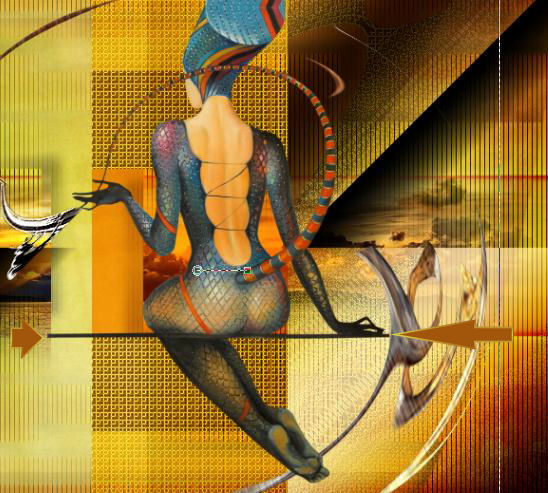
20.- Open the tube ''renee-feelings-arc '' Edit/ Copy-Edit - Paste as new layer on your working area -With your Move Tool:move as shown below
21. Open the tube ''nicole-femme-cat''/ Image Resize with 50% -Edit/ Copy-Edit - Paste as new layer on your working area
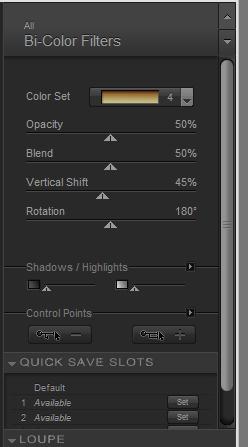
22. Open the tube '' renee-feelings-image 2''/ -Edit/ Copy-Edit - Paste as new layer on your working area - With your Move Tool:move as shown above 23. Open the tube ''CI_The vil Eye_Mist'' -Image Resize with 50% -Edit/ Copy-Edit - Paste as new layer on your working area 24. Effects-Plugins - Nick Color effex/ Bi Color-Filters with these settings /Repeat this filter with the same settings
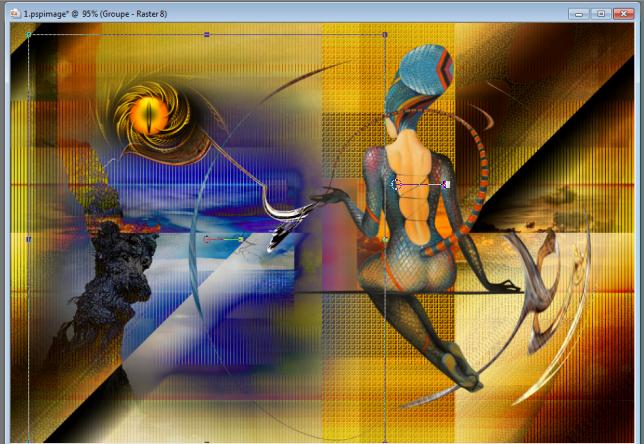
25. Open the tube ''Drevers_misted_landscape_14 ''Image Mirror 26. Edit-Copy-Edit-Paste as a new layer on your working area 27. Layers- New Mask layer from Image and select Mask ''fond_150212.jpg ''
28. Layers-Merge-Merge Group -Repeat: Layers- New Mask layer from Image and select Mask /Layers- Merge- Merge Group- With your Move Tool:move as shown below
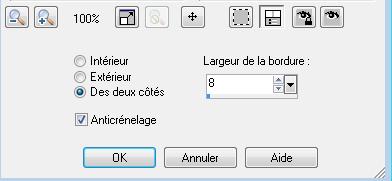
29. Layers-Arrange-Move under raster 3 =(the lady ) 30. Layer Palette -Double click on this layer and set the Blendmode to Difference and set the layer opacity of this layer to 87% 31. Layers- Merge- Merge- Visible 32. Image Resize with 85% (Resize all the layers not checked) 33. Selections- Select All- Selections - Float Selections – Defloat. 34.Selections- Modify-Select Selections Border with these settings
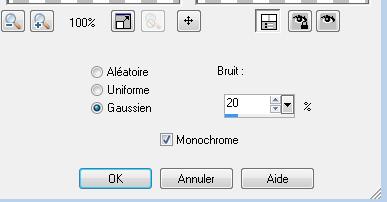
35. Set your foreground color to #607ab0 -Layers-New raster layer -Flood Fill Tool: fill the selection with the foregroundcolor #607ab0 36. Adjust-Add Remove Noise-Add Noise with these settings
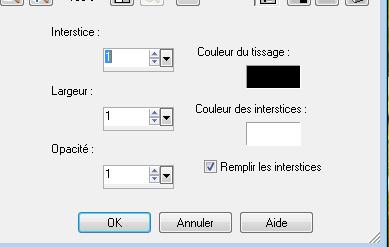
37.Effects-Textur Effects-Weave with these settings -Color black and white
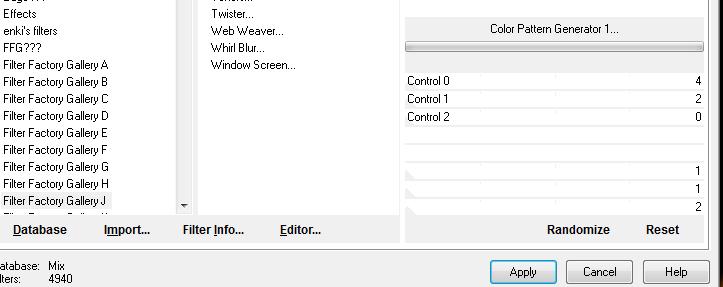
38. Selections-Deselect All 39. Effects-Edge Effects-Enhance More 40. Effects- Plugins / I-Decay/ Sin Spin Sugar 128/6 41. Layers- New raster layer /Layers-Arrange- Sent to Bottom 42. Selections- Select All/Open the Background image "fond 2" Edit/ Copy-Edit - Paste into selection 43. Selections- Deselect All 44. Effects- plugins -Unlimited 2.0 / Filter Factory J /Color pattern Generator1
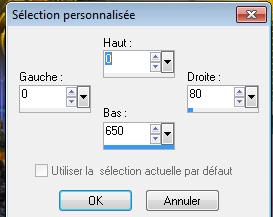
45. Activate your top layer 46. Layers- New raster layer 47. Selections-Custom Selection with these settings
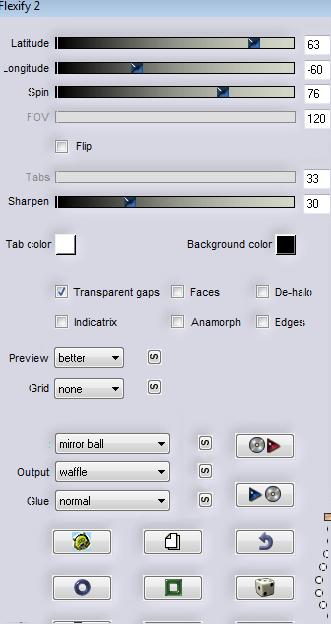
48. Flood Fill Tool: fill the selection with this color #00be00 49. Effects-Plugins- Flaming Pear flexify 2 with these settings / If your filter "Flaming Pear flexify 2" does not give the same result -The effect is included with the material " pspimage '''effet_waffle '' -Paste it as a new layer on your working aera
50. Selections- Deselect All 51. Effects- Plugins - Eyecandy5 Impact - Glass
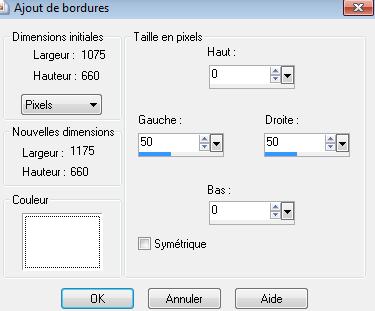
/ 52. Layers Duplicate /Image Mirror 53. Image - Add borders-Symmetric checked: 5 pixels #c90000 54. Image - Add borders No symmetric-with these settings -white
55. With the Magic Wand select the two white borders 56. Selections- Promote selection to layer 57. Selections- Deselect All 58. Effects-Plugins - Frischluft/Mosaïc plane V1.1 with these settings
59. Layers Duplicate 60. Effects- Geometric Effects -Circle -Transparent 61. Double click on this layer and set the Blendmode to Hard Light-Set the layer opacity of this layer to 30% 62. Image - Add borders-Symmetric checked: 5 pixels black 63. Write your own text-Font is into the zipfile Save as JPG * I hope you enjoyed this tutorial . Renée This lesson was written by Renée Placing 6 August 2012 * Any resemblance with an existing lesson is merely a coincidence * * Don't forget to thank the people who work for us and with us. I named the tubeurs - Testers and the translators. Thanks Renée. I am part of Tutorial Writers Inc. My tutorials are regularly recordedt ReneeGraphisme_All rights reserved *
|
 Translations