|
New
Transaltions here
Exploding colors
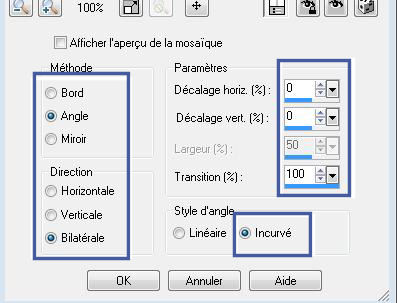
1. File - New - Transparent - New Image: 985 x 650 pixels 2. Set your Foregroundcolor to color white -Flood Fill Tool: Fill with the layer with the foregroundcolor 3. Selections- Select All 4. Open the image ''renee-eclater les couleurs'' Edit - Copy -Edit - Paste into selection 5. Selections- Deselect All 6. Effects- Image Effects- Seamless Tiling with these settings
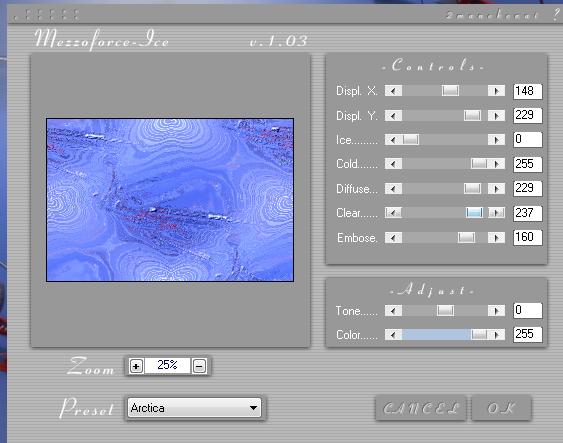
7. Effects- Plugins - Mezzo force with these settings-( Do you have problems with this filter - image is into the zipfile and paste as a new layer on your working area and move)
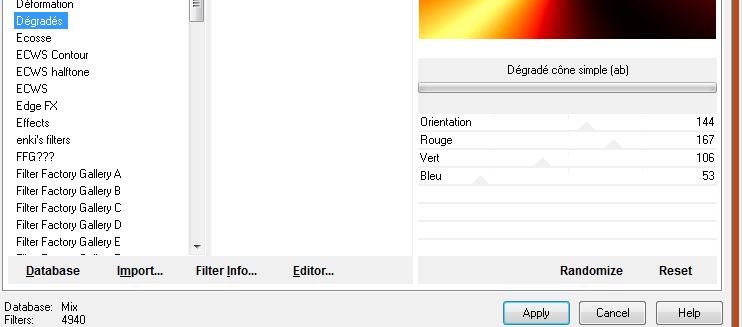
8. Layers-Duplicate 9. Effets-Plugins - Tramages /click reset /Pool shadow 10. Layers- New raster layer-Set your Foregroundcolor to #b84c1e -Activate Flood Fill Tool and fill the layer with the foregroundcolor 11. Effects-Plugins - Dégradés /Dégradé cône simple(ab)
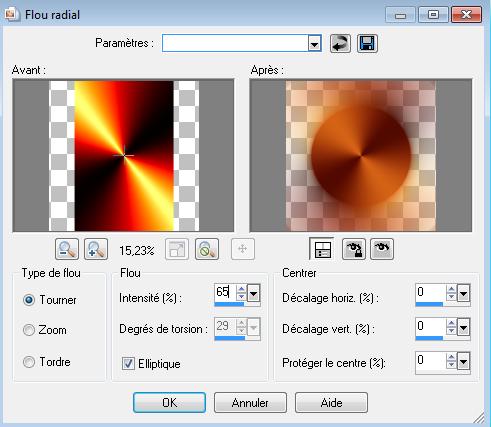
12. Double click on this layer and set the Blendmode to Difference 13. Layers-Duplicate 14. Image Free rotate 90° right 15. Adjust-Blur-Radial Blur with these settings
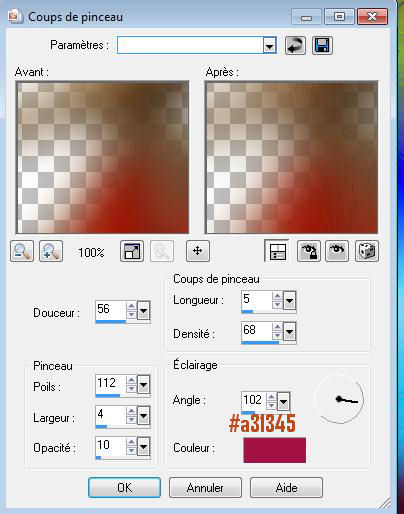
16. Layers- New raster layer 17.Selections - load/save selection - load selection from disk and select my file: ''renee-eclater les couleurs '' 18. Open the tube ''agv-evolution-MB-24061'' Edit - Copy -Edit - Paste into selection 19. Selections- Deselect All 20. Adjust-Blur-Gaussian Blur: Radius 22 21. Effects- Art Media Effects-Brush Strokes with these settings
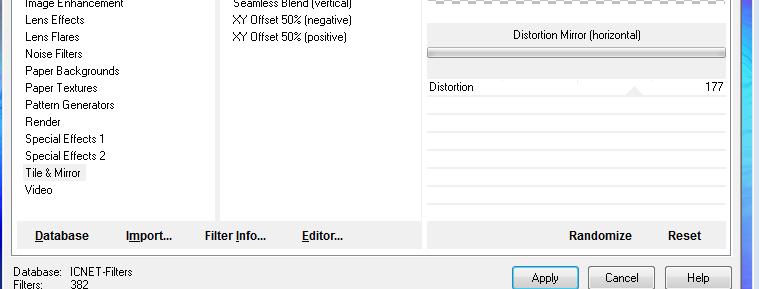
22. Effects- Plugins - Tiles & Mirror -Distorsion Mirror (horizontal)
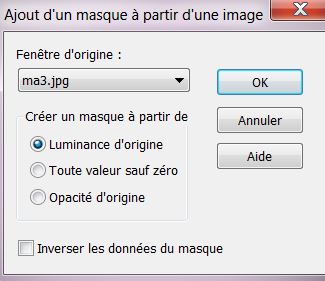
23. Effects-Plugins - Photo Agin kit /Cracker Paper -settings 212/ 105 24. Open the image ''renee-eclater-les couleurs '' on this image -Layers- New Mask layer from Image and select Mask ''ma3''
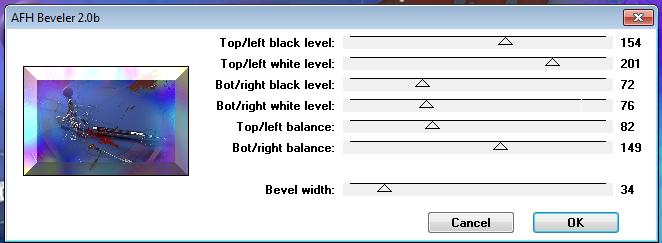
Layers- Merge- Merge- Group/Edit-Copy-Go back to your image-Edit-paste as new layer on your working area and move 25.Selections - load/save selection - load selection from disk and select my file: ''renee-eclater- lescouleurs -2'' 26. Open the tube ''renee-eclater-les couleurs eclat de verre'' Edit - Copy -Edit - Paste into selection 27. Selections- Deselect All 28. Adjust-Sharpeness- Sharpen More 29. Layers- New raster layer 30. Selections - load/save selection - load selection from disk and select my file: ''renee-eclater-les couleurs-3'' Material Properties: Set your Foregroundcolor to black and your Backgroundcolor to #6b140a 31. Prepare a Linear Gradient with these settings:Angle = 0 and Repeats =3 32. Activate Flood Fill Tool and fill the selection with the gradient 33. Effects- Plugins - Eyecandy5 Impact glass -tab Settings/User settings choose my preset: ''renee-eclater-les couleurs-glass' 34. Selections- Deselect All 35. Layers- Merge- Merge- Visible 36. Layers-Duplicate 37. Effects- Plugins - AFH - AFH beveler 2.0b with these settings
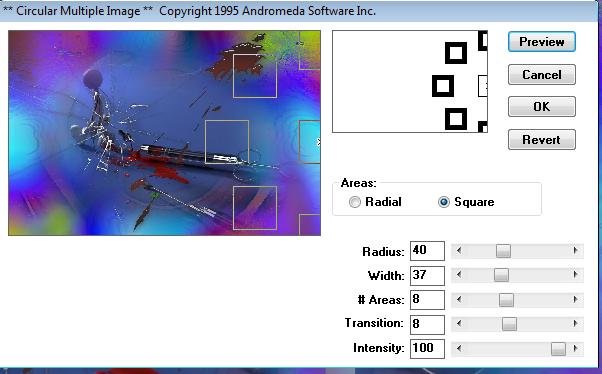
38. Effects-Plugins - Andromeda perspective / Side walls/ floors/ Preset -it open close 39. In the layer palette: activate the merged layer 40. Effects- Plugins - Andromeda -Circular multi --repeat this filter with the same settings
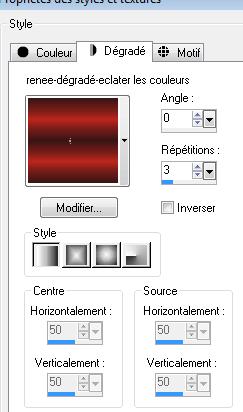
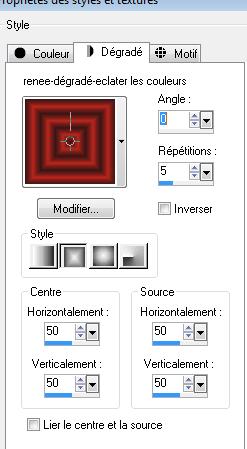
41. Layers- New raster layer 42. Selections - load/save selection - load selection from disk and select my file: ''renee-eclater-les couleurs 4'' 43. Material of the foreground: change material of the foreground into gradient select: ''renee -dégrade -eclater les couleurs.grd''- Prepare a linear gradient configured like this. Activate Flood Fill Tool and fill the selection with the gradient
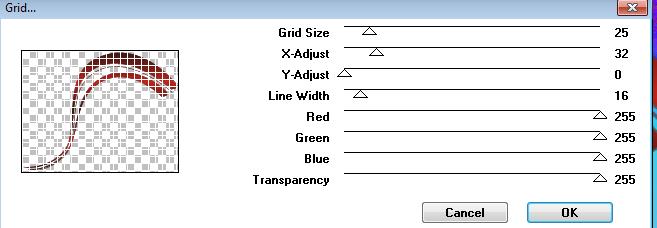
44. Effects- Plugins- VMToolbox - Grid with these settings
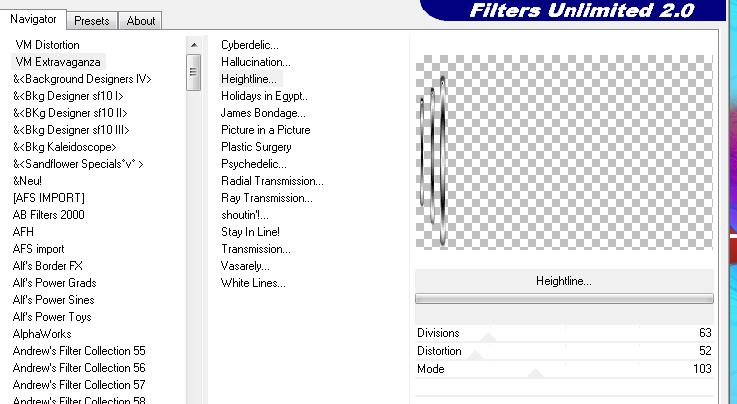
45. Selections- Deselect All 46.Open the tube ''birds '' select 2 Birds- Edit-Copy-Edit Paste as a new layer on your working area and move 47. On both layers: Effects- Plugins - Eyecandy5 impact /glass tab Settings/User settings choose my preset:'' renee-birds-glass'' 48. Open the tube ''renee-éclater -les-couleurs-barres'' Edit-Copy-Edit Paste as a new layer on your working area and move 49. Effects- Plugins - Vm Extravanga /Heightline
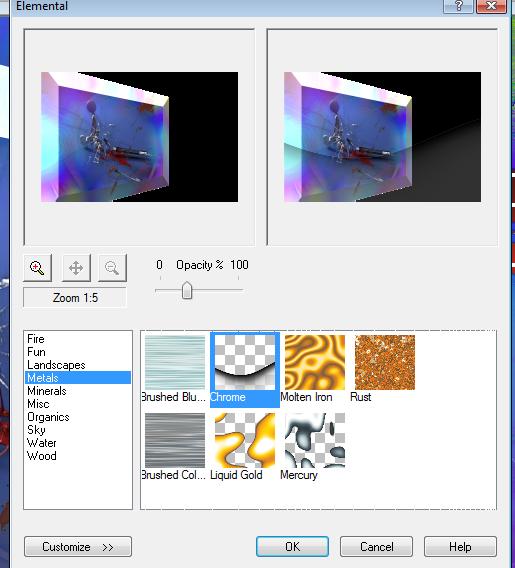
- Activate the copy of merged layer ( perspective) 50. Effects- Plugins - Xtras Elemental /metals -chrome attention the opacity >>the percentage is settle with the arrow as shown below
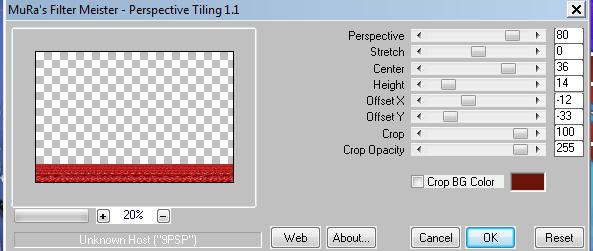
51. Activate the bottom of the layer-Palette 52. Open the tube ''renee-eclater-les couleurs-plancher Edit - Copy -Edit - Paste as new layer on your working area. With your move tool move to the bottom 53. Effects- Plugins - Mura's Meister - Perspective Tilling1.1 with these settings as shown in the example below
54. Effects- Plugins - Eyecandy5 -perspective shadow tab Settings/User settings choose my preset: ''renee-perspective shadow-eclater les couleurs " 55. Layers- New raster layer 56. Selections - load/save selection - load selection from disk and select my file:''renee-eclater-les-couleurs 5'' 57. Change foreground material into a rectangular gradient configured like this
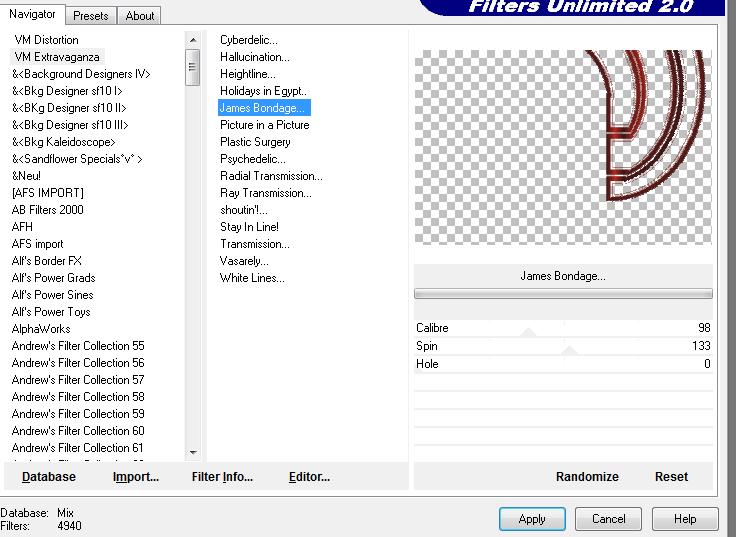
58. Activate Flood Fill Tool and fill the selection with the gradient 59. Selections- Deselect All 60. Layer Palette - Double click on this Layer and set the Blend Mode to Luminance 61. Effects- Plugins - VM Extravanga /james bondage
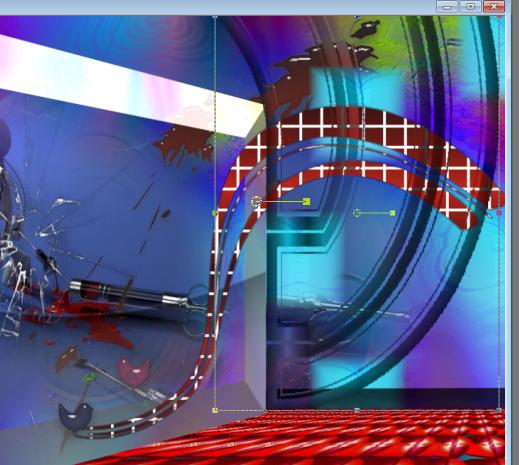
- Activate your Pick Tool (K) Mode Scale- place it in the right place as shown below
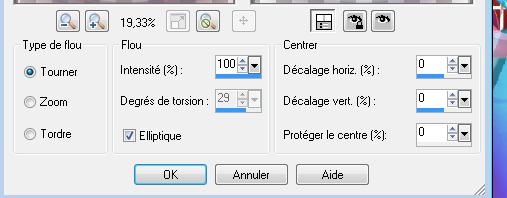
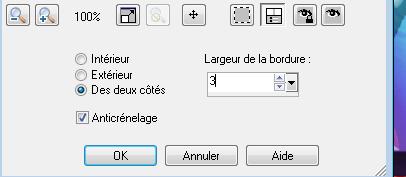
62. Set the layer opacity of this layer to 53% 63. Open the tube ''femme0255'' -Edit - Copy -Edit - Paste as new layer on your working area. With your move tool move to the right side on the shadow line and set the Blend Mode to Screen 64. Open the tube ''renee-eclater-les-couleurs-souris '' -Edit - Copy -Edit - Paste as new layer on your working area and move 65. Effects- Plugins- EyeCandy 5 perspective- Tab-Settings-Preset -Drop shadow blurry 66. Open the tube ''renee pot de peinture ''' Image Resize with 80% /Edit - Copy -Edit - Paste as new layer on your working area and move . 67. Open the tube ''renee tache de peinture bleue ''- Edit - Copy -Edit - Paste as new layer on your working area and move 68. Layers-Duplicate and place 69. Open the tube ''renee souris'' Image Resize with 80% -Edit - Copy -Edit - Paste as new layer on your working area and move 70. Open the tube renee taches 2 couleurs- Edit - Copy -Edit - Paste as new layer on your working area - Activate your Pick Tool (K) Mode Scale- place it on the pot of paint 71. Layers- Merge- Merge Visible 72. Image - Add borders-Symmetric checked:3 pixels black 73. Edith-Copy!!! 74. Image - Add borders-Symmetric checked: 60 pixels white 75. With the magic wand -select the white border of 60 pixels 76. Layers- New raster layercalque Edit - Copy -Edit - Paste into selection (Image is still in your PSP memory) 77. Adjust-Blur-Radial Blur with these settings 78. Effects- Edge Effects- Enhance More 79. Selections- Invert 80. Selections-Modify-Select-Selection Borders with these settings-Both sides
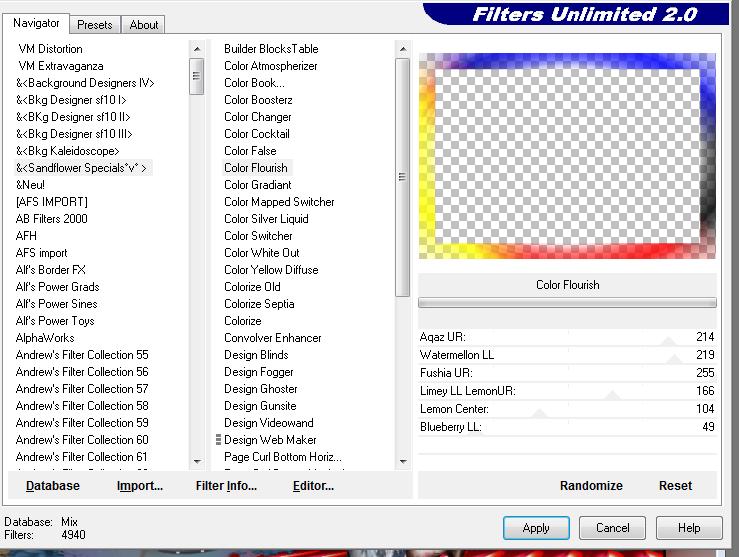
81. Change foreground material into a linear gradient 0/0 Activate Flood Fill Tool and fill the selection with the gradient 82. Selections- Deselect All 83. Image - Add borders-Symmetric checked:15 pixels black With the magic wand -select the black border of 15 pixels 84. Effects- Plugins -Unlimited - &<Sandflowers Special 'v'/colour Flourishwith these settings
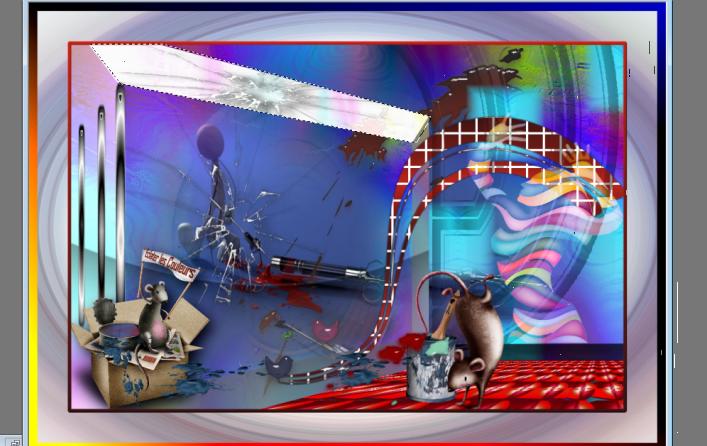
85. Selections- Deselect All 86. Freehand Selection Tool-Lasso- Point to point-Draw an selection as shown in the example below
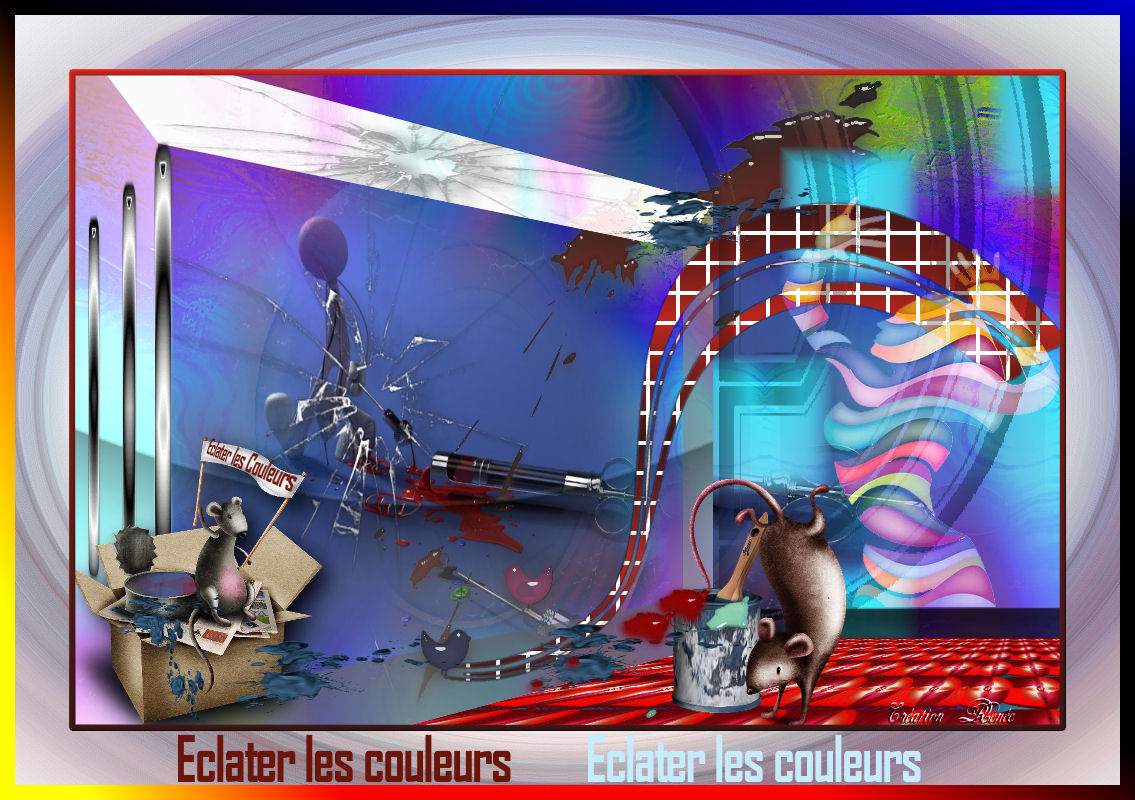
87. Layers- New raster layer -Open the tube ''renee-eclater -les couleurs -éclat de verre ''Edit - Copy -Edit - Paste into selection /Selections- Deselect All 88. Double click on this layer and set the Blendmode to Multiply and set the layer opacity of this layer to 79% 89. Change foreground material into a bright contrasting color of your choice 90. To write the title- I used the font ''Agency FB'' Size 45 write the text from 2 different colors 91. Layers- Merge- Merge All. Save as JPG
*
I hope you enjoyed this lesson Renée This lesson was written by Renée Placing 2011 * Any resemblance with an existing lesson is merely a coincidence * * Don't forget to thank the people who work for us and with us. I named the tubeurs - Testers and the translators. Thanks Renée.
* I am part of Tutorial Writers Inc. My tutorials are regularly recorded ReneeGraphisme_All rights reserved *
|
 Translations