|
New
Conception Bizarre Translations here
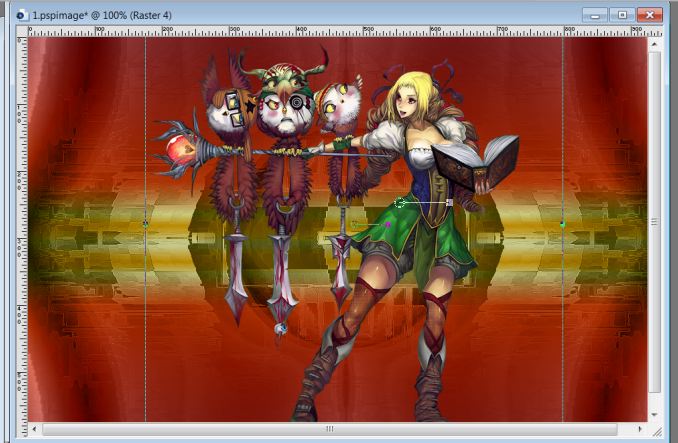
Let's start the lesson . 1. File - New - Open a new transparent image of 950 x 600 pixels 2. Material Properties:foreground material into gradient and select '' Es Automne 19'' lineair with these settings 0/0 - invert not checked /Flood Fill Tool:fill the layer with the gradient 3. Open the tube ''conception bizarre-image 1'' Edit/copy-Edit paste as a new layer on your working area 4. Effects- Plugins - Simple - Top left mirror- and repeat 1x 5. Open the tube ''fantaisie -odette'' Image resize 85 % Edit/copy-Edit paste as a new layer on your working area - Pick Tool / put the tube in it's place, as in the example below
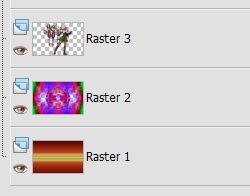
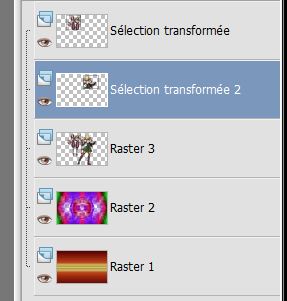
- Your layer-palette look like this now
6.
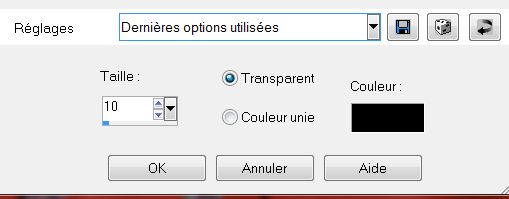
7. Selections- Promote selection to layer 8. Effects- 3D Effects- Chisel use settings below
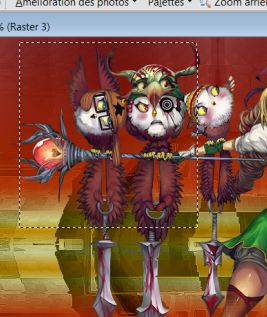
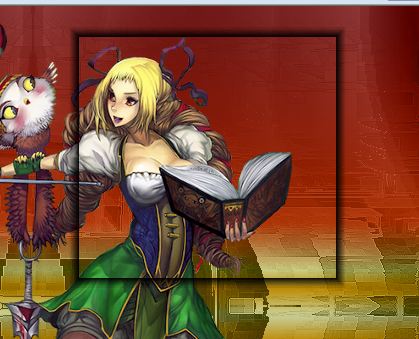
9. Selections- Deselect All 10. Activate the top of the layer-Palette=raster 3 Selection Tool-Rectangle-select this part of the tube (see example )
11. Selections- Promote selection to layer 12. Effects- 3D Effects- Chisel use settings below
13. Selections- Deselect All - Your work look like this now
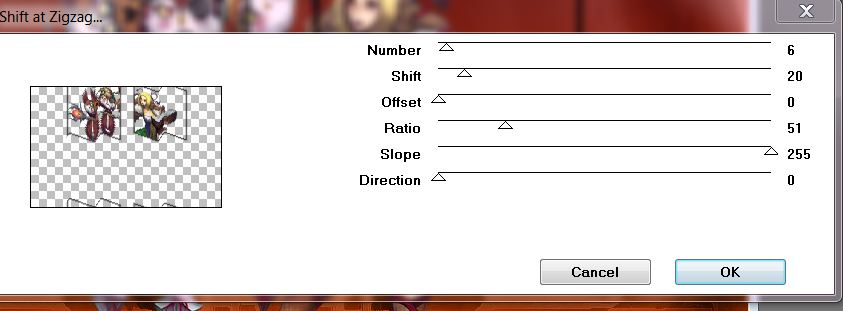
14. Activate the top of the layer-Palette- Layers- Merge -Merge Down (2 layers selections will be transformed and merged ) - Stay on this layer /Effects- Plugins - Mura's seamless - Shift at zigzag
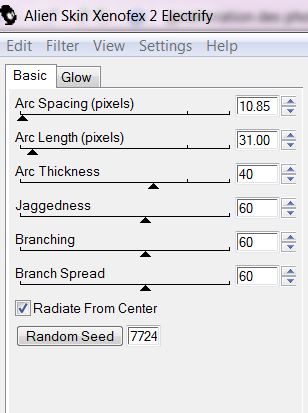
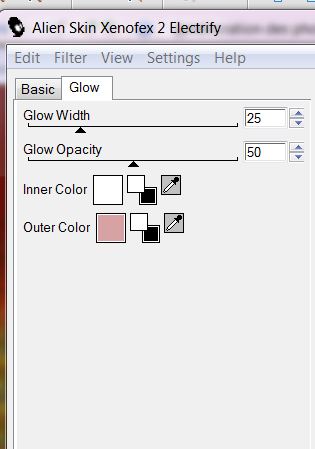
- Stay on this layer 15. Selections- Select All-Select-Select Float-Selections Defloat 16. Effects- Plugins - Alien skin Xenofex 2 color #ffffff and #d5a3a4 with these settings
17. Selections- Deselect All 18. Layer-Palette: activate raster 2 and /Open the tube ''conception- bizarre-image 2'' /Edit/copy-Edit paste as a new layer on your working area and move - Layer Palette -Double click on this layer and set the Blendmode to Soft Light - and set the layer opacity of this layer to 77% - Stay on this layer 19. Open the tube ''ML-hellebrand de Mone '' Edit/copy-Edit paste as a new layer on your working area - Do not move it is in the right place -Layer Palette -Double click on this layer and set the Blendmode to Hard Light 20. Activate the top of the layer-Palette 21. Layer-New raster layer 22. Selections - load/save selection - load selection from disk and choose my selection:''renee _conception bizarre 1'' 23. Open the tube ''renee_conception bizarre image 3 ''Edit/copy-Edit paste into selection 24. Selections- Deselect All - Layer Palette -Double click on this layer and set the Blendmode to Luminance -Legacy and set the layer opacity of this layer to 36% 25. Open the tube ''EAC-A Mans Watched tube '' Image Resize to 65 % Edit/copy-Edit paste as a new layer on your working area - Layer Palette -Double click on this layer and set the Blendmode to Luminance and set the layer opacity of this layer to 75% - Activate the top of the layer-Palette 26. Selections - load/save selection - load selection from disk and choose my selection:''renee -conception bizarre 2'' 27. Layer-New raster layer 28. Open the tube ''That hat is perfect for me'' Edit/copy-Edit paste into selection 29. Effects- 3D Effects- Chisel use settings below
30. Layer Palette -Double click on this layer and set the Blendmode to Normal and set the layer opacity of this layer to 77% 31. Selections- Deselect All 32.Layer-New raster layer 33. Selections - load/save selection - load selection from disk and choose my selection: ''renee-conception bizarre 3' 34. Open the tube ''DUEL BYIRULANA MIST BY BJPJ13L '' Edit/copy-Edit paste into selection 35. Effects- 3D Effects- Chisel use settings below
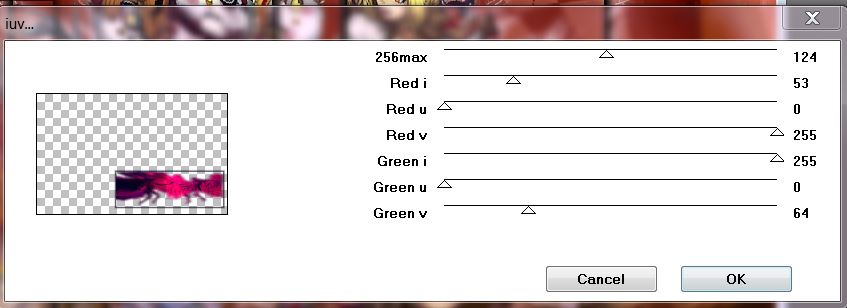
36. Selections- Deselect All - Layer Palette -Double click on this layer and set the Blendmode to Hard Light 37. Effects- Plugins - Filtre - Lumiere ambiance - iuv..with these settings .
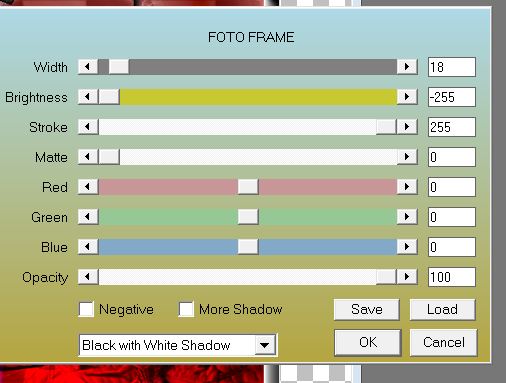
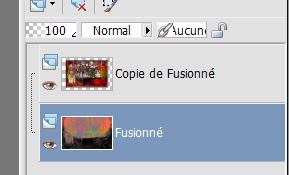
38. Layers- Merge- Merge- Visible 39. Layers- Duplicate 40. Effects- Plugins - AAA .Frame - Foto Frame use settings below
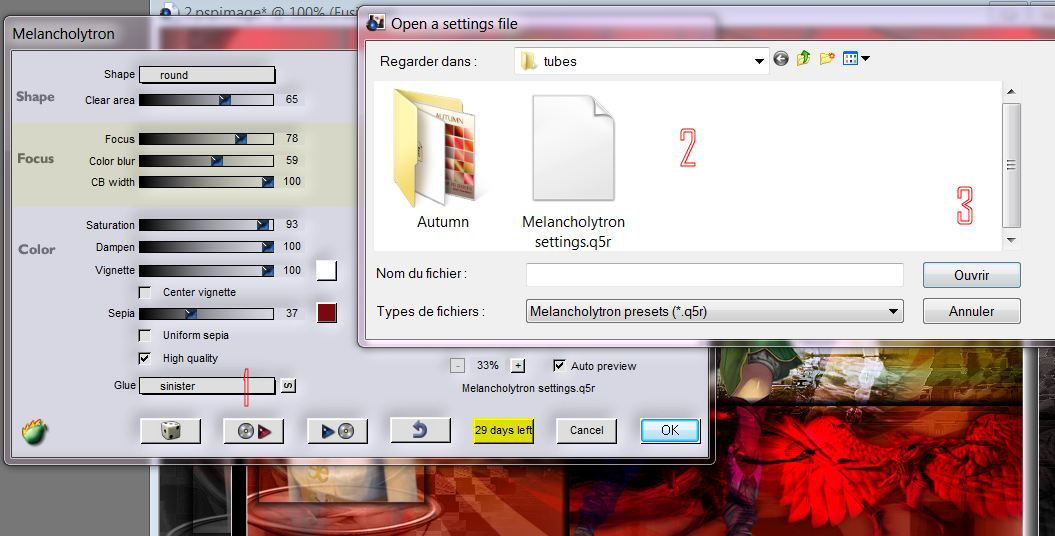
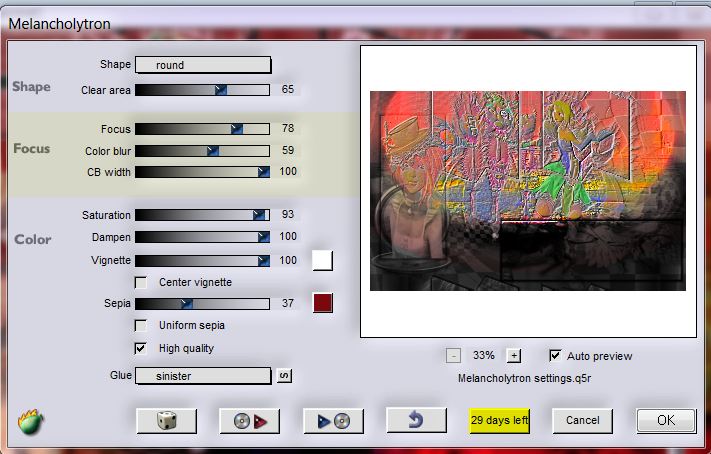
41. Image Resize to 85% (Resize all the layers not checked) - Activate the bottom of the Layer-Palette 42. Effects- Plugins – Flaming pear -Melancholytron -(the preset is into the zipfile)
If your filter Flaming Pear -melancholytron does not give the same result The effect is included with the material" pspimage'' Paste it as a new layer on your working area
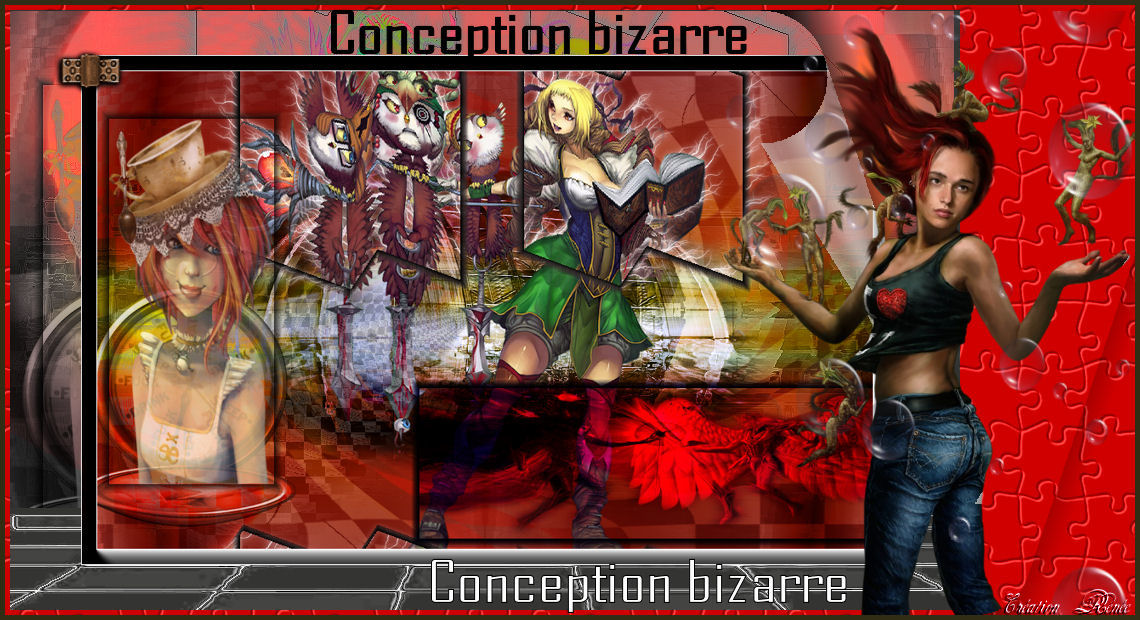
- Your work look like this now:
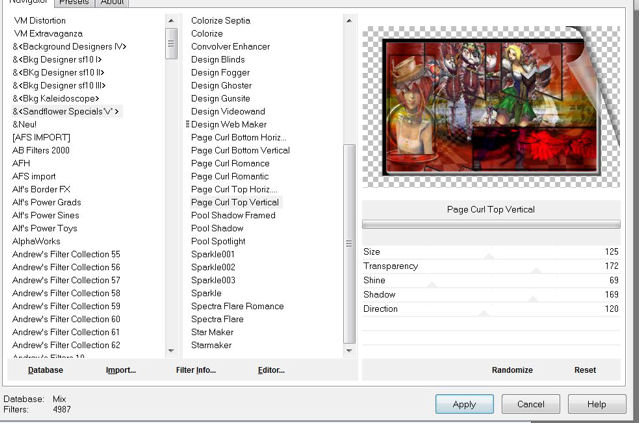
43. Activate the top of the layer-palette ( copy of merged) Effects- Plugins- Unlimited - Sandflowers Special V -Page curl Top Vertical use settings below
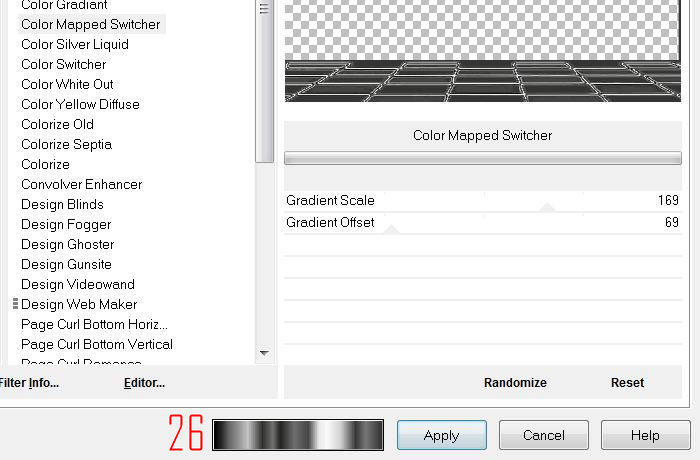
44. Activate the bottom of the layer-palette 45. Open the ''image sol '' /Edit/copy-Edit paste as a new layer on your working area 46. Effects- Plugins- Unlimited-Sandflowers Special V -Color Mapped Switcher** select in the menu 26 like this
47. Open the tube ''charniere '' Edit/copy-Edit paste as a new layer on your working area and place - Layers- Duplicate - Image Flip and place 48. Layers- Merge- Merge Visible 49. Image - Add borders-with these settings-color #d00000
50. Magic Wand : click with your magic wand in the red border 51. Effects - Plugins -Unlimited - Special effect 2- puzzle (tiled) to 112 52. Selections- Deselect All 53. Open the tube ''Treagen2269_25_10_12'' - Image Resize to 55 % Edit/copy-Edit paste as a new layer on your working area and move 54. On this layer - Effects-Plugins -Unlimited - &<Sandflowers Special- page curl romantic/ all 69 55. Open the tube ''image -bulles '' Edit/copy-Edit paste as a new layer on your working area and move 56. Image - Add borders-Symmetric checked: 5 pixels #404040 57. Write your own text Save as JPG I hope you enjoyed this lesson Renée This lesson was written by Renée Created the 01/11/2012 *
Any resemblance with an existing lesson is merely a coincidence * * Don't forget to thank the people who work for us and with us. I named the tubeurs - Testers and the translators. Thanks Renée. *
I am part of Tutorial Writers Inc. My tutorials are regularly recorded.
|
 Translations