|
New
Translations here
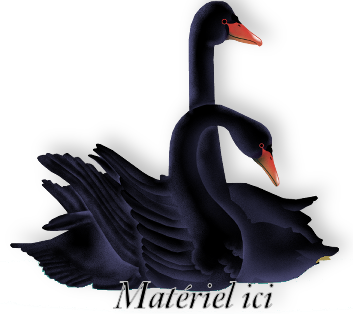
Black Swan
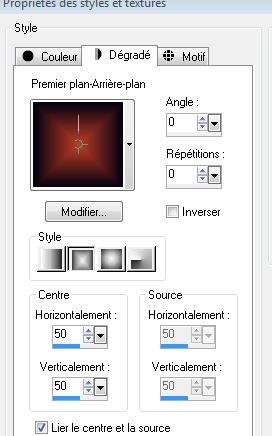
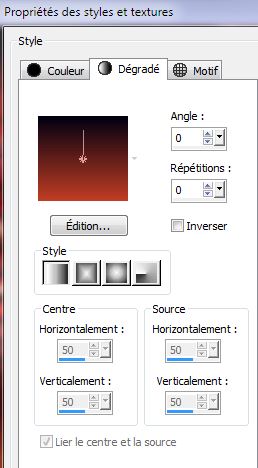
- Let's start the lesson. 1. Open the backgroundimage ''renee-black -swan -fond''/ Window - Duplicate (or shift+D) - Close the original and proceed on the copy -Promote Background Layer =Raster 1 2. Set your foreground color to #c03d23 -Set your background color to #010112- Put your foreground/background into a rectangular gradient as configured
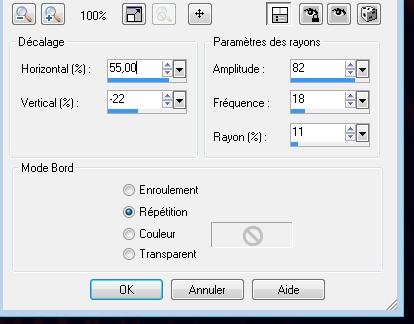
3. Layers-New raster layer-Flood Fill Tool: fill the layer with the gradient 4. Effects-Distortion Effects-Spiky Halo with these settings
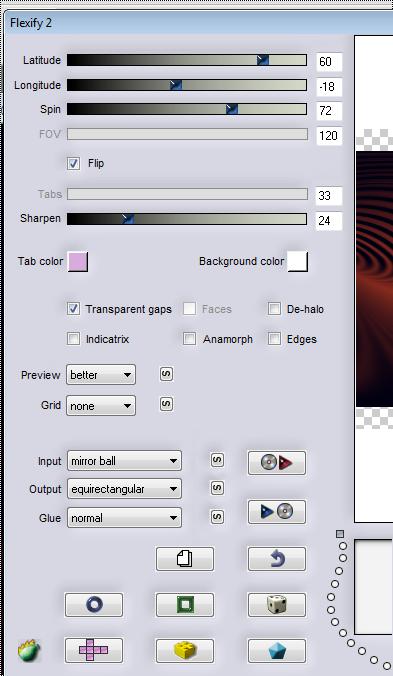
5. Image Mirror /Image Flip 6. Effects-Plugins - Flaming pear /Flexify 2 with these settings
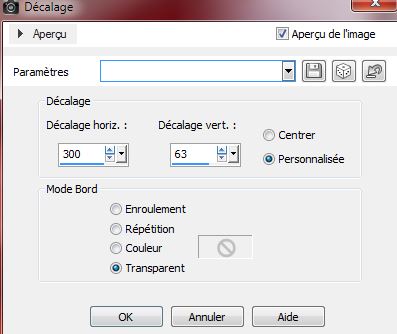
7. Activate the Pick Tool/Deformation tool (K) Mode Scale- Pull the top and bottom node and stretch up and down/up and down 8. -Double click on this layer and set the Blendmode to Hard Light and set the layer opacity of this layer to 61% 9. Open the tube' 'renee-black-swan-visage '' /-Edit/copy- Edit/ paste as new layer on your working area 10. Effects- Image Effects- Offset with these settings
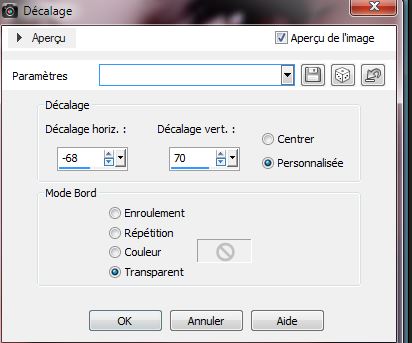
11. Open the tube ''black swan guismo modifié'' (Don't forget to duplicate the tubes (Shift+D) and close the originals. We work with copies of the tubes ) -Edit/copy- Edit/ paste as new layer on your working area /Image Resize with 65% Resize all layers not checked -Set the layer opacity of this layer to 42% 12. Effects- Image Effects- Offset with these settings
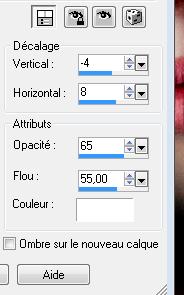
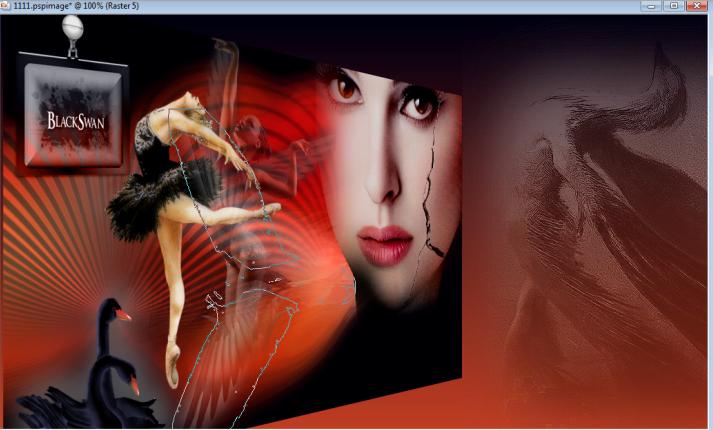
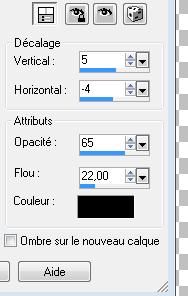
13. Open the tube ''dancer psp" Edit/copy- Edit/ paste as new layer on your working area/ Effects- Image Effects- Offset with these settings H= - 200 and V = 0 14. Open the tube ''V~black swan /Image Resize with 45% Edit/copy- Edit/ paste as new layer on your working area/ Move tool / place your tube on the left bottom side of your image 15.Effects - 3D-effect/ Drop shadow with these settings
16. Layers-Merge-Merge Visible 17. Effects-Plugins -Andromeda /Sidewalls /It open close 18. Change the gradient into a linear gradient with settings below- Layers-New raster layer- Flood Fill-Tool: fill the layer with the gradient
19. Layers-Arrange-Move Down 20. Activate the top of the layer-palette We will dress the small frame 21. Open the tube ''deco -156-2'' / Edit/copy- Edit/ paste as new layer on your working area With the magic wand tool >> select the inside of this frame -Selections-Modify-Expand with 10 pixels - Layers-New raster layer/Open the tube ''renee-black-swan-concept-texte'' Edit/copy-Edit paste into selection - Selections-Deselect All - Layers-Merge-Merge-Down - Effects-Plugins - Andromeda perspective /Andromeda /Sidewalls /It open close/Image Resize with 65% resize all layers not checked - Open the tube ''renee-bouton ''Edit/copy- Edit/ paste as new layer on your working area and move on this frame-Layers-Merge-Merge-Down The frame is now ready-With your move tool: move to the top left corner 20. Activate the top of the layer-palette 21. Open the tube ''renee-black-swan-concept3 ''/ Image Mirror- Edit/copy- Edit/ paste as new layer on your working area and move to the right -Set the layer opacity of this layer to 32% 22. Open the brush ''black-swan-aile en blanc'' in your PSP -File- Export Custom Brush (Give it a name) Activate Brush Tool and select my file:''''black-swan-aile en blanc'' with settings below
23. Layers-New raster layer /Set the foreground color to #ffffff /Stamp your brush on the right corner by using your foreground color #ffffff.
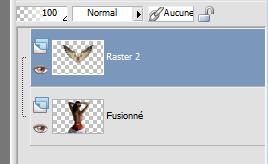
25. Open the tube ''nicole-etrange femme '' tube duplicate and close original and works with the copie *erase the signature* - Open the tube ailes "e2dd2973'' -Edit/copy- Edit/ paste as new layer on your working area /you have 2 layers as shown in the example place on the back of the tube ''nicole -femme-etrange''/Layers-Merge-Merge Down (one layer)
26. Effects - 3D-effect/ Drop shadow with these settings
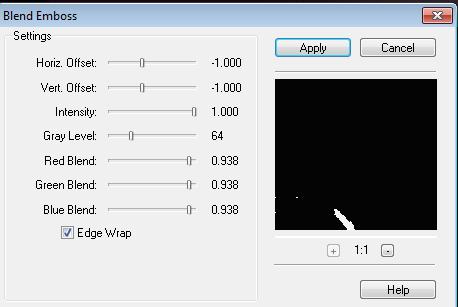
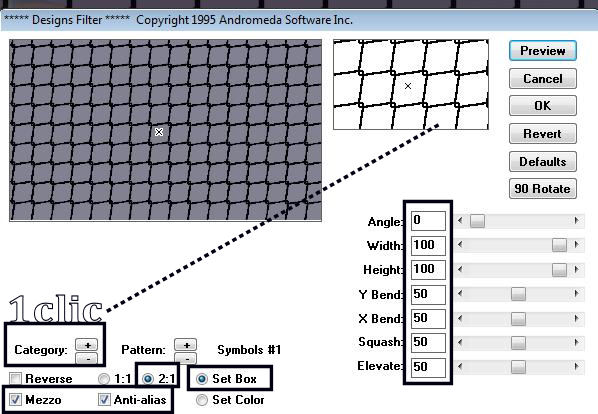
27. Image Resize 65% Edit/copy- Edit/ paste as new layer on your working area -With your Move Tool -move to the bottom right side /Double click on this layer and set the Blendmode to Hard Light 28. Everything is in place/ Layers-Merge-Merge-Visible 29. Layers- New raster layer -Pot of Paint: Change the opacity of the color at 50 % Flood Fill Tool: fill the layer with the background color #010112 30. Effects-Plugins - Andromeda -Designs *for the design of the grid /click Category *then put the settings and OK
31. Effects-Plugins -Transparency/Eliminate white - Activate Mesh Warp Tool - Pull the node as shown in the example-Your example has to be simular on mine
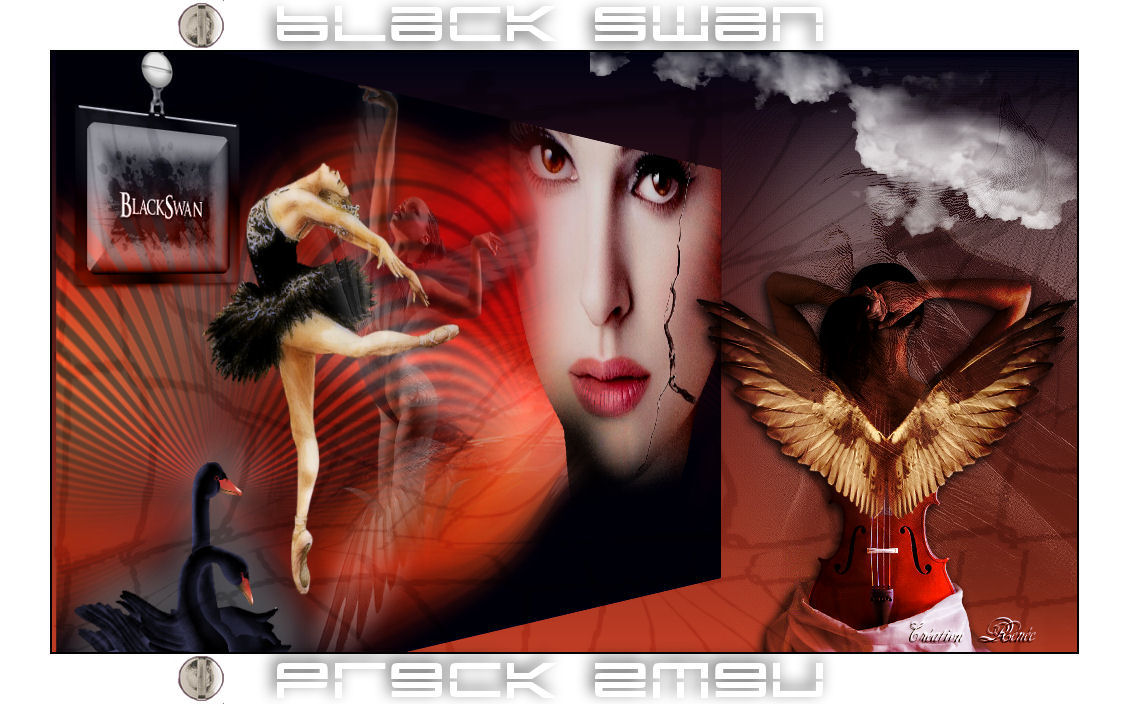
32. Double click on this layer and set the Blendmode to Soft Light – and set the layer opacity of this layer to 28% 33. With your Eraser Tool eraser what too much on the face of the girl Do you have problems with this- Psp image is into the zipfile and paste as a new layer on your working area 34. Layers- New raster layer /Layers-Arrange-Bring to Top Set your foreground color to #c03d23 -Set your background color to #010112 35.Activate Brush Tool and select my file: ''clouds01'' -Stamp your brush in the right place by using your foreground color /Set the layer opacity of this layer to 89% 36 .Layers- Merge-Merge All 37. Image - Add borders-Symmetric checked: 2 pixels black 38. Image - Add borders-Symmetric checked: 50 pixels white 39. Text tool - font -''Yonder recoil'' Size 48 / write your text ''Black swan '' Set your foreground color to black and Set the background color to white 40.- Effects - 3D-effect/ Drop shadow with the same settings 41. Layers-Duplicate /Image Flip 42. Open the ''clou pour titre'' Edit/copy- Edit/ paste as new layer on your working area and move-Layers-Duplicate-Image Flip 43 Image - Add borders-Symmetric checked: 2 pixels black Save as JPG
I hope you enjoyed this lesson Renée This lesson was written by Renée edited and update on 2011 *
* Any resemblance with an existing lesson is merely a coincidence * * Don't forget to thank the people who work for us and with us. I named the tubeurs - Testers and the translators. Thanks Renée. *
I am part of Tutorial Writers Inc. My tutorials are regularly recordedt ReneeGraphisme_All rights reserved
*
|
 Translations