|
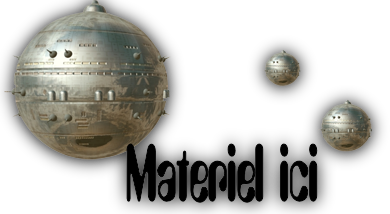
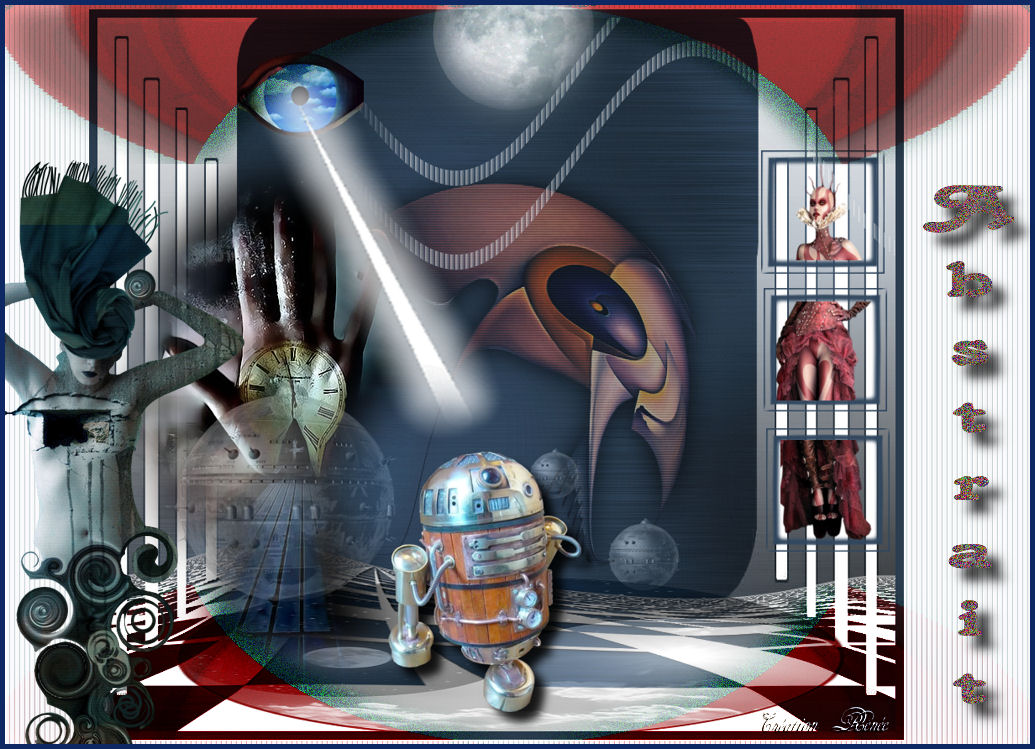
Abstrait
New
Translations here
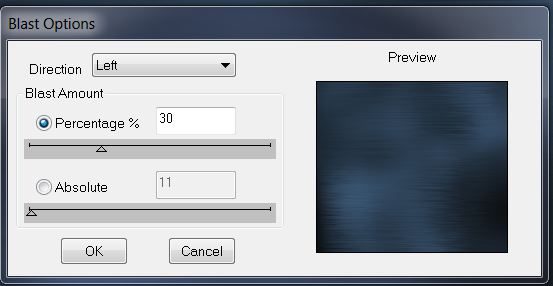
Tubes are of MTm - Nicole and Claudia Viza These tubes were received from tubeurs sharing groups . Or found by me searching on the net. please use any copyright information as needed. Thanks Renée ********** Plugins DBS flux Mura's Meister Flaming Pear Unplugged Tools EyeCandy 5 Impact You are here to my website :http://www.reneegraphisme.fr/filtres/Mes%20filtres.html Let's begin 1. File: Open Image ''fond 1'' Promote to background layer Raster 1 2. Effects –Plugins - DSB Flux -Blast
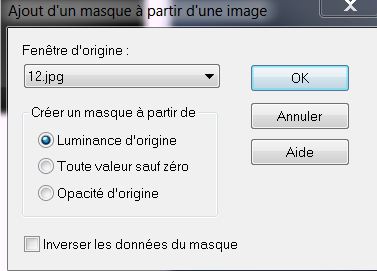
3. Layers - New raster Layer .Flood Fill Tool: Fill the layer with color white 4. Layers-New Mask Layer From Image and choose Mask: ''masque 12'
5. Layers- Merge-Merge Group 6. Effects -Plugins Mura's Meister - Perspective Tilling
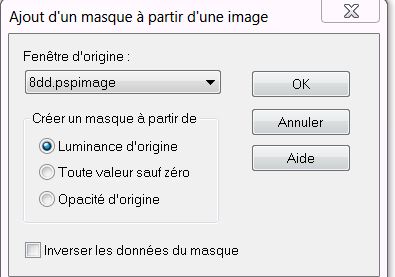
8. Effects -Distortion Effects -Twirl 60 9. Effects- Distortion Effects – Punch 100 10. Effects- 3D Effects - Drop Shadow: 1/3/100/2 black 11. Layers - New raster Layer. Flood Fill Tool: fill the layer with color white 12.Layers-New Mask Layer From Image and choose Mask: ''8dd''
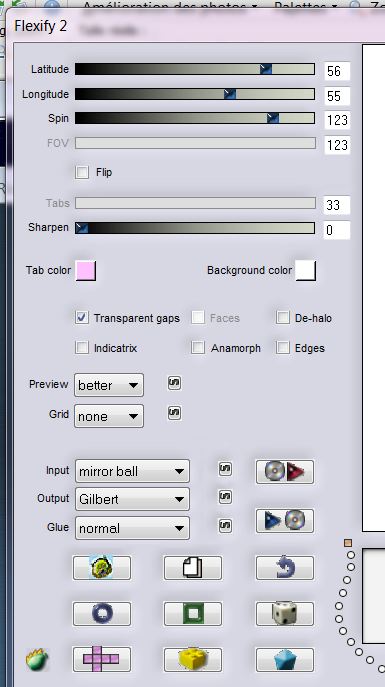
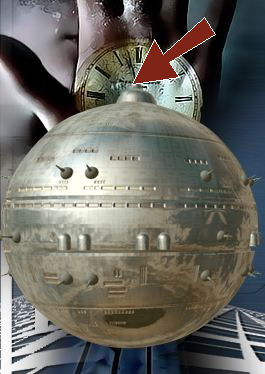
13.Layers- Merge-Merge Group 14. Move the mask up against the edge 15. Open the tube ''Mtm_abstrac_50-Kors'' -Apply the filter on the tube before setting as a new layer 16. On the tube - Effects - Plugins - Flaming Pear -Flexify2
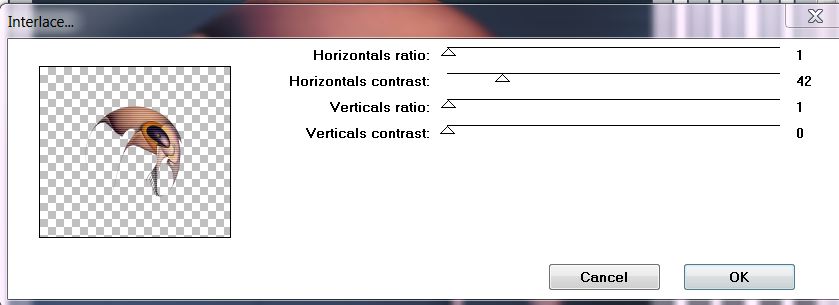
* Edit/copy-Edit/paste as a new layer (do not move !!!!) 17. Effects -Plugins -Unplugged Tools – Interlace
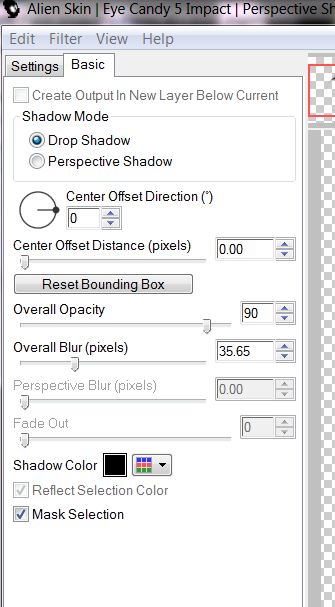
18. Layer Properties: change your Blend Mode to "Hard Light" and lower the opacity down to 65% 19. Effects- Plugins - EyeCandy 5- Perspective shadow - drop shadow lowest
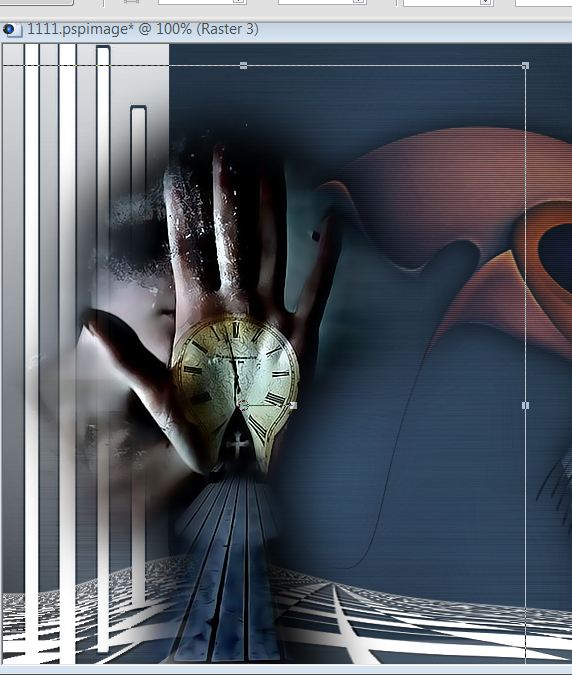
20. Open the tube ''main bleu'' .Edit/copy Edit paste as a new layer and place
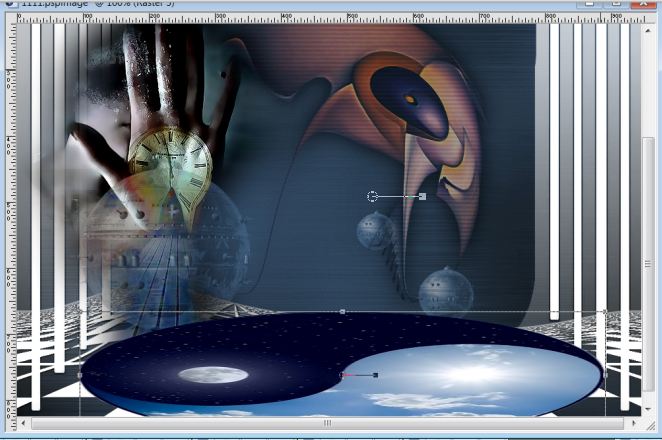
21. Open the tube ''3 sphères ''Edit/copy Edit paste as a new layer * Place like this
22.Layer Properties: change your Blend Mode to "luminance Legacy " and lower the opacity down to 46% 23. Open the tube ''tubeclaudiaviza-mix34'' Edit/copy Edit paste as a new layer and place *Activate your Pick Tool (k) give this form
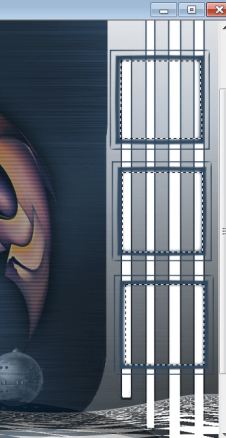
24. Layer Properties: change your Blend Mode to "luminance Legacy" and lower the opacity down to 49% 25. Frame - Open the tube ''abstrait-3 cadres'' Edit/copy Edit paste as a new layer and place 26 Activate your Selection Tool- (S) mode rectangle / select 3 frames like this
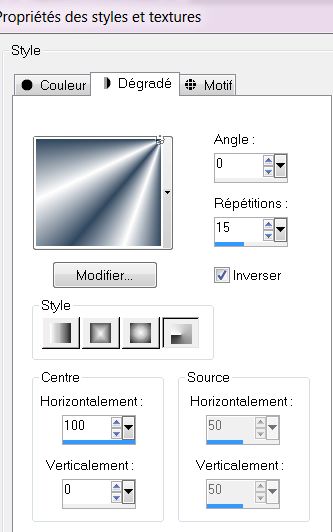
27. Layers - New raster layer 28. Open the tube ''f5'' Edit/copy- Edit paste into selection 29.Selections - Deselect all 30. Layers- Merge-Merge Down 31. Layers - New raster Layer 32. Material Properties: Foreground color to color white .Background color to color : #31475e 33.Change material of the foreground into Foreground/background radial gradient with these settings. Selections - load/save selection - load selection from disk and select''renee_abstrait''. Flood Fill Tool: fill the selection with the gradient
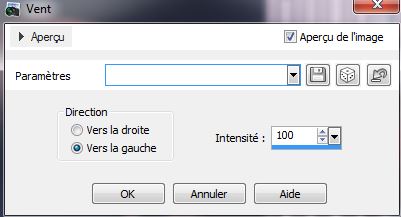
34. Selections - Deselect all 35. Effects- Distortion Effects -Wind from left 100
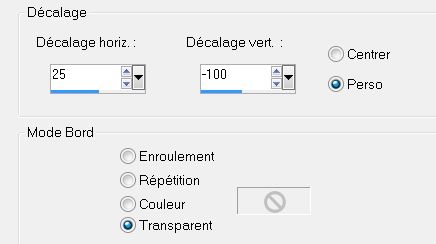
36. Layers-Duplicate 37 .Effects- Image Effects - Offset
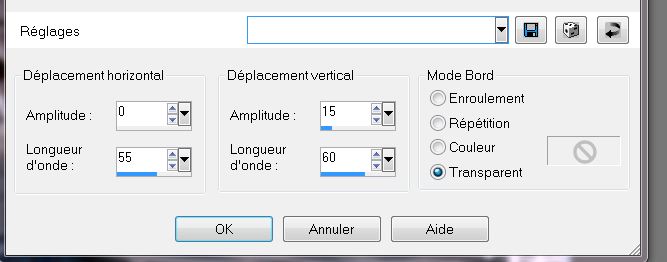
38. Layers- Merge- Merge Down 39. Effects- Distortion Effects -Wave
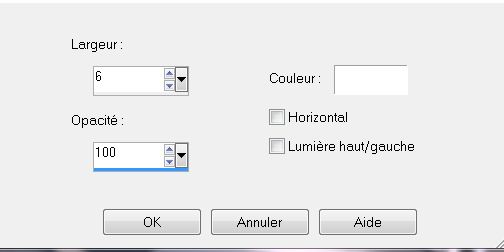
40. Layer Properties: change your Blend Mode to "Lighten " 41. Effects- Texture Effects - Blinds color white
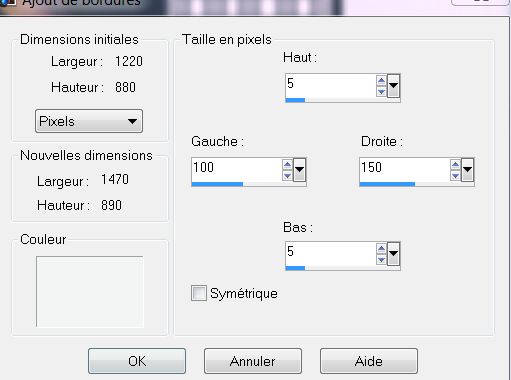
42. Layers Palette: lower the opacity down to 49% 43.Open the tube '' tubeclaudiaviza-oeil ''Image Resize to 45% Edit/copy Edit paste as a new layer and place 44. Layer Properties: change your Blend Mode to "Hard Light" 45. Open the tube ''abstrait-rayon'' Edit/copy Edit paste as a new layer and place 46. Open the tube ''tubeclaudiaviza-mix101''- Image Resize 2 x 65% / Layers- Arrange- Move 2x Down (move under the eye of raster 9) 47. Layers- Merge- Merge Visible 48. Image - Add Borders - Symmetric checked: 10 pixels color: #2c3d4f 49. Image - Add Borders - Asymmetric checked color: #f2f4f5
50. Select with the magic wand that asymmetric border 51. Effects- Texture Effects- Blinds/color white
52. Effects- Edge Effects-Enhance More 53. Selections - Deselect all 54. Image Resize 1025 pixels width 55. Open the tube '''abstrait-découpe »Edit/copy-Edit paste as a new layer and place 56. Layers - Properties: change the Blend Mode to "Multiply" and lower the opacity down to 79% -Pick Tool: Put it on both sides. It must connect to the side and place it at the top 57. Layers- Duplicate -Image Flip- and place it on the bottom .Layers - Properties: change the Blend Mode to "Overlay" / opacity 100% 58.Open the tube ''abstrait-lune ''Edit/copy-Edit paste as a new layer and place 59. Open the tube ''nicole-etrange-18-2012' 'Image Resize to 75% .Edit/copy Edit paste as a new layer and place 60. Image - Add Borders - Symmetric checked: 5 pixels #2c3d4f 61.Open the tube " texte " Ore write your own text. I hope you enjoyed this lesson This lesson was written by Renée the 18/11/2012 I am part of Tutorial Writers Inc. My tutorials are regularly recorded
|
 Translations