|
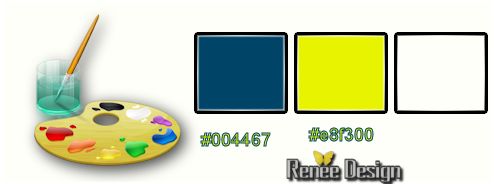
Let's start the lesson.Open the Color Palette
-
Material Properties: Set your foreground color to #004467 -Set your background color to
#e8f300
1.
Open the image:‘’ fond wanted’’/ Window - Duplicate (or shift+D) - Close the original and proceed on the copy -Promote Background Layer =Raster 1
2.
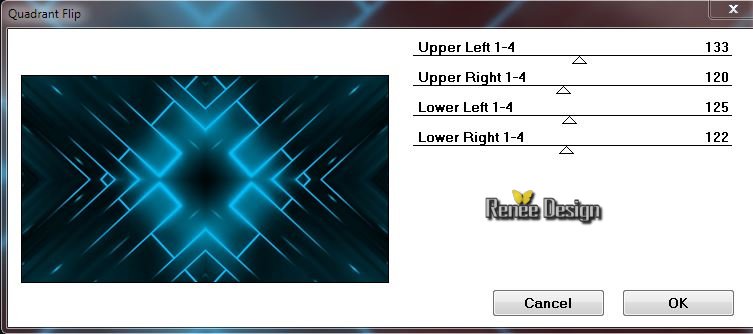
Effects-Plugins - Mirror Rave –Quadrant Flip using the default settings
-
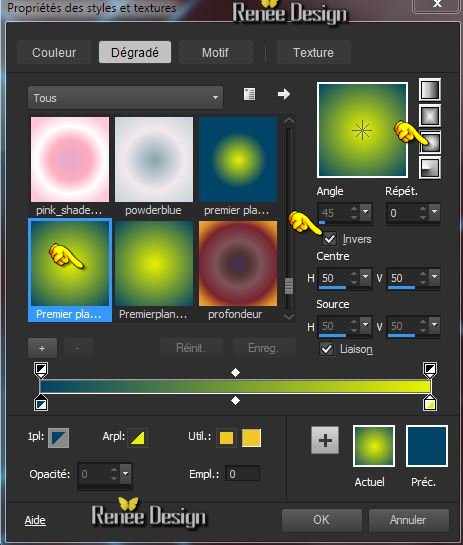
Color Palette: Prepare a foreground/background sunburst gradient with settings below
3.
Layers- New raster layer
-
-Flood Fill Tool: Fill the layer with the gradient
4.
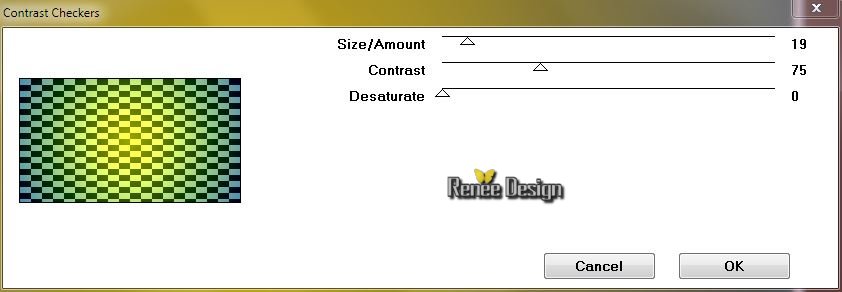
Effects-Plugins – Layouts Tools- Contrast
Checkers with settings below
5.Effects-Plugins - Mirror Rave – Quadrant Flip using the default settings
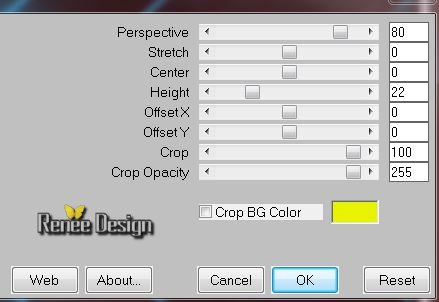
6.Effects-Plugins - Mura’s Meister- Perspective
Tilling with settings below
7.
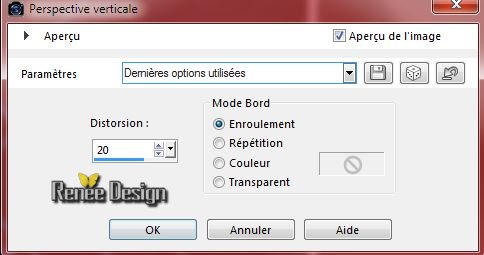
Effects-Geometric Effects –Perspective
Vertical with settings below
8.
Layers- New raster layer
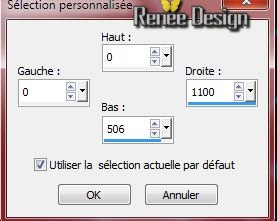
9. Selection Tool (S)-Custom selection with these settings
10.
Activate Flood Fill Tool and fill the selection with the gradient
Keep Selected !!
11.
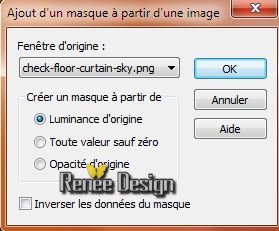
Activate the image
‘’check-floor-curtain-sky.jpg’’
-
Layers- New Mask layer from Image and select Mask
12. Effects-Edge Effects-Enhance More
13. Layers-Merge-Merge-Group
Selections-Deselect All
- Activate the bottom of the Layer -Palette =Raster 1
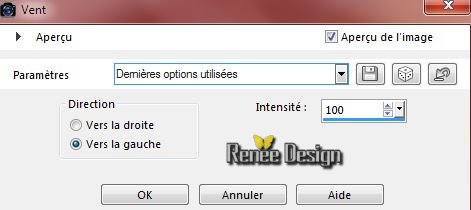
14. Effects-Distortion Effects-Wind-Winddirection From Left -Wind strength 100
15. Activate the tube ‘’Renee_tube_Interieur_Obscur’’
- Edit/copy- Edit/ paste as new layer on your working area
- Do not move it is in the right place
16. Effects-Plugins –Xero –Clarity using the default setting
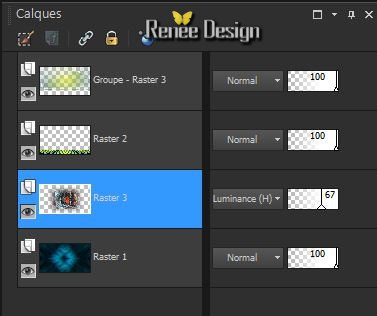
- Layer Palette -Double click on this layer and set the Blendmode to Luminance Legacy and set the layer opacity of this layer to 67%
Layer palette look like this now
- Activate the top of the layer-Palette
17. Layers- New raster layer
18.
Selections - load/save selection - load selection from disk and choose my selection: ‘’wanted-1’’
19. Pot of Paint:opacity of the color at 100% -Flood Fill Tool: fill the selection with the background color (Click 2 - 3 times in the selection )
20.
Effects-Plugins –Unlimited 2.0 - VM Experimental- Magnetic Detection
using the default setting 104/0/0/0
21.
Effects-Edge Effects Enhance
Selections-Deselect All
22. Layers- New raster layer
23.
Selections - load/save selection - load selection from disk and choose my selection: ‘’wanted_2’’
24. Pot of Paint:opacity of the color at 45%
Properties Foreground: Set your foregroundcolor to color #004467
–Flood Fill Tool: fill selection with the foregroundcolor
Selections-Deselect All
25.Layer Palette -Double click on this layer and set the Blendmode to Hard Light
26. Activate Brush image ‘’wanted -pinceau1 » in your psp
- File- Export -Custom Brush
- Give it a name "
wanted -pinceau1
27.Properties Foreground: Set your foreground color to color white
28. Layers- New raster layer
29. Activate Brush Tool and select my file:’’ wanted -pinceau1’’ with these settings

- Stamp your brush in the right place by using your foreground color
-Activate the Pick Tool/Deformation tool (K) move as shown below
30. Layers-New raster layer
31.
Selections - load/save selection - load selection from disk and choose my selection: « wanted_3 »
-
32. Pot of Paint:opacity of the color at 100% – Floodfill Tool: fill the selection with the foregroundcolor white
33.
Effects-Plugins - EyeCandy 5 Impact - Glass
-tab Settings/User settings choose my preset: ‘’ wanted_glass’
Selections-Deselect All
34. Layer Palette -Double click on this layer and set the Blendmode to Luminance Legacy
35. Layers-New raster layer
36. Flood Fill Tool: fill the layer with the foregroundcolor
37. Activate your mask ‘’masque_wanted_motivation’’
38. Layers- New mask layer from Image
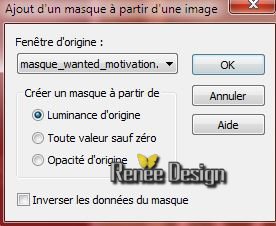
- Layers- Merge- Merge Group
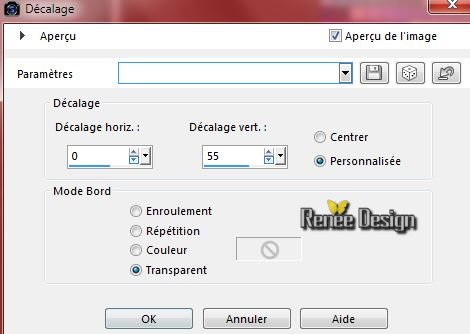
39. Effects-Image Effects-Offset with these settings below.
40. Layer Palette -Double click on this layer and set the Blendmode to Overlay and set the layer opacity of this layer to 87%
41. Layers- New raster layer
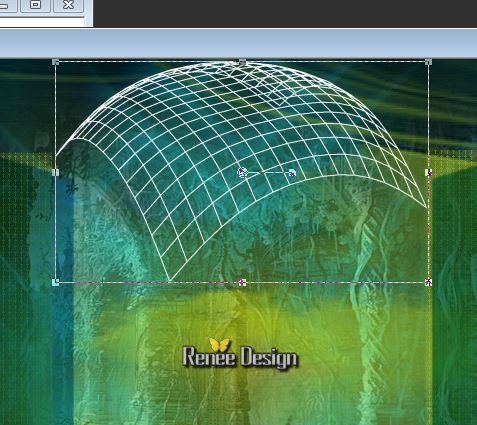
42. Activate the Brush ‘’ BrushTip_wanted_pinceau3’’ with these settings

- Stamp your brush in the right place by using your background color
Activate the Pick Tool/Deformation tool (K) move as shown below
43. Activate the tube ‘’wanted_image_1’’
- Edit-Copy-Edit Paste as a new layer on your working area
-
Move tool / place your tube on the right side of your image
44. Layers-Duplicate - Image –Mirror
- Layers- Merge- Merge- Down
45. Effects-3D Effects-Drop Shadow with these settings: 2/2/50/8 white
46. Activate the images ''Affiches ''
- I have different images /and choose what you like
- I choose image ‘’’6’’
47. Edit-Copy-Edit Paste as a new layer on your working area
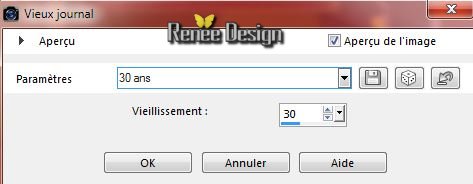
48.Effects-Artistic Effects-Aged Newspaper with these settings
49. Activate
image ‘’1 (choose what you like)
- Effects-Plugins –
Unlimited 2.0- Photo Aging Kit- Dirt & Dust settings
190-128
- Image
Resize 65%
- Edit-Copy-Edit Paste as a new layer on your working area -(With your move tool move to the left )
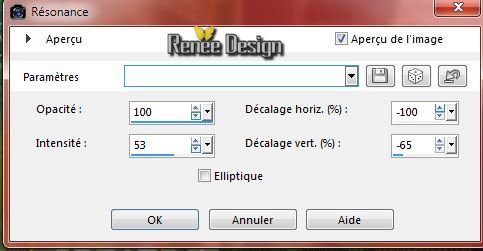
50. Effects-Reflection Effects-Feedback with these settings
51. Activate the tube ‘’urban’’ –Edit-Copy-Edit Paste as a new layer on your working area
- Activate the Move Tool-move to the right side.
Blendmode to Soft Light
52.Effects-3D Effects-Drop Shadow with these settings: 2/2/50/8 black
53. Activate the tube ''Renee_tube_guerrier_wanted''/ activate the layer "pour tutowanted" of the tube
Edit-Copy-Edit Paste as a new layer on your working area -Activate the Move Tool-move to the bottom left side
54. Activate the tube ‘’renee_titre_wanted’’
- Edit-Copy-Edit Paste as a new layer on your working area. Activate the Move Tool-move to the bottom
55. Layers-Merge-Merge Visible
56. Edit-Copy!!
57. Image - Add borders-Symmetric checked:1 pixels black
58. Image - Add borders-Symmetric checked:50 pixels white
59. Activate the Magic Wand -select the white border of 50 pixels
60. Edit-Paste into selection (Image is still in your PSP memory)
61.Adjust-Blur-Gaussian Blur Radius:28
Selections-Deselect All
62. Effects-Plugins -AAA Frame - Foto Frame with these settings
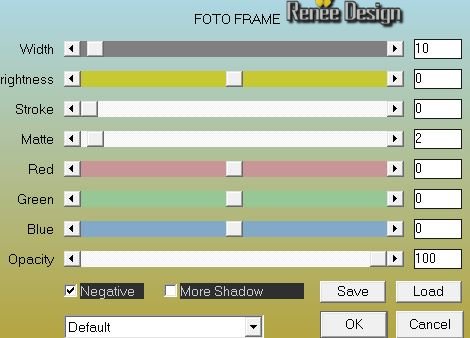
63.
Selections-Select All-Selections- Modify-Contract 51 pixels
64.Effects-Plugins -AAA Frame -Foto Frame with the same settings
Selections-Deselect All
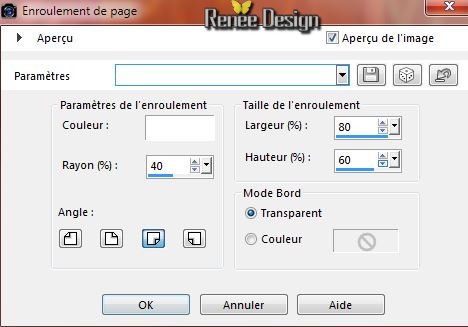
65. Activate the image affiche ‘‘4’’- Promote background layer (
Is very important for the next step
)
66. Effects-Image Effects-Page Curl with these settings
67. Edit/copy- Edit/ paste as new layer on your working area
68. Effects-Image Effects-Free Rotate: 30 ° to the left
69. With the Move Tool, move it in the bottom left corner . Set the layer opacity of this layer to 53% (it will depend on the choice of your image)
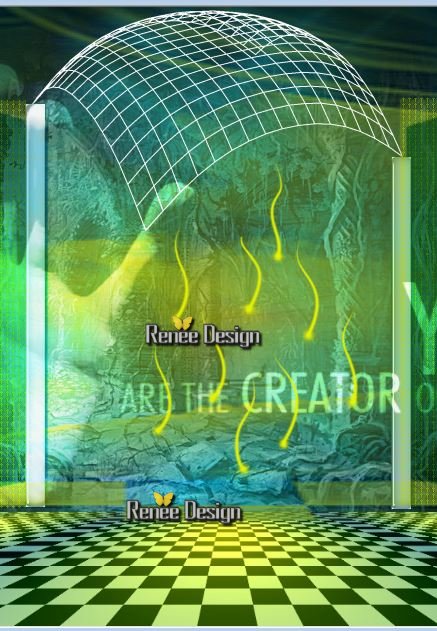
70. Layers- Merge-Merge All (flatten)
71. Image
Resize 995 pixels Width
Save as JPG
I hope you enjoyed this lesson
Renée
This lesson was written by Renée 04/04/2015
Edited and Update
on 2015
*
Any resemblance with an existing lesson is merely a coincidence *
* Don't forget to thank the people who work for us and with us.
I named the tubeurs - Testers and the translators.
Thanks Renée.
*
| 

 Translations


 When you see this logo the filter is imported in Unlimited

 All rights reserved