|
Let's start the lesson.
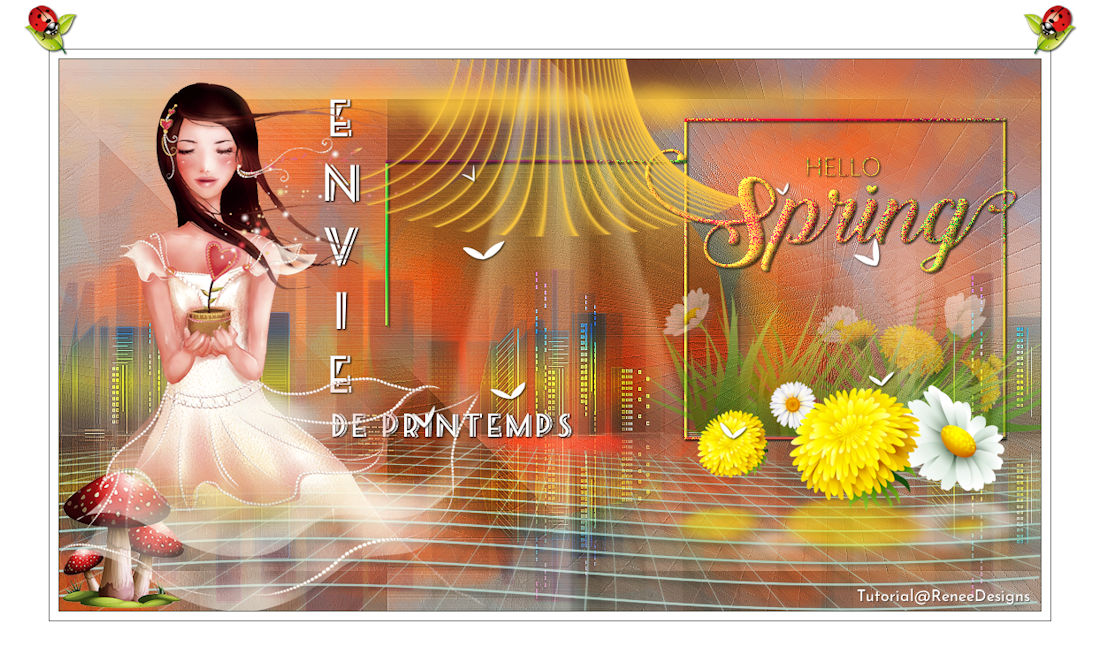
Une envie de
Printemps/A desire for Spring
- Preparation
- Material Properties: Set your foreground color to color #9eb2eb= 1 – Set your background color to color #dbb08e = 2

1. Open the Background Image
‘’Envie-printemps-fond’’- Promote Background Layer =Raster 1
2. Effects –Plugins-
Unlimited 2.0 - [AFS IMPORT] – TURBINEM using the default settings
- Repeat this filter [AFS IMPORT] – TURBINEM with the default settings
3. Effects – Edge Effects – Enhance
4. Adjust- Sharpness-Sharpen More
5. Effects –Plugins-
Unlimited - ICNET-Filters - Buttons & Frames-Mirrored
Frame: 37
6. Layers- Duplicate
7. Effects –Plugins-
Unlimited 2.0 - Sapphire Filters 09
-SapphirePlugin_0899..with these settings: 69/194/34
8. Layers-Properties-Set the Blend Mode to " Hard Light "
9. Adjust- Sharpness-Sharpen More
10. Layers-New- Raster Layer
11.
Selections –load/save selection –load selection from disc and select my selection: ‘’envie
de Printemps -1’’
12. Activate Flood Fill Tool  – Opacity
50%
–Fill the selection with the FG-Color =1
Selections- Deselect All
13. Layers-Properties-Lower the Opacity to 87%
14. Layers-New- Raster Layer
15. Activate Flood Fill Tool
– Opacity
30%-
Fill the selection with the BG-Color =2
16. Layers-New- Raster Layer
17.
Selections –load/save selection –load selection from disc and select my selection: ‘’envie
de Printemps -2’’
18.
Open the Tube‘’ Envie-printemps-Image1’’ - Edit - Copy- Activate your work -Edit - Paste into Selection
Selections- Deselect All
19. Adjust- Blur- Gaussian Blur:Radius 18
20. Layers-Properties-Set the Blend Mode to " Hard Light "
- Material Properties: Set your foreground color to color #fd8f7f= 4 – Set your background color to color #d9d5ad = 3
-Set your Foregroundcolor to Foreground-Background "Linear" gradient configured like this
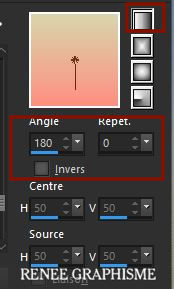
21. Layers-New- Raster Layer
22. Selections –load/save selection –load selection from disc and select my selection: ‘’envie
de Printemps -3’’
23. Activate Flood Fill Tool
– Opacity
100% – Fill the selection with the gradient
Selections- Deselect All
24. Layers- Duplicate
25. Layers- Merge Merge Down
26. Effects – Plugins – Alien Skin EyeCandy 5 Impact – Perspective
Shadow use the settings below
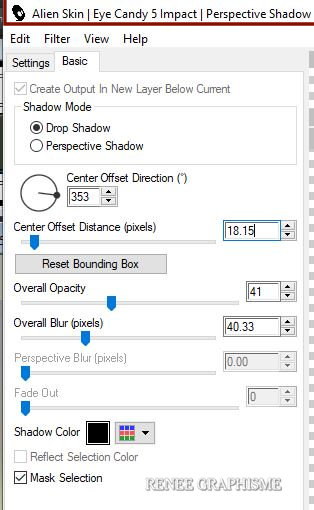
27. Layers-New- Raster Layer
28.Activate Paint Brush – Shape Round with these settings

Color Palette- Set your Foreground color to color #394336=5
Draw lines with the foreground color for a similar result
( If you don't achieve the desired effect there is an image in the folder "effect-brush-line 28" paste it as a new layer
29. Adjust- Blur- Gaussian Blur:Radius 7
30. Layers-Properties-Lower the Opacity to 44
31. Open the tube ‘’
Envie-printemps-Image2’’ -Edit - Copy- Activate your work -Edit - Paste as a new layer
- Close the two bottom layers in the layer palette
– Activate an open layer
32. Layers- Merge- Merge Visible
33. Layers-Properties-Change the Blend Mode to "Color"
- Open the two bottom layers in the layer palette
-
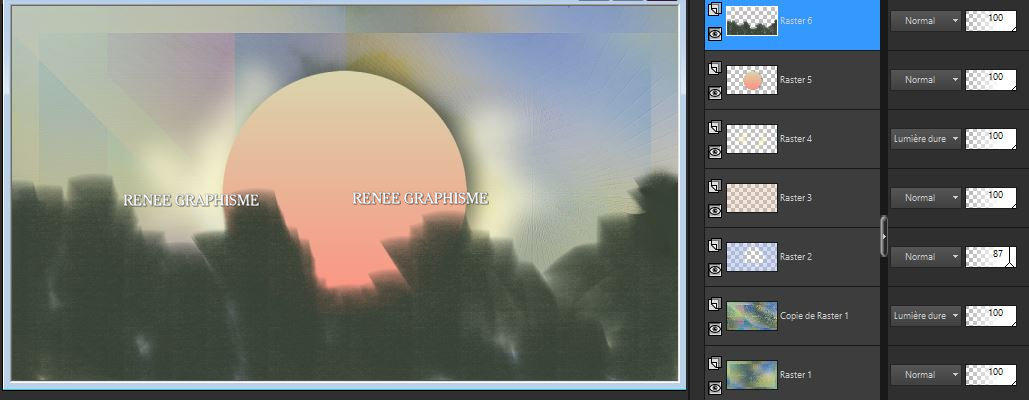
Your work and Layer Palette look like this now-You should have this result

- Activate the top of the layer palette
34. Layers- New Raster Layer
35. Selections –load/save selection –load selection from disc and select my selection: ‘’envie
de Printemps -4’’
36. Color-Palette-Set the Foreground color to color #fecb3e=6
Activate Flood Fill Tool  –
Fill the selection with the Foreground color =6 –
Fill the selection with the Foreground color =6
37. Adjust- Blur- Gaussian Blur: Radius 10
Selections- Deselect All
38.
Layers- New Raster Layer
39. Selections –load/save selection –load selection from disc and select my selection:
‘’envie de
Printemps -5’’
- Color palette - Change the foreground to gradient and select
‘’SirenaMala-Xmax8’’- Prepare a linear gradient configured like this
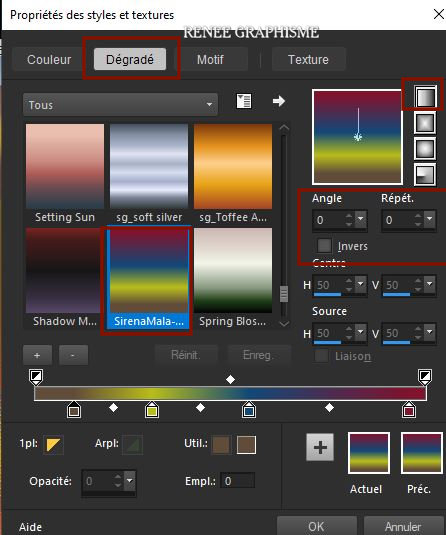
40. Activate Flood Fill Tool
 -
Fill the selection with the gradient ‘’SirenaMala-Xmax8’’- 2 Clicks -
Fill the selection with the gradient ‘’SirenaMala-Xmax8’’- 2 Clicks
41. Effects – Edge Effects - Enhance More
Selections- Deselect All
42.
Layers- New Raster Layer
43. Selections –load/save selection –load selection from disc and select my selection: ‘’envie
de Printemps -6’’
44. Color-Palette-Set the Foreground color to color #b9d1c9=8
Activate Flood Fill Tool
 -
Fill the selection with the Foreground color = 8 -
Fill the selection with the Foreground color = 8
Selections- Deselect All
45. Effects – Plugins – Alien Skin EyeCandy 5 Impact – Perspective
Shadow use the settings below
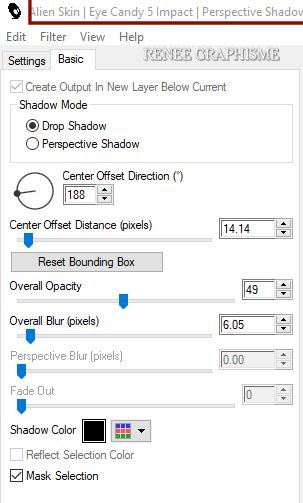
46. Layers- New Raster Layer
47. Selections –load/save selection –load selection from disc and select my selection: ‘’envie
de Printemps -7’’
48. Color-Palette-Set the Foreground color to color # 394336=5
Activate Flood Fill Tool  - Fill the selection with the Foreground color = 5
49. Layers-Properties-Change the Blend Mode to " Overlay"
Selections- Deselect All
50. Open the tube ‘’
Envie-printemps-Image3.’’ -Edit - Copy- Activate your work -Edit - Paste as a new layer
51. Objects – Align
– Bottom
52. Layers-New- Raster Layer
53. Selections –load/save selection –load selection from disc and select my selection: ‘’envie
de Printemps -8’’
- Material Properties- Change the foreground to gradient and select again ‘’SirenaMala-Xmax8’’ -Set the Background color to color #fecb3e=6
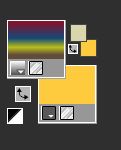
54. Activate Flood Fill Tool
 -
fill the selection with the gradient -
fill the selection with the gradient
55. Effects -Plugins-
Unlimited 2.0 - Sapphire Filters 09 -
SapphirePlugin_0879..use the settings below.
( The effects of this filter depend on the colors used and the filter size. You can decide for yourself what is best for your creation
)
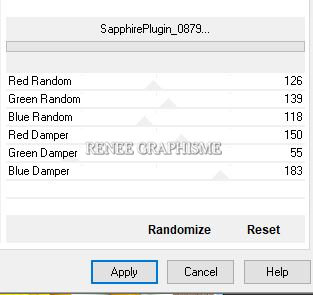
56. Effects– 3D-Effects – Inner Bevel use the settings below
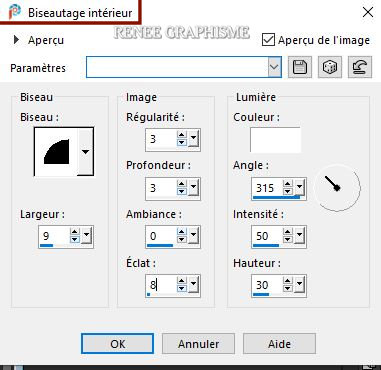
Selections- Deselect All
57. Effects – 3 D Effects– Drop Shadow with these settings: 1/1/80/3 Color Black
58. Open the tube ‘’
Envie-printemps-Image 5’’ - Edit - Copy- Activate your work -Edit - Paste as a new layer
- Place it at the right place
59. Effects – Plugins– Alien Skin EyeCandy 5 Impact – Perpective
Shadow-Tab Settings/User settings select my file –Preset : ‘’Envie
de Printemps –Shadow’’
60. Open the tube ‘’
Envie-printemps-Image4’’ -Edit - Copy- Activate your work -Edit - Paste as a new layer
61. Pick Tool: (K) on your keyboard -Enter these parameters
 389 /
- 10
-Press ( M ) to close the Pick Tool
62. Layers-New- Raster Layer
63. Selections –load/save selection –load selection from disc and select my selection: ‘’envie
de Printemps -9’’
64. Activate Flood Fill Tool
 -
Fill the selection with the Background color = 6 -
Fill the selection with the Background color = 6
Selections- Deselect All
65. Open the tube ‘’
Envie-de-printemps-Tubes -tutos.pspimage’’
I have several tube layers to use –
Paste as a new layer and place the decorative elements individually according to your taste .Resize to your liking
66. Image - Add borders-Symmetric checked: 1 pixel Color #fecb3e=6
Image - Add borders-Symmetric checked: 10 Pixels Color #ffffff
Image - Add borders-Symmetric checked: 1 Pixel Color #fecb3e=6
Image - Add borders-Symmetric checked: 55 Pixels Color #ffffff
67. Open the tube ‘’Envie-printemps-Image-deco cadre.’’ -Edit - Copy- Activate your work -Edit - Paste as a new layer Place it at the right place
68. Layers- Merge - Merge All
69. Image – Resize - 1100 Pixels Width
Save as JPG
I hope you enjoyed this lesson
Renée
This lesson was written by Renée
22-12-2020
Edited and Update
2020
*
Any resemblance with an existing lesson is a coincidence
* Do not forget to thank the people who work with us and for us
I have appointed the tubeurs and translators
Thanks
*
|
 Translations


