|
Let's start the lesson.

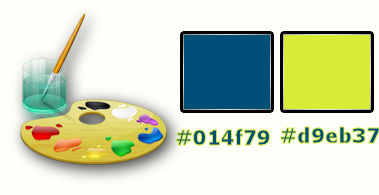
-Color-Palette : Set your foreground color to color #d9eb37 -Set your background color to color #014f79
1.
Open the background image ‘’Un petit coin de
parapluie_Fond’’/- Window - Duplicate (or shift+D) - Close the original and proceed on the copy -Promote Background Layer =Raster
1
2.
Effects-Image Effects-Seamless Tiling using the default settings
3.
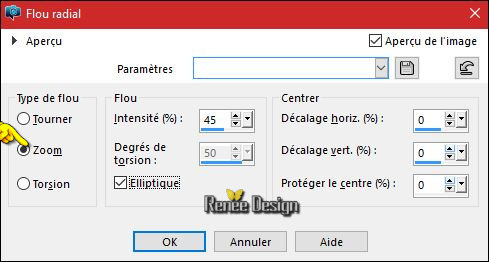
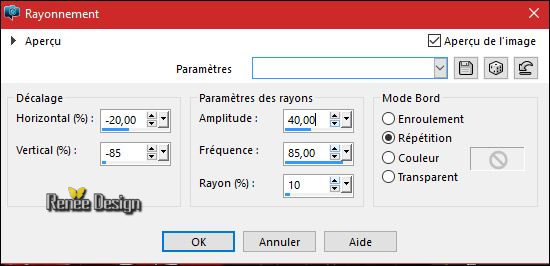
Adjust- Blur- Radial Blur use settings below
4.
Effects- Plugins – Simple - Pizza slice
Mirror
5.
Effects- Edge Effects- Enhance
6.
Layers- Duplicate
7.
Effects- Plugins– Simple Pizza slice
Mirror
8.
Effects- Plugins – Cybia – Alpha
works
9.
Effects –Plugins- Unlimited - &<Bkg
Kaleidoscope>-Tiler

10.
Activate Selection Tool -Custom Selection (S) -Rectangle with these settings
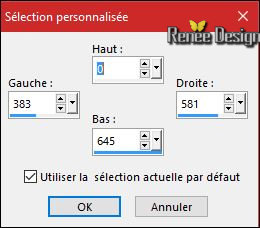
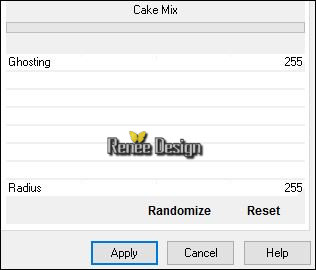
11. Effects
–Plugins- Unlimited - &<Bkg Kaleidoscope>- Cake Mix (The filter effect is dependent on the currently selected background color )
12.
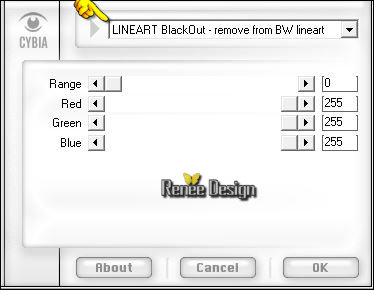
Effects –Plugins – Transparency - Eliminate
White
13.
Selections- Promote Selection to Layer
Selections- Deselect All
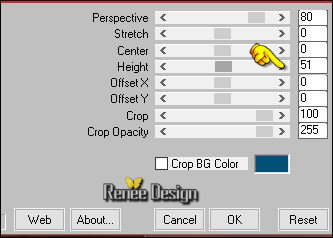
14. Effects- Plugins – Mura’s Meister –Perspective
Tilling use settings below
- In the Layer- Palette: activate the layer underneath (Copy of Raster 1)
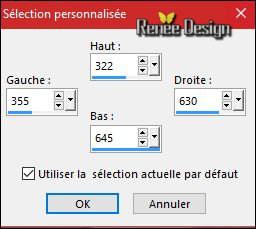
15.
Activate Selection Tool -Custom Selection (S) -Rectangle with these settings
Hit the Delete Key of your Keyboard
Selections- Deselect All
16. To replace the top of the layers palette
17.Layers- New Raster Layer
18.
Selections –load/save selection –load selection from disc and choose my selection:‘’coin_parapluie_1’’
19. Activate Flood Fill Tool and fill the selection with the foreground color
Selections- Deselect All
20. Image -
Mirror
21. Activate the tube ‘’ Coin_parapluie_image_1.png’’
- Edit/ Copy-Edit - Paste as new layer on your working image
22. Effects-Image Effects-Offset with these settings: H = 299 and V = 31
23. Activate the tube ‘’ Coin_parapluie_image_2’’- Edit/ Copy-Edit - Paste as new layer on your working image and move to the right
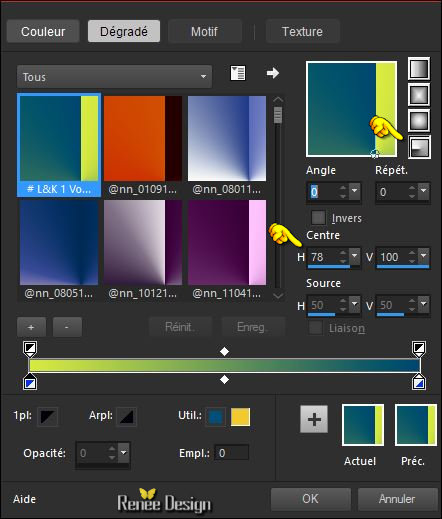
- Properties Foreground: Set your foreground to gradient 'Foreground-Background' - Radial gradient- as configured
24. Layers- New Raster Layer
25. Pot of Paint: Change the opacity of the color at 45% –Activate Flood Fill Tool and fill the layer with the gradient
26. Effects- Plugins – Simple – 4 Way Average
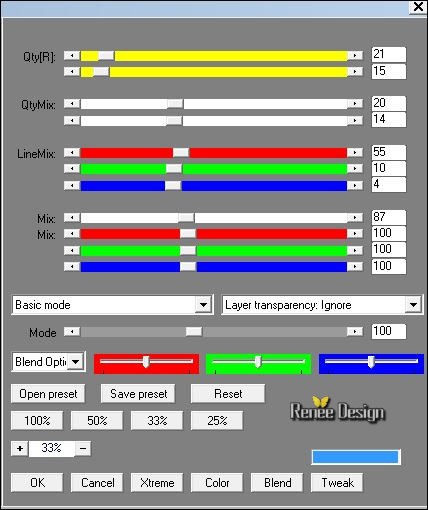
27. Effects
–Plugins- Unlimited - RCS Filter Pak 1.0- RCS Un-Earthly
Vortex

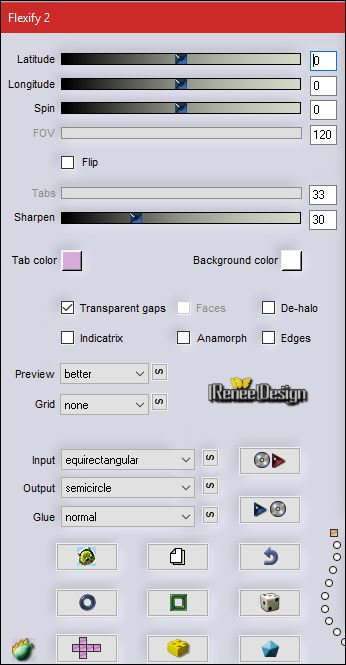
28. Effects- Plugins –Flaming Pear – Flexify 2- use settings below -Input-equirectangular-Output-semicircle
29. Image -
Flip
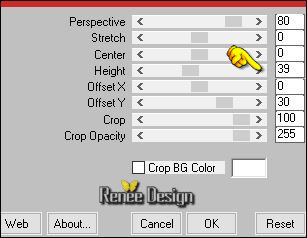
30. Effects- Plugins – Mura’s Meister – Perpspective
Tilling use settings below
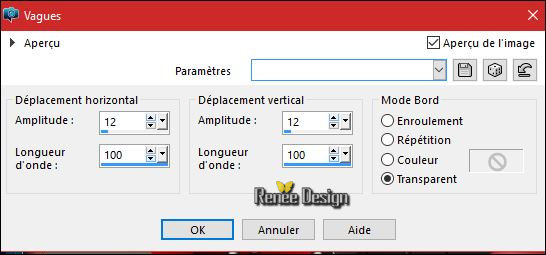
31. Effects- Distortion Effects- Wave use settings below
32.
Effects –Plugins – AP[Lines]-lines
–Lines
33.Layers- New Raster Layer
-Open the Brush image « coin_parapluie_pinceau_1758 »
- File- Export Custom Brush- Give it a name ’
coin_parapluie_pinceau_1758 ‘’
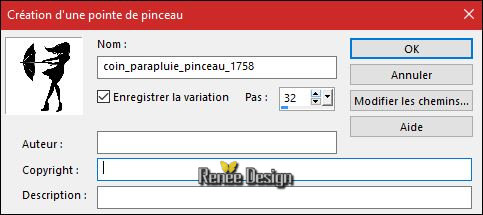
34. Activate Brush Tool and select my file in the list : ’ coin_parapluie_pinceau_1758 ‘’ use settings below

-
Stamp your brush at the right place by using your foreground color
35.Layers- New Raster Layer
36.
Stamp your brush at the right place by using your background color
-
Move Tool / place your brush as shown in the example below
37. Layers- Merge- Merge Down
38.
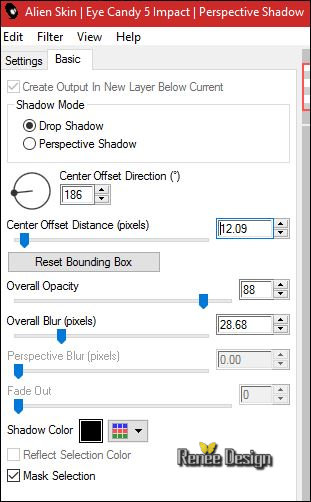
Effects- Plugins – EyeCandy 5 Impact – perspective
Shadow-tab Settings/User settings choose my Preset ‘’
coin_parapluie_shadow”
39. Activate the tube ‘’ Coin_parapluie_image_3.png’’
- Edit/ Copy-Edit - Paste as new layer on your working image
- Move Tool / place your tube on Top of your image
40. Activate the tube ‘’ Coin_parapluie_image_4.png’’
- Edit/ Copy-Edit - Paste as new layer on your working image
- Move Tool / place your tube on the bottom left side of your image
41. Activate the tube ‘’ Coin_parapluie_image_5.png’’
- Edit/ Copy-Edit - Paste as new layer on your working image
- Move Tool / place your tube on the top left corner of your image
- Layers- Duplicate
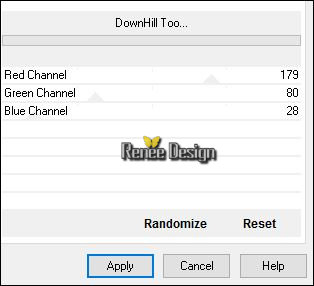
42. Effects
–Plugins-Unlimited - Lumières, Ambiances- DownHill Too...
43. Effects- Distortion Effects- Spiky Halo use settings below
- Move slightly to the left to get this
44. Open the Image ‘’Image_effet_pluie’’ at the choice- I used
« pluie_4’’
(Make this rain effect with - Effects- Plugins Ulead Effects –Particle
You can use the filter but change the background color in a light color
- use settings below
And then apply the filter Transparency –Eliminate black (If necessary it must remain transparent)
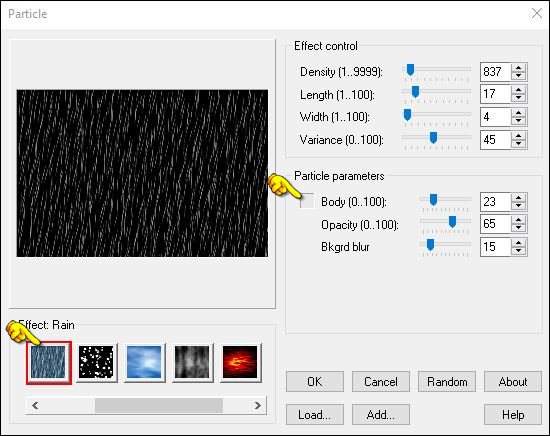
I used photoshop and in my opinion it is more realistic )
-Edit/ Copy-Edit - Paste as new layer on your working image
Too much rain ? Feel free to Remove
45. Activate the tube ‘’ Les-Sims-3-simette-parapluie-‘’
- Image
Resize to 75 %
- Edit/ Copy-Edit - Paste as new layer on your working image
-
Move Tool / place your tube on the bottom left side of your image
46.
Activate the Tool Lighten/Darken brush (push L on your keyboard) use settings below »
- Size
120
- Click and drag the mouse pointer over the area you want to lighten.(2x)
Your result will depend on these moves as shown in the example below
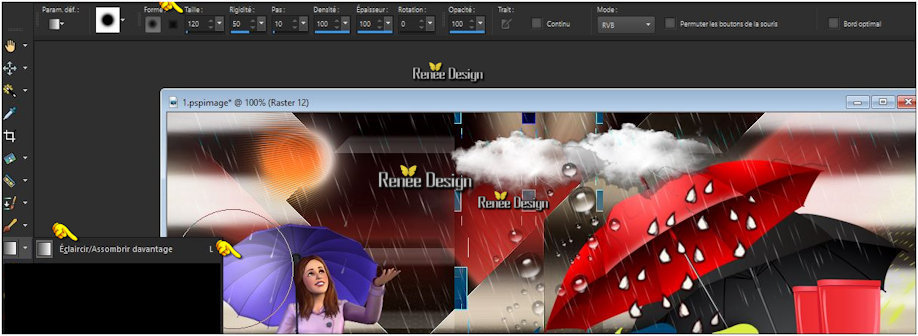
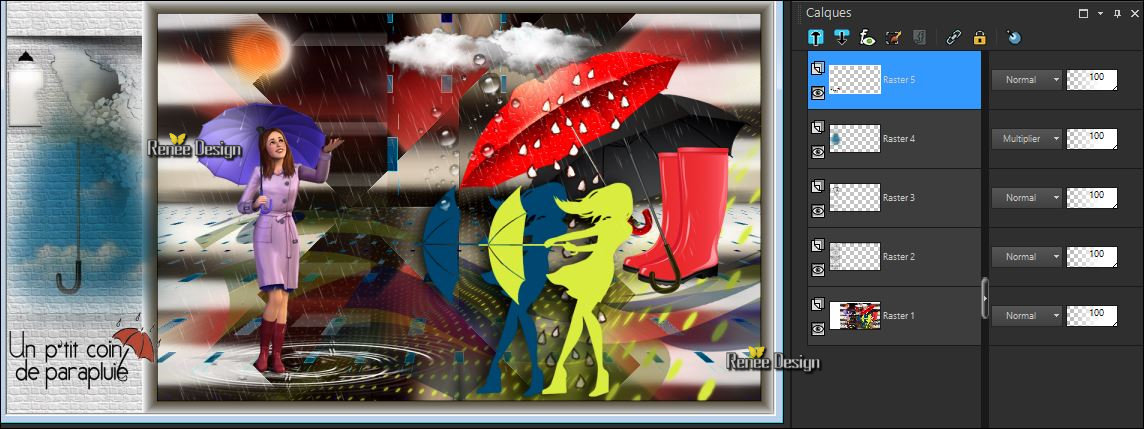
-Layer palette – Make Raster 4 active (Red Umbrella )
47. Effects-Illumination Effects- Lights-and select my file –« Preset_Lights_coin_parapluie » (››C:\Users\YourName\Documents\My PSP-files\extract in to the folder preset)

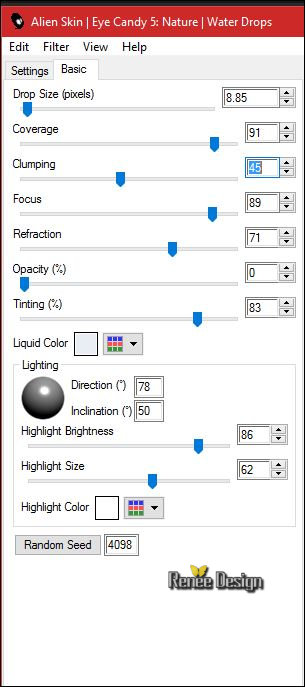
48. Effects
–Plugins - Eye Candy 5- Nature- Water Drops use settings below -Color #e8eef3 and #ffffff
- To replace the top of the layers palette
49. Layers- Merge -Merge Visible
50. Image - Add borders-Symmetric checked: 1 pixel black - Promote Background Layer =Raster 1
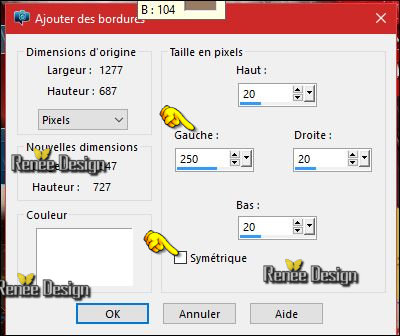
51. Image - Add Borders NO SYMMETRIC with these settings- White
52. Activate the Magic Wand and select the white border
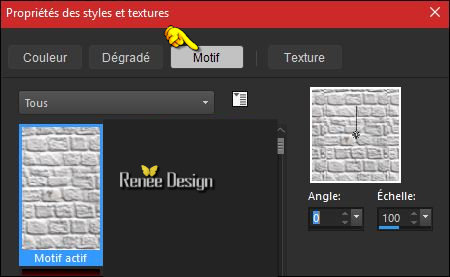
- Open your pattern « renee_motif_coin_parapluie »in your Psp
- Properties Foreground: Set the foreground to pattern as configured
53. Layers- New Raster Layer
54. Pot of Paint: Change the opacity of the color at 100 % - Activate Flood Fill Tool and fill the selection with the pattern
SELECTIONS INVERT
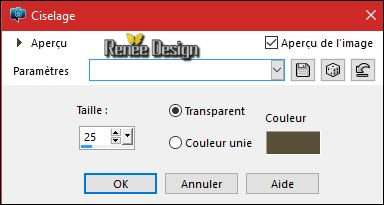
55. Effects- 3 D Effects- Chisel use settings below -Color # 5a4d3c
Selections- Deselect All
- Open the tube ‘’ Renee_elements_decos_coin de parapluie’’
56. Activate the layers: Raster 1- Raster 2 and Raster 3 Edit/ Copy-Edit - Paste as new layer on your working image
-Move Tool / place your tube on the left side of your image
- In the Layer-Palette- Make Raster 4 active Double click on this Layer and set the Blend Mode to "Multiply "
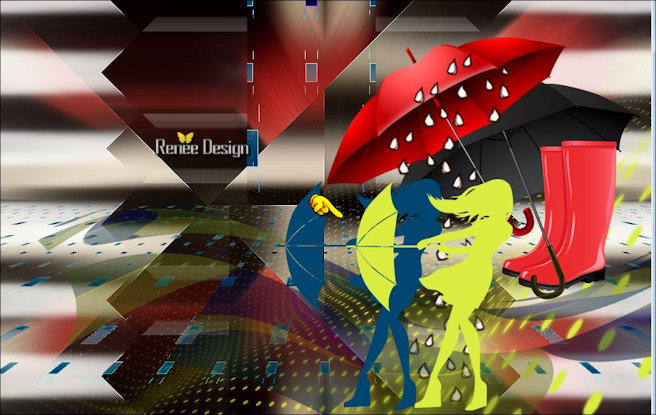
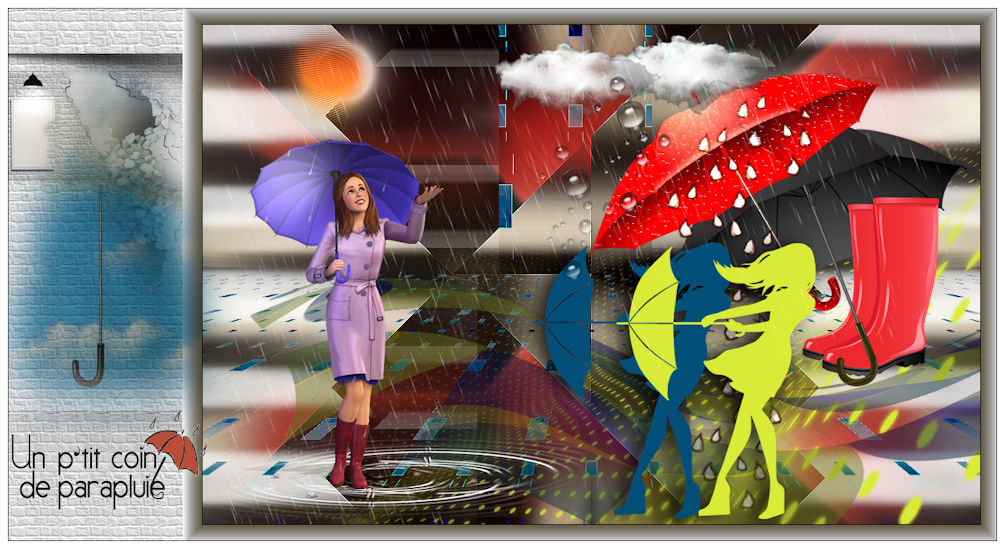
- Your work and Layer Palette look like this now-You should have this result
57. Image - Add borders-Symmetric checked: 1 pixel black
58. Image - Add borders-Symmetric checked: 10 pixels #ffffff
59. Image
Resize to 1005 Pixels width.
Save as JPEG
I hope you enjoyed this lesson
Renée
This lesson was written by Renée 30/06/2016
Edited and Update
2016
*
Any resemblance with an existing lesson is a coincidence
*
Do not forget to thank the people who work with us and for us I have appointed the tubeurs and translators
Thanks Renée
*
| 
 Translations


 * When you see this logo the filter is imported in Unlimited

 All rights reserved