|
Let's start the lesson .
1. Open the fond ''Fond_surprise_hiver''/ Promote Background Layer
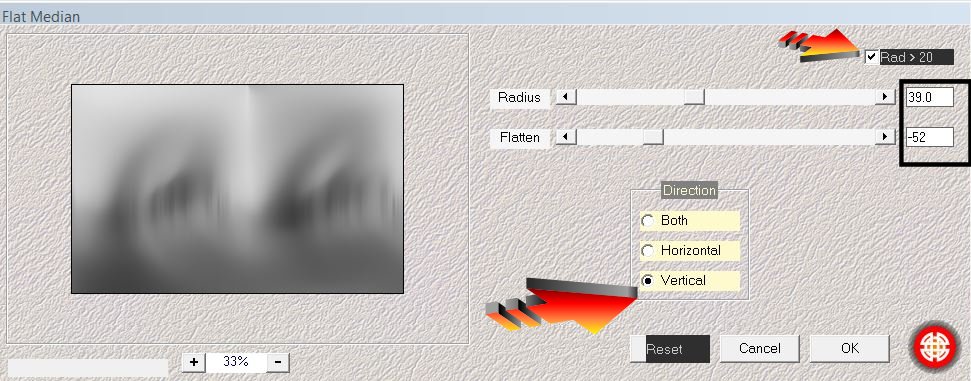
2. Effects-Plugins -
Medhi2- Flat Median
(
Radius 39 and Flatten - 52 )
3.
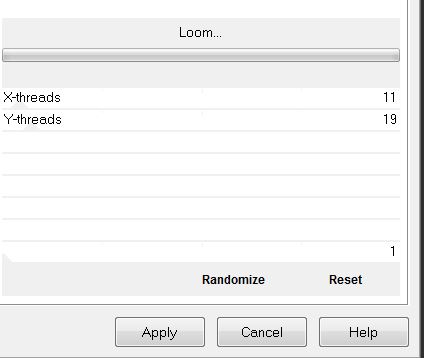
Effects-Plugins - Unlimited- Factory- Gallery M
- Loom
4. Layers-New Raster layer
5. Selections-Select All./Open the tube ''paysage-hiver-321.jpg" Edit-Copy-Edit paste into selection
6.Selections - Deselect all
7. Layers Mask-Load/Save Mask-Load Mask From Disk and choose: ''masque20/20''
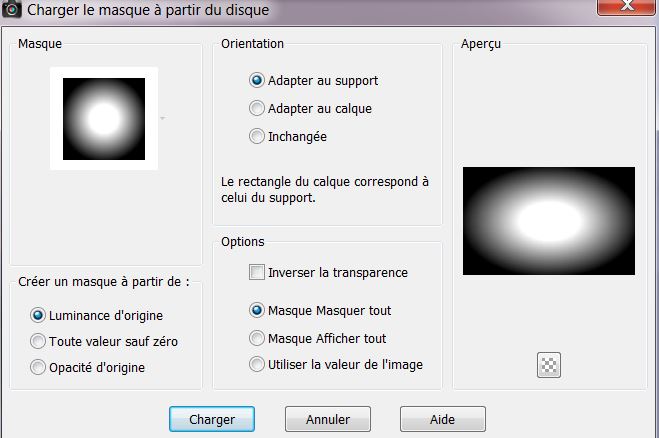
Duplicate Maske Layer 2 times
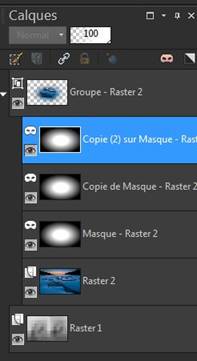
8. Layers- Merge -Merge Group
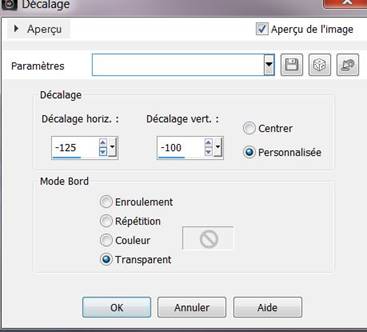
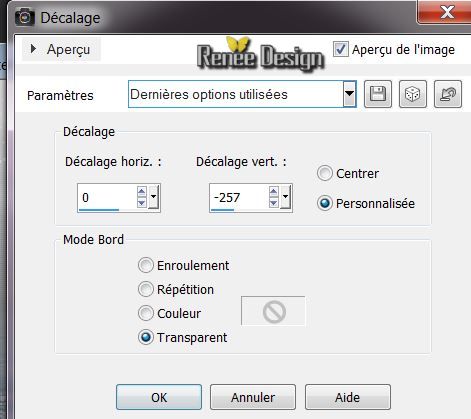
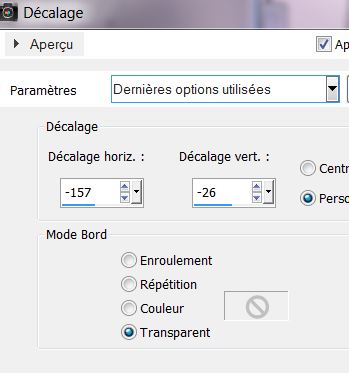
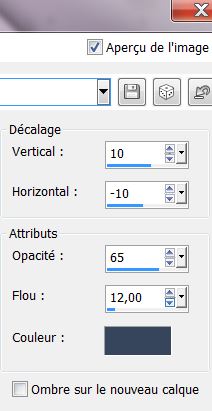
9. Effects - Images Effects - Offset with these settings
10. Effects-Edge Effects-Enhance More/ Layer Palette: change your Blend Mode to "Soft Light" .Reduce the opacity of this layer to: 73%
11. Layers-New Raster layer
12. Selections - load/save selection- load selection from disk and select my file:
''surprise_hiver1"
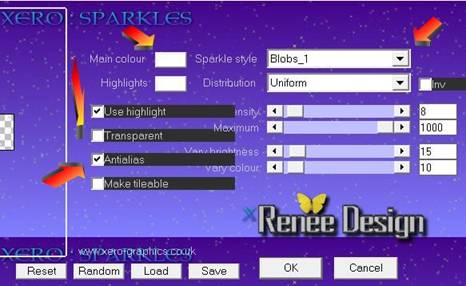
13. Effects-Plugins_Xero_Sparkles Forderground color and Background color white like this
14. Selections - Deselect all
15. Open the tube ''surprise -_hver_nuage''
Edit-copy- Edit - paste as new layer on your working area and move
16. Layers-New raster layer
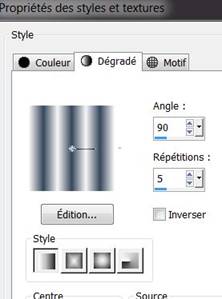
17. Material Properties: Foreground color to color: #f7f7f7 Background color to color: #37475b
18. Prepare a Sunburst Gradient as configured like this. /Repeats
=0 invert not checked
19. Flood Fill Tool: Fill the layer with the gradient
20. Effects-Plugins -
Deformation - Bulging Edge Twirl / 255
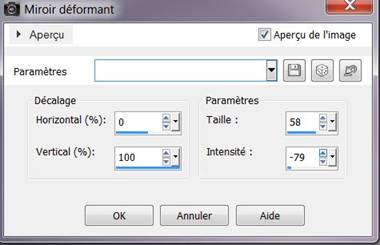
21. Effects - Distortion Effects-Warp with these settings
Layer Palette: change your Blend Mode to "Soft Light"
22. Layers-New raster layer
/Flood Fill Tool: Fill the layer with the gradient
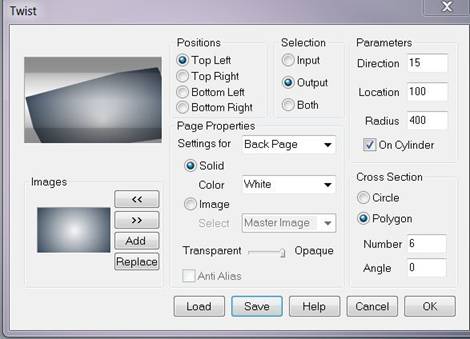
23. Effects-Plugins Vizros - Twirl - Clic sur Load
select my file Preset 'Vizros_effect''( preset is into the zipfile )
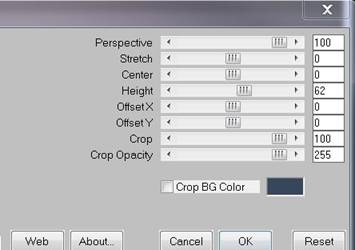
24. Effects-Plugins Mura's Meister - Perspective
Tilling
Effects - Images Effects - Offset with these settings
25. Effects - Distortion Effects-Twirl / 106
26. Effects-Plugins EyeCandy 5
Impact -Glass -tab Settings/User Settings and choose my preset ''surprise_hiver_glass'
27. Layers-Arrange-Move Down
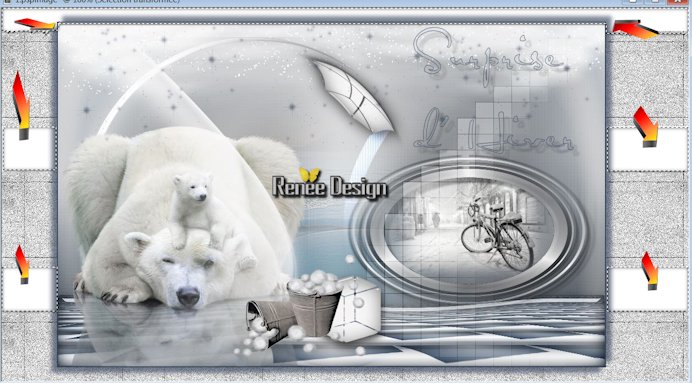
This is the result
28. Activate the top of the layer-Palette
29. Layers-New raster layer
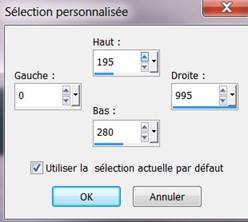
30. Activate Selection Tool - Custom selection with these settings:
31. Material of the Foreground:Change your gradient in a linear gradient as configured like this.
Flood Fill Tool: fill the selection with the gradient
32. Effects-Plugins - Simple - Horizontal grain
33. Selections - Deselect all
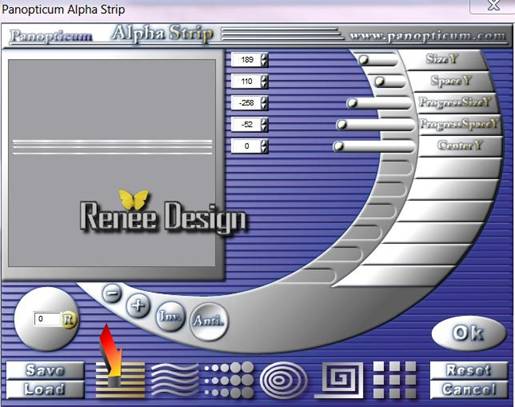
34. Effects-Plugins - Panopticum Alpha Strip
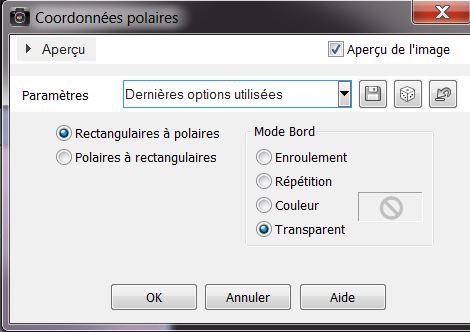
35 .Effects-Distortion Effects-Polar Coordinates with these settings
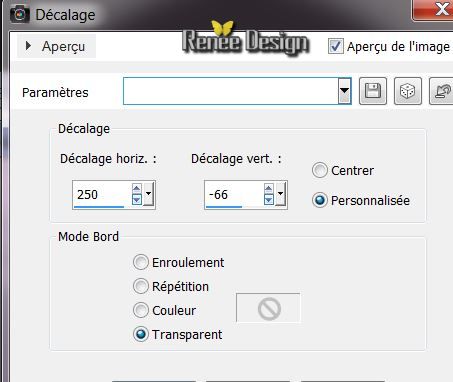
36. Effects - Images Effects - Offset with these settings
37.Effects-3D Effects-Drop Shadow/Default
38. With the Magic Wand click in the center of the ellipse
39. Layers- New Raster layer / Open the
''paysage-hiver-310'' Edit-Copy-Edit paste into selection
40. Effects-3D Effects-Drop Shadow/Default / Selections-Deselect All
Layers-Arrange-Move Down
41. Open the tube ''OursRENEE'' (close the raster layer 3 and 2 of this tube and merge the other layers visible)
Image Resize: 70%/ Edit-copy- Edit - paste as new layer on your working area and move
42 . Layers-New raster layer
-Selections - load/save selection - load selection from disk and choose: ''surprise_hiver_3'' / Flood Fill Tool: fill the selection with the foreground color -click 2 times into selection / Selections-Deselect All
43 Layers-Duplicate-Image Mirror
- Effects-Plugins - L and K's - Jouri 17/24/128
44. Layer Palette: change your Blend Mode to "Soft Light"
45. Layers-New raster layer /Brush Tool and select my file: ''etoiles_hiver" File- Export Custom Brush (Give it a name)

Activate brush tool and select my file in the list : Brush''etoiles_hiver" .Stamp with your background color - Layer Palette-reduce the Opacity to: 61%
46. Layers-New Raster layer/ Brush Tool and select my file: "@ block_1'' File- Export Custom Brush (Give it a name)
-
Activate brush tool and select my file in the list : Brush "@ block_1'' Stamp with the foreground color
47. Effects-Plugins - EyeCandy 5 -Impact
Glass / tab Settings/User Settings and choose my preset ''surprise_hiver_2''
48. Open the tube ''suprise_hiver_image_arc
'' Edit-copy- Edit - paste as new layer on your working area
49.Effects - Images Effects - Offset with these settings
50. Layers-Arrange-Move Down under raster 8 (under the tube oursrenee)
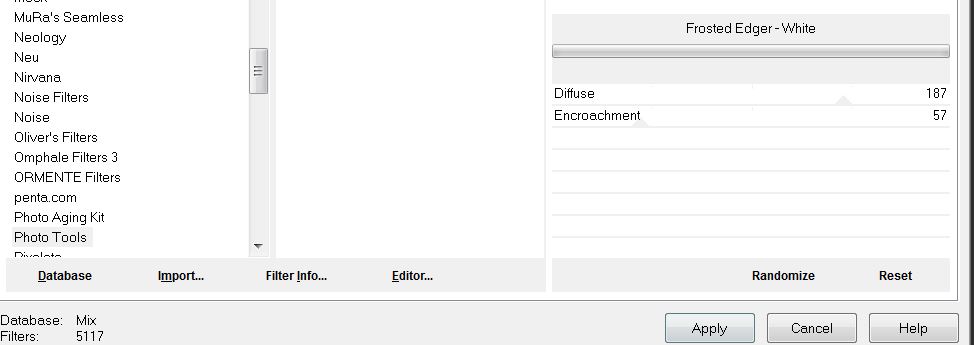
51. Effects-Plugins Photo Tools
- Frosted Edger-White
52. Aktivate the top of the Layers palette
53. Layers-New raster layer
53.Selections - load/save selection- load selection from disk and select my file: ''suprise_hiver_2''
Flood Fill Tool: fill the selection with the BG-Color
54. Effects-Plugins Photo effex / Scanlines

Layer Palette: change Blend mode to "Dodge"
55. Open the tube ''sceau_neige
'' and tube ''boulles_neige '' Edit-copy- Edit - paste as new layer on your working area and move
56. Brush Tool and select my file: Surprise -hiver
-texte / File- Export Custom Brush (Give it a name)
Activate Brush Tool and select my file in the list: Brush" Surprise -hiver
-texte " Layers-New Raster layer .Stamp with the background color
57. Effects-3D Effects-Drop Shadow/Default
58. Layers-Merge-Merge Visible
59. Edit-Copy
60. Image - Add Borders - Symmetric 2
pixels with the background color
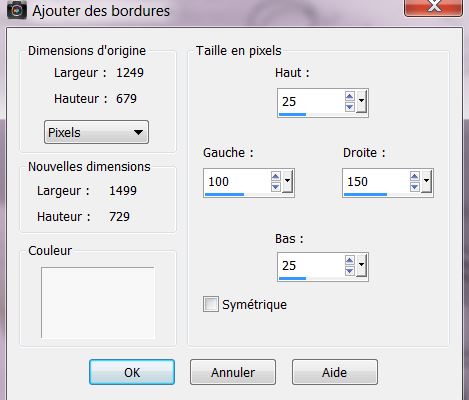
61. Image - Add Borders - Asymmetric with the foreground color white
62. With the magic wand -select the border white border
63 . Open the pattern ''motif_surprise_hiver ''
in psp/ with these settings
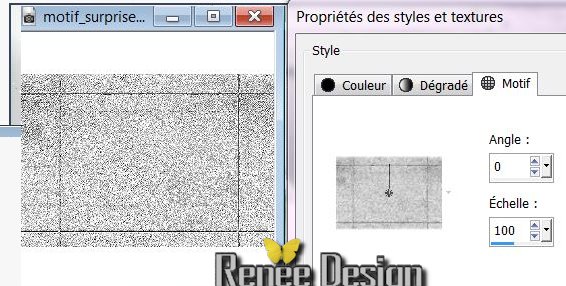
64. Flood Fill Tool: fill the selection with the foreground pattern
65. Selections-Invert
66. Effects-3D Effects-Drop Shadow/BG-Color
Repeat -Effects-3D Effects-Drop Shadow negative -10 and 10
67. Selections-Invert/ Promote selection to layer
68. Selections - Deselect all
69. Freehand Selection-Tool- Point to point (S) / Select the white parts like this
70. Effects-Plugins- Eyecandy 5 Impact - Glass tab Settings/User Settings and choose my preset ''surprise_hiver_glass'
71. Open the tube -''surprise_hiver_stalactite''
/Edit-copy- Edit - paste as new layer on your working area and move-
Layer Palette: change the Blend mode to"Luminance"
72. Open the tube ''surprise_hiver_corde''
Edit-copy- Edit - paste as new layer on your working area and move
73. Image - Add Borders - Symmetric 10 pixels BG-Color
74.
Image Resize: 1025 pixels Width
I hope you enjoyed this lesson
Renée
This lesson was written by Renée the 27/10/2013
Created
the 8/11/2013
Any resemblance with an existing lesson is merely a coincidence
*
* Don't forget to thank the people who work for us and with us.
I named the tubeurs - Testers and the translators.
Thanks Renée.
|
 Translations