|
Let's start the lesson.
Summer time 2019

1. Open the BG-Image
‘’Fond_summer_time 2019’’ – Window - Duplicate (or shift+D) - Close the original and proceed on the copy -Promote Background Layer =Raster 1
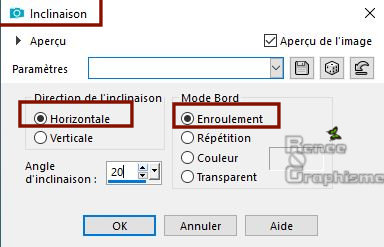
2. Effects –Geometric Effects-Skew with these settings
3. Effects –Plugins- Unlimited 2.0
– Simple – Pizza Slice Mirror
4. Effects –Plugins- Unlimited 2.0
– Simple – Blintz
5. Effects –Plugins- Unlimited 2.0
– Simple –Top Left Mirror
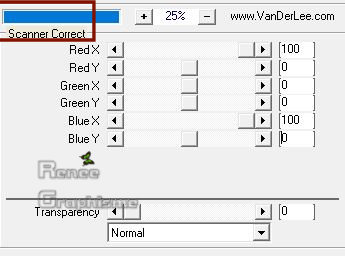
6. Effects - Plugins– Vanderlee – Unplugged X – Scanner Correct use the settings below
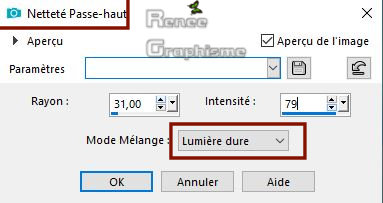
7. Adjust- Sharpness-High Pass Sharpen use the settings below
8. Activate the tube ‘’
Summer_time-Image 1.pspimage’’
- Edit - Copy- Activate your work -Edit - Paste as a new layer(do not move)
9. Effects – 3 D Effects- Drop Shadow with these settings: 1-1-100-10. Color #2173a9=3
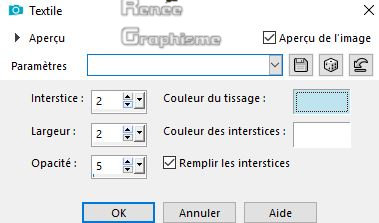
10. Effects– Texture Effects – Weave -with these settings
Color #bee4ef=4 and #ffffff=6
11. Layers-Properties-Set the Blend Mode to " Overlay "
12. Adjust- Sharpness-High Pass Sharpen with the same settings
13. Image-
Resize to 65 % - resize all layers not checked
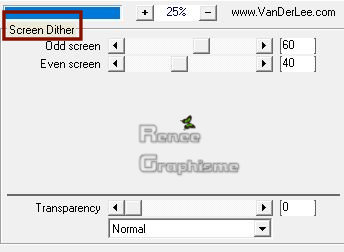
14. Effects- Plugins– Vanderlee – Unplugged X – Screen Dither
15. Effects –Plugins- Unlimited2.0
- Sapphire Filters 05- SapphirePlugin_0411..with these settings:
53/54/48/9
16. Effects –Plugins- Unlimited 2.0
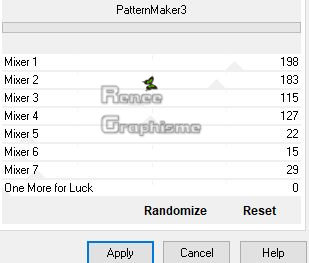
- Horizonaus Pattern Generators - PatternMaker3
17. Layers- Duplicate
18. Effects-Plugins- Unlimited 2.0
- It@lian Editors Effect – Effeto Fantasma : 17/29
19. Layers- Merge- Merge Down
20. Objects - Align -Top
21. Layers- New Raster Layer
22. Selections –load/save selection –load selection from disc and select my selection: ‘’Renee_Summer_1’’
-
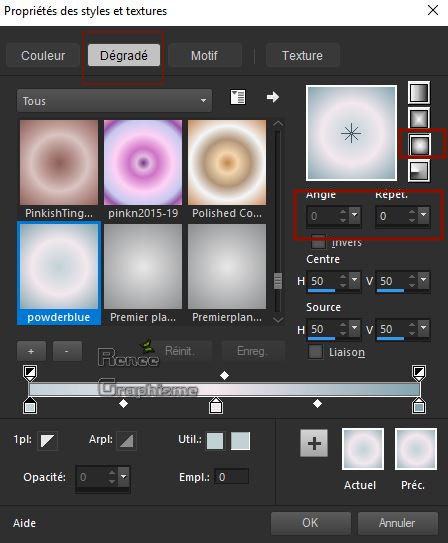
Color Palette: Set your Foregroundcolor to gradient and select :’’ dégradé powderblue’’ - Prepare a sunburst gradient configured like this.
23. Activate Flood Fill Tool
 –
Flood Fill the selection with the gradient –
Flood Fill the selection with the gradient
Selections- Select None
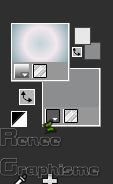
- Color Palette: Set your Foreground color to color #e8e8e8=1 – Set your Background color to color #8b8d8e=2
– Set your Foregroundcolor to foreground-background linear gradient configured like this.
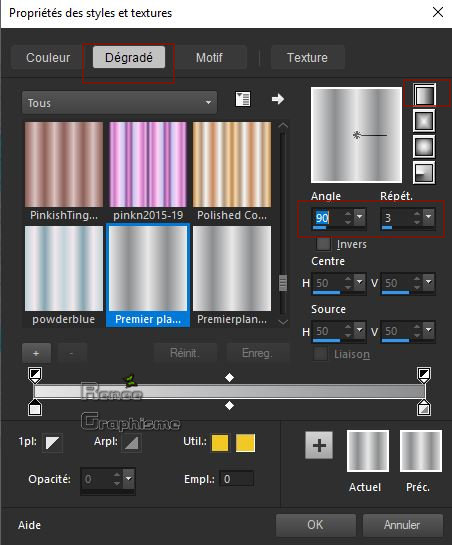
24. Layers- New Raster Layer
25.Selections –load/save selection –load selection from disc and select my selection: ‘’Renee_Summer_2’’
25a. Attention!!! Selections- Modify-Expand with 2 pixels
26. Activate Flood Fill Tool
 -
Flood Fill the selection with the gradient -
Flood Fill the selection with the gradient
Selections- Select None
27. Layers- Arrange- Move Down
28. Layers- New Raster Layer
29.Selections –load/save selection –load selection from disc and select my selection: ‘’Renee_Summer_3’’
30. Activate Flood Fill Tool
 –
Flood Fill the selection with the background color #8b8d8e=2 –
Flood Fill the selection with the background color #8b8d8e=2
Selections- Select None
31. Effects – Plugins – Graphic plus – Cross shadow use the settings below
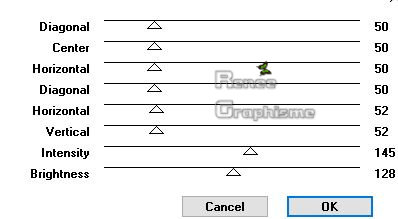
- Color Palette: Set your Foreground color to color #444444= 5
32. Layers- New Raster Layer
33.Selections –load/save selection –load selection from disc and select my selection: ‘’Renee_Summer_4’’
34. Activate Flood Fill Tool
 –
Flood Fill the selection with the foreground color =5 –
Flood Fill the selection with the foreground color =5
Selections- Select None
35.
Layers-Properties-Reduce the Opacity of this layer to 73%
-Color Palette: Set your Foregroundcolor to gradient and select ‘’powderblue.PspGradient’’
-Prepare a sunburst gradient configured like this.

36. Layers- New Raster Layer
37.Selections –load/save selection –load selection from disc and select my selection: ‘’Renee_Summer_5’’
38. Activate Flood Fill Tool
 –
Flood Fill the selection with the sunburst gradient –
Flood Fill the selection with the sunburst gradient
Selections- Select None
39. Effects – Plugins– Graphic plus Cross shadow use the settings below
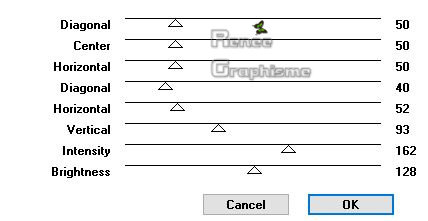
40. Layers- New Raster Layer
41.Selections –load/save selection –load selection from disc and select my selection: ‘’Renee_Summer_6’’
42. Color Palette: Set your Foreground color to color #ffffff
Activate Flood Fill Tool  – Flood Fill the selection with the foreground color #ffffff (zoom if necessary) – Flood Fill the selection with the foreground color #ffffff (zoom if necessary)
Selections- Select None
43. Effects - Edge Effects –Enhance
44. Layers- New Raster Layer
45.Selections –load/save selection –load selection from disc and select my selection: ‘’Renee_Summer_7’’
46. Activate the tube
‘’Summer_time-Image 2.pspimage’’
- Edit - Copy- Activate your work -Edit - Paste into Selection
Selections- Select None
47. Layers-Properties-Set the Blend Mode to " Overlay "
48. Activate the tube ‘’
Summer_time-Image 3.pspimage’’
- Edit - Copy- Activate your work -Edit - Paste as a new layer
49. Effects- Image Effects- Offset with these settings: H = - 197 and V = - 265
50. Layers-Properties-Set the Blend Mode to " Overlay "
- To replace the top of the layer-palette
51. Activate the tube ‘’
Summer_time-Image 4.pspimage’’
- Edit - Copy- Activate your work -Edit - Paste as a new layer
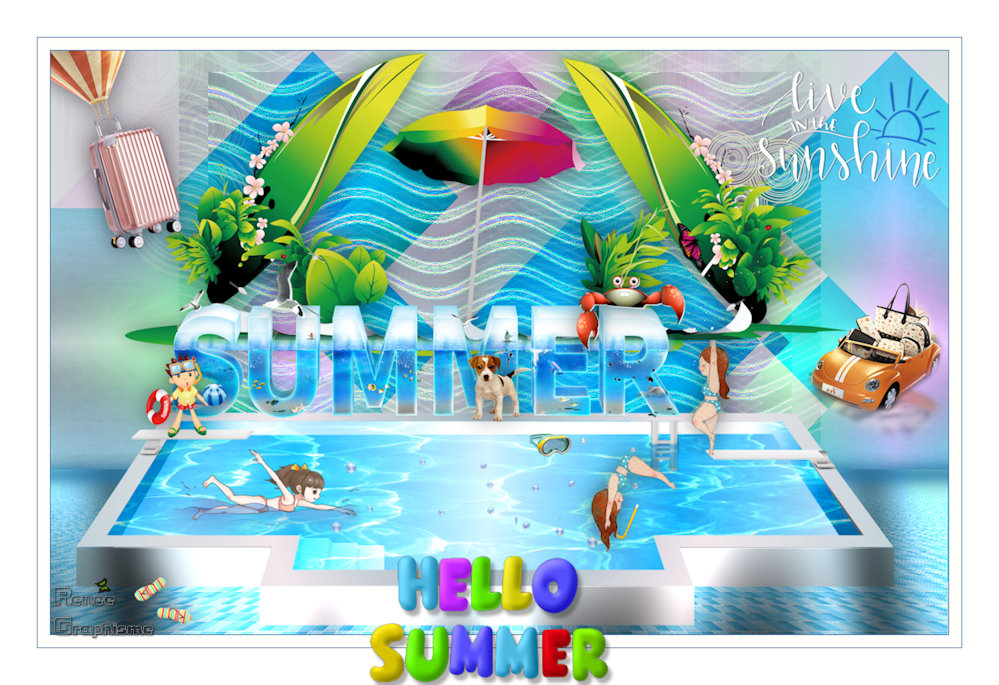
- Activate your Move Tool (M) move it in the right place (see finished image)
- Activate the bottom of the Layer-Palette = ( Raster 1)
52. Activate the tube ‘’
Summer_time-Image 6.pspimage’’
- Edit - Copy- Activate your work -Edit - Paste as a new layer
53. Objects - Align -Bottom
54. Layers- New Raster Layer
55. Activate Selection Tool -Custom Selection (S) -Rectangle with these settings
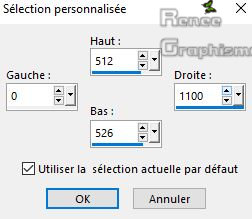
56. Color Palette: Set your Foreground color to color #2173a9=3
Activate Flood Fill Tool  -
Flood Fill the selection with the foreground color = 3 -
Flood Fill the selection with the foreground color = 3
Selections- Select None
57. Effects –3D- Effects – Drop Shadow with these settings : 0/ 15 /50 /32 color black
58. Adjust- Blur- Gaussian Blur: Radius 8
- To replace the top of the layer-palette
59. Activate the tube ‘’
Summer_time-Image 5.pspimage’’
- Edit - Copy- Activate your work -Edit - Paste as a new layer
- Do not move, it is in the right place
Open the tube
‘’Renee_TUBES_Summer time’’ and place the decorative elements individually according to your taste
60.Activate the tube"Renee texte psp image "Edit - Copy- Activate your work -Edit - Paste as a new layer
Activate your Move Tool (M) move the tube to the top right side (see finished image)
- Layers- Merge- Merge All
61. Image - Add borders-Symmetric checked 1pixel Color #2173a9= 3
62. Image - Add borders-Symmetric checked 15 pixels Color #ffffff
63. Image - Add borders-Symmetric checked 1 pixel Color #2173a9= 3
64. Image - Add borders-Symmetric checked 45 pixels Color #ffffff
65. Activate the tube ‘Titre_Hello_Summer’’ Edit - Copy- Activate your work -Edit - Paste as a new layer
Activate your Move Tool (M) move the tube at the bottom of your work
66. Image -Resize to 999 Pixels width.
Save as JPG file and you're done!
I hope you enjoyed this lesson
Renée
This lesson was written by Renée 30 May 2019
Edited and Update
2019
*
Any resemblance with an existing lesson is a coincidence
* Do not forget to thank the people who work with us and for us I have appointed the tubeurs and translators
Thanks
*
|

 Translations


