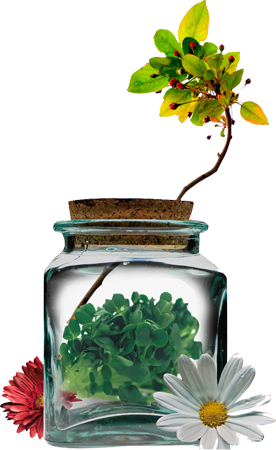
|
Let's start the lesson.
Still
color


-
Preparation - Material Properties:
Set your foreground color to #3f41a8 (2) - Set your background color to # 28f4bb (1)
1.
File: Open a new transparent Image : 1005 x 685 Pixels
2.
Activate Flood Fill Tool – Flood Fill the layer with the foreground color
3.
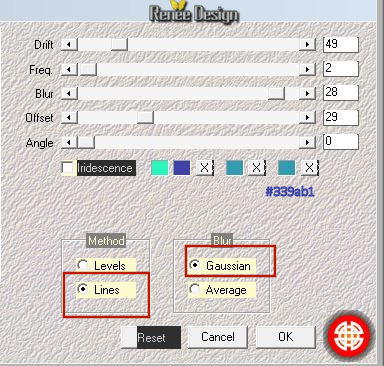
Effects –Plugins - Medhi – Vibration 1.1
-
Material Properties: Set your foreground color to #ffffff (3) - Set your background color to #3f41a8 (2)
-
Material of the foreground: Prepare a radial gradient configured like this.
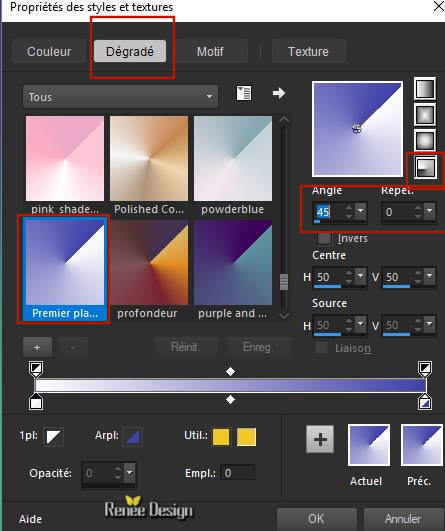
4. Layers- New Raster Layer
5.
Activate Flood Fill Tool -Flood Fill the layer with the gradient
6.
Effects –Plugins- Unlimited 2.0 - RCS Filter Pak 1.0 - RCS
Digi-Lens - Window ShadesII
7.
Effects –Plugins- Unlimited 2.0 - RCS Filter Pak 1.- RCS
Digi-Lens - Window Shades: 28
8.
Layers-Properties-Set the Blend Mode to "Overlay "
9. Effects- Reflection Effects- Rotating Mirror use the settings below
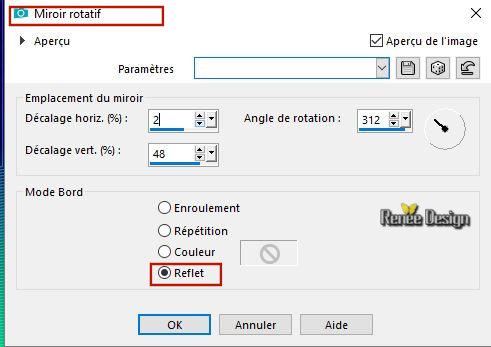
10.
Effects –Plugins – Graphic plus – Cross Shadow
using the default settings
11.
Activate the tube ‘’
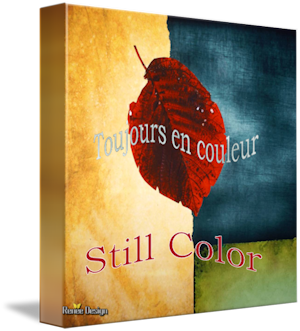
Still-color_Image 1’’
-
Edit - Copy- Activate your work -Edit - Paste as a new layer
12.
Objects-Align- Bottom
-
Layers-Properties-Set the Blend Mode to " Luminance-Legacy "-Lower the Opacity of the layer to 85%
-
Properties foreground: - Change foreground material into #ffffff
13.
Layers- New Raster Layer
14.Selections –load/save selection –load selection from disc and select my selection: ‘’ Still_color_1’’
15.Activate Flood Fill Tool – Flood Fill the selection with the foreground color #ffffff
Selections- Deselect all
16.
Effects –Plugins -Unlimited 2.0– Toadies – Weaver: 118/48/222
17.
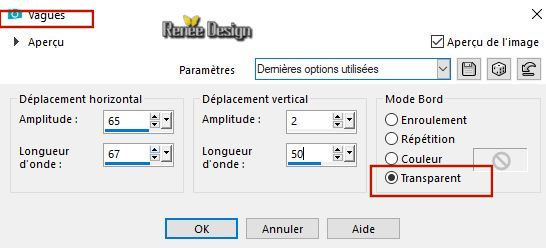
Effects – Distortion Effects- Wave use the settings below
18.
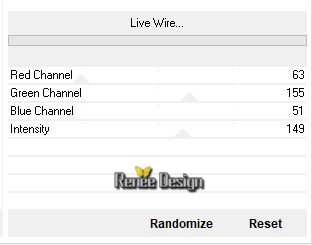
Effects- Plugins-Unlimited 2.0 - Andrew's Filters 3 -
Live Wire...
19.
Effects- 3 D Effects- Drop Shadow with these settings : 0/0/55/20 Color black
20.
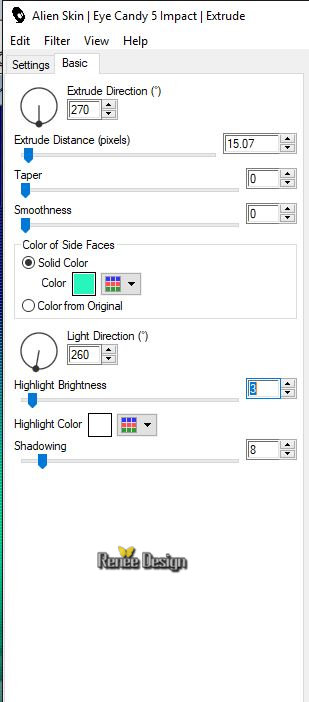
Effects –Plugins– Eye Candy 5 Impact –
Extrude use the settings below
21.
Activate Freehand Selection Tool- Point to point -Draw a selection as shown below
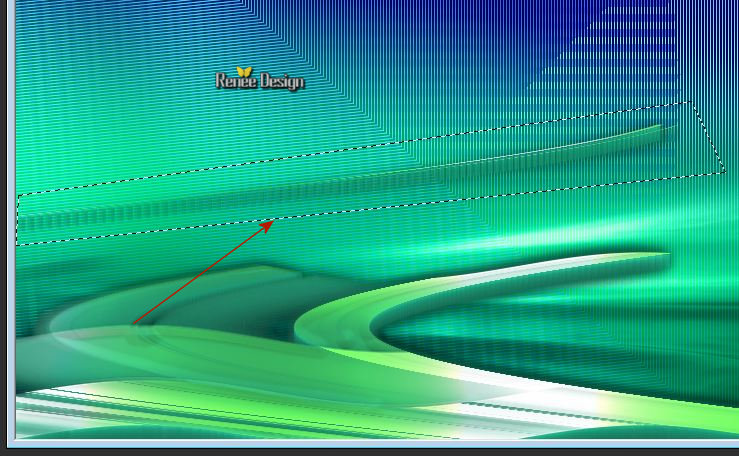
DELETE

Selections- Deselect all
-
Put the Image aside for now, we will need it later..
-
Material Properties: Foreground color to #ffffff - Set your background color to # 3192e9 (5)
We make our own shape
23.
File: Open a new transparent Image : 720 x 555
24.Selections –load/save selection –load selection from disc and select my selection: ‘’ Still
color_forme_1.PspSelection’’
25.
Activate Flood Fill Tool – Flood Fill the selection with the background color (5)
-
Lower the Opacity of the layer to 50%
Selections- Deselect all
26.
Layers- New Raster Layer
27.Selections –load/save selection –load selection from disc and select my selection: ‘’ Still
color_forme_2.PspSelection’’
28.
Activate the tube ‘’
Still-color_Image2.png’’
-
Edit - Copy- Activate your work -Edit - Paste into Selection
Keep Selected
29.
Layers- New Raster Layer
30.
Activate the tube ‘’
Still-color_Image3.png’’
-
Edit - Copy- Activate your work -Edit - Paste into Selection
Selections- Deselect all
31.
Layers-Properties-Set the Blend Mode to " Overlay "
32.
Activate the tube ‘’
Still-color_Image 4.png’’
-
Edit - Copy- Activate your work -Edit - Paste as a new layer
33.
Effects- Image Effects- Offset with these settings: H = - 53 and V = - 161
34.
Layers-Properties-Set the Blend Mode to " Overlay "
35.
Layers- New Raster Layer
36.Selections –load/save selection –load selection from disc and select my selection: ‘’ Still
color_forme_3.PspSelection’’
37.
Activate Flood Fill Tool – Flood Fill the selection with #ffffff
Selections- Deselect all
38.
Adjust- Blur- Gaussian Blur -Radius 15
39.
Layers- Duplicate – Lower the Opacity of the layer to 50 %
40.
Layers- New Raster Layer
41.Selections –load/save selection –load selection from disc and select my selection: ‘’ Still
color_forme_4.PspSelection’’
42. Properties foreground:FG-Color #215eb8 (6)
Activate Flood Fill Tool – Flood Fill the selection with the foreground color (6)
-
Lower the Opacity of the layer to 50%
Selections- Deselect all
43.
Layers- New Raster Layer
44.Selections –load/save selection –load selection from disc and select my selection: ‘’ Still
color_forme_5.PspSelection’’
45.
Activate Flood Fill Tool – Flood Fill the selection with the foreground color (6)
Selections- Deselect all
46.Layers- New Raster Layer
47.Selections –load/save selection –load selection from disc and select my selection: ‘’ Still
color_forme_6.PspSelection’’
48.Properties foreground:FG-Color #b0ffff (7)
Activate Flood Fill Tool – Flood Fill the selection with the foreground color (7)
Selections- Deselect all
-
Lower the Opacity of the layer to 55%
49.
Layers- New Raster Layer
50.Selections –load/save selection –load selection from disc and select my selection: ‘’ Still
color_forme_7.PspSelection’’
51.Properties foreground:FG-Color #ffffff
Activate Flood Fill Tool – Flood Fill the selection with the foreground color #ffffff ( 2
clicks)
-
Layers-Properties-Set the Blend Mode to " Overlay "
Selections- Deselect all
52.
Activate thetube ‘’
Still-color_Image 5.png’’
-
Edit - Copy- Activate your work -Edit - Paste as a new layer
( Do not move, it is in the right place )
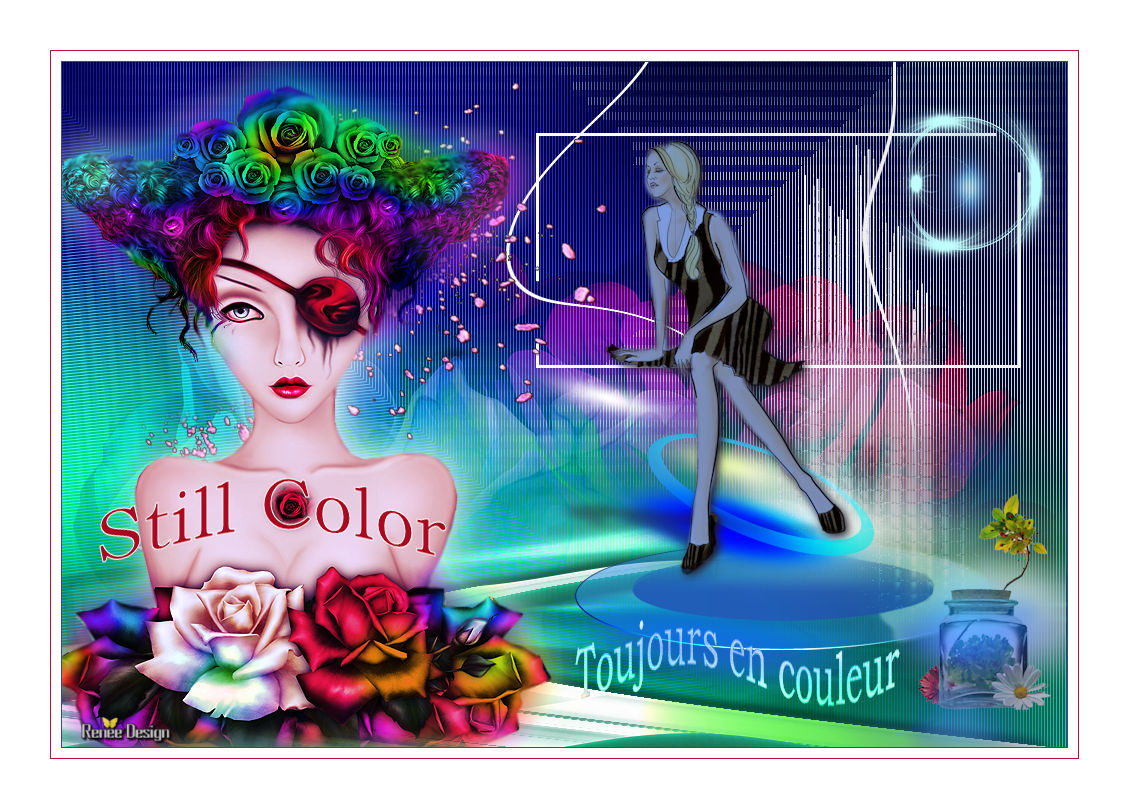
- Your work and Layer Palette look like this now-You should have this result
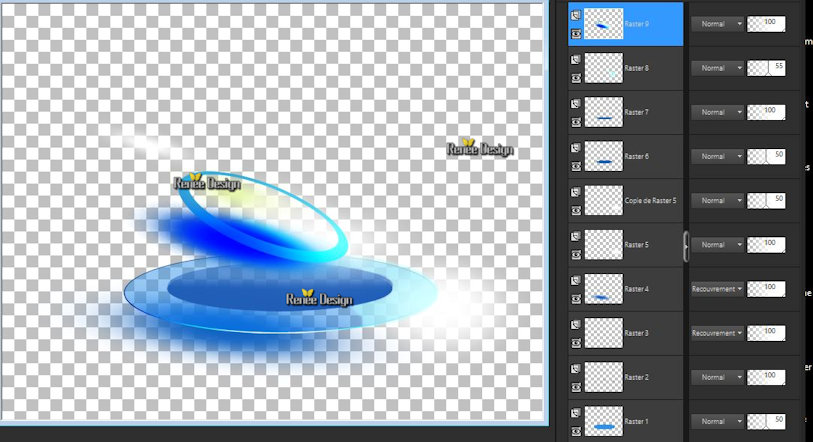
53.
Layers- Merge- Merge Visible
Save as png if you want to keep it as a tube
54.
Edit-Copy !!
Now activate the Image from step 21
Activate your work – Edit-Paste as a new Layer
55.
Effects- Image Effects- Offset with these settings: H = 226 and V = -135
-
In the Layer Palette- Make Raster 2 active
56.
Layers- Duplicate
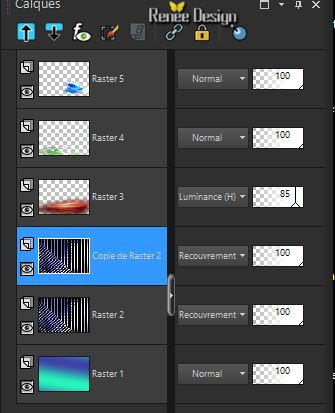
57.
Effects –Plugins – DC Layer – Side Merge
196/201/54
58.
Layers-Properties-Set the Blend Mode to " Hard Light "– Lower the Opacity of the layer to 61
%
Stay on this Layer
59.
Activate the tube ‘’ Still-color_Image 8’’
-
Edit - Copy- Activate your work -Edit - Paste as a new layer
60.
Layers-Properties-Set the Blend Mode to " Hard Light "– Lower the Opacity of the layer to 67%
61.
Activate the tube ‘’ Still-color_Image 6’’
-
Edit - Copy- Activate your work -Edit - Paste as a new layer
62.
Effects- Image Effects- Offset with these settings: H = - 33 and V = - 229
63.
Layers-Properties-Set the Blend Mode to " Luminance "– Lower the Opacity of the layer to 57%
-
To replace the top of the layer-palette
64.
Layers- New Raster Layer
65.Selections –load/save selection –load selection from disc and select my selection: ‘’Still color_2’’
66. Activate Flood Fill Tool – Flood Fill the selection with the foreground color #ffffff
Selections- Deselect all
67.
Layers- Duplicate
68.
Image - Free Rotate 90° to Right
69.
Effects - Plugins – L &K’s- Sanne : 50/0
70.
Effects- Distortion Effects Twirl -Degrees -125
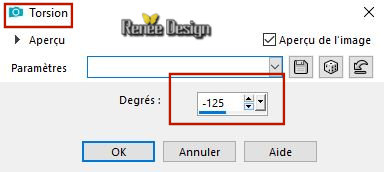
71.
Layers- New Raster Layer
72.Selections –load/save selection –load selection from disc and select my selection: ‘’Still color_3’’
73.Activate Flood Fill Tool – Flood Fill the selection with the foreground color #ffffff
Selections- Deselect all
74.
Selection Tool (S) Rectangle –Feather 20
(Draw a selection as shown in the example below)
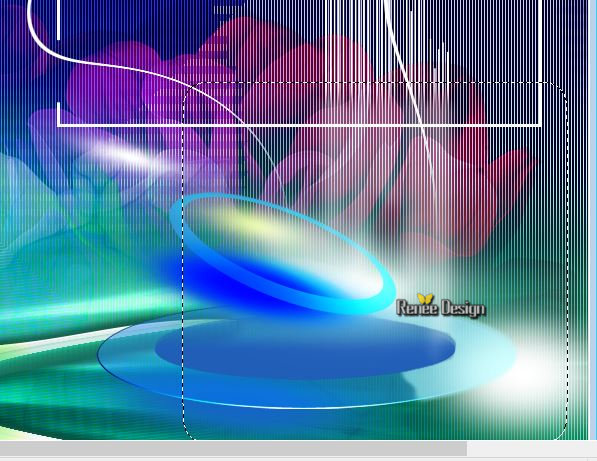
75.
Adjust- Blur-Gaussian Blur-Radius 6
Selections- Deselect all
76.Layers- Duplicate
77.
Effects- Texture-Effects -Mosaic-Glass use the settings below
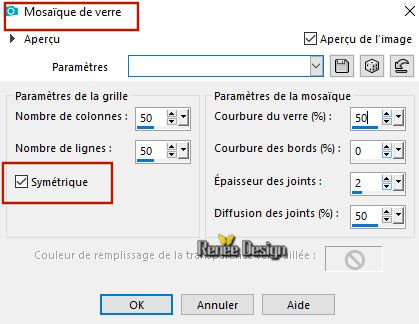
78.
Layers-Properties-Set the Blend Mode to "Overlay " – Lower the Opacity of the layer to 79%
79.
Activate the tube ‘’
Renee_TUBES_ Still_color’’
-
Edit - Copy- Activate your work -Edit - Paste as a new layer
-
Activate your Move Tool (M) place it in the right place
80.
Activate the tube ‘’
Still-color_Image 7.png’’
-
Edit - Copy- Activate your work -Edit - Paste as a new layer
-
Activate your Move Tool (M) place it in the right place
81.
Activate the tube ‘’
Still_color_fleur.png’’
82.
Effects- Image Effects- Offset with these settings: H = 396 and V = 27
83.
Layers- New Raster Layer
84.Selections –load/save selection –load selection from disc and select my selection: ‘’Still color_4’’
85.Activate Flood Fill Tool – Flood Fill the selection with the foreground color #ffffff
Selections- Deselect all
86.
Effects –Plugins- Unlimited 2.0 - Andrew's Filters 29 - A Head In
The Clouds..using the default settings
87.
Activate the tube ‘’
Renee_TUBES_Still_color_2.pspimage’’
-
Edit - Copy- Activate your work -Edit - Paste as a new layer
-
Move Tool / place your tube on the bottom left corner of your image
88.
Layers- Duplicate
89.
Layers-Arrange- Move Down
90.
Adjust- Blur- Gaussian Blur-Radius 22
91.
Effects-Distortion Effects-Wind/Winddirection From right -Wind Strength 30
92.
Image - Add borders-Symmetric checked 1 pixel Color #3f41a8 (2)
93.
Image - Add borders-Symmetric checked 10 Pixels Color #ffffff
94.
Image - Add borders-Symmetric checked 1 Pixel Color #be0e35 (4)
95.
Image - Add borders-Symmetric checked 50 Pixels Color #ffffff
96.
Activate the 2 "titre"-Edit - Copy- Activate your work -Edit - Paste as a new layer
The Text with the red color to the left side
-The Text with the light color to the bottom right side
- Blend-Mode "Luminance -Legacy "
97.
Layers- Merge -Merge All (flatten)
Save as JPG
I hope you enjoyed this lesson
Renée
This lesson was written by Renée 2 - 09 2018
Edited and Update
2018
*
Any resemblance with an existing lesson is a coincidence
* Do not forget to thank the people who work with us and for us I have appointed the tubeurs and translators
Thanks
|
 Translations


