|
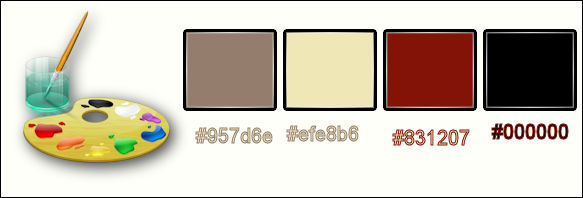
Let's start the lesson.Open the colorcard
-
-Material Properties-Set your foreground to #957d6e
-Set your background color to #efe8b6
1.
Open a transparent image of 1025 x 665 pixels
2.
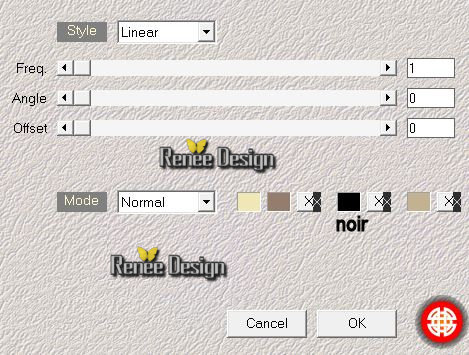
Effects-Plugins – Medhi- Wavy lab
1.1 with these settings
3. Layers -Duplicate
4.
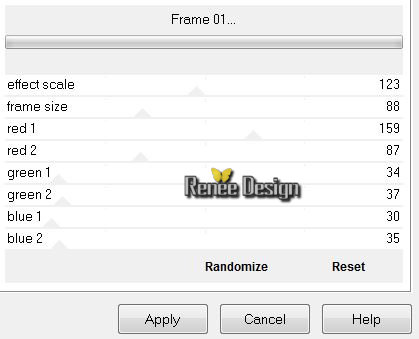
Effets –Plugins - Unlimited - Filter Factory Gallery P -Frame
01.with these settings..
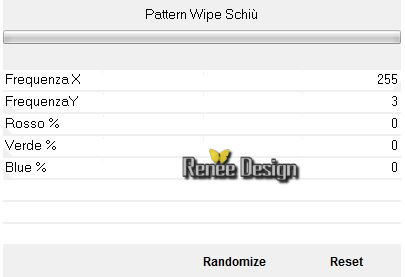
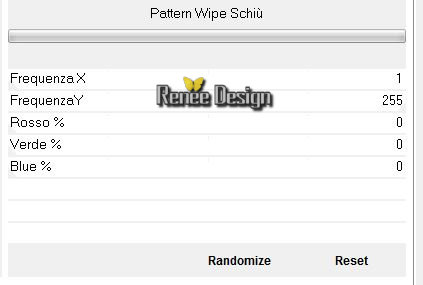
5. Effects
–Plugins-Unlimited- Italian Editors Generatore-Pattern Wipe
Schiù with these settings..
6. Layers- Merge- Merge Down
7. Layers- Duplicate
8. Image Resize a 115 % resize all layers not checked
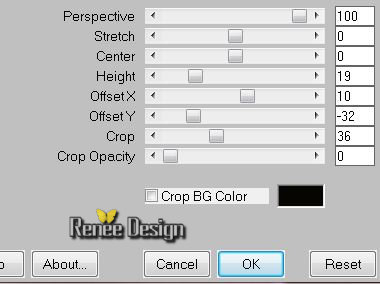
9. Effects- Plugins- Mura’s Meister –
perspective Tilling with these settings
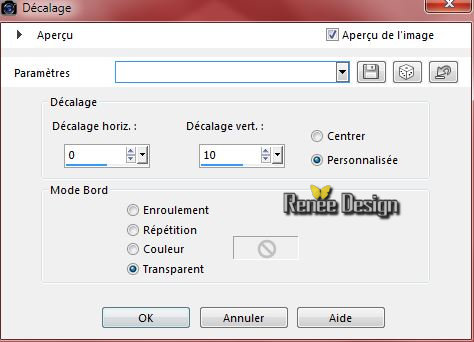
10. Effects-Image Effects-Offset with these settings
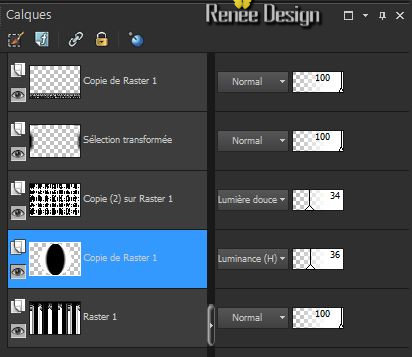
- Layer palette – Make raster 1 active
11.
Layer -Duplicate
12.
Effects –Plugins-Unlimited- Italian Editors Generatore-Pattern Wipe
Schiù with these settings
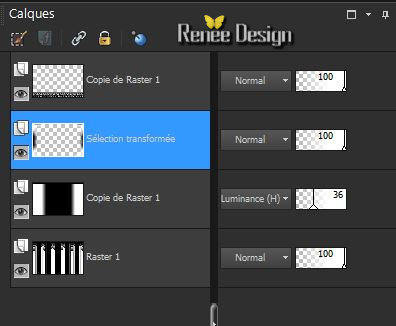
13. Layer Palette - Double click on this Layer and set the Blend Mode to "Luminance -Legacy " -Set the layer opacity of this layer to 36%
14.
Activate the magic wand and select the two white parts
15.
Selections-Promote selection to layer
16.
Effects –Plugins- Unlimited - Filter Factory Gallery D- BurnUp a
55
17.
Effects-Plugins - L and K’s - Dimitri a
215
Effects-Deselect All
Layer palette look like this now
- Layer palette – Make copy of raster 1 active
18. Layers -Duplicate
19.
Effects –Plugins - Unlimited - Filter Factory Gallery R-
Countdown... with these settings 185 and 140
20. Layer Palette - Double click on this Layer and set the Blend Mode to "Soft Light" -Set the layer opacity of this layer to 34%
- Layer palette – Make copy of raster 1 active
21. Effects- Geometric Effects- Circle-Transparent
Layer palette look like this now
22. Layers- New raster layer
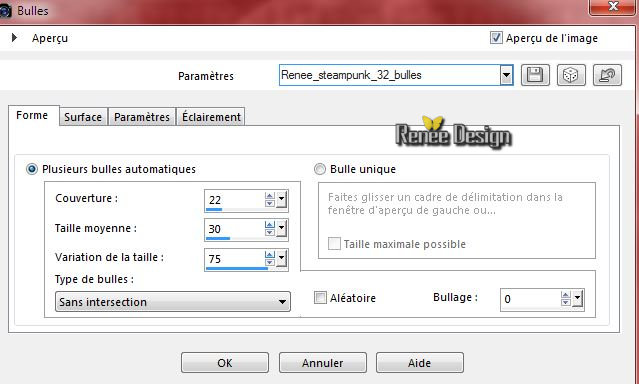
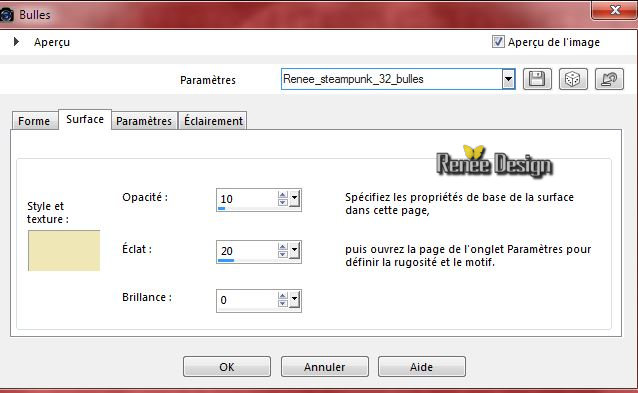
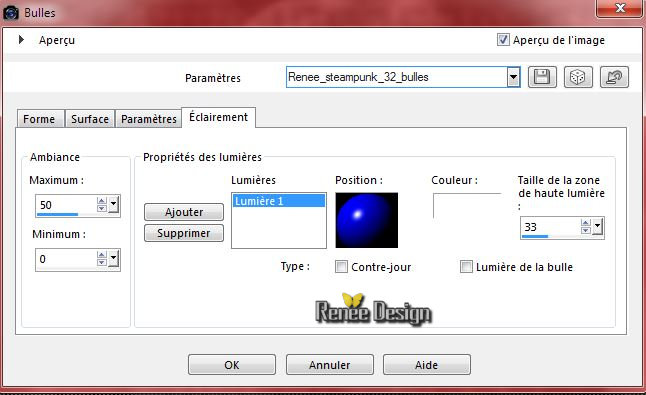
23. Effects-Artistic Effects-Balls and Bubbles
and select my file "Preset_BallsAndBubbles_Renee_steampunk_32_bulles"(Or manual settings as shown in the example below)
- (Do you have problems with this- PNG image is into the zipfile and paste as a new layer on your working area and move)
- Activate the top of the layer-Palette
24. Activate the tube ‘’ Renee_tube_muerte_by_elyphas’’
- Activate layer ‘’Sphere_2 »of the tube
- Edit/copy- Edit/ paste as new layer on your working image
25. Effects-Image Effects-Offset with these settings H = -370 and V =
180
26. Layers- Duplicate
27. Effects-Plugins – DBS Flux – radical Warp with these settings
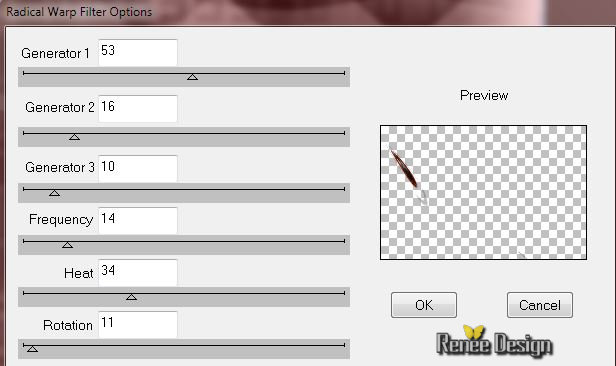
28. Layer Palette - Double click on this Layer and set the Blend Mode to "Luminance " -Set the layer opacity of this layer to 57%
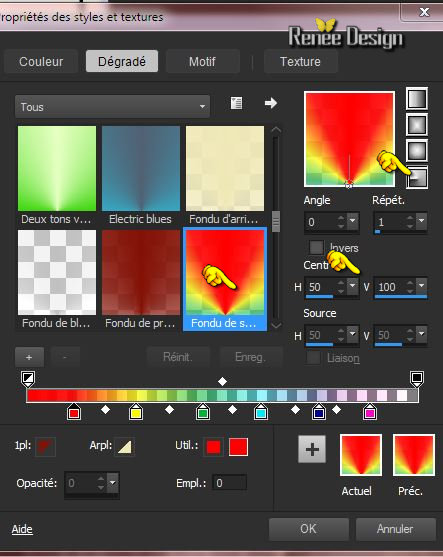
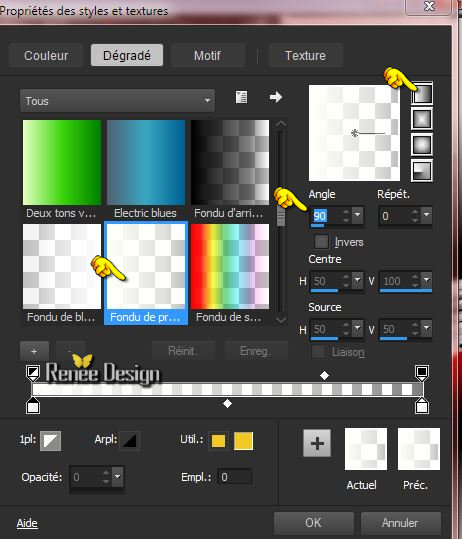
- Material Properties-Set your foreground to gradient and select ’’corel-06-027’’
-Prepare a radial gradient with these settings as shown in the example below
29. Layers- New raster layer
30.
Selections –load/save selection –load selection from disc and choose: ‘’steampunk_32_1’’
31. Activate Flood Fill Tool and fill the selection with the gradient
Effects-Deselect All
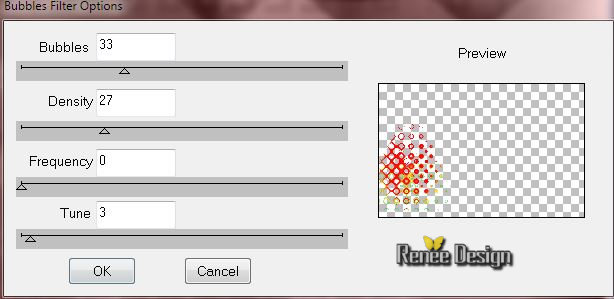
32. Effects-Plugins – DBS Flux- Bubbles with these settings
33. Adjust-Blur-Gaussian Blur : Radius 20
34. Effects-Plugins – DBS Flux- Radial Warp with these settings
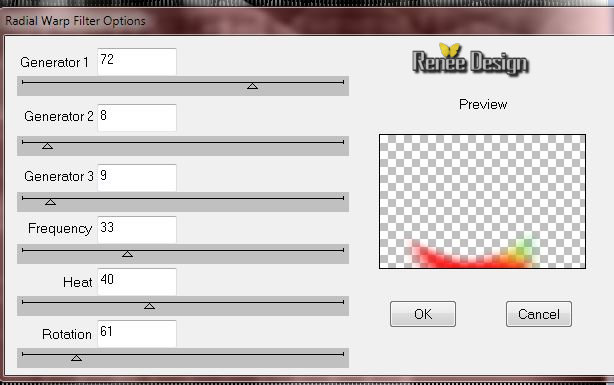
35. Layers- Duplicate
36.
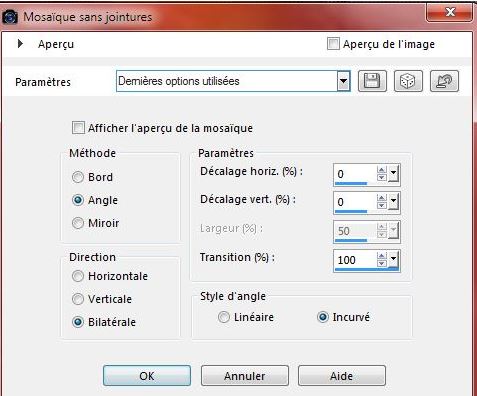
Image -Flip
37. Effects-Image Effects-Seamless Tiling with these settings
38. Layer Palette - Double click on this Layer and set the Blend Mode to "Screen "
39. Layers-New raster layer
40.
Selection Tool ( S ) Custom selection with these settings
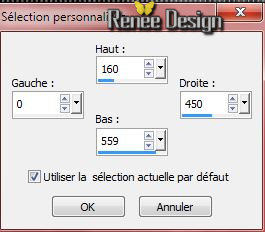
41.
Effects-Plugins – Eyecandy 5 impact – Perspective
Shadow- Drop Shadow Blury with these settings
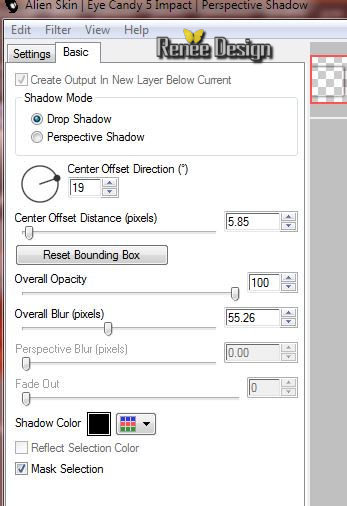
Effects-Deselect All
42. Layers- Duplicate
43.
Layers-New raster layer
44.
Selection Tool ( S ) Custom selection with these settings
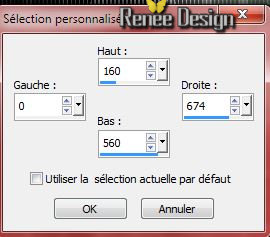
45.
Effects-Plugins – Eyecandy 5 impact –
Perspective Shadow- Drop Shadow Blury
with the same settings
46. Layer Palette - Double click on this Layer and set the Blend Mode to "Hard Light "
Effects-Deselect All
47. Layers-New raster layer
48.
Selections –load/save selection –load selection from disc and choose:
‘’steampunk_32_2’’
49. -Material Properties-Set your foreground to
#831207
50. Pot of Paint: Change the opacity of the color at 100%
- Activate Flood Fill Tool and fill the the selections with the #831207
Effects-Deselect All
51.
Effects-Plugins – Eyecandy 5 Glass- tab Settings/User settings choose my preset: ‘’
Renee_steampunk_32_glass"Or manual settings as shown in the example below

52.
Effects-Plugins – EyeCandy 5 Impact – Gradient Glow-
tab Settings/User settings choose my preset: ” steampunk32_glow"Or manual settings as shown in the example below

53. Activate the tube ‘’ Renee_tube_muerte_by_elyphas.pspimage’’
-Activate “elyphas” of the tube
- Image
Resize a 75%
- Edit/copy- Edit/ paste as new layer on your working image
-Move tool / place your tube as shown in the example below
54. Layers-New raster layer
55.
Selections –load/save selection –load selection from disc and choose:
‘’steampunk_32_3’’
- Properties Background:Set the background color to white
56. Pot of Paint: Change the opacity of the color at 65%
- Activate Flood Fill Tool and fill the the selections with the background color white
57. Effects-Texture Effects-Blinds with these settings
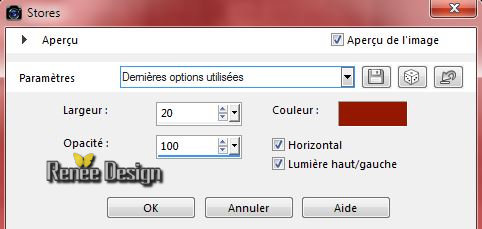
Effects-Deselect All
58. Effects- 3D Effects-Drop Shadow with these settings : 1/1/50/1 white
59. Activate the tube ‘’ Renee_tube-Angels-Wings.pspimage’’
- Image
Resize 50 %
- Edit/copy- Edit/ paste as new layer on your working image
- With the move tool, move it in the right place (see finished image)
60. Layer Palette - Double click on this Layer and set the Blend Mode to "Luminance Legacy "
61. Layers- New raster layer
62.
Selection Tool ( S ) Custom selection with these settings
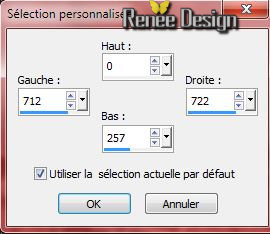
63. Pot of Paint: Change the opacity of the color at 100%
- Activate Flood Fill Tool and fill the the selections with the foreground color #831207
Effects-Deselect All
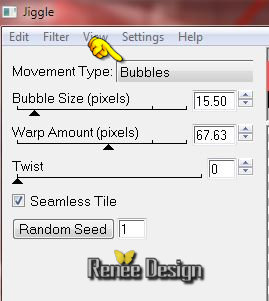
64. Effects-Plugins – Eye Candy 4000- Jiggle with these settings ( ore plugins EyeCandy
3.1 )
65. Effects- 3D Effects-Drop Shadow with the same settings
66.
Layers-New raster layer
67.
Selection Tool ( S ) Custom selection with the same settings
68. Put the foreground color to #ffffff -Activate Flood Fill Tool and fill the selection with the the foreground color white
Effects-Deselect All
69.
Effects-Plugins –Eyecandy 5 Glass- Preset
Clear
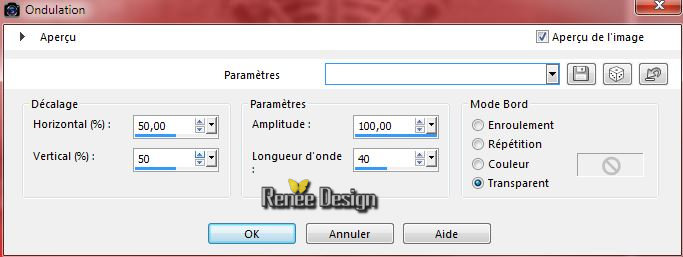
70.Effects-Distortion Effects-Ripple with these settings
71. Effects- 3D Effects-Drop Shadow using the default settings
72. Layers- New raster layer
73.
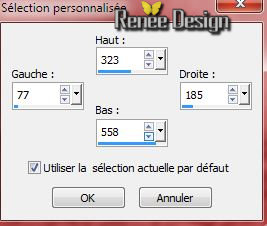
Selection Tool ( S ) Custom selection with these settings
74. Activate Flood Fill Tool and fill the selection with color black
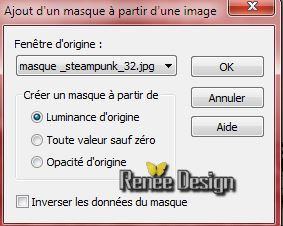
75. Layers- New Mask layer from Image and select Mask »masque
_steampunk_32 »
- Effects-Edge Effects- Enhance More
- Layers- Merge-Merge Group
Effects-Deselect All
76. Effects-Plugins - Eyecandy 5 Impact – Bevel- tab Settings/User settings choose my preset:“steampunk_32_bevel”
77. Effects- 3D Effects-Drop Shadow with these settings : 10/10/50/5 black
- Material of the foreground: Prepare a linear "Fading foreground" gradient configured like this.
78. Layers- New raster layer
79.
Selections –load/save selection –load selection from disc and choose:»steampunk_32_4 »
80. Activate Flood Fill Tool and fill the the selections with the gradient
Effects-Deselect All
- Material Properties-Set your foreground to #831207 -Set your background to #ffffff
81. Effects-Plugins – Alien Skin Xenofex 2- Burnt Edges with these settings
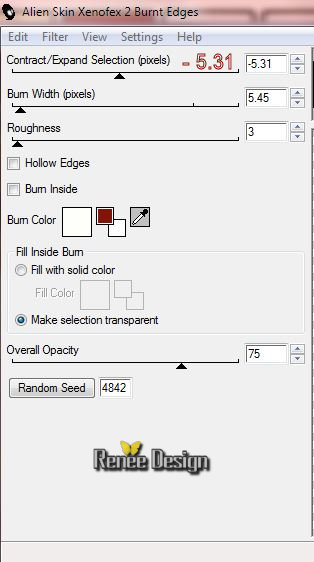
82.
Set the layer opacity of this layer to 67%
83. Layers-New raster layer
84.
Selections –load/save selection –load selection from disc and choose: ‘’
steampunk_32_5’’
85. Activate Flood Fill Tool and fill the the selections with the foreground color #831207
86.
Layers- New raster layer
87. Activate Flood Fill Tool and fill the the selections with the background color white
Effects-Deselect All
88. Effects-Image Effects-Offset with these settings

89. Image - Add borders-Symmetric checked: 1 pixel black
90. Image - Add borders-Symmetric checked:10 pixels #831207
91. Image - Add borders-Symmetric checked: 25 pixels white
92. Image - Add borders-Symmetric checked: 1 pixel black
93. Image - Add borders-Symmetric checked: 5 pixel white
94. Image - Add borders-Symmetric checked: 1 pixel black
95. Image - Add borders-Symmetric checked: 25 pixel white
96. Activate the tube Text (titre) –Edit/copy- Edit/ paste as new layer on your working image
97. Activate the tube « « coin_steampunk_32 »
- Edit/copy- Edit/ paste as new layer on your working image
- Activate your Move Tool (M) place it to the top
98. Layers- Duplicate
99. Image
Flip
100. Layers- Merge- Merge Down
101. Layer Palette - Double click on this Layer and set the Blend Mode to "Hard Light"
102.
Layers- Merge- Merge All
103. Image
Resize a 995 pixels width.
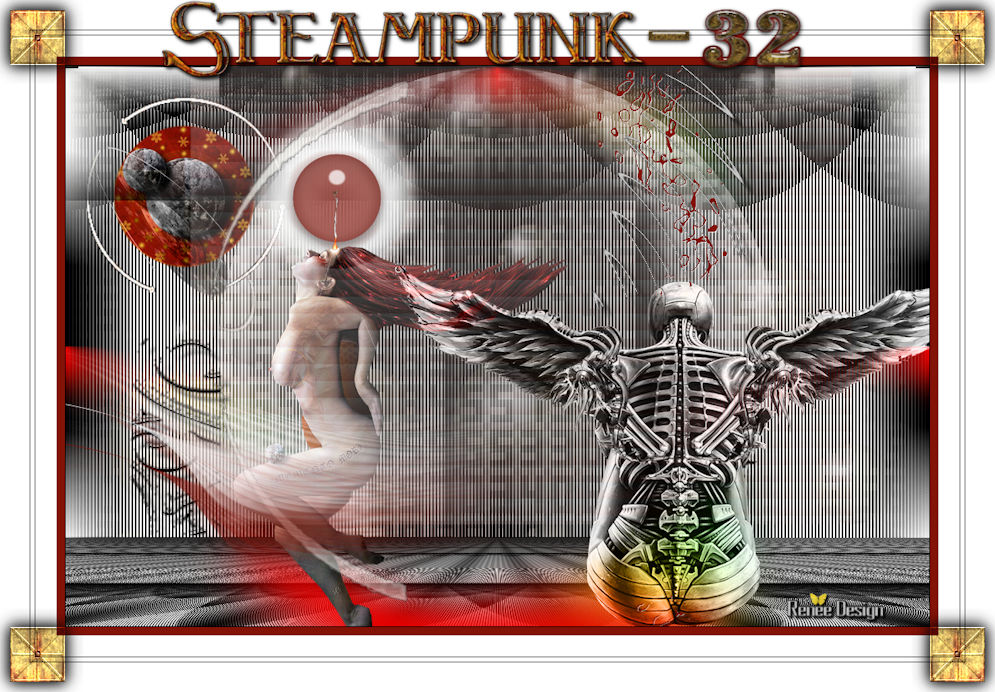
Save as JPG
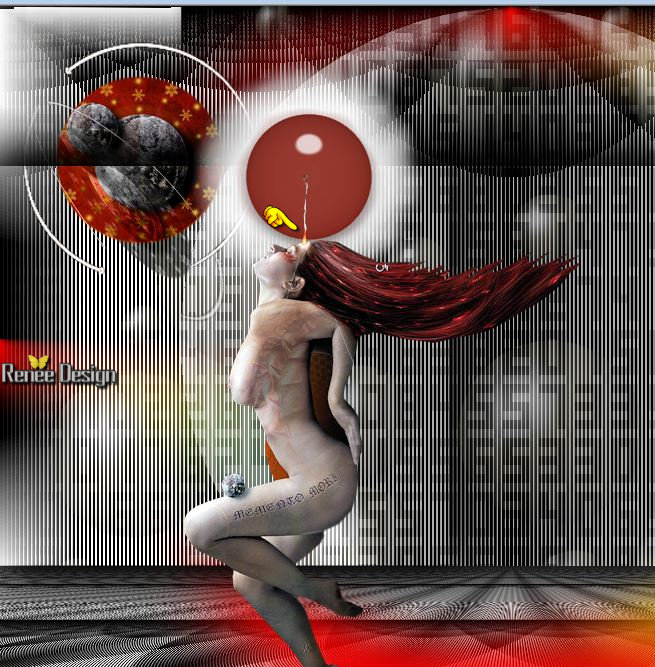
I hope you enjoyed this tutorial .
Renée
This lesson was written by Renée20/06/2015
edited and update
2015
*
Any resemblance with an existing lesson is merely a coincidence *
* Don't forget to thank the people who work for us and with us. I named the tubeurs - Testers and the translators.
Thanks Renée.
*
| 
 Translations


 When you see this logo the filter is imported in Unlimited

 All rights reserved