|
Let,s begin
1.
Open a new transparent image of 1125 x 705 pixels
2.
Materials-Properties: Forgroundcolor to: #d3d29f
Backgroundcolor to : #3b1f11
3.
Material Properties:Prepare a regtangular Gradient as below:
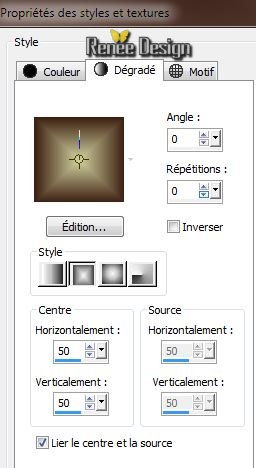
4.
Flood Fill tool : Fill the layer with the gradient
5.
Layers-Duplicate
6.
Selections-Select all /Open the tube''steampunk_33_image_1'' /Edit copy/Edit paste into selection
7.
Selections-Select none
8.
Adjust- Blur-Radial blur with these settings
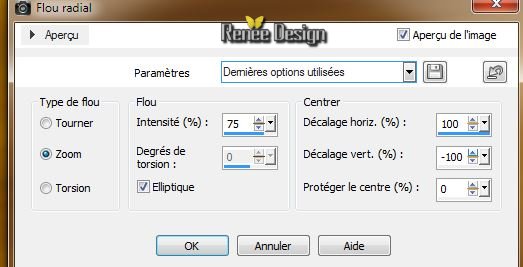
9.
Effects -Art Media Effects -Brush strokes /
Foregroundcolor
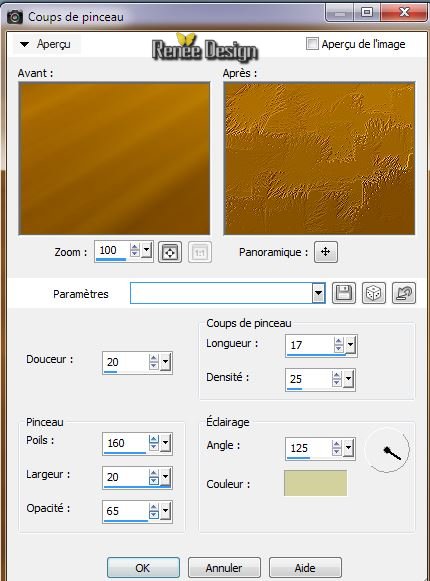
10.
Layers-Duplicate
11.
Effects - Geometric Effects - Perspective Horizontal
attention - 85
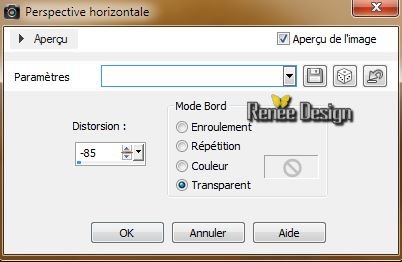
12.
Effects - Geometric Effects - Perspective Horizontal
attention 85
13.
Effects-Plugins Neology / Digital Weaver 35/105
14.
Effects - 3D Effects- Drop Shadow 0/0/65/85 black
15. Effects-Plugins Mura's Seamless /
Emboss et alpha default
16.
Effects -Plugins Mura's seamless / Shift at zigzag
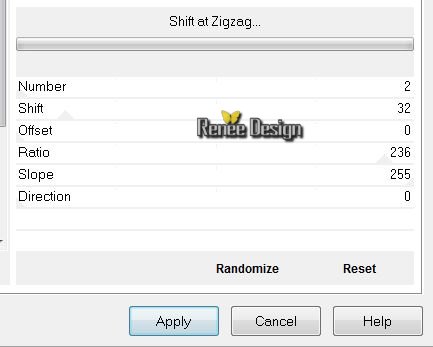
17.
Effects - Plugins Mura's seamless/ Tile
rotate to
71/4/204
18. Effects - 3D Effects- Drop Shadow 0/0/65/85 black
19 . With your keyboard and the arrow down to 400 pixels 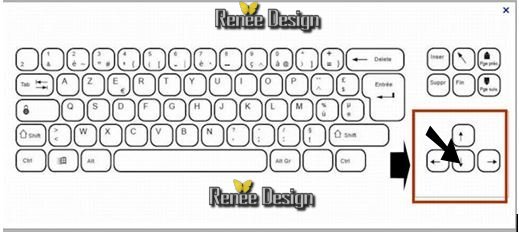
20. Aktivate your layer copie raster 1 (Copie de Raster
1)
21. Layers-New raster layer
22.
Selections-Select All / Open the tube
"cloud_station__by_shelest-steampunk3"/ Edit/copy-Edit paste into selection /Blend Mode "Luminance " or Luminance ( Legacy)
-
Selections-Select none
Your work is like this right now
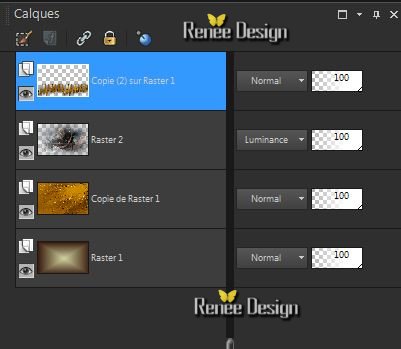
. Aktivate the bottom of the layers-palette (Raster 1)
23.
Selections-Custom selection with these setting
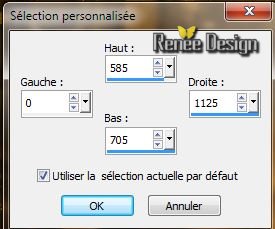
24.
Selections- Promote selection to layer
25. Effects
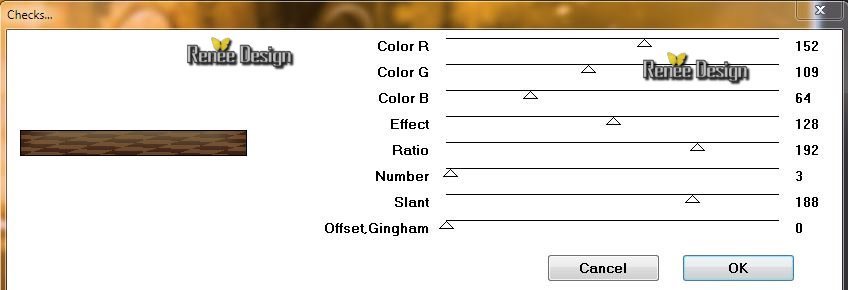
-Plugins Mura's Seamles - Cheeks
Selections-Select none
26. Effects
- Edge Effects-Enhance
27. Layers-Arrange-2x Move down (Above raster 2)
28.
Effects - Plugins Graphic Plus - Cross Shadow default
29. Aktivate the Top of the layers palette
Open the
tube ''KRYSSTEAMPUNK -08-02-14-009''/
- Activate raster 1 of your tube/Image Resize 85
% -Edit/copy-Edit paste as a new layer and place
- Activate raster 3 of your tube/Edit/copy-Edit paste as a new layer and place into the hand of the robot
30. Layers-Merge-Merge down
31. Effects
-3D Effects- Drop Shadow-/white
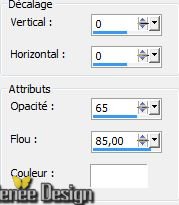 repeat drop shadow repeat drop shadow
32. Layer - New raster layer.
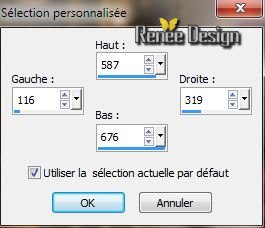
33.
Selections-Custom selection with these setting
34. Flood Fill Tool: fill the selection with the gradient
35.
Effects - Plugins EyeCandy 5 -Impact -Extrude
-Preset"steampunk3_extrude''
36.
Selections-Select none
37. Open the tube ''steampunk3_image2 - Edit/copy-Edit paste as a new layer
38. Effects
- Geometric Effects -Skew
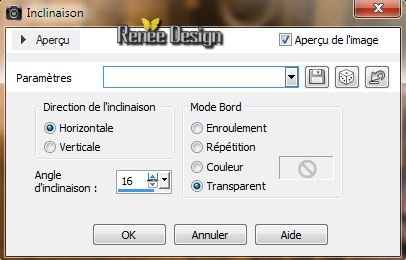
Place on the block
39. Open the tube ''steamunk3_image3'' / Edit/copy-Edit paste as a new layer and place
Blend Mode"Multiply" and lower the opacity to 77%
40.
Open the tube ''steamunk3_image4'' / Edit/copy-Edit paste as a new layer and place
41. Open the tube ''STP18.Krysdesign'' /Edit/copy-Edit paste as a new layer and place
42 . Effects
- 3D Effects-Drop Shadow: white

43. Layer - New raster layer.
44.
Selections - load/save selection - load selection from disk and choose : ''steampunk3_1''
/Flood Fill Tool: fill the selection with the gradient
45. Effects
- Texture Effects - Blinds
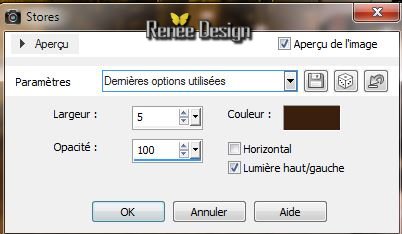
46.
Selections-Select none
47. Effects
- Distortion Effects -Twirl 100°
48. Layers-Duplicate / Place your image a little lower
49. Open the tube ''steampunk3_ecrou'' Edit/copy-Edit paste as a new layer and place
Layers-Duplicate /and place see black arrows
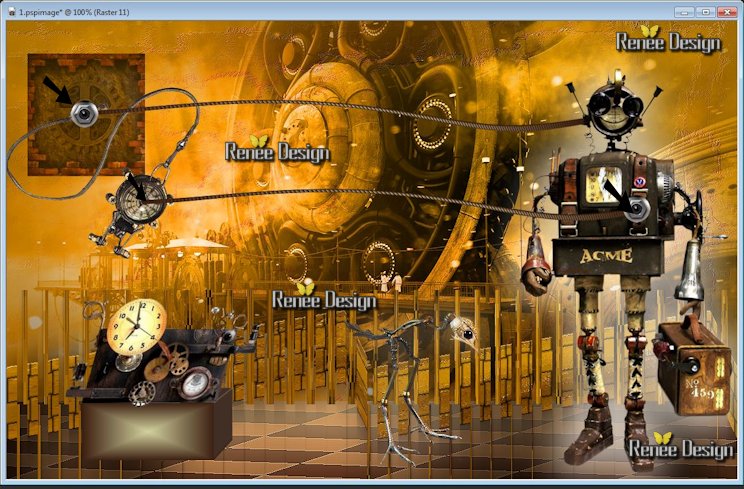
50. Open the tube ''382011_Tubed-by_Sietske''/Image Resize 25
% - Edit/copy-Edit paste as a new layer and place
51.
Layers-Merge-Merge Visible
52.Image - add borders symmetric: 2 pixels with your background color
53.Image - add borders symmetric: 5 pixels with your foreground color
54.Edit/Copy
55.Image - add borders symmetric: 50 pixels white
56.Magic wand:
click with your magic wand in the white border
57. Edit paste into selection
58.
Adjust- Blur - Gaussian Blur radius: 20
59. Effects -Plugins Alf's Power Toys /
Split Distortion on 32
60.
Selections- Invert
61.
Effects -Plugins AAA Frame - foto Frame
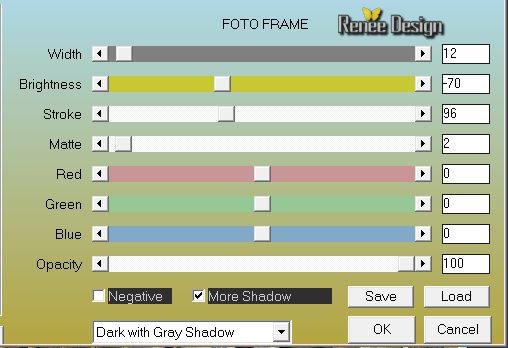
62.
Selections-Select none
63. Open the titre:Edit/copy-edit paste as a new layer ore write your own text
64.Image - add borders symmetric: 3 pixels with your background color
I hope you enjoyed this lesson
Renée
This lesson was written by Renée 8/02/2014
Created
the 2014
*
Any resemblance with an existing lesson is merely a coincidence
*
Don't forget to thank the people who work for us and with us. I named the tubeurs - Testers and the translators. Thanks
Renée

|