|
Let's start the lesson

- Preparation
-Material Properties:
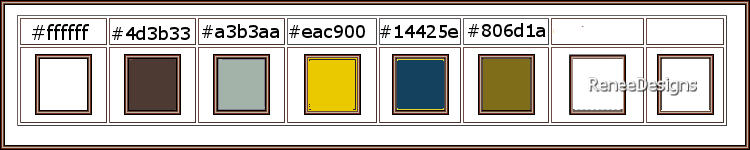
Set your foreground color to color #4d3b33= color 2- Set your background color to color #a3b3aa=color 3
- Prepare a foreground/background radial gradient configured like this
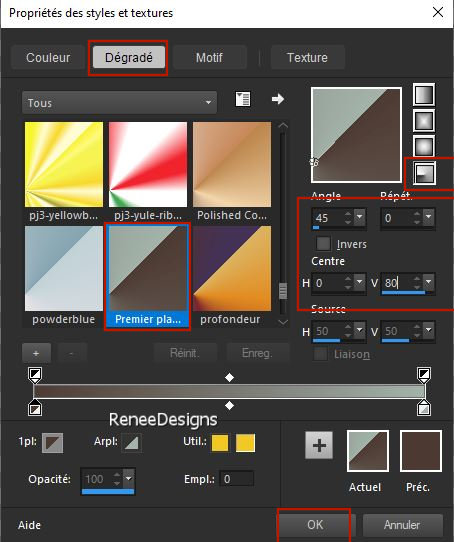
1. File: Open a new transparent image in this size 1100 x 750 Pixels
2. Flood Fill Tool  –
Fill the layer with the gradient –
Fill the layer with the gradient
3. Effects - Plugins- Filters Unlimited 2.0 - Filter Factory
Gallery H- Stigmatism..with these settings: 77/0
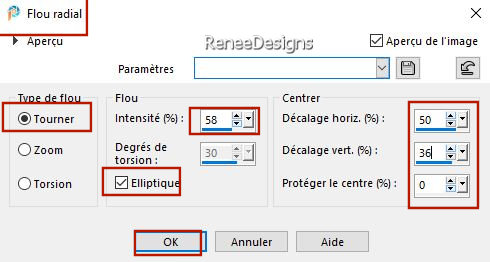
4. Adjust- Blur- Radial Blur use the settings below
5. Layers – Duplicate
6. Image - Mirror - Mirror Horizontal (Image - Mirror in older versions of PSP)
7. Layers-Properties-Change the Blend Mode to " Soft Light"
8. Layers- Merge- Merge Visible (rename this layer Raster 1)
9. Effects – Edge Effects – Enhance More
10. Layers – Duplicate
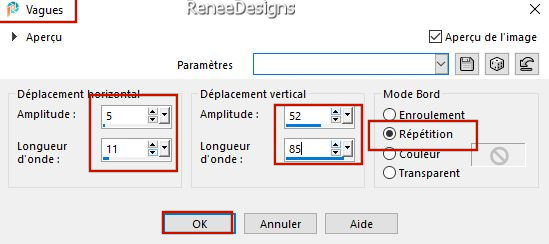
11. Effects- Distortion Effects– Wave use the settings below
12. Layers-Properties-Set the Blend Mode to " Hard Light " – Reduce the Opacity of this layer to 55%
- Activate the bottom of the layer palette =Raster 1
13. Effects - Plugins - Filter- Unlimited 2.0 -ColorRave- Color
Cocktail 2.1 using the default settings
14. Effects-Plugins
- Filter- Unlimited 2.0 -Tramages- Pool Shadow using the default settings
- Activate the top of the layer palette (Copy of Raster 1)
15. Effects – Illumination Effects – Sunburst use the settings below– Color #eac900 = 4
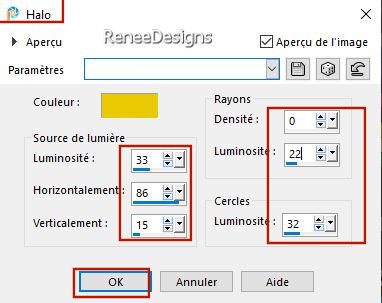
16. Effects – Illumination Effects – Sunburst use the settings below– Color white

17. Layers- New Raster Layer
18. Selections –load/save selection –load selection from disc and select my selection: ‘’Steampunk-57- 1’’
19. Effects – Plugins – Creativity- Splatter – Clouds
. Tick first on Image
– Click Clouds and Small
. Tick Settings :
1. Density : Slide the cursor (see red arrow_
2. Opacity : Slide the cursor (see red arrow_
3. Scale Image :
Check and place the cursor (which will give the shape of the clouds)
4. Randomise Scaling :
Check and place the cursor
5. Order by depth :
Check all options
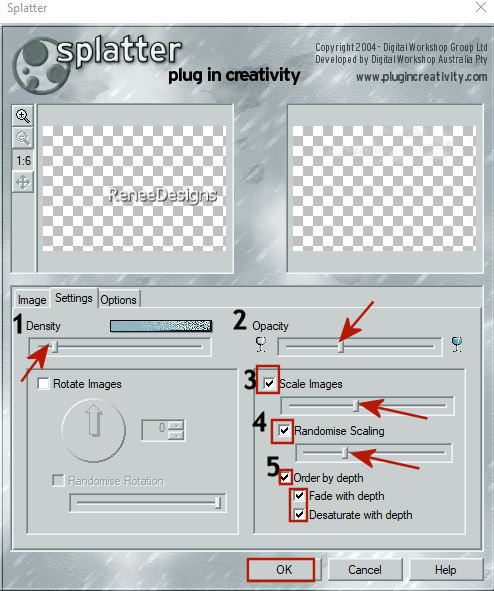
Click on OK (With ''Scale Images " the result will be different depending on the placement of the cursor.
It is your decision when you are satisfied with the result).
20. Layers-Properties-Set the Blend Mode to "Screen" (or other to your taste)

21. Open the Tube ‘’Renee-Tubes-Steampunk57-Image 1’’ -Edit - Copy- Activate your work -Edit - Paste as a new layer
22. Pick Tool: (K) on your keyboard -Enter these parameters on the toolbar
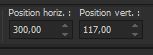 300/117 300/117
Press ( M ) to close the Pick Tool
- Color Palette-Change the foreground color to color #ffffff-color 1 – Background color remains on #a3b3aa= color 3
23. Layers- New Raster Layer
24. Selections –load/save selection –load selection from disc and select my selection: ‘’Steampunk-57- 2’’
25. Flood Fill Tool - 1 click background color
- 1 click foreground color
- 1 click background color
26. Effects -
3D-Effects - Drop Shadow with these settings: 2/2/60/5 Color Black
27. Layers- New Raster Layer
28. Selections –load/save selection –load selection from disc and select my selection: ‘’Steampunk-57- 3’’
29. Flood Fill Tool – Fill the selection with the foreground color=1
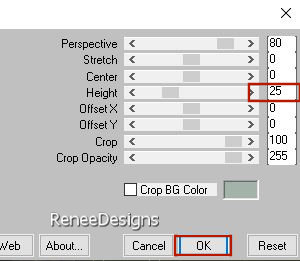
30. Effects - Plugins- Mura’s Meister – Perspective Tiling use the settings below
31. Layers- New Raster Layer
32. Selections –load/save selection –load selection from disc and select my selection: ‘’Steampunk-57- 4’’
33. Flood Fill Tool – Fill the selection with the background color =3
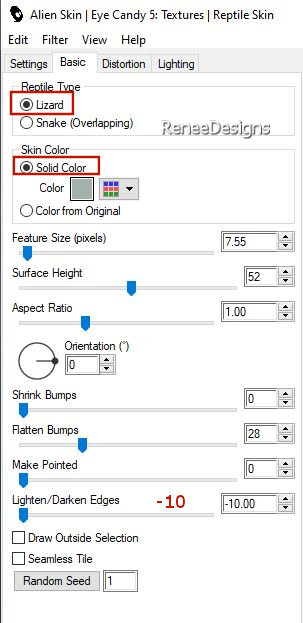
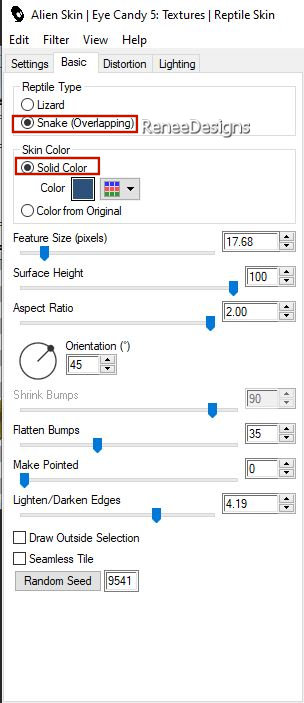
34. Effects - Plugins- Alien Skin EyeCandy 5- Textures- Reptile Skin-use the settings below/Background color=3
35. Layers- New Raster Layer
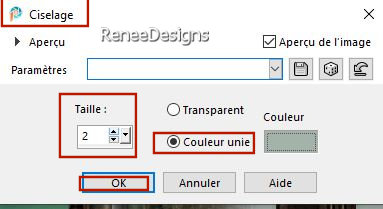
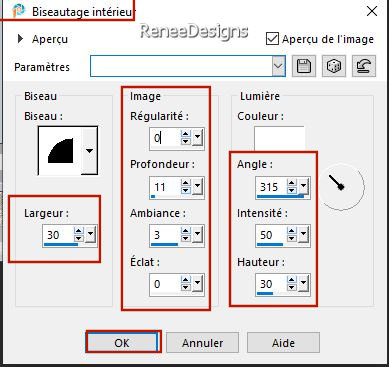
36. Effects-
3D -Effects– Chisel use the settings below / Background color=3
37. Layers- Merge- Merge Down
38.Layers- Arrange - Move Down 2 times (under raster 3)
39. Layers-Properties-Set the Blend Mode to "Hard Light"
- Activate the top of the layer palette
40. Layers- New Raster Layer
41. Selections –load/save selection –load selection from disc and select my selection: ‘’Steampunk-57- 5’’
42. Open the Tube ‘’Renee-STP57-Mur.png’’ -Edit - Copy- Activate your work -Edit - Paste into selection
43. Effects-3D Effects– Drop Shadow with these settings: 0/0/100/100 Color Black
44. Layers-Properties-Set the Blend Mode to "Overlay"
45. Open the Tube ‘’Renee-Tubes-Steampunk57-Image 2’’ -Edit - Copy- Activate your work -Edit - Paste as a new layer
- Move it in the right place ( see finished image)
46. Adjust- Hue
and Saturation – Colorize/ Renée chose 126/66 (Choose a color to match your background layer only)
47. Effects - Plugins- Alien Skin EyeCandy 5 – Impact- Perspective
Shadow-Tab-Settings- User Settings and select my file-Preset :STP-57-Shadow’’
48. Open the Tube ‘’Renee-Tubes-Steampunk57-Image 3’’ -Edit - Copy- Activate your work -Edit - Paste as a new layer
- Move it in the right place( see finished)
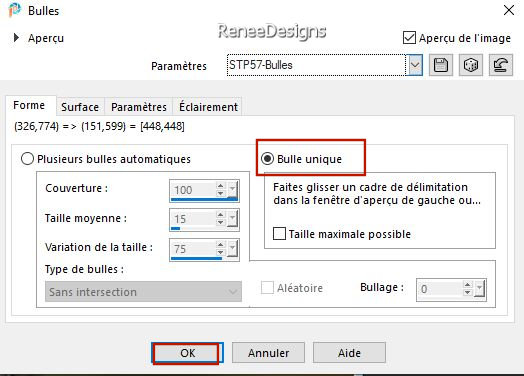
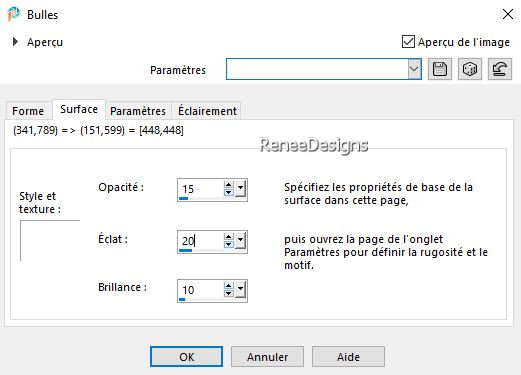
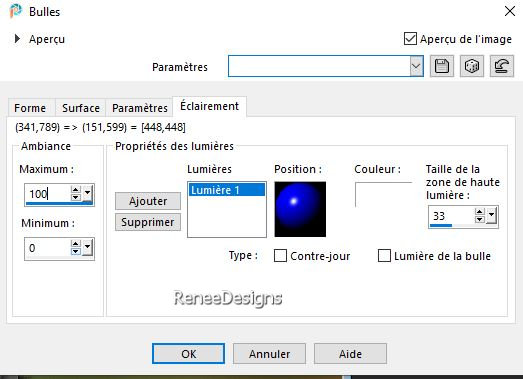
49. Layers- New Raster Layer
50. Effects –Artistic Effects – Balls and Bubbles –select my file -Preset :’’STP57_Bulles ‘’(
Place in the presets folder of your psp)
51. Pick Tool: (K) on your keyboard -Enter these parameters on the toolbar
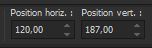 120/
187 120/
187
Press ( M ) to close the Pick Tool
52. Layers-Properties-Change the Blend Mode to " Screen "
53. Effects - Plugins - Alien Skin EyeCandy 5 – Impact- Perspective
Shadow-Tab-Settings- User Settings and select my file-Preset : ’’STP-57-Shadow-2’’
54. Open the Tube ‘’Renee-Tubes-Steampunk57-Image 4’’ -Edit - Copy- Activate your work -Edit - Paste as a new layer
55. Pick Tool: (K) on your keyboard -Enter these parameters on the toolbar
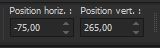 -
75/ 265 -
75/ 265
56. Open the Tube ‘’Renee-Tubes-Steampunk57-Image 5’’ -Edit - Copy- Activate your work -Edit - Paste as a new layer
- Place at the bottom/Objects- Align-Bottom
57. Effects – Distortion Effects– Wind – Wind Strength 100- Wind Direction-Right
58. Open the Tube ‘’Renee-Tubes-Steampunk57-Image 6’’ -Edit - Copy- Activate your work -Edit - Paste as a new layer
- Place at the bottom right
59. Open the Tube ‘’Renee-Tubes-Steampunk57-Image- Etoiles’’ -Edit - Copy- Activate your work -Edit - Paste as a new layer (of your choice )-
Move
59a. Put the image aside for now, we will need it later !!
-Color palette-Change the foreground color to #14425e=color 5- and the background color to #806d1a= 6
60. Open a new transparent image in this size: 315 x 355 Pixels
61. Selections –load/save selection –load selection from disc and select my selection: ‘’Steampunk-57-roue 1’’
62. Flood Fill Tool
- Fill the selection with the foreground color #14425e= 5
63. Effects -Plugins- Alien Skin EyeCandy 5- Textures- Texture
Noise -Tab- Settings- User Settings and select my file- Preset : ‘’STP-57-Texture Noise’’
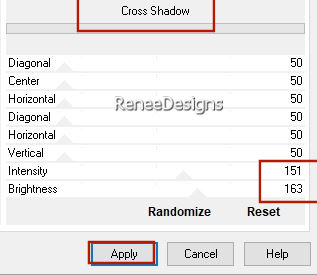
64. Effects - Plugins - Filters Unlimited 2.0- Graphic Plus – Cross
Shadow use the settings below
65. Layers- New Raster Layer
66. Selections –load/save selection –load selection from disc and select my selection: ‘’Steampunk-57-roue 2’’
67. Flood Fill Tool -
Fill the selection with the background color #806d1a= 6
68. Effects - Plugins- Alien Skin EyeCandy 5- Textures- Reptile Skin
– (click on Factory Defaut and then put the following parameters)
69. Effects-
3D -Effects– Inner Bevel use the settings below /Color White
70. Layers- New Raster Layer
71. Selections –load/save selection –load selection from disc and select my selection: ‘’Steampunk-57-roue 3’’
72. Open the Tube ‘’Renee-Tubes-Steampunk57-cadran’’ -Edit - Copy- Activate your work -Edit - Paste into selection
73. Layers- Merge- Merge Visible
74. Edit- Copy !!
Activate your minimized image from step 59 a
75. Edit - Paste as a new layer
76. Pick Tool: (K) on your keyboard -Enter these parameters on the toolbar
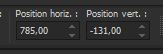 785
/ - 131 785
/ - 131
Press ( M ) to close the Pick Tool
77. Layers – Duplicate
78. Image - Resize by 60%.- Uncheck - Resize all layers
- Place the tube on the right place (see finished image)
79. Layers –
Duplicate
80. Image - Resize by 60%.- Uncheck - Resize all layers
- Place the tube on the right place (see finished image)
82. You can now apply the blend mode to these three layers as you wish -
for Renée:The blend mode of the top layer is set to "Hard Light", the middle layer is set to "Darker" and the bottom layer is set to "Normal".

83. Effects-3D -Effects - Drop shadow on these 3 layers: 3 / -2 / 58 /18 Color Black
- Place the tube on the right place (see finished image)
84. Image - Add borders-Symmetric checked: 10 Pixels- Color #14425e= 5
85.EDIT- COPY
86. Open the Tube " cadre"
87.
Edit - Paste Into Selection (Image is still in your PSP memory)
88. Image - Resize to 999 Pixels width (Resize all layers checked)
89.Open the Tube
" titre "– Image Resize 40 % -Edit - Copy- Activate your work -Edit - Paste as a new layer
- Paste the author's watermark on your work and your own watermark
90. Layers- Merge- Merge (flatten)
Save as JPG
That's it - Thank you / I hope you enjoyed this lesson
Renée
This lesson was written by Renée 28/06/2022
Edited and Update
in 2022
*
*
Any resemblance with an existing lesson is a coincidence
* Do not forget to thank the people who work with us and for us
-I have appointed the tubeurs and translators
Thanks
|

 Translations