|
Let's begin
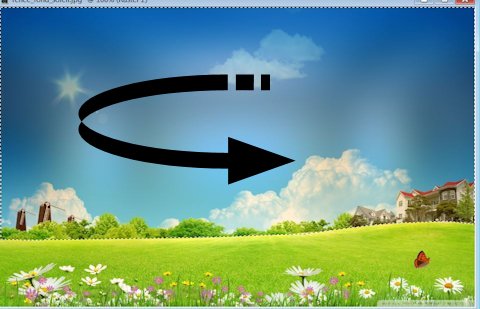
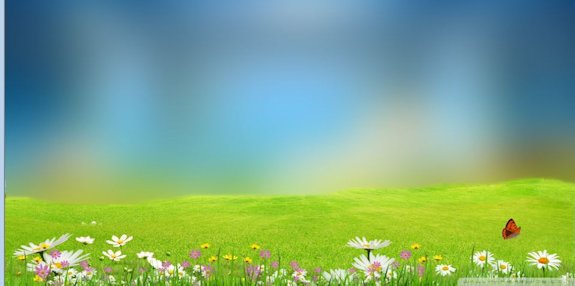
1. Open the fond
''renee_fond_soleil'' Promote background Layer = Raster 1
2. Layers- New raster layer
3. Selections- Select All
4.
Open the tube ''dreamsc"" Edit/Copy-Edit Paste into selection
5. Selections- Deselect All
6. Open the Freehand Selection Tool -Point to Point / Select the upper part like this
7.
Adjust-Blur- Gaussian Blur: Radius 52
8.
Selections- Deselect All
9. With the clone brush use settings below

- Place the brush on the spot you want to create (see print screen) and push on your right mouse button
-Go to the spot where you want to apply your shape and push your left mouse button to apply .
Your example has to be simular on mine
10. Open the tube ''renee_soleil_image_1'' Edit/copy- Edit/ paste as new layer on your working area (do not move it is in the right place)
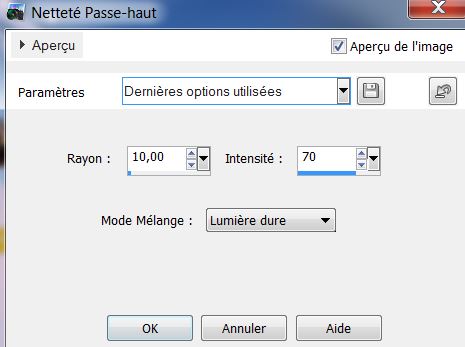
11. Adjust-Sharpness - High Pass-Sharpen
12. Material Properties: Foreground color Black and Background color White
13. Open font'' schneidler'' ,(or choose any other) - size 150 and write S O L E I L . Use a different layer for each letter
14. With the deformation tool: make the letters bigger and arrange them this way
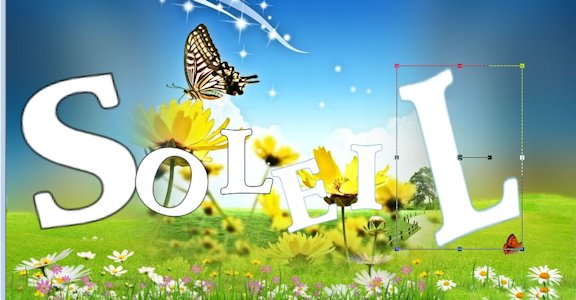
We will "dress up" the letters = SOLEIL
There fore we will select each letter from the word S.o.l.e.i.l separately
1.
Highlight layer with the letter 'S'
. Magic wand tool: Sélect the letter and fill with color #f7ea0f
. Selections- Deselect All
- Effects - Plugins - Eye Candy -5 - Impact / Extrude
tab Settings/User Settings and choose my preset ''renee_soleil_extrude_1''
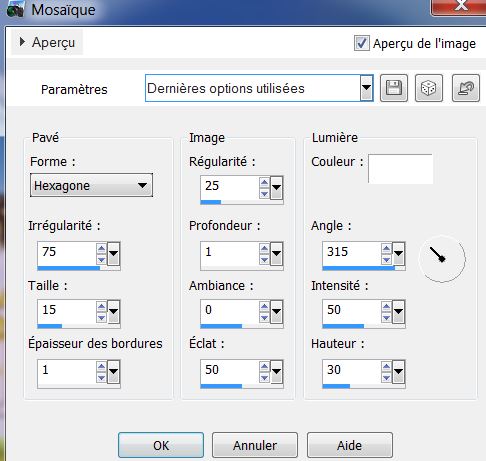
2.Magic wand tool: Highlight layer with the letter '' O''
- Effects -Texture Effects - Mosaïque with these settings
- Effects- Plugins - Xero -
Porcelaine custom settings
3. Magic wand tool: Highlight layer with the letter ''L''
- Flood Fill Tool: fill with color #e5f247
- Selections- Deselect All
- Effects- Plugins -
EyeCandy5- Impact- Extrude -
tab Settings/User Settings and choose my preset ''renee_soleil_extrude_2''
4.
Magic wand tool: Highlight layer with the letter ''E''
- Open gradient ''vivarant_07'' Prepare a linear gradient configured like this.
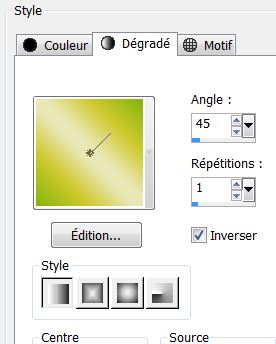
-Flood Fill Tool: fill with the gradient
- Effects- Plugins
EyeCandy 5 - Impact - Glass – Clear
-
Selections- Deselect All
-
5.Magic wand tool: Highlight layer with the letter ''
I''
Flood Fill Tool: fill with color #69c995
- Effects
Texture Effects - Mosaïque glass use settings below

-
Selections- Deselect All
-Effects- Edge Effects- Enhance
-
6. Magic wand tool: Highlight layer with the letter ''L''
-
Flood Fill Tool: fill with color #528ab4
-
Effects- Plugins - EyeCandy 5 - Impact - Extrude -tab Settings/User Settings and choose my
Preset ''renee_soleil_extrude_4''
-
Effects- Plugins - Eye Candy 5 - Impact - Glass -
Preset - Clear
- Your letters are dressed up now so it is time to arrange them nicely
- The result
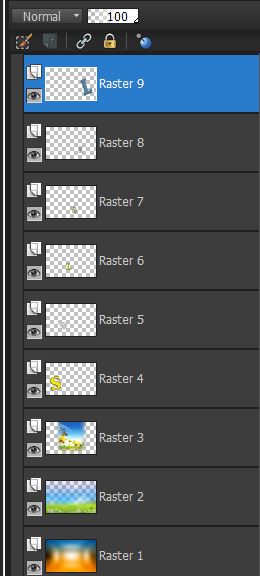
15. Close eye raster layers 1-2 and 3/ Activate a open layer /Layers-Merge- Merge Visible (all the letters of the word SOLEIL )
16.
Open the locked layers
-The result
17. Layer palette-Activate Raster 3
18. Open the tube ''fleur_ca0XL'' Edit/copy- Edit/ paste as new layer on your working area and move
19. Effects- 3D Effects-Drop Shadow-Default settings
20. Open the tube ''calqguismistedmongolfiere29082012''
Image Resize 60% /Edit/copy- Edit/ paste as new layer on your working area and move
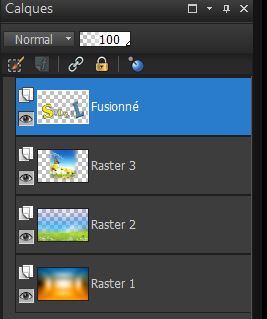
21. Layers-Merge- Merge Visible
22. Layers- Duplicate
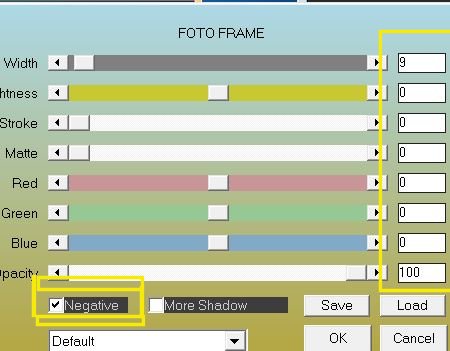
23. Effects- Plugins - AAA Frame - Foto Frame- checked
Negative
24. Image
Resize 88% (All layers not checked)
25. Activate the bottom of the Layers palette (merged layer)
26. Adjust-Blur- Gaussian Blur: Radius 32
27. Activate the top of the Layers palette (copy of merged layer )
30.
Open the tube ''betje-schildpad-15-05-2012''
Image Resize 70%. Edit/copy- Edit/ paste as new layer on your working area and move
31. Layers- New raster layer
32. Picture Tube Tool: open the tube ''gazon '' with these settings /It is in your psp ''corel_10_046''
Stamp 1x on your working aerea

33. Layers- Arrange- Move Down
34. Open the tube ''hublo'' Image Resize 35% /Edit/copy- Edit/ paste as new layer on your working area and move
35. Layer Palette: Set the Blend mode to "Hard Light "
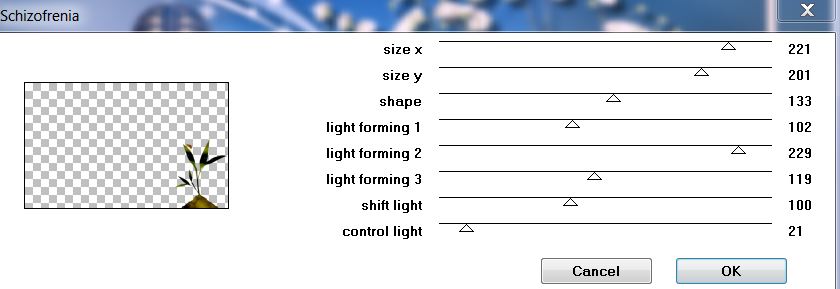
36. Open the tube ''calguisccinelle19210'' /Edit/copy- Edit/ paste as new layer on your working area and move
37. Effects- Plugins - Tronds II - Schizofrenia
38. Image - add borders-Symmetric checked 5 pixels color #f6e90e
-
Save as JPG
I hope you enjoyed this lesson
This lesson was written by Renée
18/04/2013

|


 Translations