|
Let's start the lesson. Open the Color-Palette
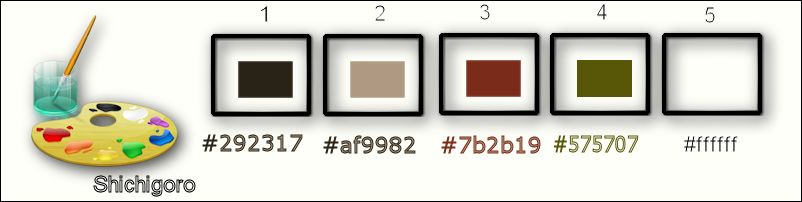
-Material Properties- Foreground color to #292317 Background color to #af9982
1. File - New - New Transparent Image:1015 x 645 pixels
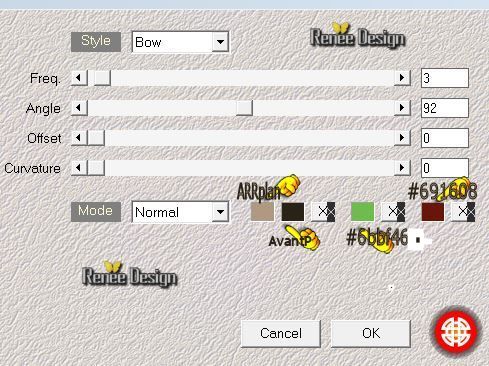
2. Effects- Plugins - Medhi Wavy lab 1.1 with these settings
The colors are BG-Color -FG-Color and #6bbf46
et#691608
3. Adjust- Blur-Gaussian Blur: Radius 46%
4. Layers- Duplicate
– Image
Mirror
- Set the layer opacity of this layer to 50%
- Layers- Merge- Merge Down
5. Layers- Duplicate
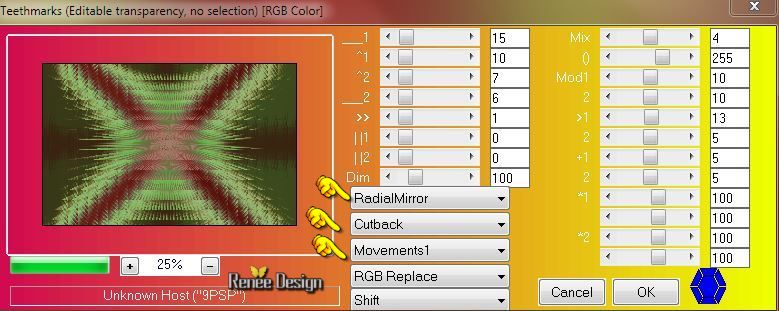
6. Effects- Plugins - Innovation 1.5 - Teethmarks with these settings
7. -Double click on this layer and set the Blendmode to "Difference "- Set the layer opacity of this layer to 38%
- Properties Background-background color to
#7b2b19
8. Layers - New raster layer
9.
Selections - load/save selection - load selection from disk and select my file:
« Shichigoro_1 »
- Activate Flood Fill Tool and fill the selection with the background color
Selections- Deselect All
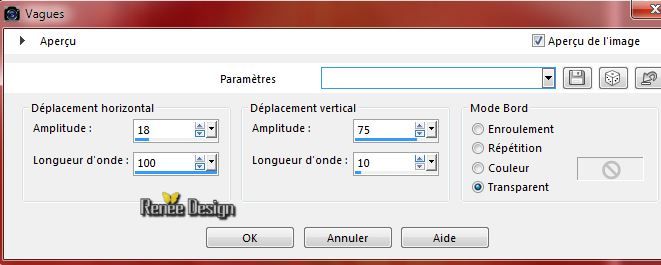
10. Effects- Distortion Effects- Wave with these settings
11. Effects- Plugins –Medhi Weaver
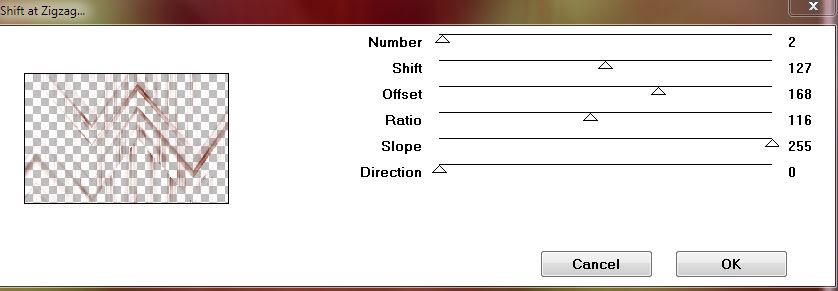
12.
Effects- Plugins –Mura’s Seamless –Schift at Zigzag
13.
Selections - load/save selection - load selection from disk and select my file : ‘’Shichigoro_2’’
- Hit the Delete Key of your Keyboard
(click 3 times )
- Selections- Deselect All
14. Layers - New raster layer
15.
Selections - load/save selection - load selection from disk and select my file : ‘’Shichigoro_3’’
- Activate Flood Fill Tool and fill the selection with the foreground color
16. Effects- Plugins –Eyecandy 5 Textures – Brick wall use settings below
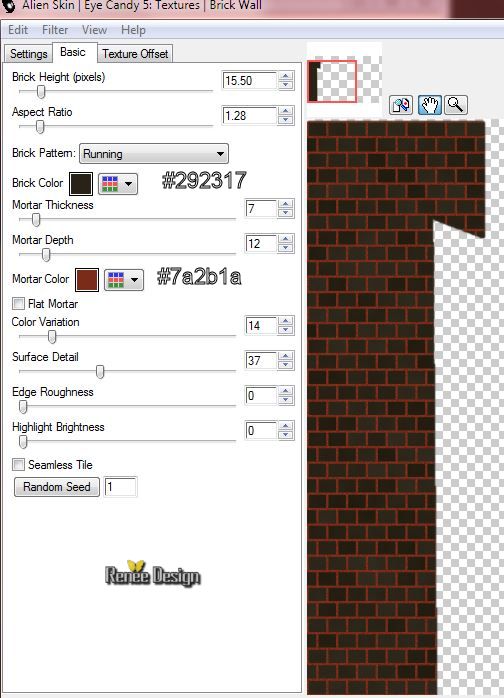
Selections- Deselect All
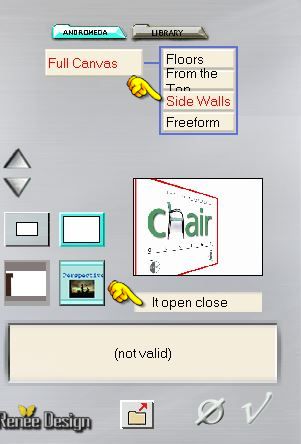
17. Effects- Plugins - Andromeda – Perspective – Side
Walls
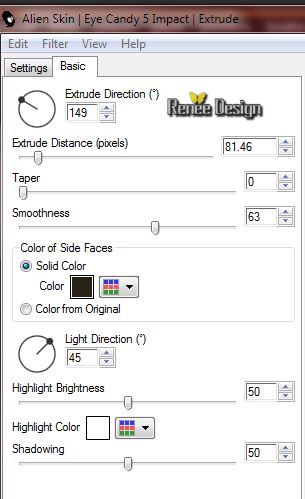
18.
Effects- Plugins -Eyecandy5 Impact -
Extrude use settings below
19. Layers - New raster layer
20.
Selections - load/save selection - load selection from disk and select : ‘’ Shichigoro_4’’
21. Activate the tube « Shichigoro_porte’’
- Edit/copy-Edit paste into selection
22. Double click on this layer and set the Blendmode to "Luminance -Legacy"
23. Adjust-Sharpness-Sharpen More
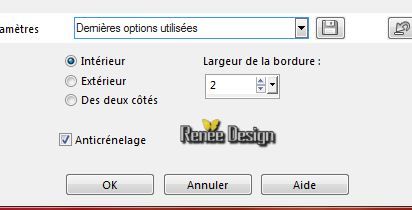
24.Selections-Modify-Select-Selection Borders with these settings-Inside
25. Layers - New raster layer
26. Activate Flood Fill Tool and fill the selection with the background color
Selections- Deselect All
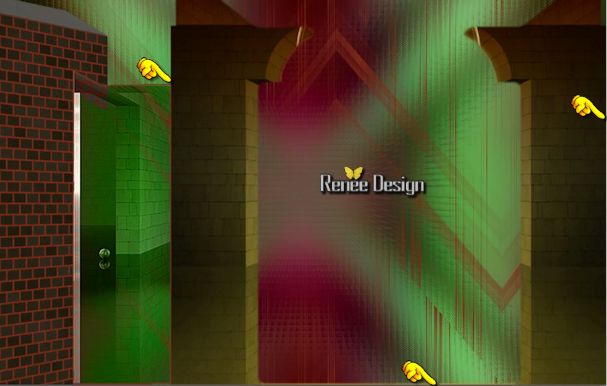
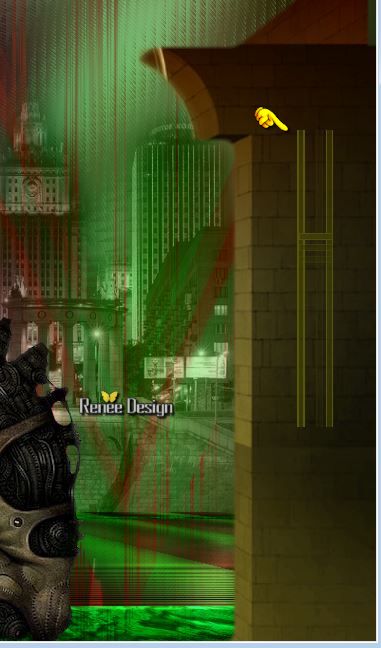
27. Activate the tube ‘’ Shichigoro_2colonnes’’
- Edit-Copy
- Edit - Paste as new layer on your working area
- With your Move Tool – move see print screen
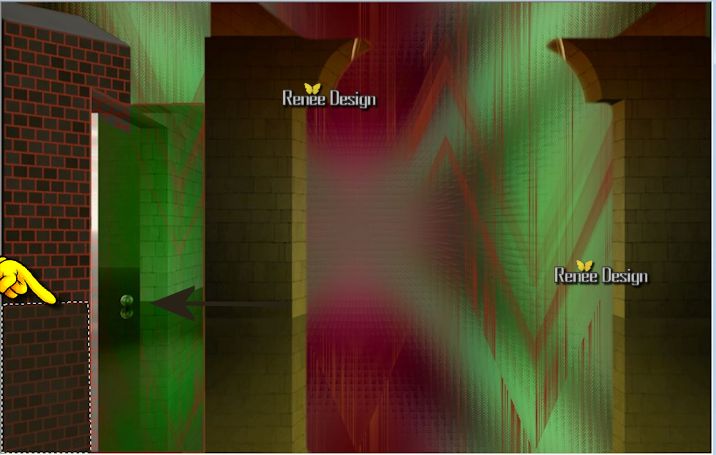
28. Layers - New raster layer
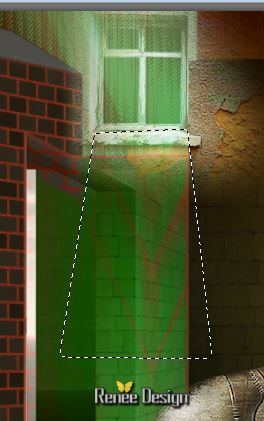
29. Activate Freehand Selection Tool - lasso -point to point with these settings

- Draw a selection as follows
(Stay with selection in the shade height as shown in the example )
30. Activate Pot of Paint
-Change the opacity of the color to 60% –Activate Flood Fill Tool and fill the selection with the foreground color
Selections- Deselect All
- Activate the bottom of the layer-Palette=Raster 1
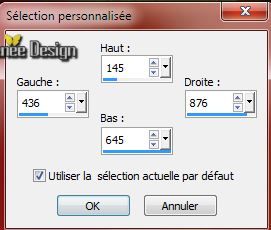
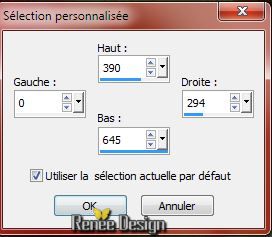
31.
Activate Selection Tool -Custom Selection (S) with these settings
32. Selections- Promote selection to layer
33. Layers- Arrange- Bring to Top
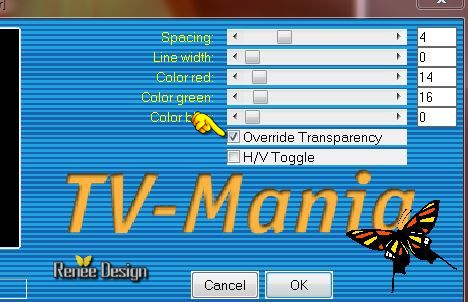
34.
Effects- Plugins - Neology Filter Pack- TV
mania
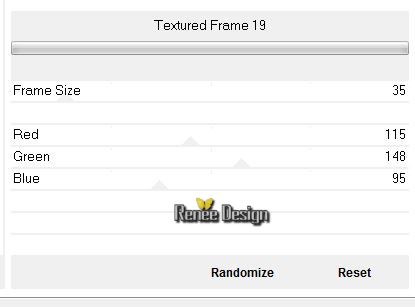
35.
Effects- Plugins - Unlimited ICNET Filter – Frames Textured- Textured
Frame 19
Selections- Deselect All
36. Layers- Arrange- Move 2x Down (under the wall)
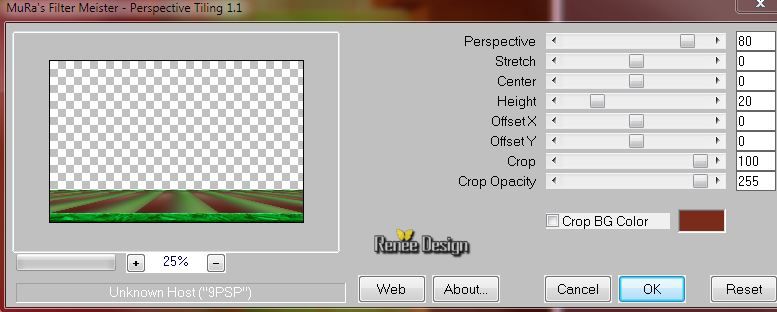
37.Effects- Plugins -Mura’s Meister - Perspective Tiling with these settings
38.
Activate Selection Tool -Custom Selection (S) with these settings
DELETE on your keyboard
Selections- Deselect All
39. Double click on this layer and set the Blendmode to Hard Light
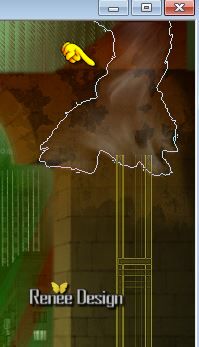
40. Activate the tube ‘’ TubeNP-719’’
- Edit/copy- Edit/ paste as new layer on your working area
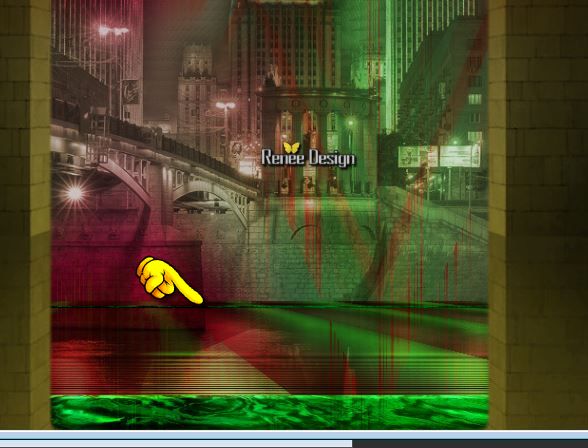
41. Layers- Arrange- Move Down (under promoted selection )
-With your Move Tool – move see print screen:
42. -Double click on this layer and set the Blendmode to "Luminance Legacy " and set the layer opacity of this layer to 69%
- Layer Palette look like this now-You should have this result
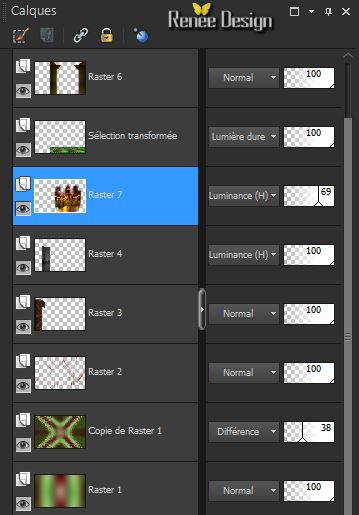
- Activate the top of the layer-palette
43.
Activate the tube ‘’
Renee_tube_2D07_give-a-flower_shichigoro-shingo.pspimage’’
- Image
Resize with 70%
- Edit-Copy– Edit - Paste as new layer on your working area
-
Activate your Move Tool -place your tube on the bottom of your image
44. Activate the tube ‘’ DI_tube805.psp’’
activate layer ‘’modifié’’ of this tube
- Edit-Copy–Edit - Paste as new layer on your working area
- With your Move Tool -move to the upper left side
45. Double click on this layer and set the Blendmode to Screen
46. Layers - New raster layer
47. Activate Freehand Selection Tool - Lasso - Point to point
Draw a selection like this
48. Pot of Paint: Change the opacity of the color to 20% -Activate Flood Fill Tool and fill the selection with color white
Selections- Deselect All
49.
Effects- Plugins -Toadies -What are you
20/20
50. Activate the tube “”Shichigoro_cercles’’
- Edit/copy- Edit/ paste as new layer on your working area (placed on the left wall)
-Material Properties- Foreground color to #575707
51. Layers - New raster layer
52. Activate Brush:‘Shichigoro1’ in your PSP
- File- Export Custom Brush (Give it a name) -
53. Activate Brush Tool and select my file:‘Shichigoro1’ with these settings

-Stamp your brush in the right side by using your foreground color
54. Layers- Duplicate
- Image-Flip/ Place against the bottom edge (see the finished image)
55. Layers- Merge- Merge Down
56. Effects- Edge Effects- Enhance
57. Double click on this layer and set the Blendmode to "Screen" and set the layer opacity of this layer to 59%
-Material Properties- Foreground color to #7b2b19 -Background color to color white
58. Activate your Brush:‘’Shichigoro3’’ in your psp-- File- Export Custom Brush (Give it a name) -Activate Brush Tool and select my file:‘’Shichigoro3’’ Size 220

59. Layers - New raster layer
-
Stamp your brush in the upper right corner by using your foreground color

60. -Double click on this layer and set the Blendmode to "Luminance Legacy " and set the layer opacity of this layer to 53%
64. Layers - New raster layer
65. Activate your Brush:‘’ Shichigoro2 ‘’in PSP
- File- Export Custom Brush (Give it a name) -
Activate Brush Tool and select my file: ‘’ Shichigoro2 ‘’Size 165- Rotate
180

-Stamp your brush in the upper right corner by using your background color
66.
Set the layer opacity of this layer to 46%
67. Layers - New raster layer
68. Activate your Brush:’’ Shichigoro4’’ in your PSP
File- Export Custom Brush (Give it a name) / Size 60 –Rotate
0
Activate Brush Tool and select my file:’’ Shichigoro4’’ with these settings

-
Stamp your brush in the right side by using your background color

69. Double click on this layer and set the Blendmode to Overlay
70. Layers- Duplicate
71. Layers- Merge- Merge Down
72. Activate the tube ‘’ Shichigoro_barres_clous’’
- Edit/copy- Edit/ paste as new layer on your working area
- With your move tool place it to the right side
73. Layers-Merge-Merge Visible
74. Image - Add borders-Symmetric checked: 1 pixels Color 1
75. Image - Add borders-Symmetric checked: 2 pixels Color 2
76. Image - Add borders-Symmetric checked: 2 pixels Color 1
77. Image - Add borders-Symmetric checked: 60 Pixels white
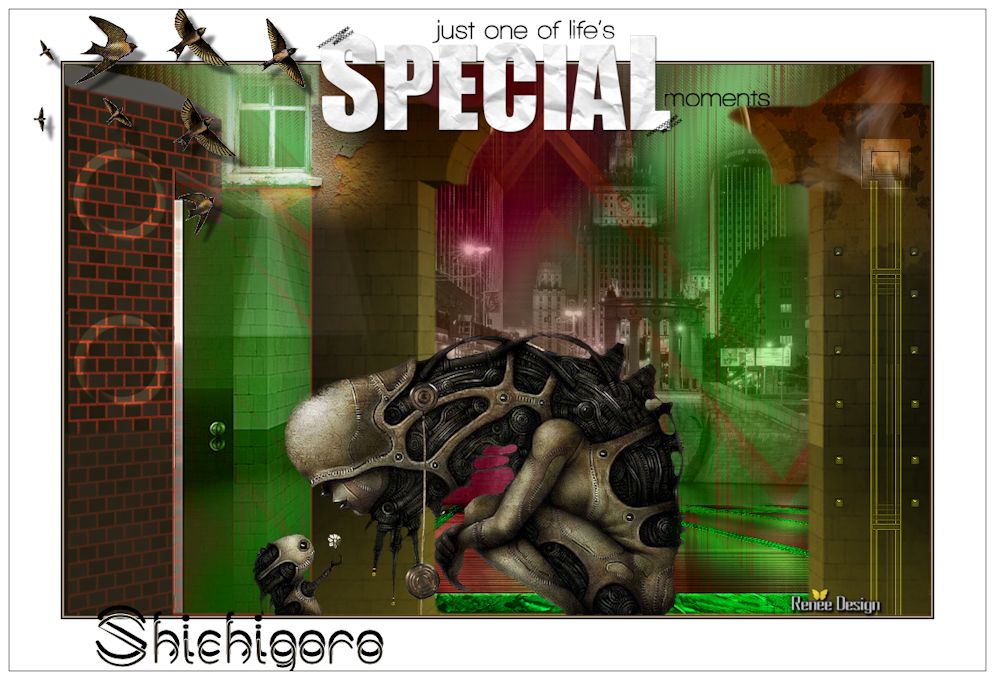
78. Activate the tube ‘’titre’’ Edit-Copy–Edit - Paste as new layer on your working area and move
79. Activate Text Tool-Font "ZirkleOne "Size 72
Pixels
- Material Properties: Foreground color black --Background color white
-
Write your text "Shichigoro "
73. Effects - 3D Effects - Drop shadow with these settings:-10/ 0 /100 /0 black
74.
Activate the tube’’Renee_tubes_flock-of-swallows-.pspimage’’
- Edit-Copy–Edit - Paste as new layer on your working area-With your move tool move to the left
75. Activate Erase Tool- If you have too much Swallows then erase some (to your taste)
76. Effects - 3D Effects - Drop shadow using the default setting
77. Image - Add borders-Symmetric checked:1 pixels Color 1
78. Image - Add borders-Symmetric checked:10 pixels white
79. Image-
Resize with 995 pixels Width
Save as JPG
I hope you enjoyed this lesson
Renée
This lesson was written by Renée 18/01/2015
Placing
2015
*
Any resemblance with an existing lesson is merely a coincidence *
* Don't forget to thank the people who work for us and with us. I named the tubeurs - Testers and the translators.
Thanks Renée.
*
| 
 Translations


 When you see this logo the filter is imported in Unlimited *

 All rights reserved