|
Let's start the lesson
Saint Valentin
2024-01-01
 
-
Preparation
-Material Properties: Set your Foreground color to color #cf5a58= 1 – Set your Background color to color #f0e4d8= 2

1.File-Open a New Transparent Image in this size :1000 x 700 Pixels
2.Flood Fill Tool
 –
Fill the layer with the Foreground color #cf5a58= 1 –
Fill the layer with the Foreground color #cf5a58= 1
3.
Selections – Select All
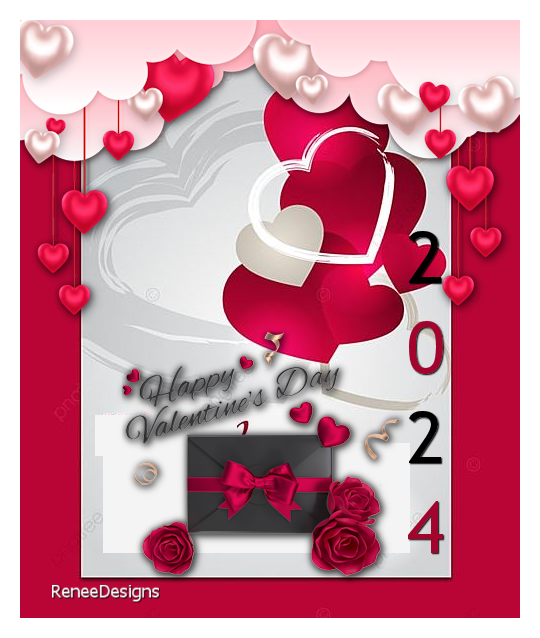
Open the tube ‘’Renee-TUBES-Saint-Valentin-2024-1’’-
Edit - Copy- Activate your work -Edit - Paste into Selection

4.
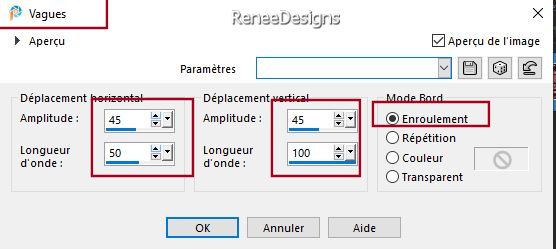
Effects – Distortions Effects– Wave use the settings below
5.
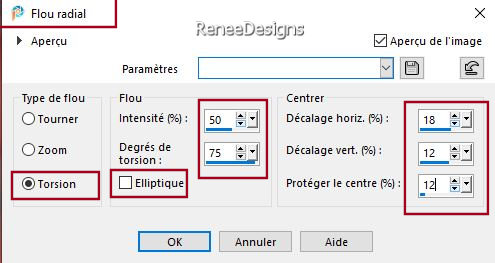
Adjust- Blur- Radial Blur use the settings below
6.
Adjust- Blur - Gaussian Blur -Radius 22%
7.
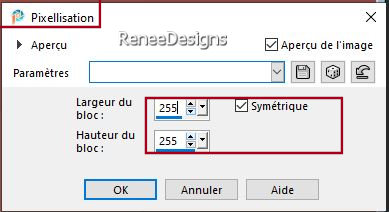
Effects – Distortion Effects– Pixelate use the settings below
8.
Effects – Edge Effects– Enhance More
9.
Adjust- One Step Photo Fix
10.
Selections –load/save selection –load selection from disc and select my selection:’’ ST-Valentin-2024-1’’
-
Selections- Promote Selection to Layer
11.
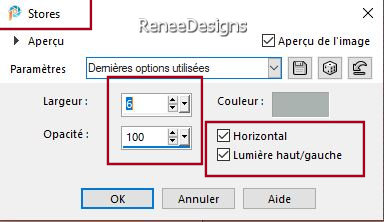
Effects –Texture Effects – Blinds use the settings below-Color #aab3af= 3
12.
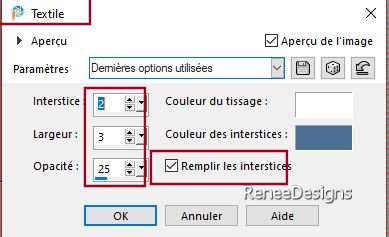
Effects – Texture Effects– Weave use the settings below - Colors White and #4a6f93=4
13.
Effects – Edge Effects– Enhance More
14.
Effects- 3D- Effects- Drop Shadow with these settings: 8/8/55/35 Color Black

15.
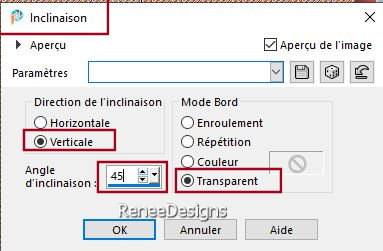
Effects- Geometric Effects- Skew use the settings below
16. Effects- Image Effects- Seamless Tiling
/Stutter Diagonal
17. Effects- Image Effects- Seamless Tiling /
Stutter Vertical
18.
Layers- Duplicate
19.
Image - Mirror - Mirror Horizontal (Image - Mirror in older versions of PSP)
20.
Layers- Merge- Merge Down
21.
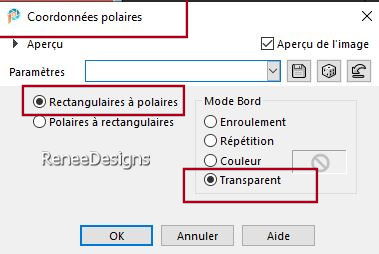
Effects- Distortion Effects-Polar Coordinates-Rectangular to Polar -Transparent
22.
Selections –load/save selection –load selection from disc and select my selection:’’ ST-Valentin-2024-2’’


23.
Image - Mirror - Mirror vertical ( Image - Flip in older versions of PSP)
24.
Objects - Align - Top
25.
Effects- 3D- Effects- Drop Shadow with the same settings
26.Layers-Properties-Set the Blend Mode to " Multiply "
- Activate the layer underneath ( Raster 1)
27.
Effects- Plugins - Filters in Unlimited 2.0 -
Crescent Moon - CutGlass...with these settings: 3/70/0
28.
Effects- Image Effects- Seamless Tiling using the default settings
29.
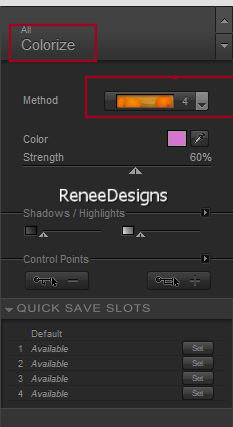
Effects- Plugins - Nick Softwar Color Effex
Pro.3 0 –Colorize- Method 4 – Color #d874d0 -Strenght 60%
30.
Open the tube
‘’ST Valentin-2024-Image 1’’ - Edit - Copy- Activate your work -Edit - Paste as new layer
31.
Pick Tool: (K) on your keyboard -Enter these parameters on the toolbar
 3
/242 3
/242
- Press ( M ) to close the tool
-Activate Raster 1 in the Layer Palette
32.Open the tube ‘’ST Valentin-2024-Image 2-cœurs’’ - Edit - Copy- Activate your work -Edit - Paste as new layer
33.
Layers-Properties-Set the Blend Mode to "Overlay " -Reduce the opacity of this layer to 53%
34.
Activate the tube ‘’Renee-TUBES-Saint-Valentin-2024-2-Flacons’’
-
Image - Resize to 50%
-
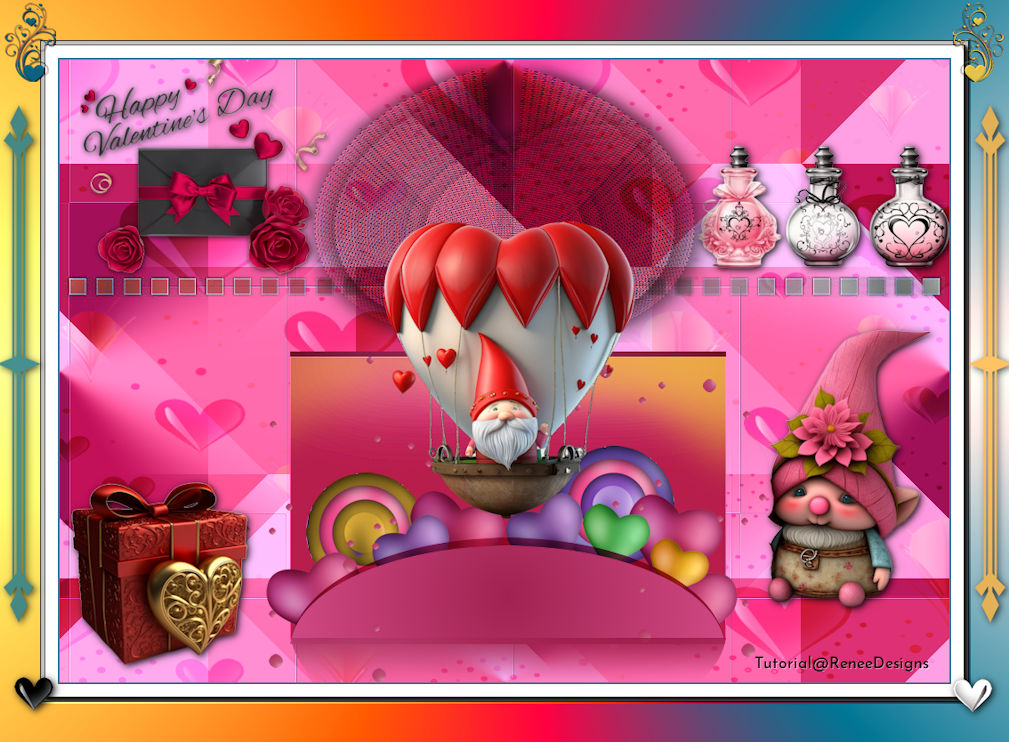
Edit - Copy- Activate your work -Edit - Paste as new layer–Move the tube in the right place ( see finished image )
35.
Effects- Plugins - Alien Skin EyeCandy 5 -
Impact -Perspective Shadow- Preset : Drop Shadow Lowest
36.
Open the tube ‘’ST Valentin-2024-Image 3’’ - Edit - Copy- Activate your work -Edit - Paste as new layer
Place in top left corner ( see finished image )
You may minimize your working area for a moment, but do not close, we will need it again soon
37.
File-Open a New Transparent Image in this size : 608 x 450 Pixels
38.
Selections –load/save selection –load selection from disc and select my selection:’’ ST-Valentin-2024-3’’
39. Open the tube
‘’STValentin-2024-Fond-boite’’ - Edit - Copy- Activate your work -Edit - Paste into Selection
40.
Layers- New Raster Layer
41.
Selections –load/save selection –load selection from disc and select my selection:’’ ST-Valentin-2024-4’’
42.
Open the tube ‘’STValentin-2024-Fond-boite’’ - Edit - Copy- Activate your work -Edit - Paste into Selection
43.
Adjust- One Step Photo Fix
44.
Effects – Edge Effects –Enhance
45.
Layers-Properties-Set the Blend Mode to " Screen "
46.
Layers- New Raster Layer
47.
Selections –load/save selection –load selection from disc and select my selection:’’ ST-Valentin-2024-5’’
48.Properties Foreground :
Set your Foreground Color to color #f0bd41=5
Flood Fill Tool
 –
Fill the selection with the Foreground color #f0bd41=5 (click twice in the selection) –
Fill the selection with the Foreground color #f0bd41=5 (click twice in the selection)
-
Material Properties: Set your Foreground Color to color #a12350=6---Set your Background Color to color #d14984=7
-
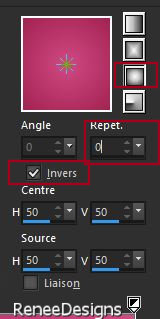
Replace your Foreground color with a Foreground/Background Sunburst Gradient configured like this
49.
Layers- New Raster Layer
50.
Selections –load/save selection –load selection from disc and select my selection:’’ ST-Valentin-2024-6’’
51.
Flood Fill Tool
 –
Fill the selection with the Gradient –
Fill the selection with the Gradient

52.Layers-Properties-Set the Blend Mode to " Multiply "
53.
Layers- New Raster Layer
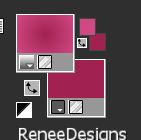
Material Properties:- Turn the colors around- FG-Color #d14984=7---BG-Color #a12350=6
54.
Selections –load/save selection –load selection from disc and select my selection:’’ ST-Valentin-2024-7’’
55.
Flood Fill Tool
 –Fill the selection with the Gradient –Fill the selection with the Gradient

- Activate Raster 3 in the layer-Palette
56.
Open the tube - ‘’ST
Valentin-2024-Image – Cercle’’ - Edit - Copy- Activate your work -Edit - Paste as new layer
-
Place on the right (see finished image)
57.
Layers - Duplicate– Colorize to your taste- Place on the left
58.
Open the tube ‘’ST Valentin-2024-Image – cœurs’’
Place and colorize if desired
Or take Renée's- ‘’ST Valentin-2024-cœurs-en ligne’’
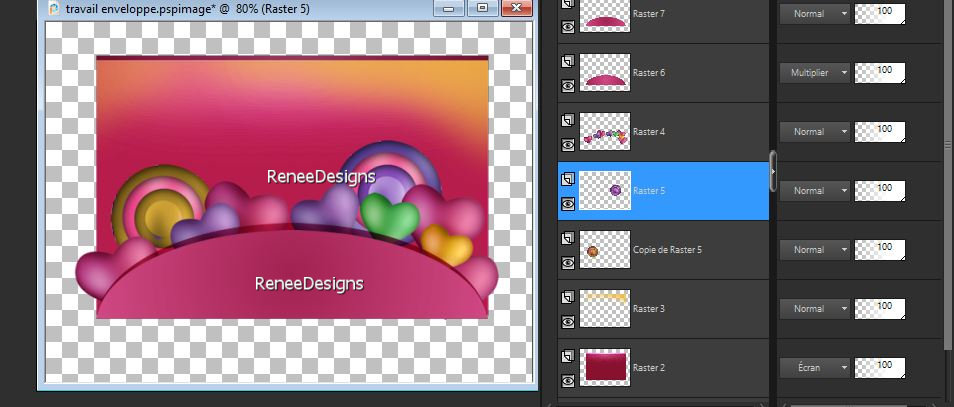
- Your work and layer palette look like this now-You should have this result
59.
Open the tube ‘’ST
Valentin-2024-Image – billes’’ - Edit - Copy- Activate your work -Edit - Paste as new layer
- Do not move !!
-
Layers- Merge- Merge Visible
-
EDIT- COPY
-
Activate your minimized image of point 36
60.
Edit - Paste as new layer (do not move)
61.
Objects – Align - Bottom
62.
Open the tube ‘’ST
Valentin-2024-Ombre-enveloppe.’’ - Edit - Copy- Activate your work -Edit - Paste as new layer
63.
Pick Tool: (K) on your keyboard -Enter these parameters on the toolbar
 260
/ 650 260
/ 650
- Press ( M ) to close the tool
64.
We are going to decorate( Renée has several tube in a separate folder) –Open " St-Valentin-2024 en Plus "-Resize if necessary-
Drop shadow to your own taste
65. Image - Add Borders-Symmetric checked: 2 Pixels-Color # 4a6f93=4
66.
Selections - Select All
67. Image - Add Borders-Symmetric checked: 20 Pixels -Color White
68. Effects- Plugins – AAA Frame Foto Frame use the settings below
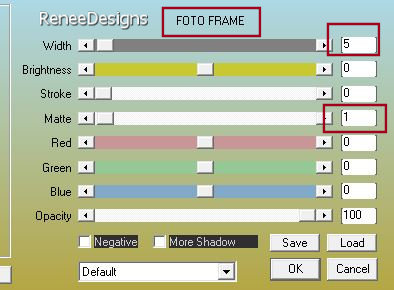
69.
Selections - Select All
70. Image - Add Borders-Symmetric checked: 45 Pixels -Color White
71. Selections – Invert
72. Effects- Plugins - Filters in Unlimited 2.0 - Andrew's
Filter Collection 56 - A Bit Left Over Gradient...using the default settings

73. Open the tube ‘’Renee-STValentin-2024-Deco –cadre’’ - Edit - Copy- Activate your work -Edit - Paste as new layer . Do not move
- Paste the author's watermark on your work and your own watermark
74.
Layers- Merge- Merge All ( flatten)
75. Image - Resize - to 89% - Resize all layers- Checked
Save as JPG
01/01/2024

I hope you enjoyed this lesson
Renée
This lesson was written by Renée 01/01/2024
Edited and Update
in 2024
*
*
Any resemblance with an existing lesson is a coincidence
* Do not forget to thank the people who work with us and for us - I have appointed the tubeurs and translators
Thanks
|
 Translations


