|
Let's start the lesson.

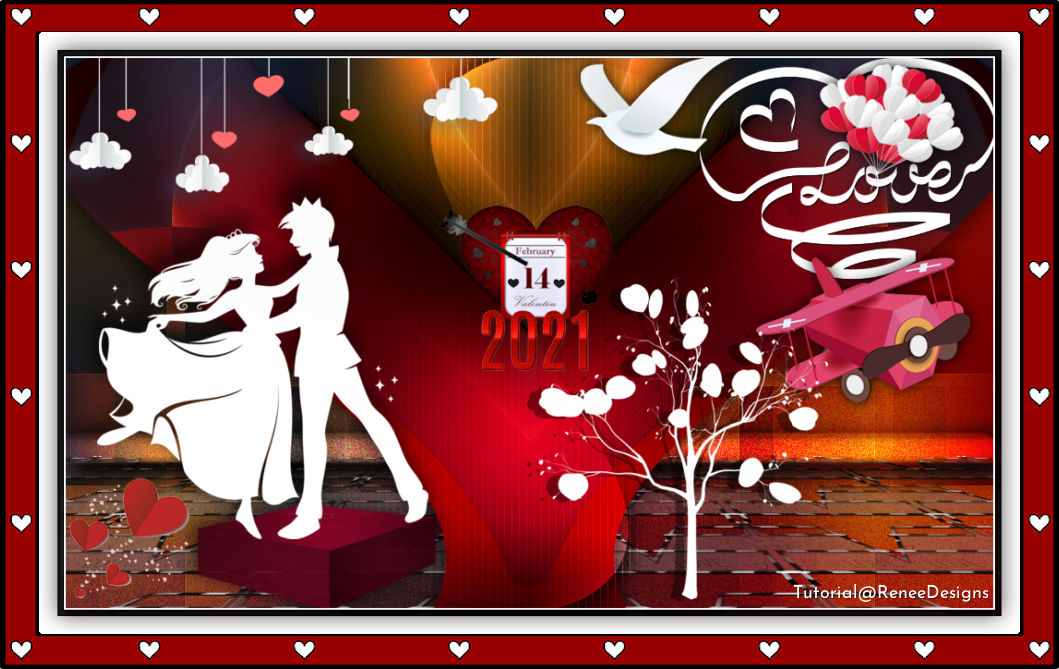
Saint Valentin/Valentine 2021
- Use the color palette in your psp,
A super simple way to quickly change any color in Paintshop pro

- Preparation
- Material Properties: Set your foreground color to color #1d1d1d= 2– Set your background color to color #750000 = 1
1.File: Open a new transparent image 1015 x 625 Pixels
2. Effects – Plugins– Medhi – Wavy Lab 1.1 use the settings below
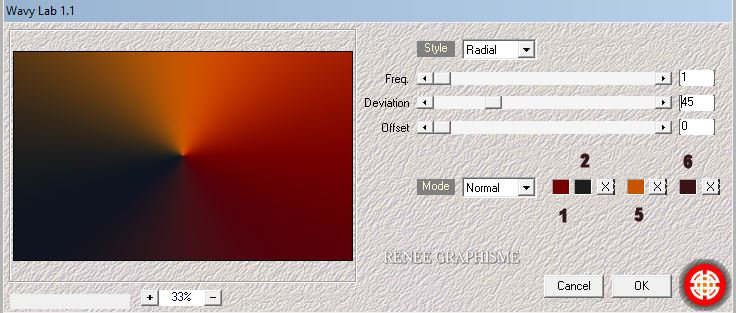
3. Effects – Art
Media Effects – Brush strokes with these settings- Color White
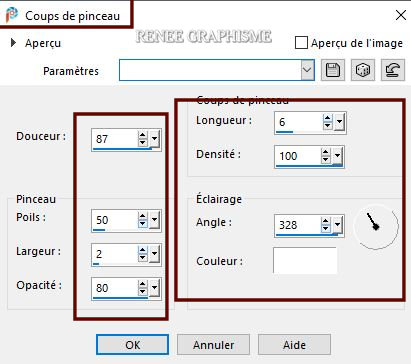
4. Layers- Duplicate
5. Image - Free Rotate
90° Direction Right
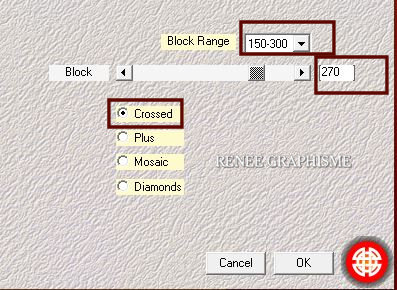
6. Effects – Plugins– Medhi – Sorting Tiles use the settings below
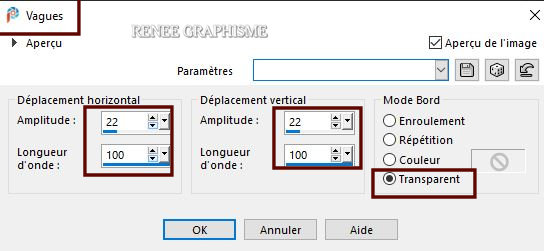
7. Effects – Distortion Effects– wave use the settings below
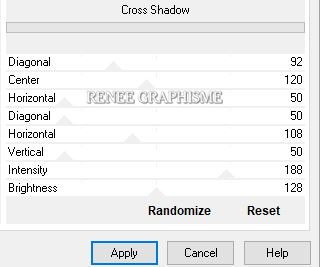
8. Effects –Plugins-
Unlimited 2.0 – Graphic Plus – Cross Shadow use the settings below
- Activate the layer underneath (Raster 1)
-
Selections-Select All
- Activate the layer above
9. Image - Crop to selection
10. Layers- Duplicate
11. Effects –Plugins-
Unlimited 2.0-Graphic plus - Horizontal Mirror with these settings: 128/0
12. Effects – 3 D Effects– Drop Shadow with these settings: 3/ -3 /80 /45 Color Black
13. Layers- New Raster Layer
14. Color Palette- Set your Foreground color to color #ffffff=3
Activate Flood Fill Tool  –
fill the layer with the Foreground color = 3 –
fill the layer with the Foreground color = 3
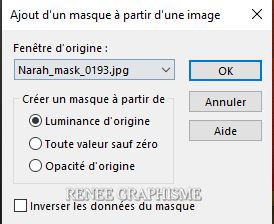
15. Layers- New Mask Layer -From Image and select Mask ‘’
Narah_mask_0193’’
- Layers Duplicate -
you have this
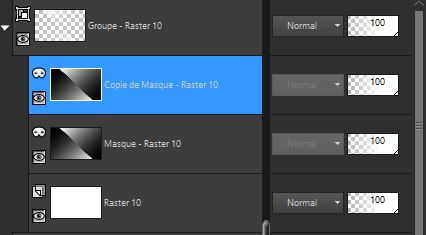
- Layers-Delete
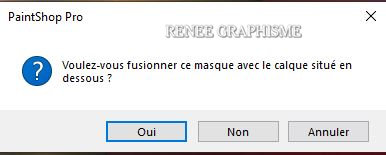
As requested-Would you like this mask merged into the layer below it ?>> Answer -Yes
- You have this
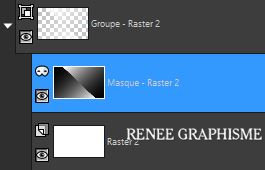
Activate the layer above (Group Raster 2 ) - Layers- Merge- Merge Group
16. Effects– Geometric Effects – Circle – Transparent
17. Layers-Properties-Change the Blend Mode to " Overlay"
17a.
Effects – 3 D Effects– Drop Shadow with these settings: 3/ -3 /80 /45 Color Black
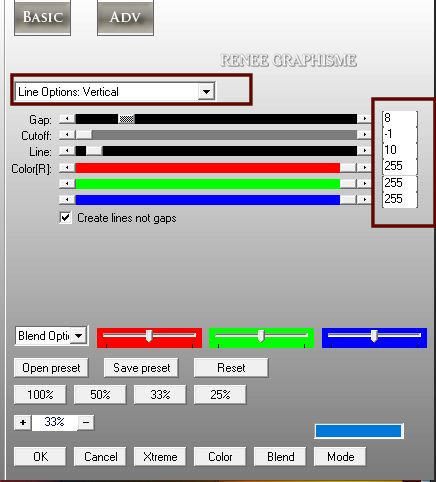
18. Effects – Plugins - AP[Lines] Lines
Silverling use the settings below
19. Effects – Plugins – Alien Skin EyeCandy 5 impact – Perspective
Shadow use the settings below
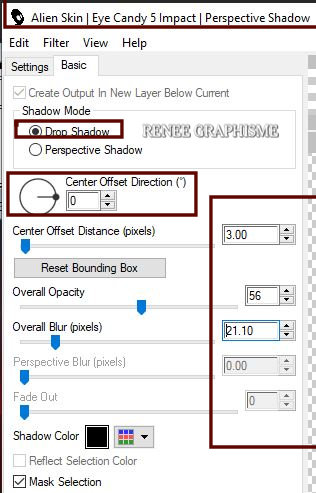
- Activate Copy of Raster 1-Repeat this Filter Alien Skin EyeCandy 5 impact – Perspective
Shadow with the same settings
Your work and Layer Palette look like this now-You should have this result
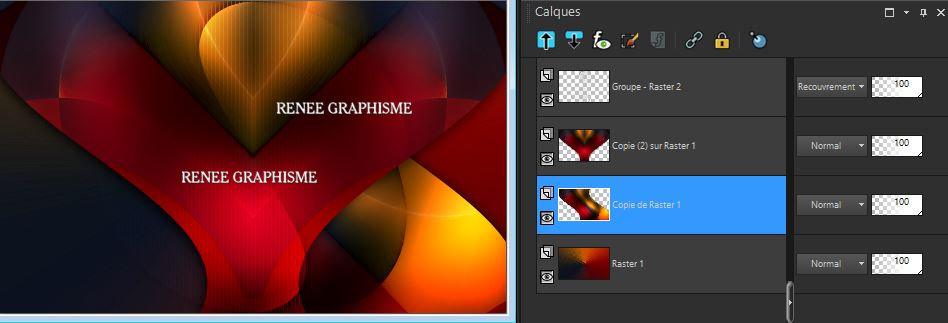
-Stay on this layer
20. Effects –Plugins-
Unlimited 2.0- Toadies – Weaver with these settings
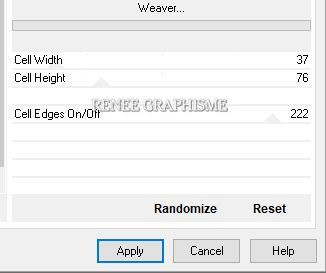
21. Effects - Edge Effects – Enhance
22. Effects – Reflection Effects– Rotating Mirror use the settings below
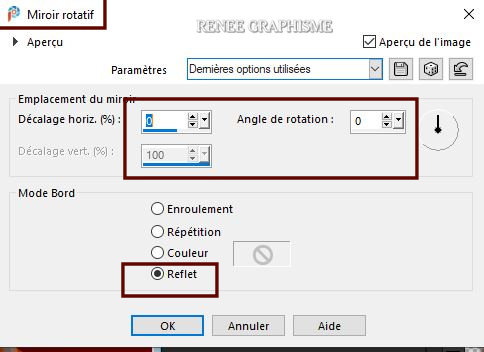
23. Effects – Plugins – Vanderlee- Unplugged X – Difference use the settings below
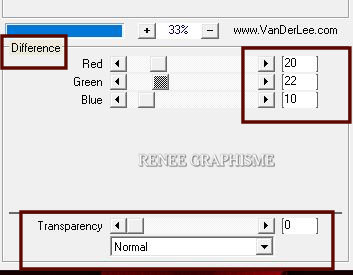
24. Layers-Properties-Change the Blend Mode to " Screens " –Lower the Opacity to 47%
Close Eye of Copy (2) on Raster 1 to better see the work
25. Layers- New Raster Layer
26. Activate Selection Tool -Custom Selection (S) -Rectangle with these settings 
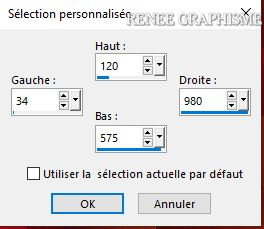
27. Activate Flood Fill Tool
 –
fill the selection with the Foreground color #ffffff=3 –
fill the selection with the Foreground color #ffffff=3
28. Selections-
Modify- Contract 8 Pixels
DELETE

Selections- Deselect All
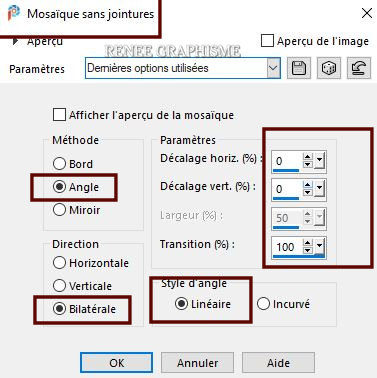
29. Effects- Image Effects- Seamless Tiling use the settings below
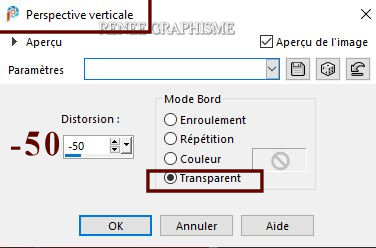
30. Effects – Geometric Effects – Perspective Vertical with these settings
31. Effects –Plugins-
Unlimited 2.0- It@lian Editors Effect- Scacchi using the default settings
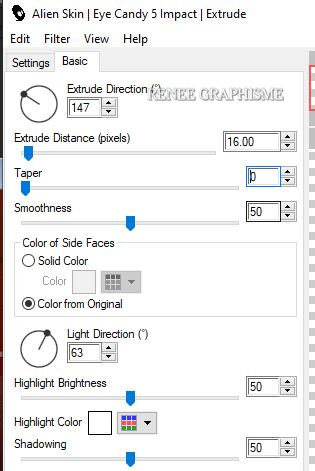
32. Effects- Plugins – Alien Skin EyeCandy 5 Impact – Extrude use the settings below
33. Effects – Reflection Effects– Rotating Mirror use the settings below

34. Layers- New Raster Layer
35.Selections –load/save selection –load selection from disc and select my selection: ‘’ST-Valentin2021-1’’
36. Open the image
‘’Renee_ST-Valentin-2021-Love’’
- Edit - Copy- Activate your work -Edit - Paste into Selection
Selections- Deselect All
37. Layers-Properties-Lower the Opacity to 24%
38. Layers- Arrange- Move Down
-Activate the layer above (Raster 2)
- Layers -Merge- Merge Down
39. Effects – Plugins– Mura’s Meister – Perspective Tiling using the default settings
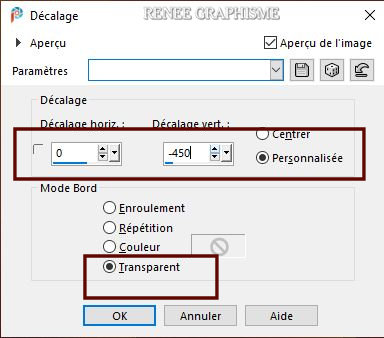
40. Effects – Image Effects- Offset with these settings
41. Effects – 3 D Effects– Drop Shadow with these settings: 1/1/100/ 1 Color Black
-Make visible the Copy Layer (2) on Raster 1
Layer Palette- Activate the bottom layer (Raster 1)
– Selections -
Select All
-Layer Palette- Activate Raster 3
42. Image - Crop to selection
-Stay on this layer
43. Layers- New Raster Layer
44.Selections –load/save selection –load selection from disc and select my selection: ‘’ST-Valentin2021-2’’
45. Activate Flood Fill Tool
 –
Fill the selection with the Foreground color #ffffff=3 –
Fill the selection with the Foreground color #ffffff=3
46. Effects - Plugins– Alien Skin EyeCandy 5 Impact – Extrude with the same settings ( point 25)
Selections- Deselect All
47. Effects – 3 D Effects– Drop Shadow with these settings: 10/10/100/45 Color Black
48. Layers-Properties-Change the Blend Mode to " Overlay "
- To replace the top of the Layer Palette
49. Layers- New Raster Layer
50.Selections –load/save selection –load selection from disc and select my selection: ‘’ST-Valentin2021-3’’
51. Activate Flood Fill Tool  – Fill the selection with the Foreground color #ffffff=3
Selections- Deselect All
52. Effects – 3 D Effects– Drop Shadow with these settings: 1/1/85/0 Color Black
53. Open the tube ‘’Renee_ST-Valentin-2021-Montage’’ -Edit - Copy- Activate your work -Edit - Paste as a new layer
54.
Pick Tool (K) Enter these parameters for the X and the Y positions on the Toolbar
  545 / 0
Press ( M ) to close the Pick Tool
55.We are going to decorate- I have several tube layers to use
– Paste as a new layer and place the decorative elements individually according to your taste
56. Image - Add borders-Symmetric checked: 2 Pixels Color Black
Selections -Select All
57.Image - Add borders-Symmetric checked: 20 Pixels Color White
58. Effects – 3 D Effects– Drop Shadow with these settings: 0/0/65 / 35 Color Black
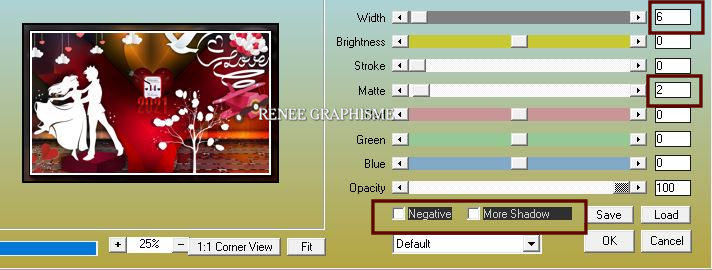
59. Effects – Plugins – AAA Frame – Foto Frame use the settings below
Selections- Deselect All
60.Edit-Copy !!!!!
61. Open the tube " Cadre " in your Psp
- Activate the Magic Wand with these settings - select the inside of the frame
- Selection- Modify-Expand 3 Pixels
- Edit- Paste -Into Selection (Image is still in your PSP memory)
- Layers- Arrange- Move Down
Selections- Deselect All
62. Layers- Merge- Merge All
Save as JPG
To all of you a Happy Valentine's Day

I hope you enjoyed this lesson
Renée
This lesson was written by Renée28-12-2020
Edited and Update
2020
*
Any resemblance with an existing lesson is a coincidence
* Do not forget to thank the people who work with us and for us
I have appointed the tubeurs and translators
Thanks
|
.png)
 Translations


