|
Let's start the lesson.
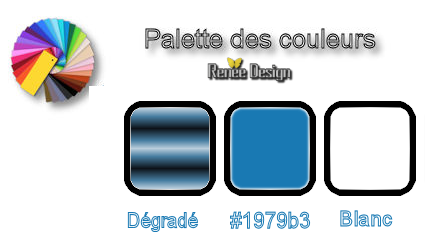
Used Colors

-
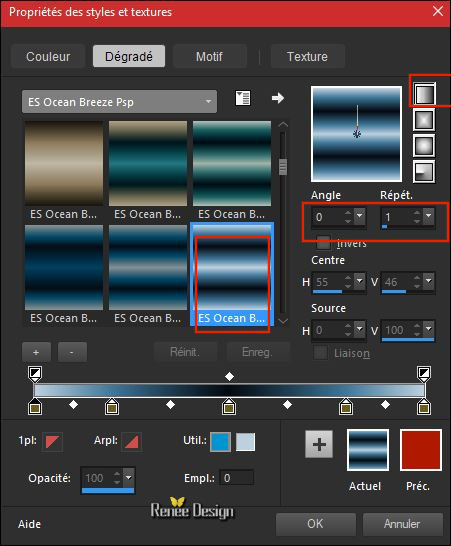
Preparation - Color Palette: Set your foreground material into gradient and select "Es
Ocean Breeze 027 ‘’ – Prepare a linear gradient configured like this.
1.Open the Image ‘’Rentree_2017’’ Window - Duplicate (or shift+D) - Close the original and proceed on the copy -Promote Background Layer = Raster 1
2.
Layers- New Raster Layer
3.
Selections –load/save selection –load selection from disc and select my selection:‘’
Rentree_2017’’
4.
Activate Flood Fill Tool  – and fill the selection with the the gradient – and fill the selection with the the gradient
Selections- Deselect All
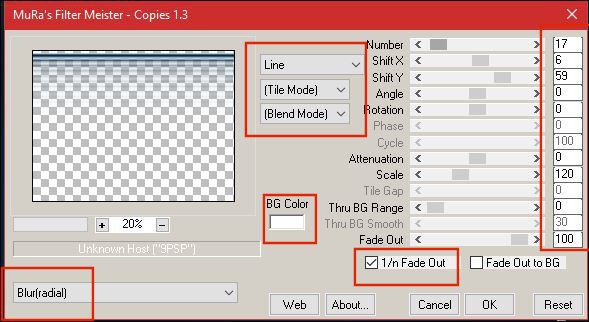
5. Effects –Plugins –
Mura’s Meister – Copies use the settings below
6.
Effects- Edge Effects- Enhance
7.
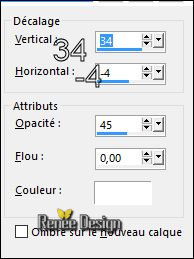
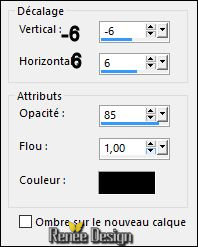
Effects – 3D Effects –Drop Shadow with these settings /#ffffff
8.
Layers- New Raster Layer
9.Activate Flood Fill Tool and fill the layer with #ffffff
10.
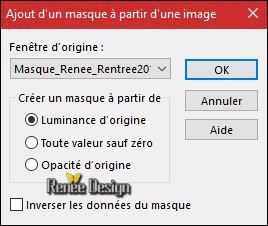
Layers- New Mask layer from Image and select ‘’Masque_Renee_rentree 2017’’
Layers-Merge- Merge- Group
11.
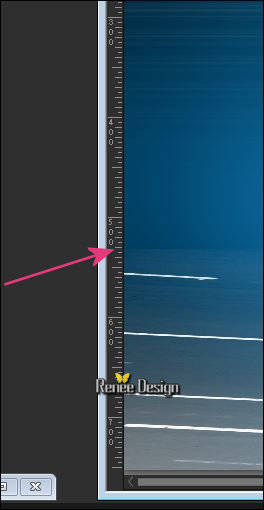
Activate the Pick Tool (K) Mode Scale- Pull the Top Node down to >> 570
-
Effects- Edge Effects- Enhance
-
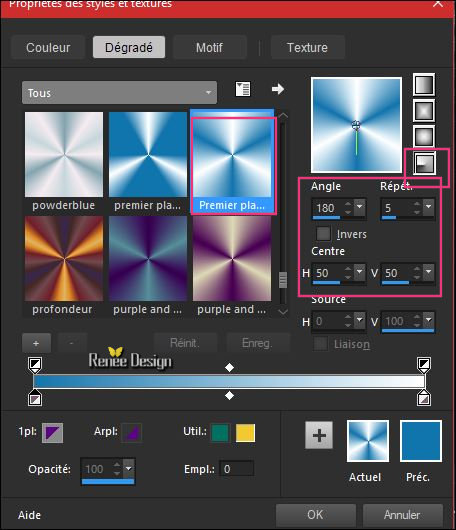
Preparation - Color Palette: Set your Foreground color to #1979b3 -Set your Background color to #ffffff
-Prepare a radial gradient configured like this.
12.
Layers- New Raster Layer
13. Activate Flood Fill Tool –fill the layer with the gradient
14.
Adjust- Blur- Gaussian Blur: Radius : 38
15.
Effects – Plugins – Filtre AP [Distort ] GridEdge
1 / patched
(Old version AP16 GX Power Blend)

16.
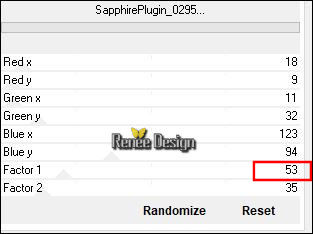
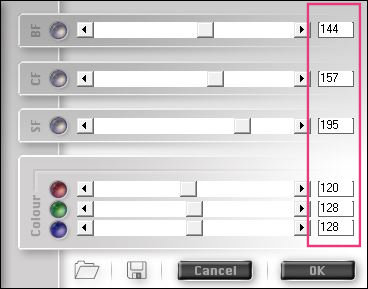
Effects –Plugins - Unlimited - Sapphire Filters 03-
SapphirePlugin_0295..
17.
Effects – Plugins – Fotomatic – Fast
Fix use the settings below
18.
Layers-Properties-Set the Blend Mode to " Soft Light "
19. Open your tube ‘’
Tubes_renee_rentree_2017.pspimage’’(do not close, we will need it again soon)
- Activate the layer ‘’terre’’ of the tube
- Edit - Copy- Activate your work -Edit - Paste as a new layer.
- Move tool / place your tube on the right side of your image
20. Activate the layer ‘’ Bonne rentree’’ of the tube- Edit - Copy- Activate your work -Edit - Paste as a new layer and move (see finished image )
- Layer palette – Make Raster 1 active
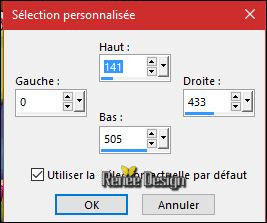
21.
Activate Selection Tool -Custom Selection (S) -Rectangle with these settings
-
Promote selection to Layer
Selections- Deselect All
22. Layers- Arrange- Bring to Top
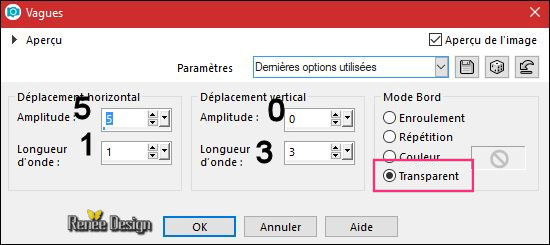
23. Effects- Distortion Effects- Wave use the settings below
24.
Font ‘’ An Unfortunate Event.ttf’’
Color #1979b3
and #ffffff
-
Text Tool -Write Vive l’école ‘’/ Size 36
Pixels
-
Layers- Convert to raster layer
25. Effects – 3D Effects –Drop Shadow with these settings
Open the tube ‘’ Renee_rentree2017_image3.png’’
- Edit - Copy- Activate your work -Edit - Paste as a new layer.
- Place against the text ''vive l’école ''
26. Layers- New Raster Layer
- Activate Brush Tool and select my file: ‘’ rentree 2017.PspBrush’’
- Stamp your brush at the right place by using your background color #ffffff
27. Effects – 3D Effects –Drop Shadow with these settings 1/1/85/1 black
28. Back on the tube ‘’ Tubes_renee_rentree_2017.pspimage’’
-I have 3 layers with decorations you can use.
Is everything in the right place and on the right layer ?
29.Image - Add borders-Symmetric checked 1 Pixel black
30.Image - Add borders-Symmetric checked 55 Pixels #ffffff
31. Open the tube ‘’ Cadre_Renee_Tube_Rentree_2017’’
- Edit - Copy- Activate your work -Edit - Paste as a new layer.
32. Image - Add borders-Symmetric checked 3 Pixels black
33. Image -
Resize to 999 Pixels width.
Save as JPG
I hope you enjoyed this lesson
Renée
This lesson was written by Renée 16/08/2017
Edited and Update
2017
*
Any resemblance with an existing lesson is a coincidence
*
Do not forget to thank the people who work with us and for us I have appointed the tubeurs and translators
Thanks
Renée
*
| 


 Translations


 If a plugin supplied appears with this icon it must necessarily be imported into Unlimited *