|
Let's start the lesson.
Podium_sur_ma_ ville

-
Preparation/ Material Properties: Set your foreground color to #6b0001=Nr.1 - Set your background color to #000000 = Nr. 3
1. Open the Image ‘’ Fond_Podium_sur_ma_
ville’’- Window - Duplicate (or shift+D) - Close the original and proceed on the copy -Promote Background Layer =Raster 1
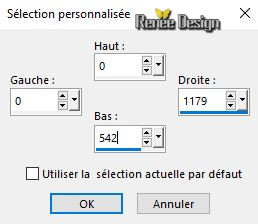
2. Activate Selection Tool -Custom Selection (S) -Rectangle with these settings 

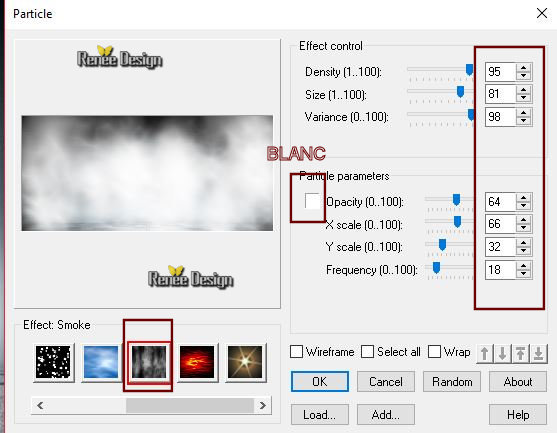
3. Effects – Plugins – Ulead Effects – Particle use the settings below

Selections-Deselect All
4. Layers- New Raster Layer
5. Selections –load/save selection –load selection from disc and select my selection:
‘’Podium_ville’’
6.
Activate Flood Fill Tool  flood fill the selection wit the foreground color #6b0001 flood fill the selection wit the foreground color #6b0001
7. Effects – Plugins -_Unlimited 2.0- ICNETFilters - Paper
Textures- Canvas, Fine 156/87
Selections-Deselect All
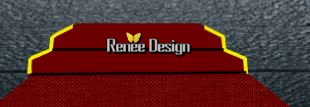
If you do not want to build the stairs, or is it too difficult, Activate the tube ‘’’podium marches.png’’ (is into the zipfile) and paste as a new layer on your working area and move,
then continue to point 20
8. Layers- New Raster Layer
9. Selections –load/save selection –load selection from disc and select my selection:
‘’Podium_ville_1’’
10.
Activate Flood Fill Tool  flood fill the selection wit the foreground color #6b0001 =Nr 1
11. Layers- New Raster Layer
12. Selections –load/save selection –load selection from disc and select my selection:
‘’Podium_ville_2’’(she will cancel the previous one )
13.Color Palette: FG-Color to # f5ecoo =Nr.2
- Activate Flood Fill Tool  flood fill the selection wit the foreground color # f5ecoo = Nr 2
14. Adjust- Blur- Gaussian Blur: Radius 2
15. Layers-Properties-Set the Blend Mode to " Lighten " -Lower the Opacity of the layer to 59%
Selections-Deselect All
16. Activate Pen Tool (V) with these settings and select ‘’Line style –Continuous line- Width 3- Color #000000

Foreground color #000000 -(Press the Shift key for a straight line ) Draw two lines as shown in the example below

- Convert to Raster Layer
17. Adjust- Blur- Gaussian Blur: Radius 4
18. Layers-Properties-Set the Blend Mode to " Hard Light "
19. Activate the tube ‘’
barre_escalier.png ‘ -Edit - Copy- Activate your work -Edit - Paste as a new layer
20.
Effects- Image Effects- Offset with these settings: H = - 4 and V = -
293
- Color Palette: Set your foreground color to #ff0000 =Nr.4 - Set your background color to #ffffff =Nr.7
21. Layers- New Raster Layer
22. Selections –load/save selection –load selection from disc and select my selection:
‘’Podium_ville_3’’
-
Activate Flood Fill Tool  flood fill the selection with the foreground color #ff0000
Selections-Deselect All
22.Layers- New Raster Layer
23. Selections –load/save selection –load selection from disc and select my selection:
‘’Podium_ville_4’’
-
Activate Flood Fill Tool  flood fill the selection with the foreground color #ff0000 (6 clicks)
Selections-Deselect All
24. Layers-Properties-Set the Blend Mode to " Difference"
25. Layers- Duplicate- Layers- Merge- Merge Down (for stronger effect)
26. Layers- New Raster Layer
27. Selections –load/save selection –load selection from disc and select my selection:
‘’Podium_ville_5’’
28.
Activate Flood Fill Tool  flood fill the selection with the foreground color #ff0000
Selections-Deselect All
29. Layers-Properties-Set the Blend Mode to " Overlay "
30. Effects –Plugins -Unlimited 2.0 –ICNETFILTERS_ Noise Filters-
Add Noise (Monochromatic) 104
31. Adjust- Sharpness- Sharpen
32. Layers- New Raster Layer
33. Selections –load/save selection –load selection from disc and select my selection:
‘’Podium_ville_6’’
34.Color Palette-
FG-Color #ffffff - Activate Flood Fill Tool  flood fill the selection with # ffffff
Selections-Deselect All
35. Set the Opacity of this layer to 26%
36. Activate the tube’’ podium_Image1.png
‘’
-
Edit - Copy- Activate your work -Edit - Paste as a new layer
37. Effects- Image Effects- Offset with these settings:H = 18 and V = -
69
38. Layers-Properties-Set the Blend Mode to " Screen "
Color Palette -
FG-Color # fec964 = Nr
5
39.Layers- New Raster Layer
40. Selections –load/save selection –load selection from disc and select my selection:
‘’Podium_ville_7’’
41.
Activate Flood Fill Tool  flood fill the selection with the foreground color # fec964 ( 2 clicks)
Selections-Deselect All
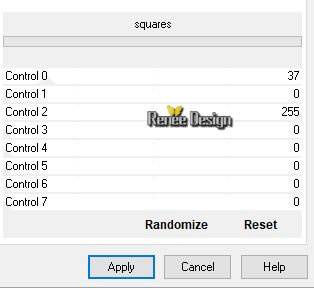
42. Effects –Plugins -Unlimited 2.0 - [AFS IMPORT] –squares use the settings below

43.Layers-Properties-Set the Blend Mode to " Hard Light "
44. Activate the tube ‘’ Renee_Podium_Ville.pspimage’’
-
Edit - Copy- Activate your work -Edit - Paste as a new layer
-
Activate your Move Tool (M) Move it to its place ---- slightly up (see finished image )
-
Color Palette: Set the FG-Color to #fec964 = Nr. 5 - Set the BG-Color to #7b4e1f = Nr. 6
45. Layers- New Raster Layer
46. Selections –load/save selection –load selection from disc and select my selection:
‘’Podium_ville_8’’
47.
Activate Flood Fill Tool  -
flood fill the selection with the background color #7b4e1f = Nr. 6 (2 clicks) -
flood fill the selection with the background color #7b4e1f = Nr. 6 (2 clicks)
48. Selections- Modify- Contract with 3 pixels
49. Activate Flood Fill Tool
 - flood fill the selection with the foreground color # fec964 ( 2 clicks)
Selections-Deselect All
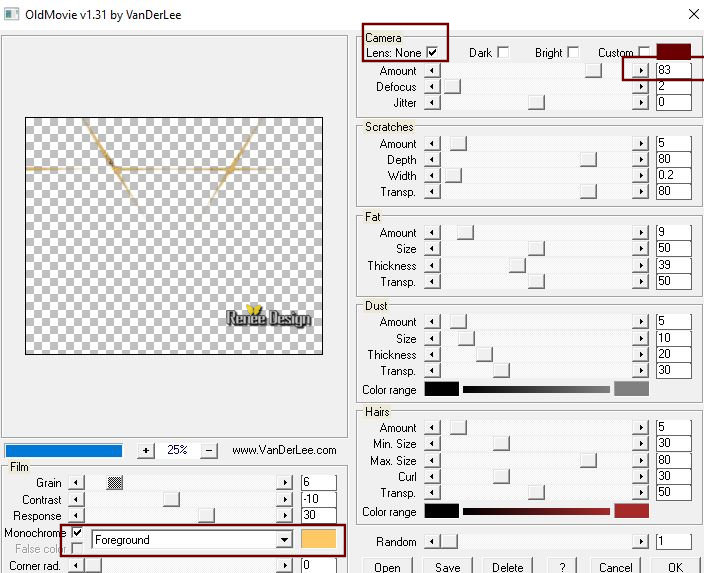
50. Effects – Plugins – Vanderlee – Old movie use the settings below

51. Effects – Edge Effects- Enhance
52. Effects –3 D Effects- Drop Shadow with these settings : 9 / 0/ 55 /9 Color black
53. Activate the tube ‘’ podium_Image4.png’’
-
Edit - Copy- Activate your work -Edit - Paste as a new layer
54. Objects –Align - Top /Activate your Move Tool (M) Move it to its place ---- slightly up (see finished image )
55. Layers-Properties-Set the Blend Mode to " Screen "
56. Activate the er le tube ‘’ podium_Image5.png’’
-
Edit - Copy- Activate your work -Edit - Paste as a new layer
-
Do not move, it is in the right place
57. Layers-Properties-Set the Blend Mode to " Color - Legacy "
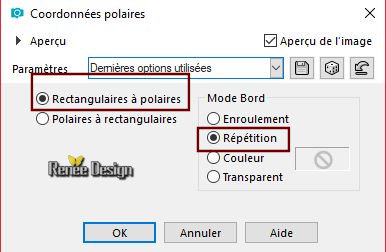
58. Effects- Distortions Effects-Polar Coordinates-Rectangular to Polar-Repeat checked

59. Layers- New Raster Layer
60. Selections –load/save selection –load selection from disc and select my selection:
‘’Podium_ville_9’’
61.
Color Palette: FG-Color to # ffffff -Activate Flood Fill Tool  flood fill the selection with the foreground color # ffffff ( 2 clicks)
Selections-Deselect All
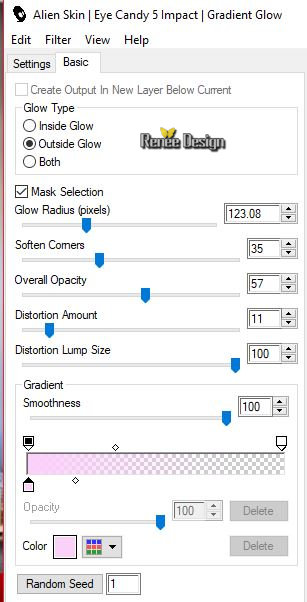
62. Effects – Plugins – AlienSkin-Impact –
Gradient Glow- Tab- Settings- User settings and select my Preset
‘Podium_Glow’
Or manual settings as shown in the example below -Color #fbd1fa

63.
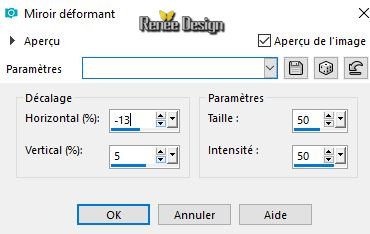
Effects- Distortion Effects- Warp use the settings below

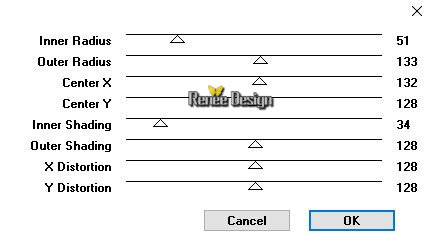
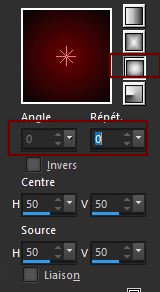
64. Effects –Plugins - VMNatural – Bubble planet use the settings below ( for me in unlimited)

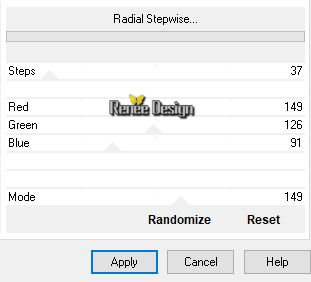
65. Effects –Plugins -Unlimited 2.0- Alf's Power Grads- Radial
Stepwise..use the settings below .

66. Lower the Opacity of the layer to 75 %
67. Activate the tube ‘’ Podium_Reverbere’’
-Edit - Copy- Activate your work -Edit - Paste as a new layer
68. Effects- Image Effects- Offset with these settings: H = -375 and
V = - 133
69. Layers- New Raster Layer
70. Selections –load/save selection –load selection from disc and select my selection:
‘’Podium_ville_10’’
71.
Activate the Flood Fill Tool  flood fill the selection with the foreground color # ffffff (3 or 4 clicks) flood fill the selection with the foreground color # ffffff (3 or 4 clicks)
Selections-Deselect All
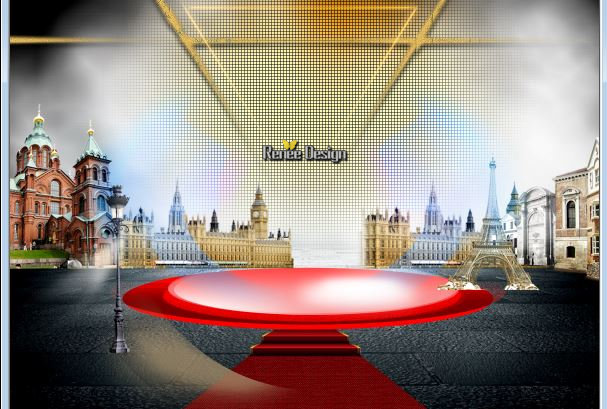
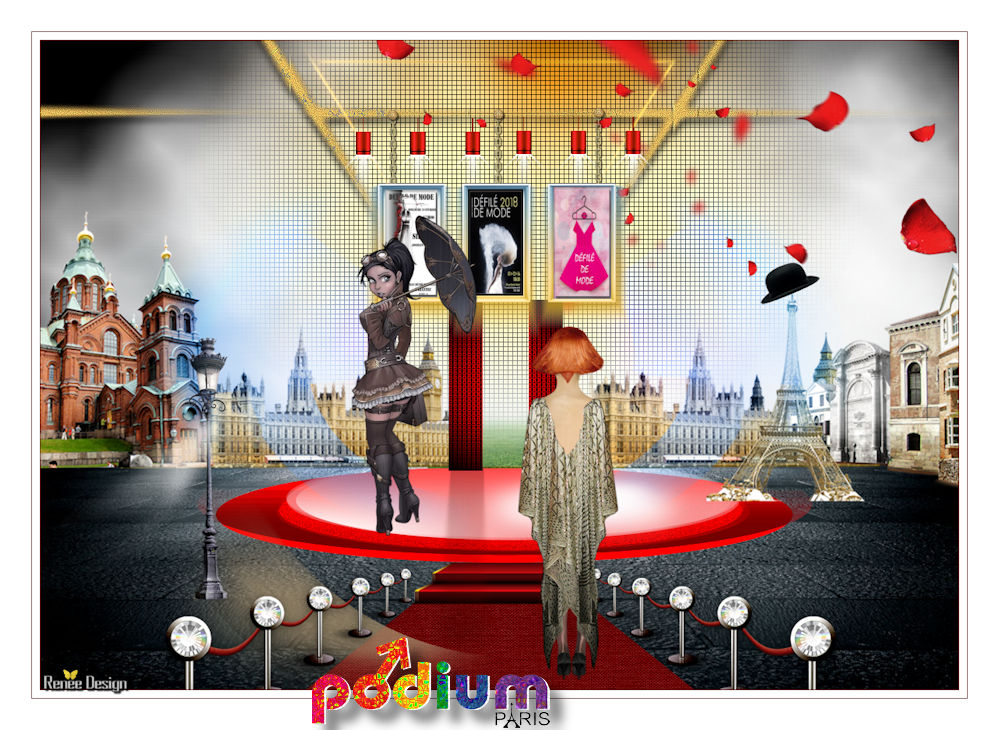
Your work look like this now-You should have this result

72. Activate the tube ‘’ podium_melon.png’’
-
Edit - Copy- Activate your work -Edit - Paste as a new layer
- Place on the Eiffel Tower
73. Activate the tube ‘’podium- cordons.png’’
-
Edit - Copy- Activate your work -Edit - Paste as a new layer-Activate your Move Tool (M) move it in the right place (see finished image )
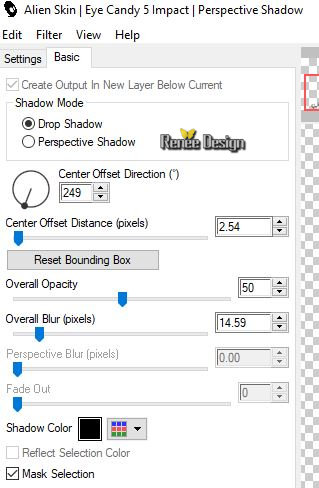
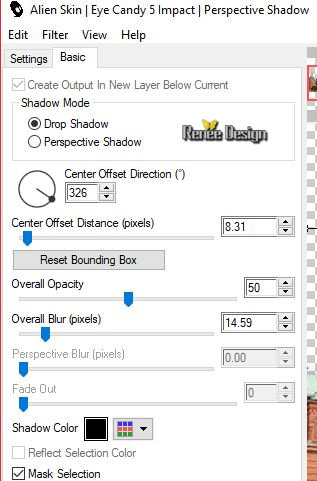
74. Effects – Plugins – Eyecandy 5 Impact –
Perspective shadow use the settings below

75. Activate the tube ‘’ podium_lampes.png’ -Edit - Copy- Activate your work -Edit - Paste as a new layer
-Activate your Move Tool (M) move it in the right place (see finished image )
76. Layers- Merge- Merge Visible - Rename
Raster 1
-Color Palette: Set your foreground color to #6b0001 = Nr. 1- Set your background color to #000000 = Nr. 3
-
Prepare a foreground/background sunburst gradient configured like this

77. Layers- New Raster Layer
78. Selections –load/save selection –load selection from disc and select my selection:
‘’Podium_ville_11’’
79.
Activate Flood Fill Tool  -
flood fill the selection with the gradient -
flood fill the selection with the gradient
Selection Stay Active
80. Effests -Plugins -VM Experimental - Magnetic Detection using the default settings
(for me in unlimited )
81.Effects- Edge Effects- Enhance More
Selections-Deselect All
82. Effects – Plugins – Eyecandy 5 Impact –
Perspective shadow - Tab- Settings- User settings and select my preset ‘’ podium_Pespective.f1s’
Or manual settings as shown in the example below

83.
Activate the tube ‘’podium_cadres.png’’
-
Edit - Copy- Activate your work -Edit - Paste as a new layer
- Activate your Move Tool (M) move it in the right place (see finished image )
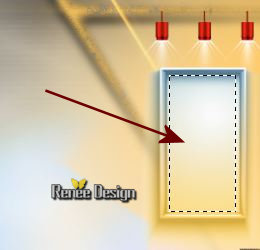
84. Selection Tool ( s) – Rectangle - Select this part as shown in the example below

85. Layers- New Raster Layer !!!! for the other images)- Activate the Image "affiche" Edit - Copy- Activate your work -Edit - Paste into Selection
Selections-Deselect All
- Repeat steps 84 and 85 for the other 2 frames
-
Activate the bottom layer (merged layer)
86. Activate the tube ‘’ Podium_pétales de fleurs’’
-
Edit - Copy- Activate your work -Edit - Paste as a new layer
-Place petals to your liking and remove those that are not in accordance with your tube.
- To replace the top of the layer-palette
87. Activate the tube ‘’ Alies
1-2VR036i-woman-24062014.png’’
-
Image Resize to 80% and Resize to 90 %
-
Edit - Copy- Activate your work -Edit - Paste as a new layer
- Move Tool ( M) move it in the right place
88. Activer le tube ‘’ Alies
1-2FA211-steampunk-01022015.pspimage’’
-
Image Resize to 80%
-Edit - Copy- Activate your work -Edit - Paste as a new layer
- Move Tool ( M) move it in the right place
89. Image - Add borders-Symmetric checked 1 Pixel Color #6b0001 =Nr. 1
90. Image - Add borders-Symmetric checked 10 Pixels #ffffff
91. Image - Add borders-Symmetric checked 1 Pixel Color #6b0001 =Nr. 1
92. Image - Add borders-Symmetric checked 40 Pixels #ffffff
93. Image Resize to 999 Pixels Width
94. Activate the "titre"-Edit - Copy- Activate your work -Edit - Paste as a new layer and move
Layers- Merge- Merge All ( flatten)
Save as JPG
I hope you enjoyed this lesson
Renée
This lesson was written by Renée 20 Mai 2018
Edited and Update
2018
*
Any resemblance with an existing lesson is a coincidence
* Do not forget to thank the people who work with us and for us I have appointed the tubeurs and translators
Thanks
*
| 
 Translations




 If a plugin supplied appears with this icon it must necessarily be imported into Unlimited *


