Let's begin
1. Open a transparent image of 995 x 645 pixels
2. Prepare your color palette - foreground #dad4ce and
background #8f8175
Configure a gradient as follows:
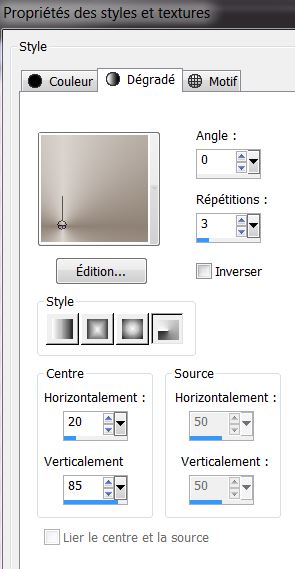
3. Fill the layer with the gradient
4. Effects - Graphics Plus - Horizontal Mirror 128/0
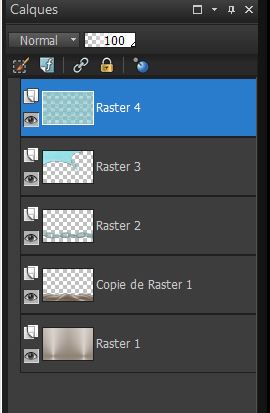
5. Layers - duplicate
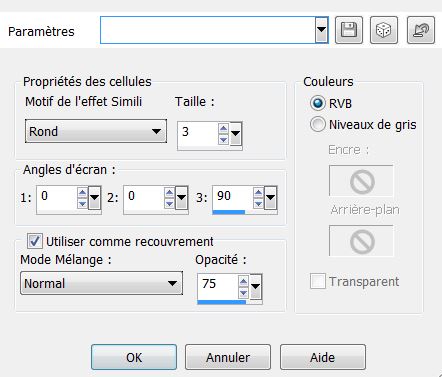
6. Effects - Artistic Effects - Halftone
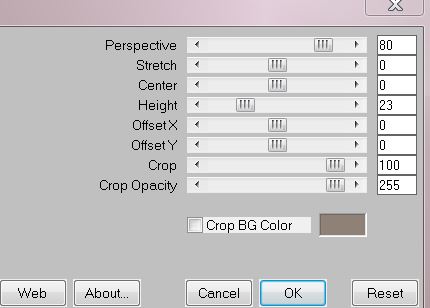
7. Effects - Mura'sMeister - Perspective Tiling/ color
#908176
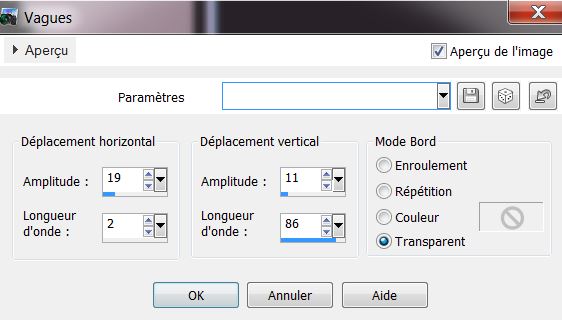
8. Effects - Distortion Effects - Wave

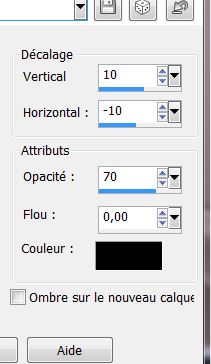
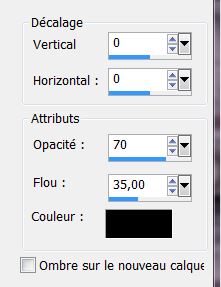
9. Effects - 3-D effect - Drop Shadow
10. Open the tube ''image _chaine'' and paste as new
layer
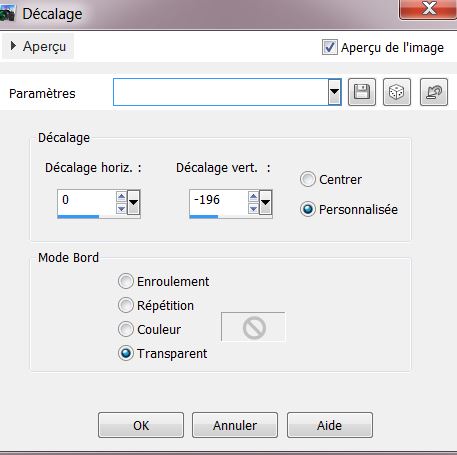
11. Effects - Image effects - Offset
12. Set the layer to Luminance mode and opacity to 67
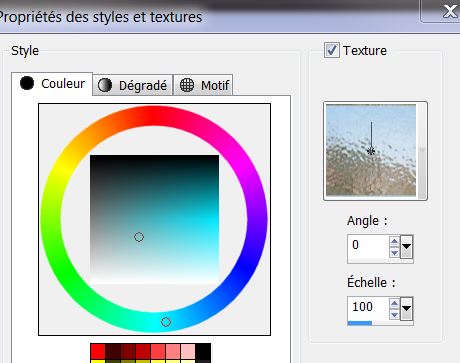
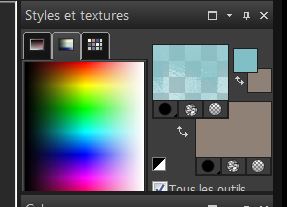
13. Color Palette - Set your foreground #80bfc6/ open
texture "001_glass.jpg"
14. Layers - Add a new layer
15. Selection Tool - custom selection
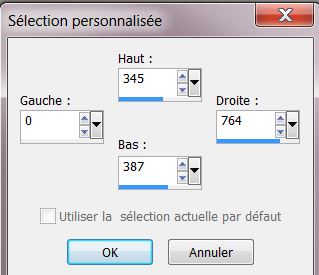
16. Left mouse button / fill the selection
17. Selections - deselect
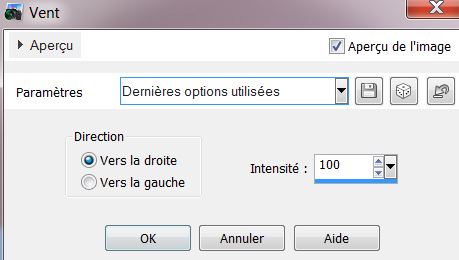
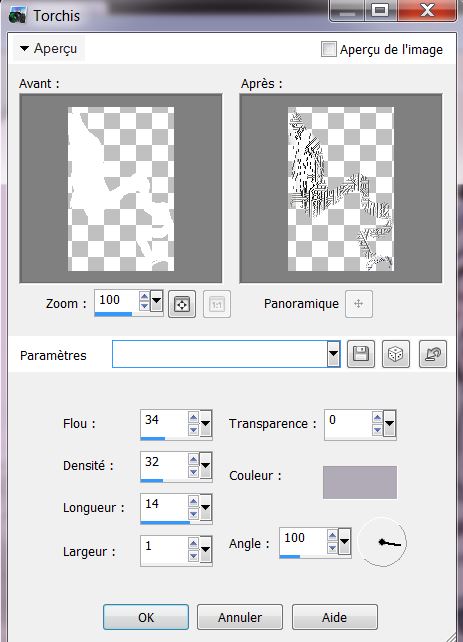
18. Effects - distortion effect / wind
19. Effects - Flaming Pear - Flexify2
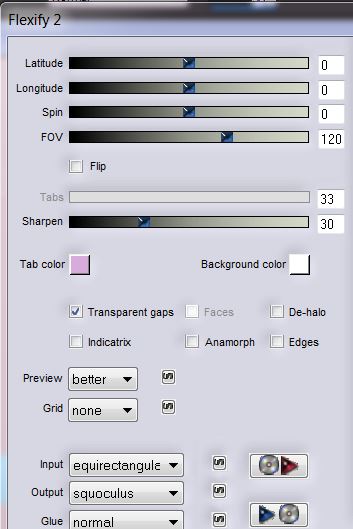
20.
Image flip
21. Effect Mura's Meister - Copies
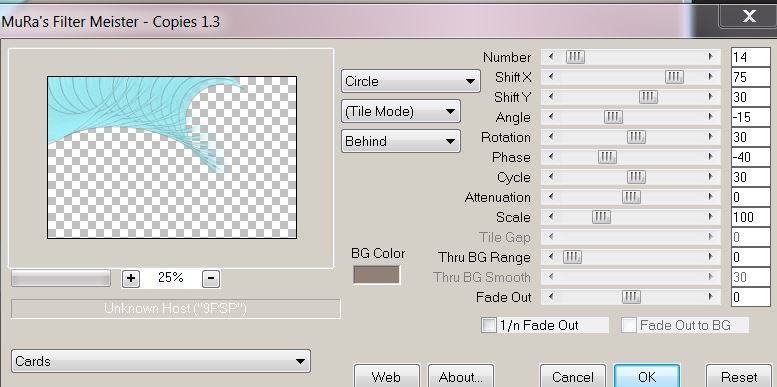
22. Change the layer mode to Soft Light
23. Effects - Edge effects - enhance
24. Layers - add a new layer
25. Using the texture foreground - fill the layer
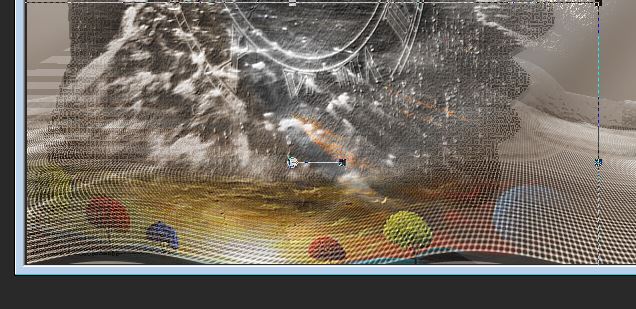
26. It should look like this:
27. Effects - Flaming pear Lunar Cell / locate the
preset in the materials folder "presetLunaire.q1q: / (follow
the arrows as shown in the capture)
Click ok

28. Effects - Transparency - Eliminate Black
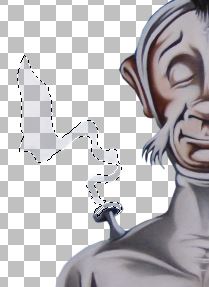
29. Open the tube "logane_renee_02_04_2013" and paste as
a new layer
30. With the Magic Wand select the part of the tube as
shown (I have the tolerance set to 10)
31. Layers - add a new layer / and fill the selection
with white
32. Effects / texture effects /Straw wall color #B1ABB8
33. Selections - deselect
34. Layers - Merge down
35. Effects - EyeCandy 5 - perspective shadow - Preset
''ozone_1''
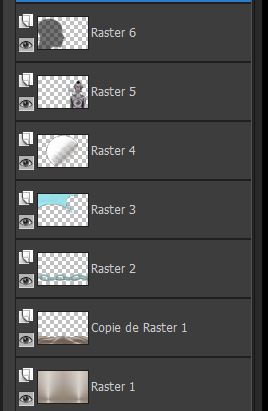
36. Layers - Add a new layer
37. Selections - Load selection from disk - "ozone_1"
38. Fill with the color #dcdcdc / Warning: paint tool /
set the opacity to 50
39. Effects - Filters Unlimited 2.0 / VM Experimental -
Mighty Maze - settings 42/255/255/255
40. Change the blend mode to Soft Light
41. Effects - Edge effects - Enhance
42. Effects - Transparency Eliminate White
43. Selections - Deselect
44. Effects - EyeCandy 5/ Impact - perpsective shadow -
Preset "ozone_pshadow_1"
Your Palette should look like this:
45. Layers - Add a new layer
46. Selection tool - Custom selection
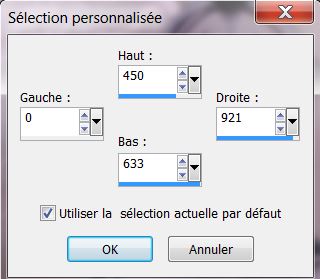
47. Change the foreground color to #dcdcdc and settings
like this:

48. Fill the selection
49. Selections - Select none
50. Effects - Distortion effects - Wave
51. Change the blend mode to soft light
52. Layers arrange down twice - under Raster 5 (character)
53. Effects - EyeCandy 5 Impact - Perspective Shadow -
Preset "ozone_2"
54. Click and activate the top layer
55. Layers - Add a new layer
56. Selections - Load the selection "ozone_1" again Open
tube ''aclis_paisaje_02-07_11_2012''. Paste into the
selection
57. Effects - FM Tile Tools - Blend Emboss default
58. Change the blend mode to Luminance Legacy
59. Selections - deselect
60. Open the tube ''papillon'' Paste and move to suit
yourself
61. Open the tube ''verlaine'' - Click on raster 3 and
paste as new layer
- Move like this
62. Layers merge visible
63. Image - add borders 5 pixels - #8f8175
64. Image - add borders 50 pixels - #dcdcdc
65. Image - add borders 5 pixels - #8f8175
66. With the magic wand select the 50 pixels border
67. Effects - Penta Com - Jeans 48/4
68. Selections - Invert selection
69. Effects - 3-D effect - Drop Shadow
70. Selections - deselect
71. Paste text tube of your choice (there are 2 to
choose from)
72. Merge all layers
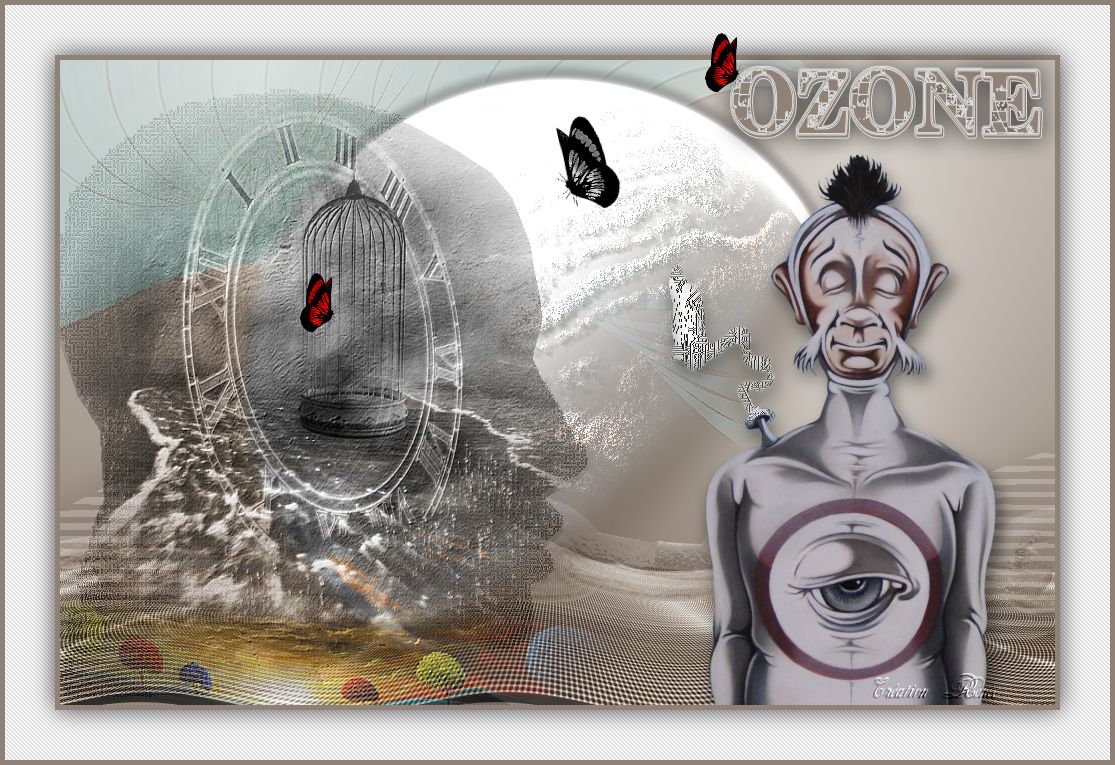
All finished
Thanks Sally

|