|
Let's start the lesson
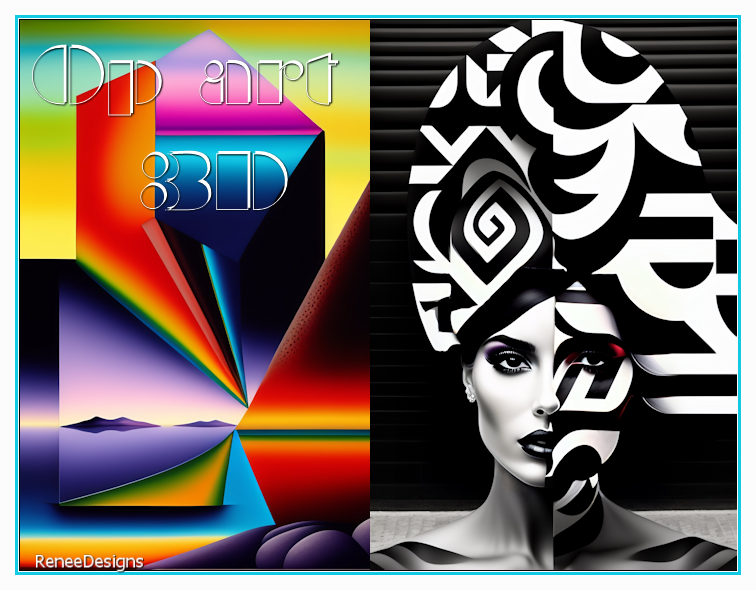
Op art 3D
1. Open the Background image " Fond
‘’Op-art-3D’’ – Promote Background Layer =Raster 1
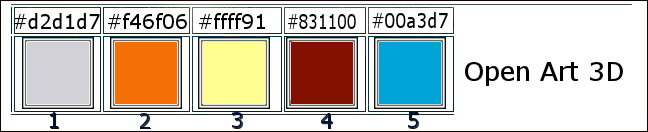
- Material Properties: Set your Background color to color # d2d1d7=1
- Properties of the Background-set the Background color to "Fadingbackground sunburst gradient" with the settings below (Corel 06-025)
2. Layers- New Raster Layer
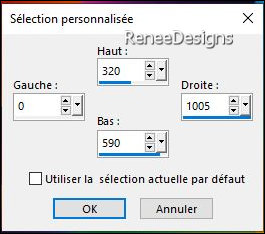
3. Activate Selection Tool -Custom Selection (S) -Rectangle with the same settings 
4. Flood Fill Tool
 - Fill the selection with the gradient

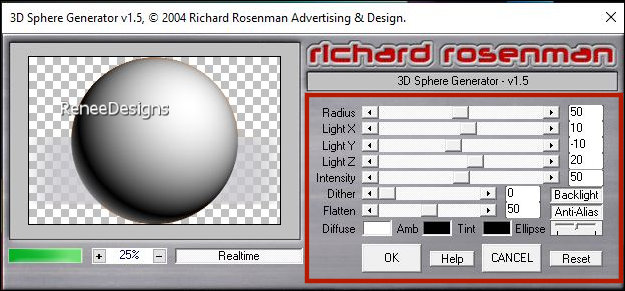
5. Effects –Plugins– Richard Rosenman – 3 D Sphere Generator use the settings below
6. Layers-Properties-Set the Blend Mode to " Soft Light "
7. Selections –load/save selection –load selection from disc and select my selection: ‘’
Op-Art-3D-1’’

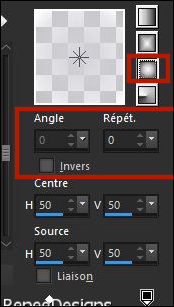
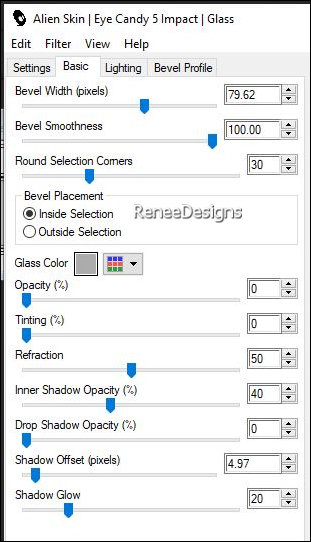
8. Effects - Plugins - Alien Skin EyeCandy 5 - Impact - Glass use the settings below -Color #acacac
- Activate Raster 1 in the Layer palette
9. Selections –load/save selection –load selection from disc and select my selection: ‘’
Op-Art-3D-2’’
10.
Selections- Promote selection tot layer
11.
Effects – Edge Effects – Enhance More
12.
Effects – 3D Effects– Drop Shadow with these settings: 10/
-14 / 80 / 45 Color Black
- Activate the layer of Raster 1 in the Layers palette
13.
Adjust- Blur- Gaussian Blur-Radius 54%
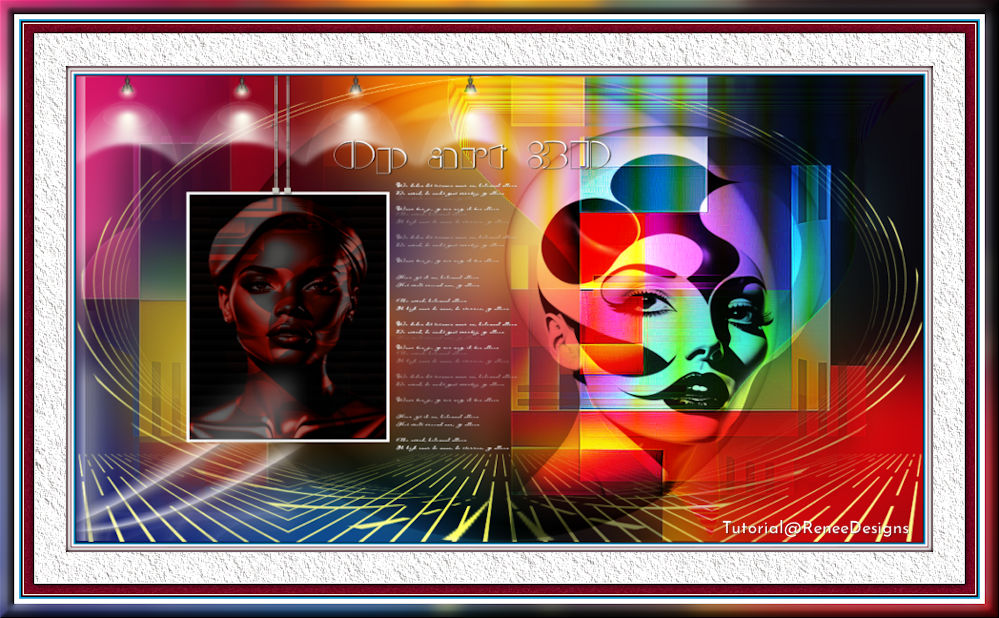
Put the image aside for now, we will need it later
If you want to create your own image, follow these steps:
– Or select an already finished image from the Tube folder. (''visages-terminés)-Create a new raster layer behind the selected image and fill it with black, then proceed to point 21.
14.
File: Open a new BLACK image in this size 367 x 551 Pixels
15.
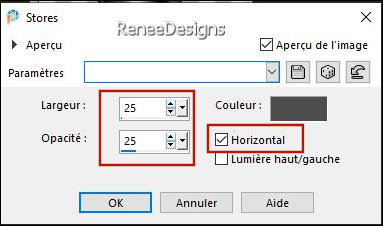
Effects – Texture Effects – Blinds use the settings below- Color #4c4c4c
16.
Use an image of a black and white face 550 pixels high
17.
Or take this Tube
‘’Renee-Tubes-Visage-Op art 3D’’ --Edit - Copy- Activate your work -Edit - Paste as a new layer
Be careful, because the effect depends on where in the image you click to change the color, and play carefully with the blend mode and the opacity of the layer.
18.
Activate Color Changer Tool

Apply 1 click on the character with a color of your choice (Renée chose red)
19.
Open the Tube ‘’ Renee-Tubes-decos-Op art
3D’’ -Edit - Copy- Activate your work -Edit - Paste as a new layer
20.
Activate Color Changer Tool / color the image
OK
21.Layers- Merge- Merge Visible
22.
Image - Add borders-Symmetric checked: 5 pixels -Color white
23.
Image - Resize 359 Pixels height -Resize all Layers checked
24.
Edit - Copy !!
Activate the Image you minimized at step 13
- Activate the top of the layer-palette
-Edit - Paste as a new layer (your created image)
25.
Pick Tool: (K) on your keyboard -Enter these parameters on the toolbar
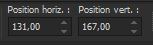 131 / 167
-Press ( M ) to close the Pick Tool
26.
Open the Tube ‘’
Renee-Tubes-Femme-Op art 3D’’ -Edit - Copy- Activate your work -Edit - Paste as a new layer
Move to the right or -
Pick Tool: (K) on your keyboard -Enter these parameters on the toolbar (508/71)
27.
Layers-Properties-Set the Blend Mode to " Overlay "
28.
Open the Tube ‘’Renee-Tubes-lampes-Op art 3D’’ -Edit - Copy- Activate your work -Edit - Paste as a new layer
29.
Objects – Align- Top – Place it against the left edge
- Activate Raster 1 in the layer palette
30.
Layers- New Raster Layer
31.
Selections –load/save selection –load selection from disc and select my selection: ‘’
Op-Art-3D-3’’
32.
Properties Foreground- Set your Foreground color to color #ffff91=3
Flood Fill Tool –
Fill the selection with the Foreground color #ffff91=3
33.
Layers- Duplicate
34.
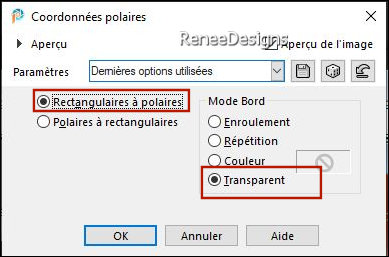
Effects – Distortion Effects– Polar Coordinates- Rectangular to Polair-Transparent
-Activate the layer underneath
35.
Effects – Reflection Effects -Rotating Mirror use the settings below
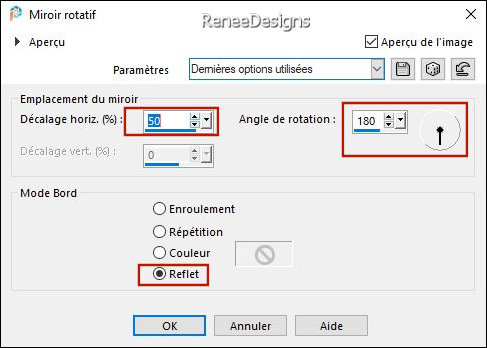
36.
Effects – Reflection Effects -Rotating Mirror using the default settings
- Activate the top of the layer palette
37.
Open the Tube ‘’Renee-Tubes-attaches-Op art 3D’’ -Edit - Copy- Activate your work -Edit - Paste as a new layer
-
Place on top of the frame(see finished image)
- Activate Raster 1 in the Layer palette
38.
Layers- New Raster Layer
39.
Selections –load/save selection –load selection from disc and select my selection: ‘’Op-art-3D-4’’
-Properties Foreground- Set your Foreground color to color #f46f06 =
2
40.Flood Fill Tool
–
Opacity 50% -Fill the selection with the Foreground color #f46f06 =
2
Reset the opacity of the paint pot to 100%
41.
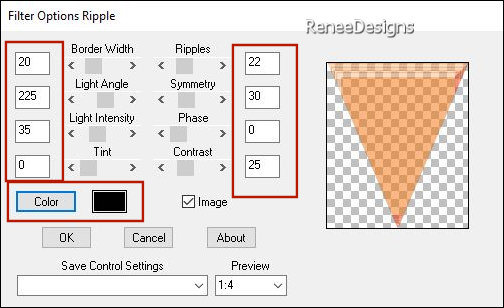
Effects – Plugins – Bordermania - Ripple use the settings below-Color Black
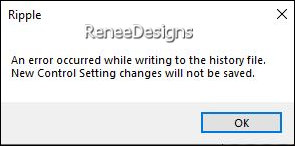 you will get this message - click ok and the filter will open you will get this message - click ok and the filter will open
42.
Effects – Edge Effects – Enhance
43.
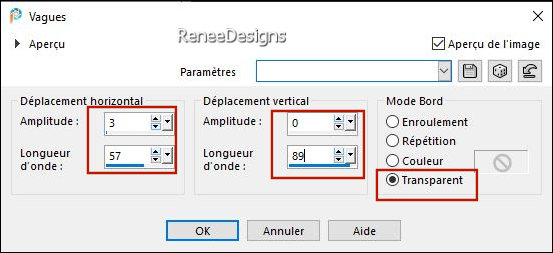
Effects – Distortion Effects– Wave use the settings below
44.
Effects - Plugins - Filters in Unlimited 2.0 -
Tronds Filters II – RasterLookalike with these settings: 10/ 150
45.
Layers-Properties-Set the Blend Mode to " Overlay "
46.
Effects – Plugins – FM Tile Tools – Blend Emboss
using the default settings
47.Open the Tube
‘’
Renee-Tubes-lignes-Op art 3D’’- Edit - Copy- Activate your work -Edit - Paste as a new layer
48.
Pick Tool: (K) on your keyboard -Enter these parameters on the toolbar
 -21
/ 1 -21
/ 1
49.
Open the Tube " titre "-Renée chose the font - a_braggaotlsh(fr.allfont.net) (Included in the material) Or choose a font of your own
-Edit - Copy- Activate your work -Edit - Paste as a new layer- Or write your own title
Place the text of your choice or take a look at the example of Renée
50.
Image - Add borders-Symmetric checked: 1 Pixel -Color Black
51.
Image - Add borders-Symmetric checked: 2 Pixels- Color #00a3d7= 5
52.
Edit-Copy!
53.
Open the Tube frame/ cadre -Edit- Paste into Selection
54.
Paste the author's watermark on your work and your own watermark
55.
Layers- Merge- Merge All ( flatten)
56.
Image - Resize - 999 Pixels width-Resize all Layers checked
Save as JPG
I hope you enjoyed this lesson
Renée
This lesson was written by Renée 25/04/2023
Edited and Update
in 2023
*
Any resemblance with an existing lesson is a coincidence
* Do not forget to thank the people who work with us and for us -I have appointed the tubeurs and translators
Thanks
*
*
|
 Translations