|
Let's start the lesson.
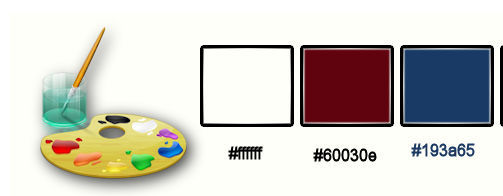
- Color-palette:Set your foreground color to #ffffff- Set your background color to #60030e
1.
Open the background image ‘’ fond_lune.pspimage’’-Window - Duplicate (or shift+D) - Close the original and proceed on the copy=raster1
2.
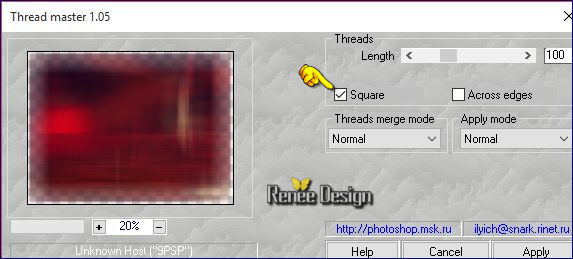
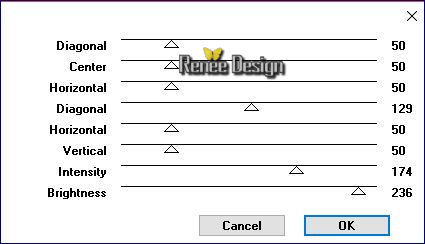
Effects- Plugins -Amphisoft – Three
master use settings below
3.
Layers- Duplicate
4.
Effects- Plugins - L and K’s – Dimitri a
80
5.
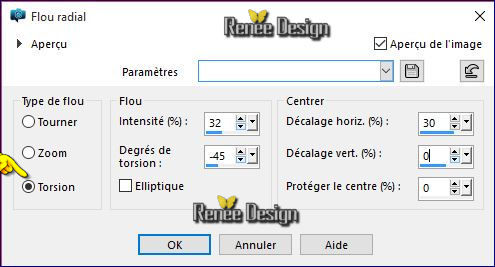
Adjust- Blur- Radial Blur use settings below
-
Double click on this Layer and set the Blend Mode to "Hard Light "
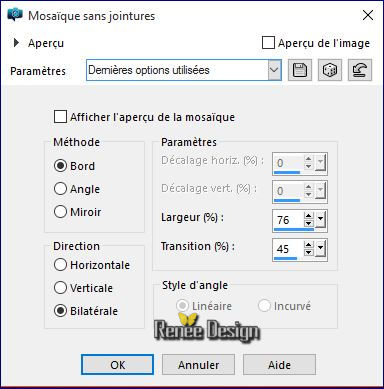
6. Effects-Image Effects-Seamless Tiling use settings below
7.
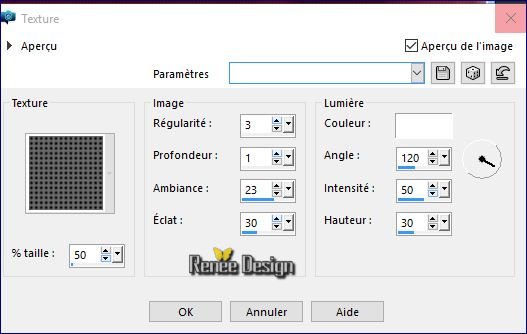
Effects - Texture Effects - Textures use settings below (reason = spheres))
8.
Effects -Effects Photos - Timeline (platynotipie)
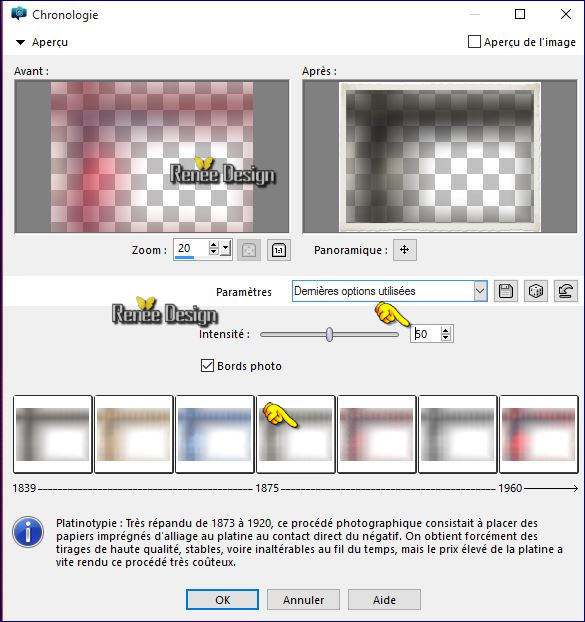 (The 4 th in the grid as the designated=platynotipie) (The 4 th in the grid as the designated=platynotipie)
In the Layer-Palette-Stand on the layer below (raster
1)
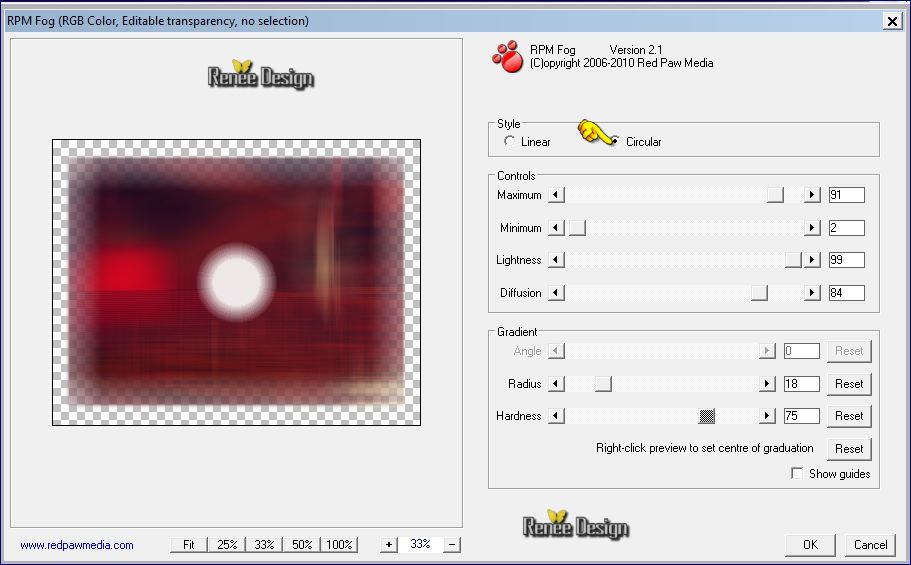
9.Effects- Plugins - Red paw Media- RPM Fog use settings below
10. Open the tube ‘’Renee_tube_lune_rouge’’
- Image
Resize to 50%
- Edit/ Copy-Edit - Paste as new layer on your working image
11. Effects-Image Effects- Offset with these settings H = 420 and V = 71
12. Layers- New Raster Layer
13.
Selections –load/save selection –load selection from disc and choose my selection:‘’the_moon1’’
14. Activate Flood Fill Tool and fill the selection with the foreground color #ffffff
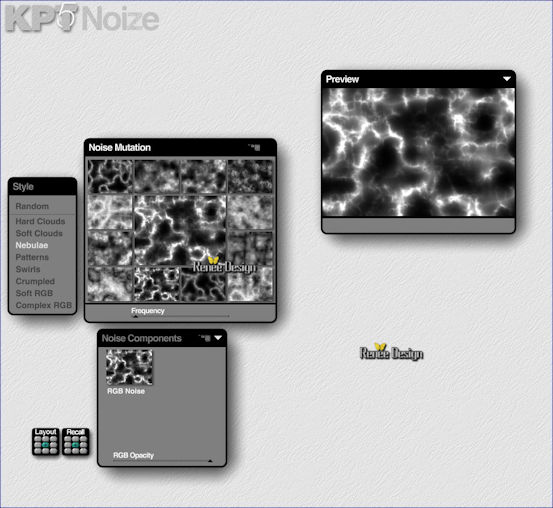
15. Effects- Plugins KPT5- Noize/ Nebulea with these settings
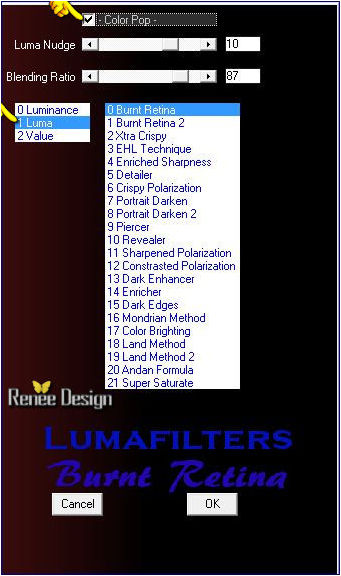
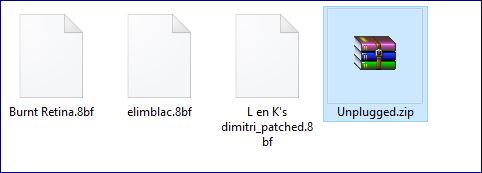
16. Effects- Plugins – Luma filters / Burnt Retina use settings below
17. Effects- Edge Effects- Enhance More
Selections- Deselect All
- Double click on this Layer and set the Blend Mode to "Hard Light "-Set the layer opacity of this layer to 75%
18. Layers- New Raster Layer
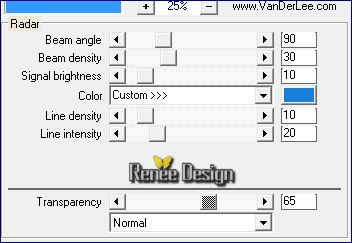
19. Effects- Plugins – Vanderlee Unplugged X Radar use settings below-
color #247DD1
-. Double click on this Layer and set the Blend Mode to "Screen "
20.
Effects- Plugins –Transparency –Eliminate
black
21. Layers- New Raster Layer
22.
Selections –load/save selection –load selection from disc and choose my selection: ‘’the_moon2’’
23. Activate Flood Fill Tool and fill the selection with the foreground color white
Selections- Deselect All
- Color Palette to Foreground color
#193a65
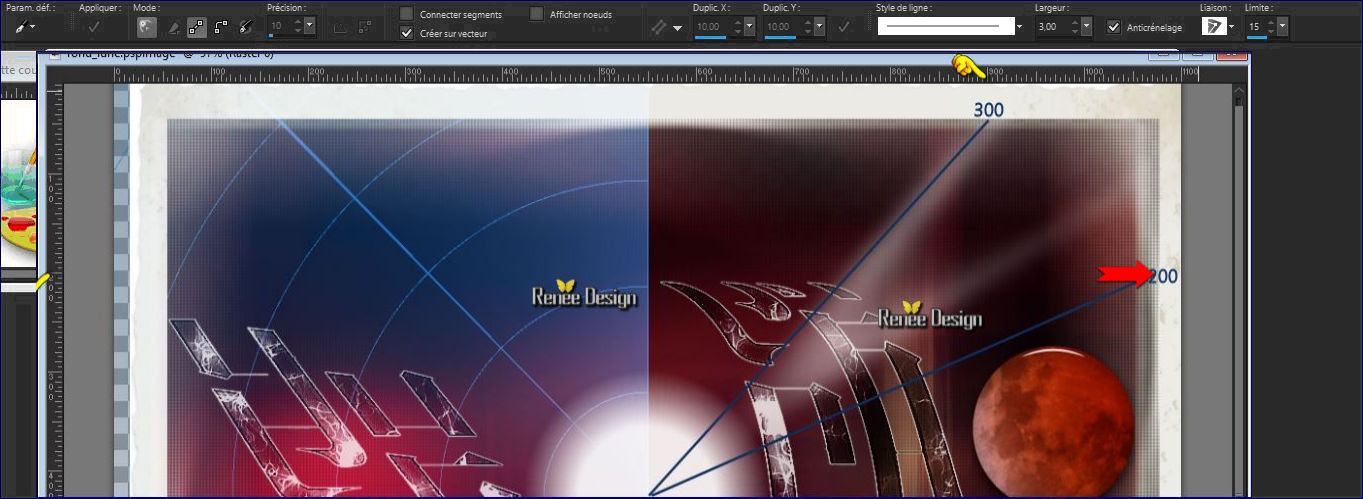
24. Activate Pen Tool -Full -Line -with these settings
And draw two lines like this
Convert to Raster Layer
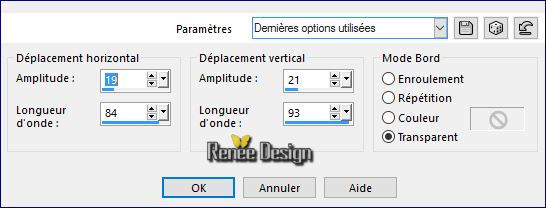
25. Effects-Distortion Effects- Wave use settings below
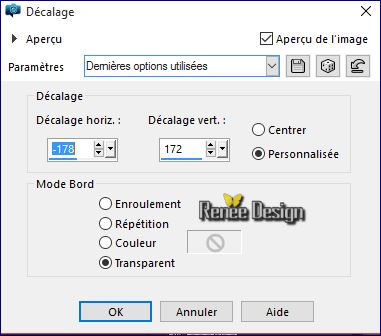
26. Effects-Image Effects- Offset with these settings
27. Layers- Duplicate –Image Flip
28. Layers- Merge- Merge Down
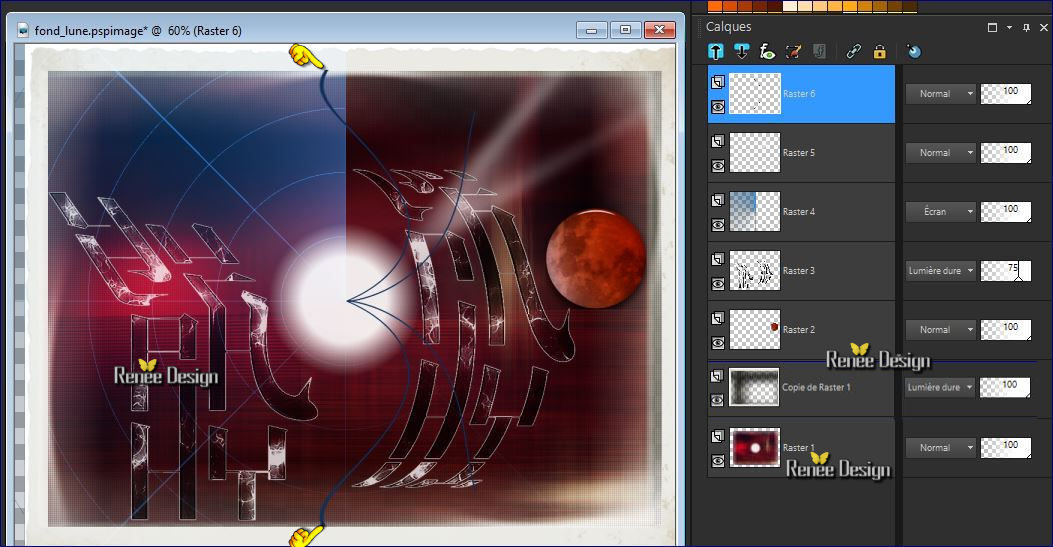
Erase that would exceed the edge of the frame and reframe effect in the center if required (see screenshot)
-
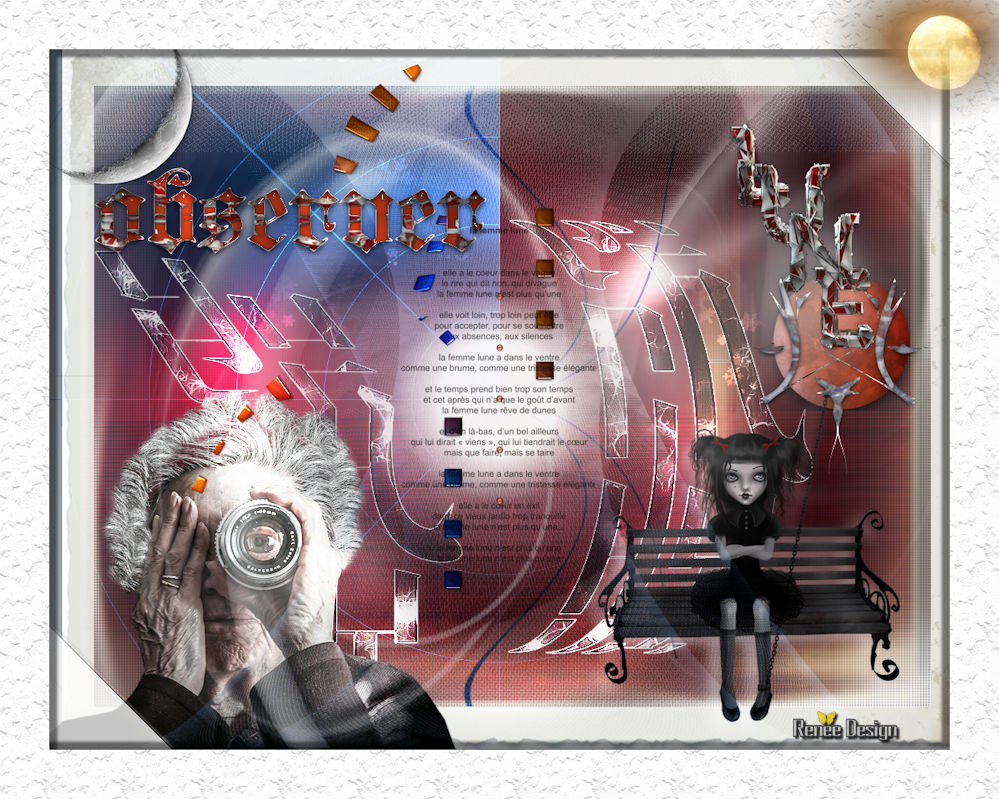
You should have this result as shown in the print screen ( Put the layers in the right order)
29. Double click on this Layer and set the Blend Mode to "Overlay"
30. Layers- New Raster Layer
31.
Selections –load/save selection –load selection from disc and choose my selection: ‘’the_moon3’’
- Properties foreground: set your foregroundcolor to White
32. Activate Flood Fill Tool and fill the selection with the foreground color white (2 clicks )
Selections- Deselect All
33. Double click on this Layer and set the Blend Mode to "Overlay"
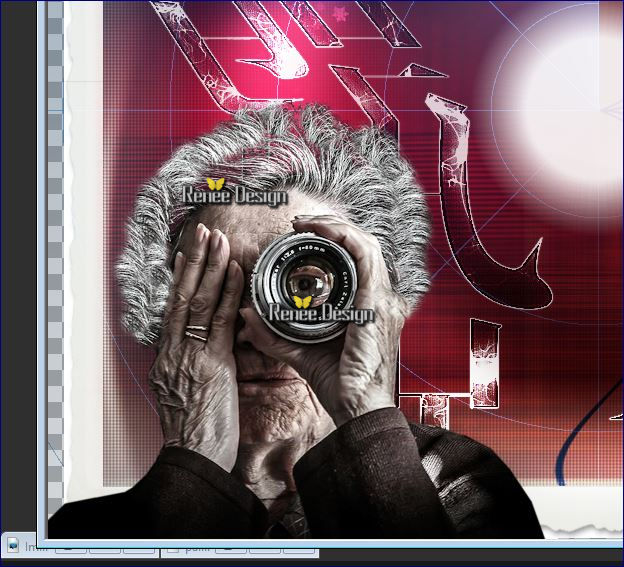
34. Open the tube’’Renee_tube_vision’’
-Image
Resize to 60%
- With the move tool, move it in the bottom left corner(as shown in the example below)
35. Layers- Arrange- Move Down
- To replace the top of the layers palette
36. Layers- New Raster Layer
37.
Selections –load/save selection –load selection from disc and choose my selection: ‘’the_moon4’’
38.
Activate Flood Fill Tool and fill the selection with the foreground color white
Selections- Deselect All
39. Effects- Edge Effects- Enhance More
40.
Set the layer opacity of this layer to 81%
41. Open the tube ‘’fillette_sur_banc de Trizia
-Edit/ Copy-Edit - Paste as new layer on your working image
- With your Move Tool: move it to the bottom right corner.
42. Effects- 3 D Effects- Drop Shadow with these settings 9/-14/50/22 color white
43. Layers- New Raster Layer
44. Pot of Paint: Change the opacity of the color at 50% -Activate Flood Fill Tool and fill the layer with the foreground color white
45. Layers- Load/Save mask-Load Mask from Disk and select: « Narah_mask_0799.jpg’’
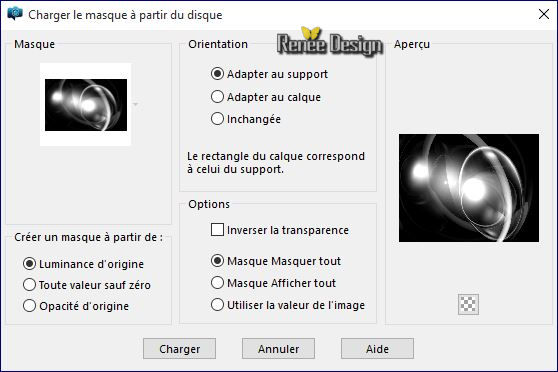
- Layers- Merge- Merge- Group
46. Image
Mirror
- Properties background: set your backgroundcolor to #193a65
47. Layers- New Raster Layer
48. Pot of Paint: the opacity of the color at 50%- Activate Flood Fill Tool and fill the layer with the background color
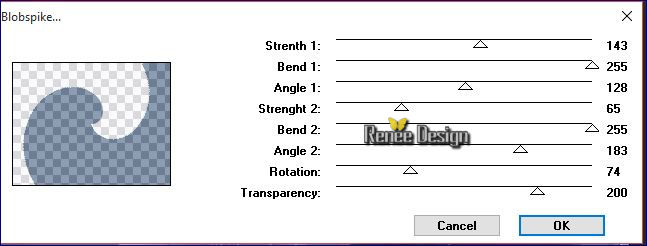
49. Effects
–Plugins- Unplugged Shapes/Blobspike use settings below
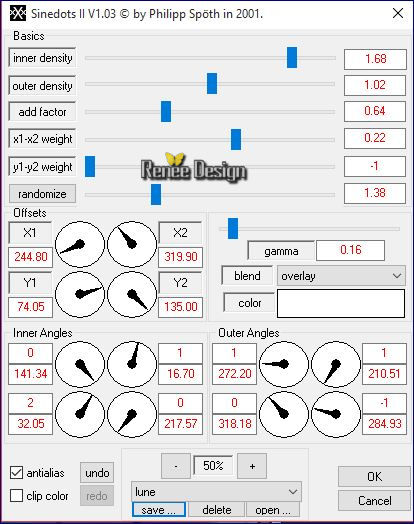
50. Effects- Plugins – Dragon Fly – Sinedots II use settings below
51. Double click on this Layer and set the Blend Mode to "Soft Light "-Set the layer opacity of this layer to 57%
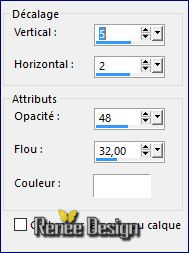
52. Effects- 3 D Effects- Drop Shadow with these settings:
53. Open the tube ‘’ Image_lune_2.pspimage’’
- Edit/ Copy-Edit - Paste as new layer on your working area (do not move it is in the right place)
54. Open the tube ‘’ Image_lune_3.pspimage’’
-Edit/ Copy-Edit - Paste as new layer on your working area -
With the move tool, move it in the upper right corner ( red moon)
55. Open the tube ‘’ Image_lune_4.pspimage’’
- Edit/ Copy-Edit - Paste as new layer on your working area (do not move it is in the right place)
56. Layers- Duplicate
57.
Effects- Plugins – Flaming Pear – flexify 2 with these settings- ore select my Preset ‘’
Observer_lune_Flexify 2 settings.q2q’’

58. Image
Mirror
59. Double click on this Layer and set the Blend Mode to "Hard Light "
60. Effects- Plugins Graphic plus – Cross shadow use settings below
61. Layers- New Raster Layer
62.
Selections –load/save selection –load selection from disc and choose my selection: ‘’the_moon5’’
63. Pot of Paint: Change the opacity of the color at 100%- Activate Flood Fill Tool and fill the selection with the foreground color white
64. Open the tube ‘’image_lune3 »
- Edit/ Copy-Edit - Paste into selection-
- Open the tube ‘’image_lune3 » /Image Flip
- Edit/ Copy-Edit - Paste into selection-
If you want to write another word you tube '_alphabet _Lune tutorial letter for Renee "in the tube file
65. Effects- Plugins – Eyecandy 5 Impact – Glass -tab Settings/User settings choose my preset:‘’lune_renee_glass’’
Selections- Deselect All
- Control the placement of the tube '' lune_3 '' - See complete before merging
66. Layers- Merge- Merge Visible
67. Open the tube text‘’ Image_lune5.pspimage’’
- Edit/ Copy-Edit - Paste as new layer on your working image
-With the move tool, move it in the upper left
68. Open the tube ''Dossier LUNE ''
- Choose a tube taste
69. I activated « lune_4.png «
- Edit/ Copy-Edit - Paste as new layer on your working image
-With the move tool, move it in the upper left corner
70. Open the tube ‘’texte_la_femme_lune »
- Edit/ Copy-Edit - Paste as new layer on your working area (do not move it is in the right place)
71.-Set the layer opacity of this layer to 67%
72. Layers- Merge- Merge Visible
73.
Selections- Select All
74. Image - Add borders-Symmetric checked: 60 pixels color white
75.
Selections-Invert
76. Effects
–Plugins- Unlimited - ICNET FILTERS - Paper Textures- Wallpaper,
Coarse a 128/99
77.Effects- 3 D Effects- Drop Shadow using the default settings
- Repeat Shadow negative
Selections- Deselect All
78. Image Resize 999 pixels width
79.Open the tube ''Dossier LUNE ''
- Open the tube ''Dossier LUNE ''Choose moon and paste as new layer
- With the Move Tool, move it in the upper right corner
80. Layers- Merge- Merge All (flatten)
Save as JPG
I hope you enjoyed this lesson
Renée
This lesson was written by Renée 29/12/2015
Edited and Update
2016
*
Any resemblance with an existing lesson is a coincidence
* Do not forget to thank the people who work with us and for us I have appointed the tubeurs and translators
Thanks Renée
| 
 Translations


 When you see this logo the filter is imported in Unlimited

 All rights reserved