|
Let's begin
1. Open the fond fond
''Jhanna-transformé'' Window/ Duplicate/ we will work with this. Close original.
2. Open the tube ''arbre
magique'' Edit/copy -Edit/paste as a new Layer and place
3. Layers-New Raster Layer
4. Selections - load/save selection - load selection from disk and choose ''renee_bois_des_reves_1'' Flood Fill Tool: fill the selection with this color:
#a2dcd2
5. Effects - Plugins Redfield- Rippl es
Magic V1.12 
6. Selection - Select none
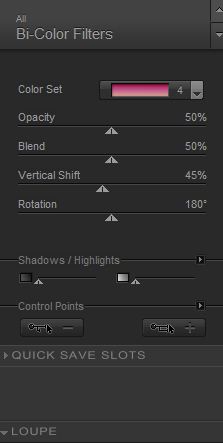
7. Effects - Plugins Nick Color Effex
-Pro3 / Bi Colors Filters/ color set = violet-pink4
8. Lower the Opacity to
59%
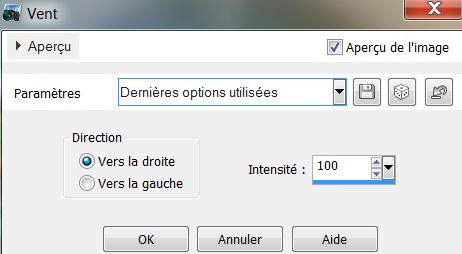
9. Effects - Distortion Effects -Wind
10. Open the tube ''œil''
Edit/copy -Edit/paste as a new Layer and place
Put your work aside for a moment
We will prepare our tube
- Open the tube
''angeldesign-escargot '' Duplicate your tube /Close the original and work with the copie
/remove the signature
- Image / Resize to 65%
- Open the tube
''Alies12Fa87-mermaid-09022013'' Edit/copy -Edit/paste as a new Layer
and paste on escargot
- Image -Free Rotate 90° left
- And place like this(move down under the layer of escargot /lower the Opacity to 50%/
so you can better see your work
- Eraser Tool: eraser away see the example the escargot and woman
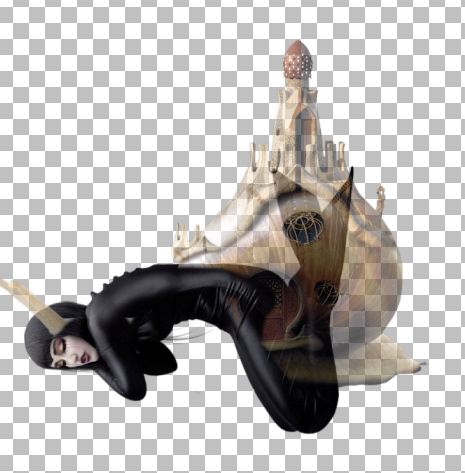
- When it's perfect - Opacity to 100%
- These two layers : Layers Merge -Merge Visible
*Your tube is ready
************************************************************************************************-
- Rename this tube in this name: ''femme_escargot" Edit/copy
11. Activate your work again/ Edit/paste as a new Layer
(''femme_escargot '' )Image Resize to 65 %
12. Place at in the right place
13.Effects- EyeCandy 5-Impact
- Perspective shadow
''preset-renee_bois_des_reves_shadow''
14. Open the tube
''arbuste" Edit/copy-Edit/paste as a new Layer and place
15. Open the tube
''logane_chienloups_20mars2013'' Image Resize to 45 % Edit/copy -Edit/paste as a new Layer and place
16.Open the tube
''pont" Edit/copy -Edit/paste as a new Layer and place
17. Open the tube ''souris'' et
''souris 2'' Edit/copy -Edit/paste as a new Layer and place
18. Aktivate the top of the Layers palette
19. Layers-New Raster Layer.
20. Selections –load/save selection –load selection from disc and choose:'''renee_bois_des_reves_2 '' Flood Fill Tool: Fill the selection with white
21. Selection - Select none / Blend Mode of this layer to"Soft Light"
22. Open the tube ''échelle ''Edit/copy -Edit/paste as a new Layer and place
23. Image - add borders symmetric:
5 pixels black
24. Image - Add Borders -Asymmetric color #2b2909
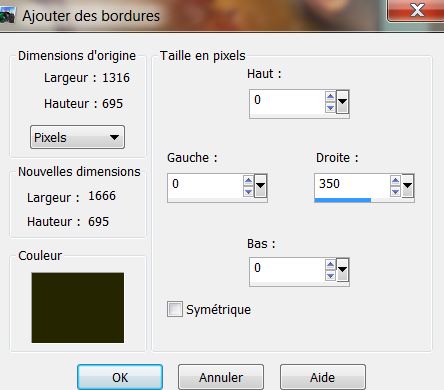
25. With your magic wand select the border of 350 pixels
26. Selections-Promote selection to layer
27. Selections-Select none
28. Effects - Andromeda
Perspective /side walls /preset ''rt.open''
29. Activate your bottom layer in your layer palette
30. With your magic wand select the border of 350 pixels again
31. Delete : Flood Fill Tool: fill the selection with this color
#b0e2c5
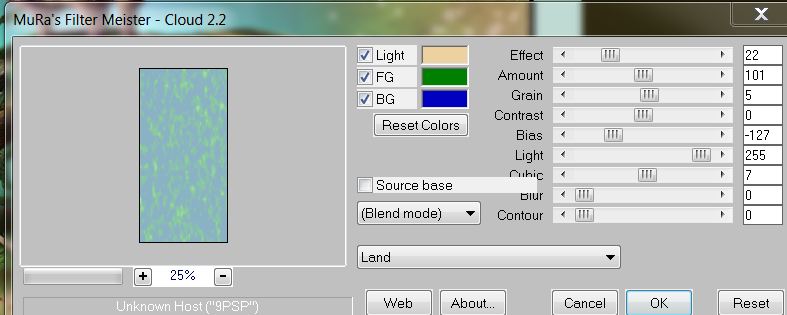
32. Effects - Plugins Mura's Meister
/Clouds with this colors
Light
#ECD29F/FG #077B02/BG
#0000C4
33. Selections-Select none
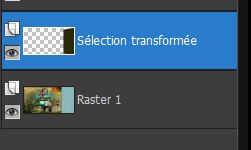
34. Activate your top layer in your layer palette( selection transformée)
35. Blend Mode of this layer to "Multiply" and lower the opacity to 42%
- Your work and Layer Palette look like this now:
36. Aktivate the bottom layer in your layer palette ( raster 1)
37.Open the tube
''renee_bois_des_reves_fillette '' Edit/copy -Edit/paste as a new Layer
- Place on the right
38. Open the tube de
''échelle '' Edit/copy -Edit/paste as a new Layer and place
39. Image - Add Borders - Symmetric : 2 pixels black
40. Open the Tube titre Edit/copy -Edit/paste as a new Layer and place
41. Image Resize 1025
pixels Widht
I hope you enjoyed this lesson
Renée
This lesson was written by Renée at
25/03/2013
Any resemblance with an existing lesson is merely a coincidence
*
Don't forget to thank the people who work for us and with us. I named the tubeurs - Testers and the translators.
Thanks Renée
* |  O....bois des
Rêves
O....bois des
Rêves


 Translations


