|
Let's start the lesson.
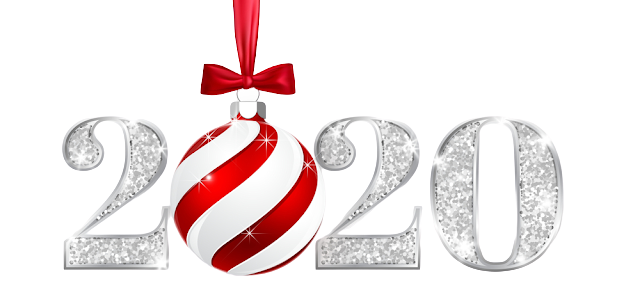
Noël 2020
First part
- Preparation
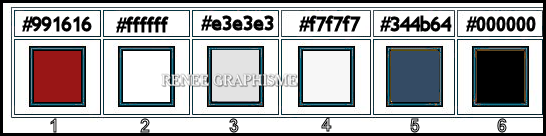
- Material Properties: Set your foreground color to color #991616= 1 – Set your background color to color #ffffff
=2
1.File: Open a transparent image of 761 x 1015 Pixels
2. Flood Fill Tool
 -
Fill the Layer with the Foreground color= 1 -
Fill the Layer with the Foreground color= 1
3. Effects –Plugins- Mura’s
Seamless – Stripe of Cylinder use the settings below
4. Effects – Plugins– Penta.com – Jeans 12/4
5. Effects – Edge Effects – Enhance
6. Layers- New Raster Layer
7. Selections –load/save selection –load selection from disc and select my selection:‘Noel-2020-1’’
8. Flood Fill Tool
–
Fill the selection with the Background color=2
Selections- Deselect All
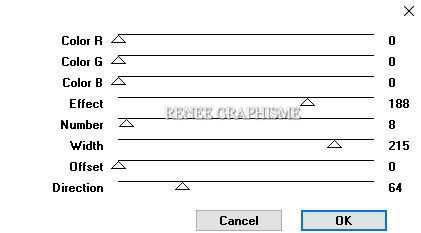
9. Effects –Plugins-
Unlimited 2.0 – Twoo Moon - Venitian Blur... using the default settings
10. Layers- New Raster Layer
11. Selections –load/save selection –load selection from disc and select my selection: ‘Noel-2020-2’’
12. Flood Fill Tool
–
Fill the selection with the Background color=2
Selections- Deselect All
13. Effects –Plugins-
Unlimited 2.0 – Twoo Moon - Wish it would Rain... using the default settings
14. Layers- New Raster Layer
15. Selections –load/save selection –load selection from disc and select my selection:‘Noel-2020-3’’
16. Flood Fill Tool
–
Fill the selection with the Background color=2
Selections- Deselect All
17.Effects
–Plugins- Unlimited 2.0 – Twoo Moon -
StringThing.. using the default settings
18. Layers- Arrange- Move Down ( twice)
- To replace the top of the Layer-Palette
19. Layers- Merge- Merge Down and repeat Layers- Merge- Merge Down
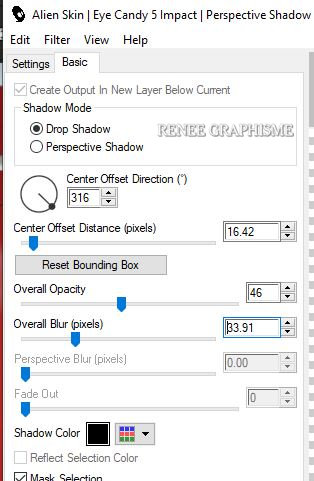
20. Effects – Plugins – Alien Skin Eye Candy 5 –Impact –Perspective
Shadow use the settings below
- Open the tube ‘’ ReneeGraphisme- TUBES TUTO NOEL 2020’’
(Do not close we need it later for the rest of the work)
21. Activate layer ’lampe ‘’ of the tube -Edit - Copy- Activate your work -Edit - Paste as a new layer and move in the right place
22. Activate layer ’’ guirlande ‘ of the tube -Edit - Copy- Activate your work -Edit - Paste as a new layer and move in the right place
23. Layers- Duplicate
- Move it in the right place( see finished image)
24. Layers- Merge- Merge Down (2 Guirlandes) Layers- Arrange -Move it 2x down -above Raster 1
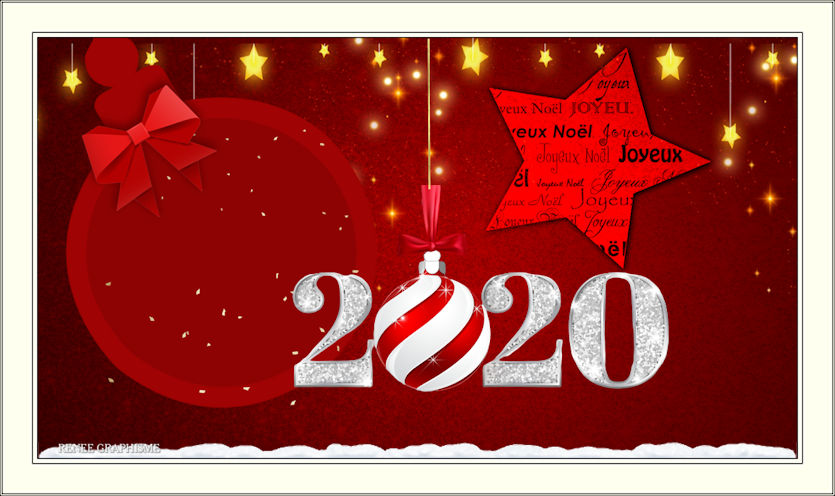
Your work and Layer Palette look like this now-You should have this result
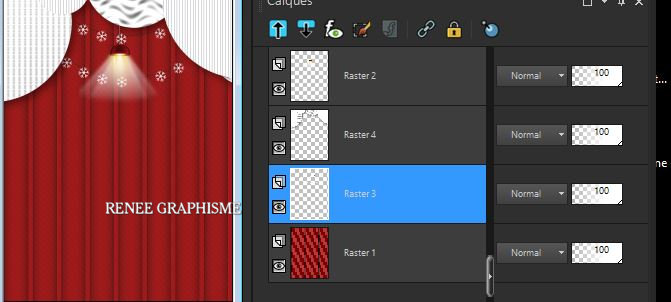
- Activate the bottom of the Layer-Palette=Raster 1
25. Layers- New Raster Layer
26.
Selections –load/save selection –load selection from disc and select my selection: ‘Noel-2020-4’’
27. Flood Fill Tool
–
Fill the selection with the Background color =2
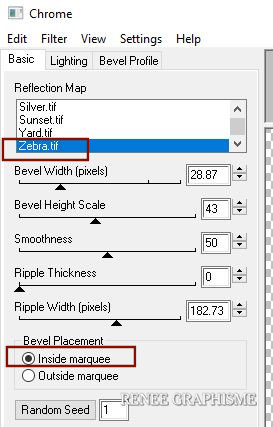
28. Effects – Plugins – EyeCandy 4000- Chrome use the settings below
Selections- Deselect All
29. Image - Negative Image
30. Layers- New Raster Layer
31.
Selections –load/save selection –load selection from disc and select my selection: ‘Noel-2020-5’’
32. Color-Palette-Set the Foreground color to color #e3e3e3=3
Flood Fill Tool
–
Fill the selection with the Foreground color=3
33.Adjust-Blur- Gaussian Blur: Radius 3
Selections- Deselect All
- Activate the bottom layer in the Layer-Palette= Raster 1
34. Open the tube ‘’Renee_Noel2020-
Cercle rouge’ ’-Edit - Copy- Activate your work -Edit - Paste as a new layer
- Do not move, it is in the right place
35. Layers-Properties-Change the Blend Mode to "Overlay"
36. Layers- New Raster Layer
37.
Selections –load/save selection –load selection from disc and select my selection:‘Noel-2020-6’’
38. Flood Fill Tool
-
Fill the selection with the Background color=2
Selections- Deselect All
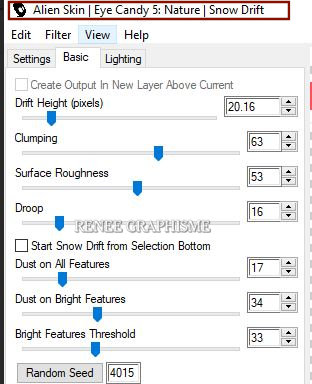
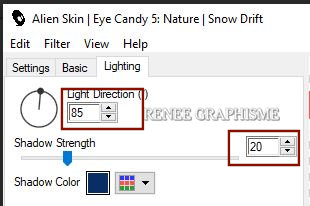
39. Effects – Plugins-Alien
skin EyeCandy - Nature- Snow Drift use the settings below
-Back to tube
‘’ ReneeGraphisme- TUBES TUTO NOEL 2020.’’
40. Decorate with a tube of your choice and place
41. Apply Drop shadow of your choice
- Make sure everything is at the right place
42. Layers- Merge- Merge Visible
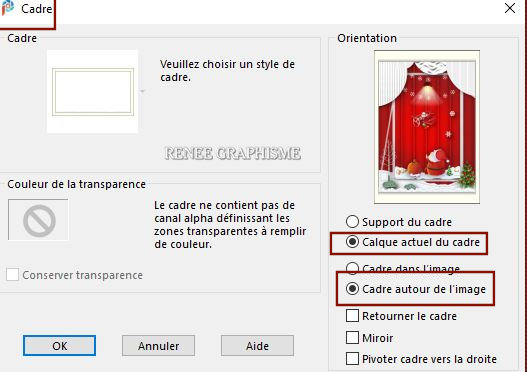
43. Image - Picture Frame and select my Frame
–Cadre Noël 2020 with these settings
44. Open the " titre
"or write your own text
45. Layers- Merge- Merge Visible
Put the image aside for now, we will need it later( If you want to use it as a greeting card save in png)
Second part
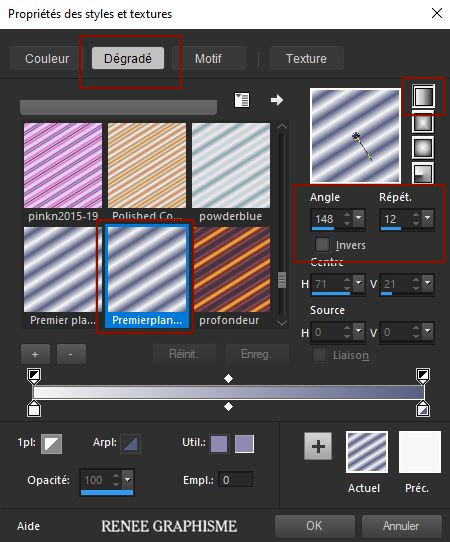
- Material Properties: Set your foreground color to color #f7f7f7= 4 – Set your background color to color #344b64= 5
- Material Properties: Set your Foregroundcolor to foreground-background "Linear" gradient configured like this
1.File: Open a transparent image of 1205 x 750
2. Flood Fill Tool
– Fill the layer with the gradient
3. Adjust-Blur- Gaussian Blur: Radius 22
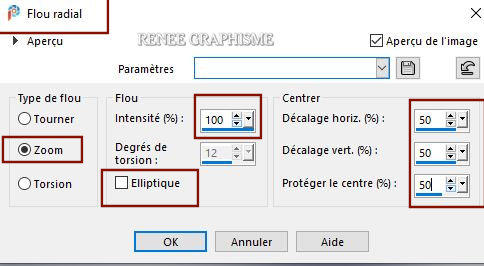
4. Adjust- Blur- Radial Blur use the settings below
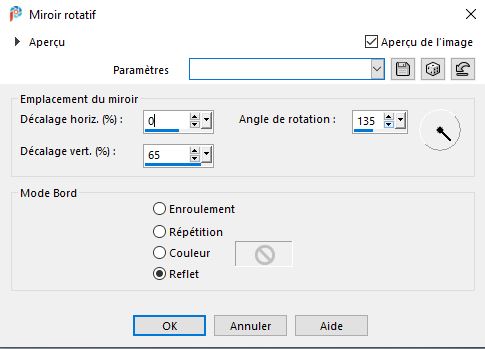
5. Effects – Reflection Effects – Rotating Mirror use the settings below
6. Effects- Plugins – FM TileTools- Saturation Emboss using the default settings
7. Open the tube ‘’
Renee-Noel2020-image etoile’’ --Edit - Copy- Activate your work -Edit - Paste as a new layer
8. Effects –Plugins-
Unlimited 2.0 – FunHouse -Angulate... using the default settings
9. Adjust-Sharpness -Sharpen More
10. Layers- Merge- Merge Down
11. Layers- Duplicate
12. Effects – Plugins – Mura’s Seamless – Stripe of Cylinder
13. Effects - Plugins –Transparency – Eliminate Black
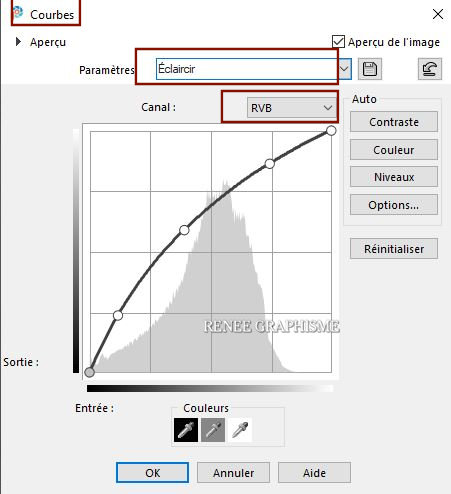
14. Adjust-
Brightness and Contrast – Curves >> Settings- Lighten
15.Layers-Properties -Lower the Opacity to 73
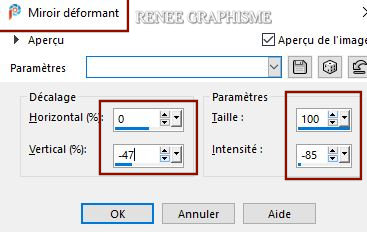
16. Effects – Distortion Effects- Warp use the settings below
17. Open the tube ‘’
Renee-Noel2020-image-cercles.pspimage’’ -Edit - Copy- Activate your work -Edit - Paste as a new layer
18. Objects- Align -
Top
- Material Properties: Set your Foreground color to color #000000= 6 – Set your Background color to color #991616=1
19. Layers- New Raster Layer
20.
Selections –load/save selection –load selection from disc and select my selection:‘Noel-2020-7’’
21. Flood Fill Tool
–Fill the selection with the Foreground color=6
22. Adjust- Blur- Gaussian Blur: Radius 45
23. Layers-Properties-Change the Blend Mode to "Overlay" – Lower the Opacity to 46
Selections- Deselect All
24. Layers- New Raster Layer
25.
Selections –load/save selection –load selection from disc and select my selection:‘Noel-2020-8’’
26. Flood Fill Tool
Fill the selection with the Background color= 1
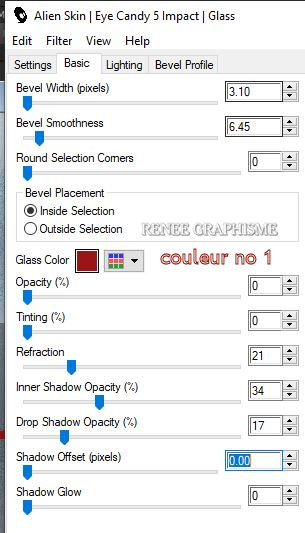
27. Effects – Plugins – Alien Skin EyeCandy 5 – Impact – Glass use the settings below
28. Layers- New Raster Layer
29.
Selections –load/save selection –load selection from disc and select my selection:‘Noel-2020-9’’
30. Flood Fill Tool
–Fill the selection with the Background color= 1
Selections- Deselect All
31. Layers- New Raster Layer
32.
Selections –load/save selection –load selection from disc and select my selection:‘Noel-2020-10’’
33. Flood Fill Tool
–
Fill the selection with the Foreground color=6
34. Layers-Properties-Change the Blend Mode to "Multiply" – Lower the Opacity to 65
Selections- Deselect All
35. Open the tube ‘’ Renee_Noel2020-
Noeud.pspimage’’ -Edit - Copy- Activate your work -Edit - Paste as a new layer
36. Pick Tool: (K) on your keyboard -Enter these parameters
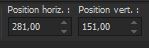 281 /151
- Press ( M ) to close the Pick Tool
37. Layers- New Raster Layer
38.
Selections –load/save selection –load selection from disc and select my selection:‘Noel-2020-11’’
39. Color-Palette-Set the Foreground color to color #ffffff=2
Flood Fill Tool
–
Fill the selection with the Foreground color=2
40. Adjust- Blur- Gaussian Blur: Radius 8
Selections- Deselect All
41. Layers- New Raster Layer
42.
Selections –load/save selection –load selection from disc and select my selection:‘Noel-2020-12’’
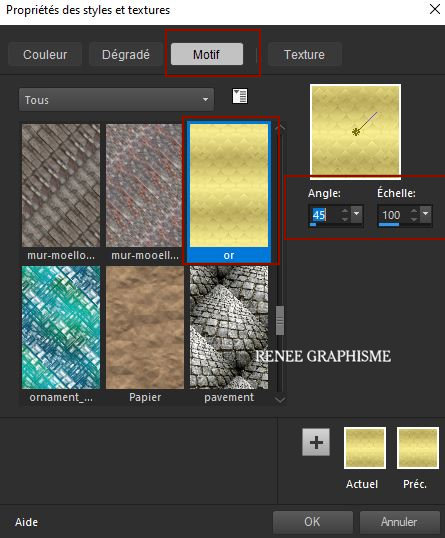
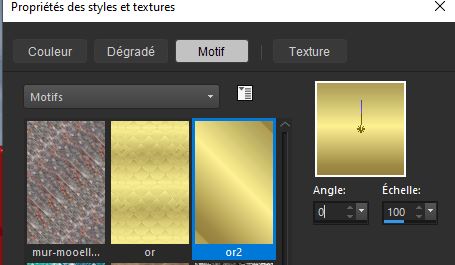
Open the patteren "Or" in your Psp
- Set your colour palette as follows : activate the pattern tab as below and Choose the pattern "or"
43.Flood Fill Tool
- Flood fill your selection with that pattern ‘’or’’
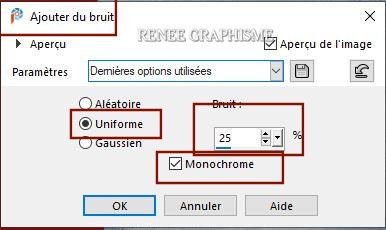
44. Adjust -
Add Remove Noise-Add Noise – Uniform with these settings
45. Effects – 3 D Effects- Drop Shadow with these settings: Color Black
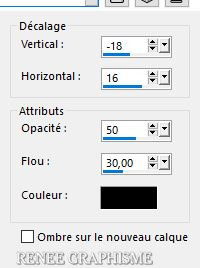
Selections- Deselect All
- In the Layer-Palette-Activate Raster 2 or Raster 3 (with the circles and the stars)
46. Layers- Arrange- Bring to Top
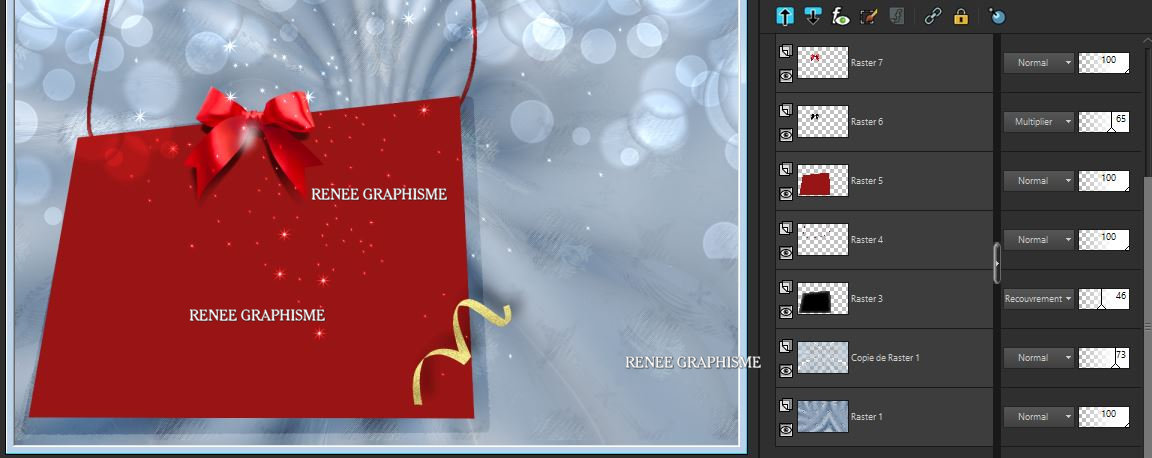
-Your work and Layer Palette look like this now-You should have this result
47.Open the tube ‘’
Renee-Noel2020-image-bandes pspimage’’ -Edit - Copy- Activate your work -Edit - Paste as a new layer
48. Objects- Align- Bottom
49. Effects – 3 D Effects- Drop Shadow with the same settings
50. Layers- New Raster Layer
51. Selections –load/save selection –load selection from disc and select my selection:‘Noel-2020-13’’
52. Open the patteren "Or2" in your Psp
Activate the pattern tab as below and Choose the pattern "or 2" use the settings below
Flood Fill Tool
–
Fill the selection with the pattern ''or'' / ''or2'' at your choice
Selections- Deselect All
53. Effects- 3
D Effects– Drop Shadow with these settings : 1/1/85/1 / Color Black
54.
Open the tube ‘’Renee-Noel2020-image-Titre.pspimage’’ -Edit - Copy- Activate your work -Edit - Paste as a new layer
55. Pick Tool: (K) on your keyboard -Enter these parameters 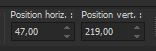 47/219
Press ( M ) to close the Pick Tool
Activate your minimized image of point 45 ( the Christmas card)
56. Image -
Resize 60% and reduce it again with 75 %
57. Edit-Copy!!
58. Activate your work -Edit - Paste as a new layer
59. Pick Tool: (K) on your keyboard -Enter these parameters
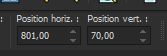 801/70 801/70
60. Effects – Plugins – Alien Skin EyeCandy 5 Impact – Perspective
Shadow –Tab-Settings-User Settings and select my file -Preset : ‘’Renee_Noel2020-shadow’’
61. Image - Add borders-Symmetric checked: 1 Pixel Color Red=1
62. Image - Add borders-Symmetric checked: 20 Pixels Color White=2
63. Image - Add borders-Symmetric checked: 1 Pixel Color Red=1
64. Image - Add borders-Symmetric checked: 40 Pixels Color White=2
65. Open the tube''
deco cadre ''-Edit - Copy- Activate your work -Edit - Paste as a new layer and move
66. Layers- Merge- Merge Visible
67. Image -
Resize 1012 Pixels Width
68. Open the tube
"personnage" (the girl)-Edit - Copy- Activate your work -Edit - Paste as a new layer and move
69. Layers- Merge- Merge All.
Save as JPG
Merry Christmas to everyone

06-09-2020
cute animated holiday fonts
here
I hope you enjoyed this lesson
Renée
This lesson was written by Renée 2020
Edited and Update
in 2020
*
Any resemblance with an existing lesson is a coincidence
* Do not forget to thank the people who work with us and for us -
I have appointed the tubeurs and translators
Thanks
*
|
 Translations