|
Let's start the lesson.
-
Preparation
- Material Properties: Set your foreground color to color #880910= 1 – Set your background color to color #048d9d= 2

-
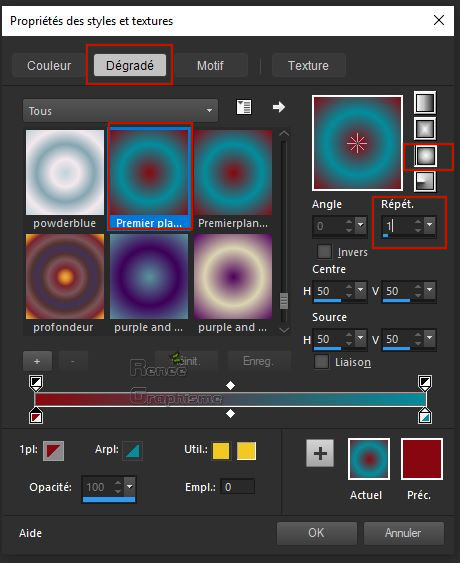
Prepare a foreground/background sunburst gradient configured like this
1. File- Open a new transparent Image of 1008 x 698 Pixels
2. Aktivate Flood Fill Tool
 – Flood fill the layer with the gradient
3. Selections-Select All
4.
Open the tube ‘’ Renee_TUBES_Masque rouge.png’’/Edit - Copy- Activate your work -Edit - Paste Into Selection
Selections- Select None
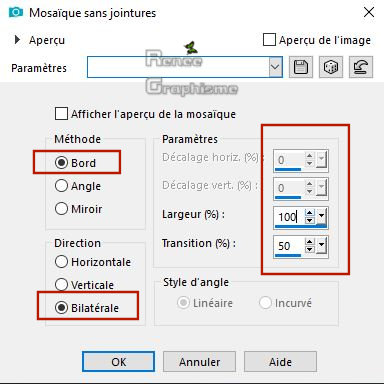
5. Effects-Image Effects-Seamless Tiling use the settings below
6. Adjust-Blur -Gaussian Blur : Radius 45
7. Effects –Plugins -Unlimited 2.0 - Teph's Tricks -Slide X 50%
8. Effects –Plugins- Unlimited 2.0 - Simple – Top Bottom Wrap
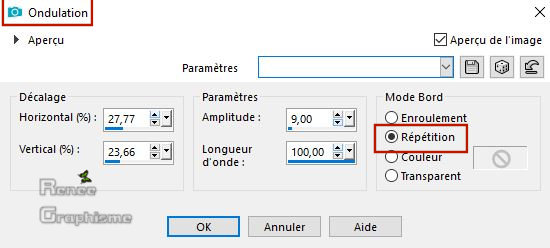
9. Effects –Distortion Effects-Ripple use the settings below
10. Effects- Edge Effects- Enhance More
11. Layers- New Raster Layer
12. Set your foreground color to color black-Activate Flood Fill Tool - Flood fill the layer with black
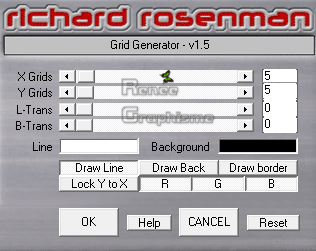
13. Effects –Plugins– Richard Rosenman - Grid
Generator use the settings below
14. Effects – Plugins– Transparency- Eliminate
black
15. Effects – Plugins- Mura’s Meister -
Perspective Tilling using the default settings
16.
Effects- Image Effects- Offset with these settings: H = 0 and V = -350
17. Layers-Properties-Lower the Opacity of the layer to 36%
-
Properties Foreground: Set your foreground color to color #ffffff
18. Layers- New Raster Layer
19. Selections –load/save selection –load selection from disc and select my selection: ‘’Masque_rouge
1’’
20. Activate Air Brush Tool
 use the setting below use the setting below

Put the airbrush on the spot where the arrow is => as in the example
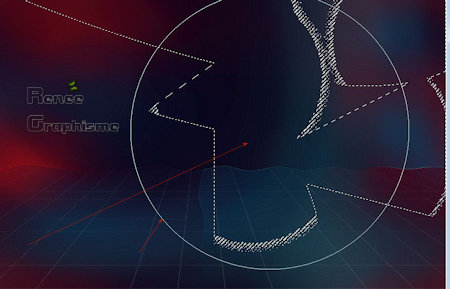
Click 1 or 2 times with the VG color #ffffff
Selections- Select None
21.
Layers-Properties-Lower the Opacity of the layer to 40%
22. Layers- New Raster Layer
23. Selections –load/save selection –load selection from disc and select my selection: ‘’Masque_rouge
2’’
24. Activate Air Brush Tool with the same settings -Put the airbrush on the spot where the arrow is => as in the example- Click 1 time with the BG color #048d9d =2
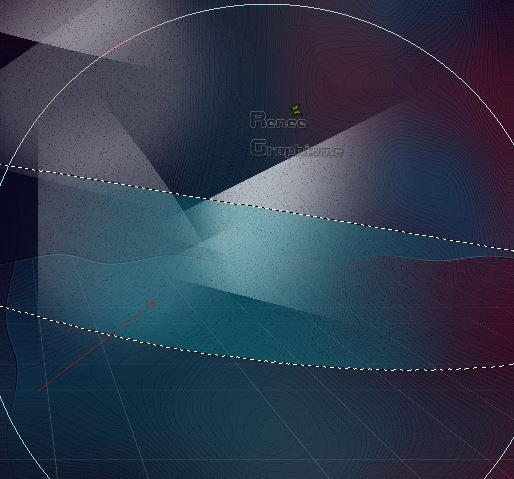
Selections- Select None
25. Adjust-Blur -Gaussian Blur : Radius 8
26. Layers- New Raster Layer
27. Selections –load/save selection –load selection from disc and select my selection: ‘’Masque_rouge
3’’
Material of the foreground: change material of the foreground into gradient select:
‘’@nn_150913_GR_133_tdstudio’’ Prepare a linear gradient configured like this
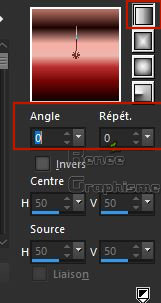
28. Activate Flood Fill Tool
 - Flood fill the selection with the gradient
Selections- Select None
29. Effects - Plugins- Flaming pear Flood Click on the Red Arrow and load
Preset ‘’Masque_rouge-Flood settings’’
Note: If the Preset doesn't work for you, use the settings below
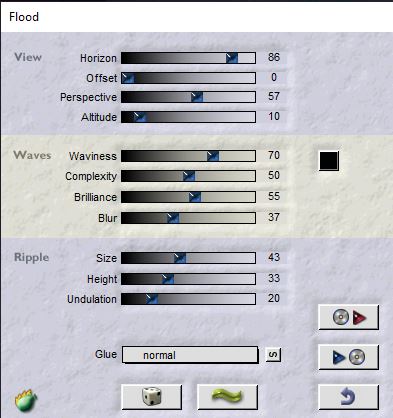
30. Effects- Edge Effects- Enhance
31.Open the tube ‘’ Masque_rouge_Image paysage’’
-
Edit - Copy- Activate your work -Edit - Paste as a new layer
-
Do not move, it is in the right place
32. Layers-Properties-Lower the Opacity of the layer to 55%
-
Activate the bottom layer in the layer palette = Raster 1
33. Activate Selection Tool -Custom Selection (S) -Rectangle with these settings

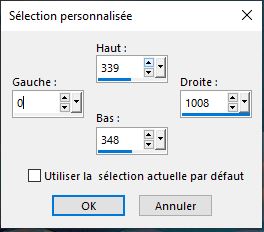
34.
Selections- Promote selection to layer
35. Layers- Arrange- Bring to Top
Selections- Select None
36. Effects –Distortion Effects-Ripple with the same settings
37. Layers-Properties-Set the Blend Mode to "Exclusion"
38.
Layers- New Raster Layer
39. Selections –load/save selection –load selection from disc and select my selection: ‘’Masque_rouge
4’’
40.
Activate Flood Fill Tool
 - Flood fill the selection with the gradient
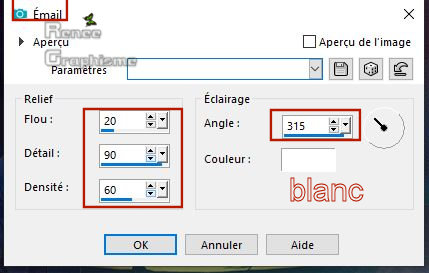
41. Effects-Artistic Effects – Enamell use the settings below
Selections- Select None
42.
Effects – 3 D-Effects – Drop Shadow with these settings: 1/2/100/4 black
43.Open the tube ‘’Renee_TUBES_Masque rouge-Papillons’’
-
Edit - Copy- Activate your work -Edit - Paste as a new layer
-
Move it in the right place ( see finished image)
44. Open the tube ‘’ Renee_TUBES_Masque rouge-Spot’’
-
Edit - Copy- Activate your work -Edit - Paste as a new layer
45. Effects – Image Effects- Offset with these settings: H =297 and V = 203
-
Material Properties: Set your foreground color to color #ffffff – Set your background color to color #0c2840= 3
46.
Layers- New Raster Layer
47. Selections –load/save selection –load selection from disc and select my selection: ‘’Masque_rouge
5’’
48. Activate Flood Fill Tool
 -
Flood fill the selection with the foreground color #ffffff. Click 3 or 4 times -
Flood fill the selection with the foreground color #ffffff. Click 3 or 4 times
49. Effects- Edge Effects- Enhance
Selections- Select None
50. Layers- New Raster Layer
51.
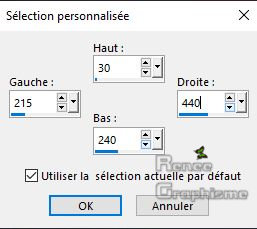
Activate Selection Tool -Custom Selection (S) -Rectangle with these settings
-
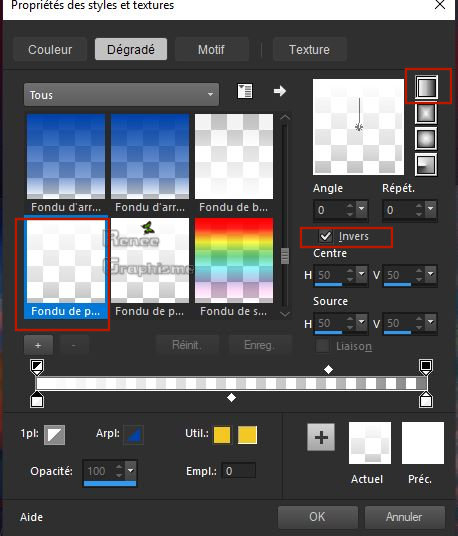
Material of the foreground: change material of the foreground into linear gradient select " Fading white" configured like this ( Corel_06_026)
52.
Activate Flood Fill Tool
 -
Flood fill the selection with the gradient -
Flood fill the selection with the gradient
53. Effects –Plugins- Unlimited 2.0 - VM 1- Mighty Maze using the default settings : 43/255/255/255/0
54. Effects- Edge Effects-Enhance
55. Effects – Plugins – Transparency – Eliminate
white
56. Effects- Edge Effects-Enhance
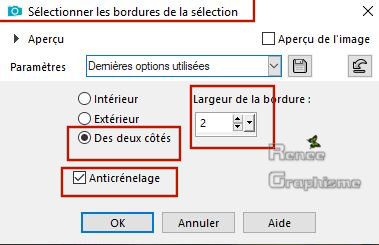
57. Selections- Modify- Select Selection Borders with these settings
58. Layers- New Raster Layer
59. Activate Flood Fill Tool
 –
Flood fill the selection with the background color #0c2840= 3 –
Flood fill the selection with the background color #0c2840= 3
Selections- Select None
60. Effects- Edge Effects-Erode
- In the Layer-Palette: activate the layer underneath = (Raster 11)
61. Effects –Plugins- Unlimited 2.0 - UnPlugged Tools - REM
Lotus... with these settings: 140/89/52/192
62. Layers-Properties-Lower the Opacity of the layer to 53%
-In the Layer-Palette: activate the layer above
63.
Effects – 3 D-Effects – Drop Shadow with these settings: 1/1/100/1 white
64.Open the tube ‘’ calguisRaNGEL24032015.pspimage’’
-
Edit - Copy- Activate your work -Edit - Paste as a new layer
-
Move it in the right place ( see finished image)
65. Effects – 3 D-Effects – Drop Shadow with these settings: 1/1/100/1 black
-
You are at the top of the layer-palette
66. Open the tube ‘’ Renee_TUBES_Masque rouge’’
-
Image -Resize to 80%
-
Edit - Copy- Activate your work -Edit - Paste as a new layer
-
Move it in the right place ( see finished image)
-
In the layer-palette activate Raster 10 ( the one in the corner )
67. Layers- New Raster Layer
68.
Selections –load/save selection –load selection from disc and select my selection: ‘’Masque_rouge 6’’
69. Activate Flood Fill Tool
 -
Flood fill the selection with the (fade white) gradient -
Flood fill the selection with the (fade white) gradient
Selections- Select None
70.Layers-Properties-Set the Blend Mode to " Screen " – Lower the Opacity of the layer to
51%
71. Layers- New Raster Layer
72. Selections –load/save selection –load selection from disc and select my selection: ‘’Masque_rouge
7’’
73. VG-Color #ffffff-Activate Flood Fill Tool
 -
Flood fill the selection with the foreground color #ffffff -
Flood fill the selection with the foreground color #ffffff
Selections- Select None
74. Layers-Properties -Lower the Opacity of the layer to 46%
-
To replace the top of the layer-palette
75.
Open the tube '' titre ''Edit - Copy- Activate your work -Edit - Paste as a new layer
- Move it in the right place ( see finished image)
76. Layers- Merge - Merge Visible
77. Layers- Duplicate
78. Image Resize to 88% Resize All Layers - not checked
79.
Effects – 3 D-Effects – Drop Shadow with these settings: -15/ 20/50 /30 black
-
Repeat Drop Shadow : 15/-20/50/30 black
80. Effects –Plugins- Unlimited 2.0 - Filter Factory Gallery V -
Color booster...: 92
-
In the Layer-Palette: activate the layer underneath = ( Merged Layer )
81.
Adjust-Blur -Gaussian Blur : Radius 65
82.
Effects –Plugins- Unlimited 2.0 – Willy - Tablet Lines..with these settings: 182/0/0/2
83. Image - Add borders-Symmetric checked: 2 pixels black
Save as JPG.
I hope you enjoyed this lesson
Renée
This lesson was written by Renée 06-03-2019
Edited and Update
2019
*
Any resemblance with an existing lesson is a coincidence
* Do not forget to thank the people who work with us and for us I have appointed the tubeurs and translators
Thanks
*
|

 Translations


