1. Open the Image: ''fond'' Promote Background Layer
2. Layers New raster layer.Flood fill tool: fill the layer with color black
3. Layers- New Mask Layer From Image and choose:
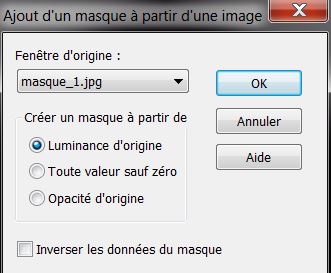
4.Layers-Merge-Merge Group
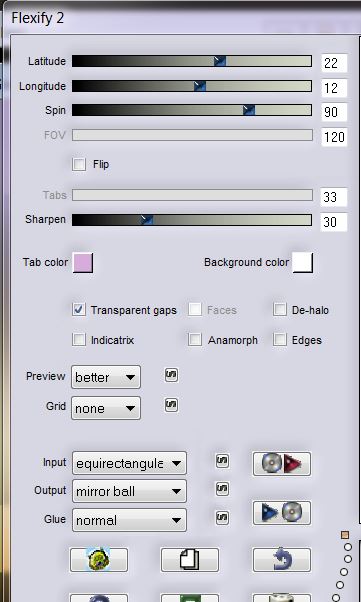
5. Effects-Plugins Flaming Pear Flexify 2 use settings below
6. Layers- New raster layer
Selections - load/save selection- load selection from disk and select my file:
''ligne magique1''
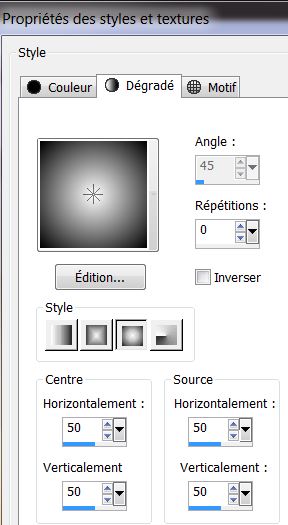
7.Material palette: change foreground color into color White-Background color into color Black
Prepare a Sunburst Gradient as configured like this
8. Activate flood fill tool and fill the selection with the gradient
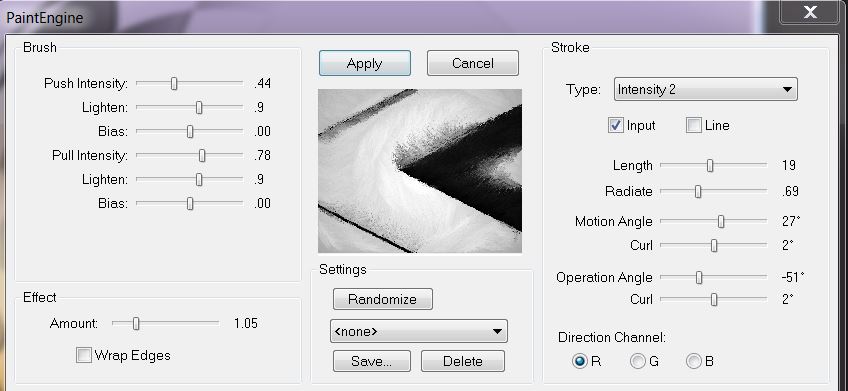
9. Effects-Plugins Fantastic machine - Pain
engine
10. Effects-Plugins FM Tile tools - Blen Emboss
/ Default
Selections-Deselect All
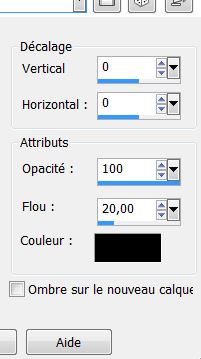
11. Effects - 3D Effects - Drop shadow//use settings below.
12. Layer Palette -Double click on this Layer and set the Blend Mode to "Hard Light " and set the Layer Opacity of this Layer to 69%
13. Layers- New raster layer-
Flood fill tool:fill it with color black
14. Effects-Plugins - Simple - Quarter Corner
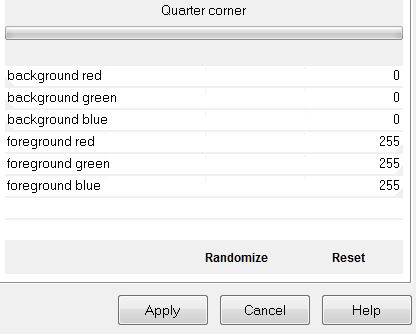
With the Magic Wand -with these settings /select the white part

Delete -Selections- Deselect All
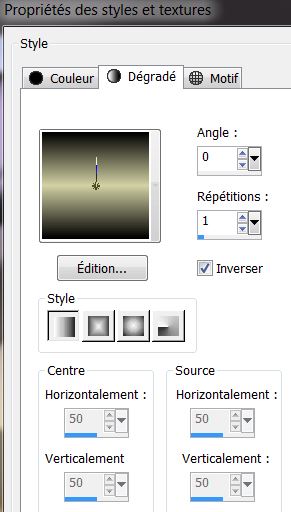
15. Material palette: change foreground color into color #d2d2a3
Prepare a linear gradient configured like this.
16. Layers-New raster layer
17. Selections - load/save selection- load selection from disk and select my file:
''lignes_magiques_2'' / Activate flood fill tool and fill the selection with the gradient
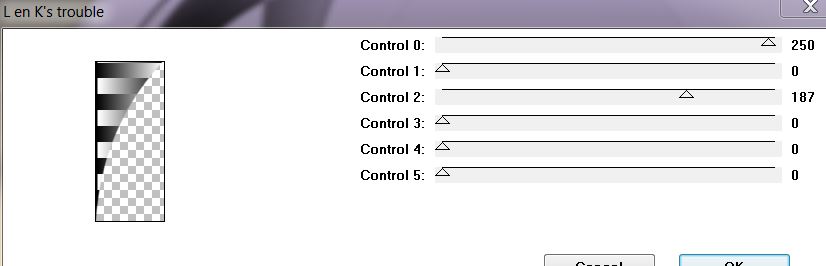
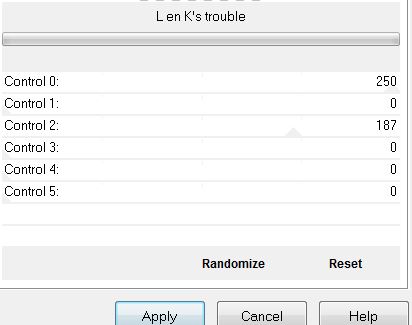
18. Effects -Plugins L and K's - Trouble
19. Selections-Deselect All
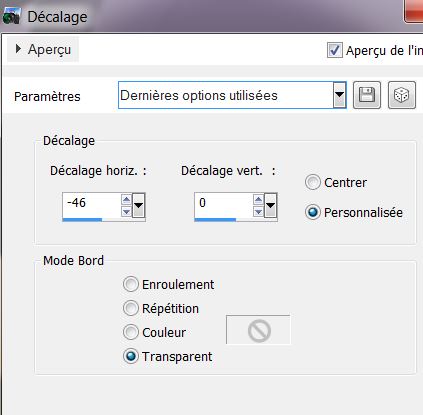
20.Effects - Images Effects - Offset
21.Layers- New raster layer
22. Selections - load/save selection- load selection from disk and select my file:
''lignes_magiques_3'' /Activate flood fill tool and fill the selection with the gradient
23. Effects-Plugins - L and K's Trouble
Selections-Deselect All
24. Effects -Effects - 3D Effects - Drop shadow: same settings
25. Open the tube
''image_1'' Edit - Copy -Edit - Paste as new layer on your working area and move like this

26. Layers- New raster layer
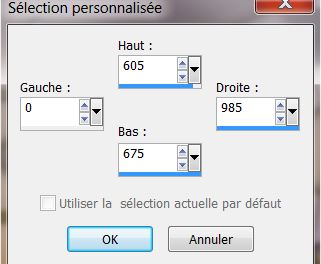
27. Selection Tool-Gustom Selection with these settings(S)
28. Activate flood fill tool and fill the selection with the gradient
29.
Effects -Plugins L and K's Trouble same settings (point 23)
30.
Selections-Deselect All
31.
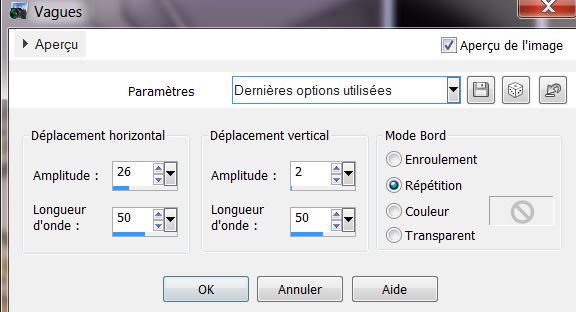
Effects-Distortion Effects-Wave use settings below
Layer Palette -Double click on this Layer and set the Blend Mode to "Hard Light " and set the Layer Opacity of this Layer to 81%
32.
Effects - 3D Effects - Drop shadow/ 2/1/100/5 black
33.
Open the tube ''Chris-MistDarness'' Edit - Copy -Edit - Paste as new layer on your working area do not move !
34.
Layers- Arrange Move down 2x
Your work look like this now:
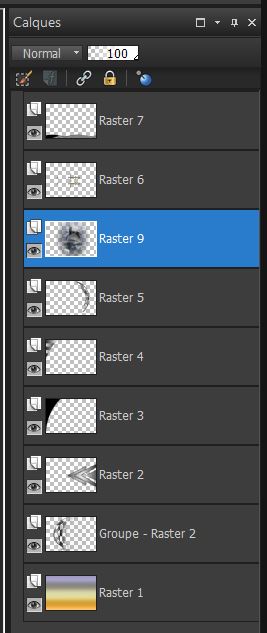
35. Activate the top of the Layers palette
36.
Layers- New raster layer/ Flood fill tool:fill the layer with color black
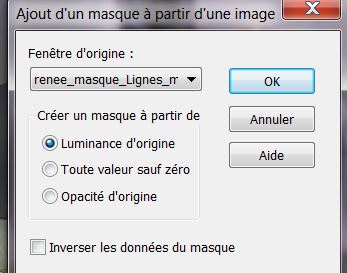
37.
Layers-New Mask Layer From Image and choose Mask: 'renee_masque_lignes_magiques''
38.Layers-Merge-Merge Group
39.Activate Selection Tool-(S) Selection Type: Rectangle - draw a rectangle like this ( Two Parts)
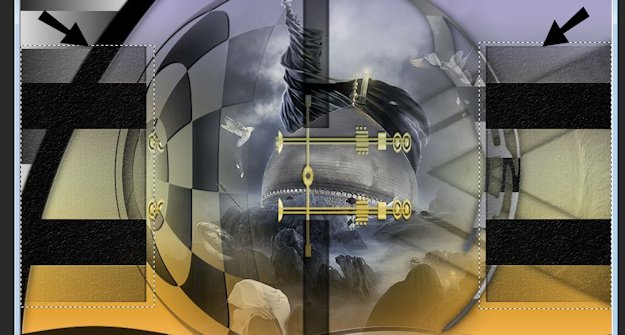
40. Effects-Plugins - Alien skin Snapt art- Stylize - Tab-Settings-User Settings and click on the Preset ''lignes_magiques_stylize''
41.
Selections - Promote selection to layer
42
Layer-Palette-Activate the layer underneath( Group -Raster 8) -
Delete
Selections-Deselect All
43.
Stay on this layer ( Group - Raster 8)
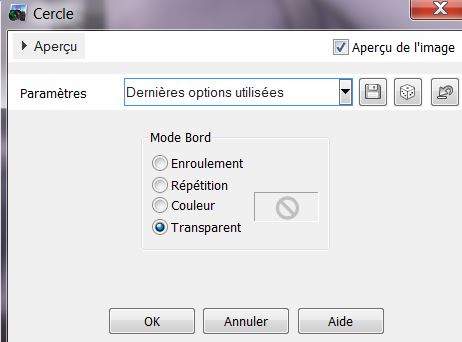
44.
Effects- Geometric Effects-Circle use settings below
45
Activate the top of the layer-Palette( Promoted Selection)
46.
Repeat_ Effects- Geometric Effects-Circle use settings below
47.Layers- Merge-Merge - Visible
48
Edit -Copy!!!!!!!!
49.
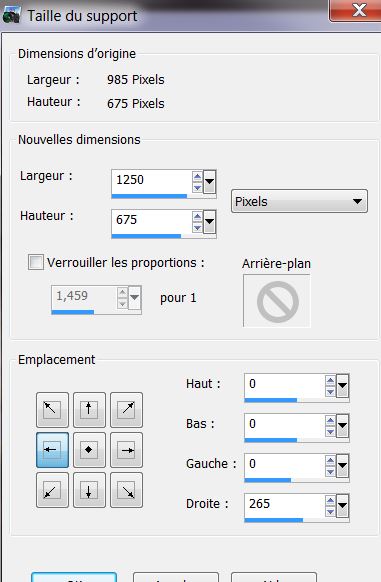
Image-Canvas Size use settings below
50.
Magic Wand-Match mode RGB-select the right side (Attention: Feather 0)
51.
Layers- New raster layer
52.
Edit-Paste into selection(Image is still in your PSP memory)
53.Adjust-Blur-Gaussian Blur:Radius 30
54.
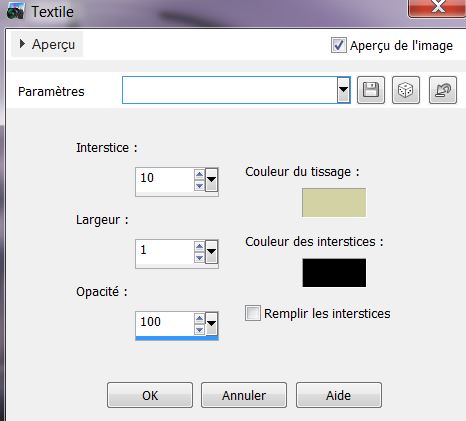
Effects- Textureffects-Weave / Colors #d2d2a3 and black
55.
Effects-Plugins - Ete Candy 5 Impact - Glass - Tab-Settings-User Settings and click on the preset '' lignes
_magiques_glass''
Selections-Deselect All
56.
Open the tube ''barre_roserika'' Edit - Copy -Edit - Paste as new layer on your working area and move
57.
Layers- Duplicate-Image Mirror -and place
58.Open the tube ''Giada_I-heart_a_Devil_song ''
Edit-Copy-Edit Paste as a New layer. With your move tool place it on the right side
59. Effects-Plugins EyeCandy 5 Impact -
Perspective shadow- Drop shadow blury
60. Layers- Merge-Merge - Visible
61.
Image - Add Borders - Symmetric checked 2 pixels color black
62.
Image - Add Borders - Symmetric checked 25 pixels color #878587
63.
Image - Add Borders - Symmetric checked 3 pixels color black
64.
Select the 25 pixels border with the magic wand .
65.
Effects-Plugins Eye Candy 5 - Glass -Tab-Settings-User Settings and click on the preset '' lignes
_magiques_glass''
Selections-Deselect All
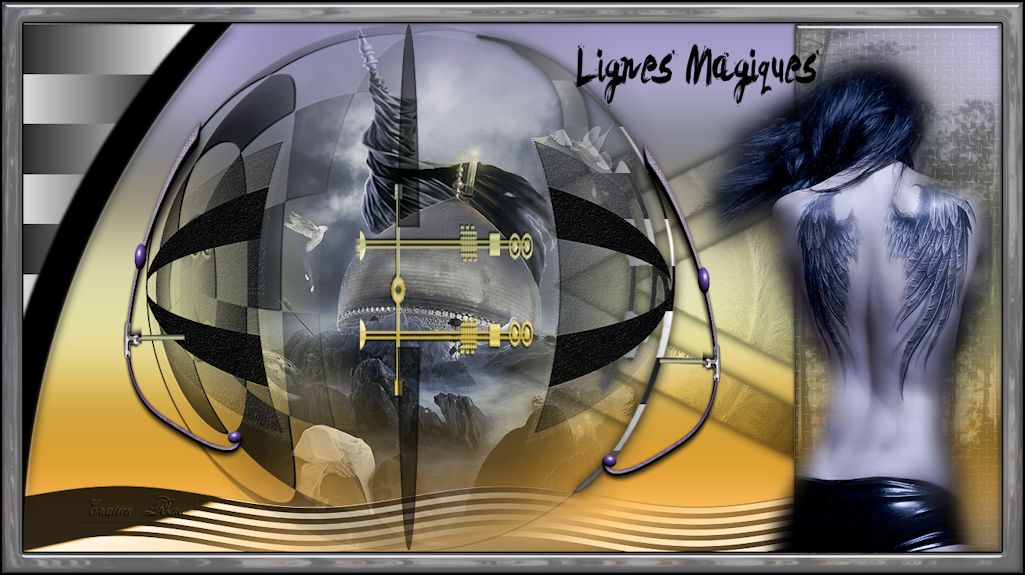
Activate Text Tool-Font: '' Levi Brush '' write or paste the title to your taste
Image
Resize 1025 pixels Width
Save as JPG
I hope you enjoyed this lesson
Thanks !
This lesson was written by Renée the
20/08/2013

|


 Translations