|
Let's begin
1.
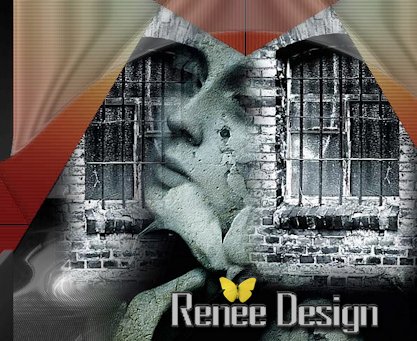
File:Open the image
''texturescameron_ice.jpg/Promote Background Layer =raster
1
2.
Image - Negative Image
3.
Effects-Plugins Flaming Pear /Demitone 50
4.
Effects- Plugins Mura's Meister/ Perspective Tilling -
Default
5. Selections - load/save selection- load selection from disk and select my file
'larmes_pierre_1"
6. Layers-New raster layer
7.
Flood Fill Tool: Fill the Layer with color white
8.
Effects -Plugins Unlimited2.0 - Lumière Ambiance/ Simple
Cone gradient 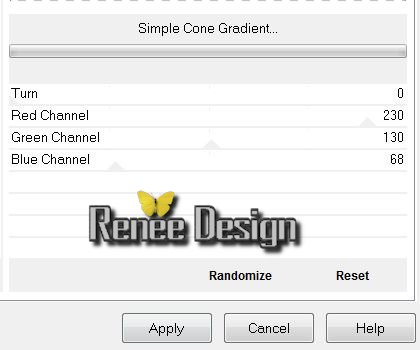
9. Effects -Plugins Unlimited 2.0
/Jeux de lignes /Enlacement /Default
10. Selections-Select none
11. Layers-Duplicate
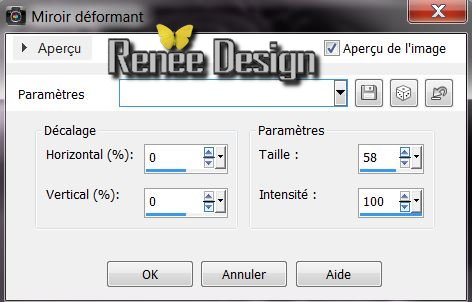
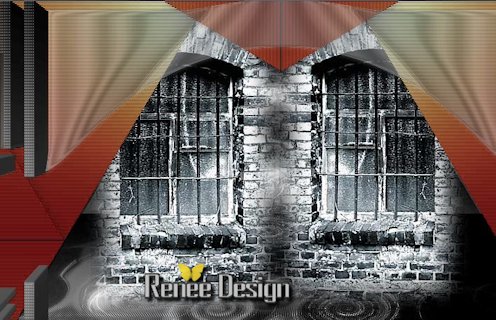
12. Effects-Plugins Simple / Pizza Slice
Mirror
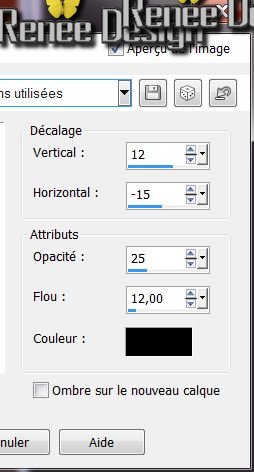
13. Effects - 3D Effects - Drop Shadow
1/1/50/20 black
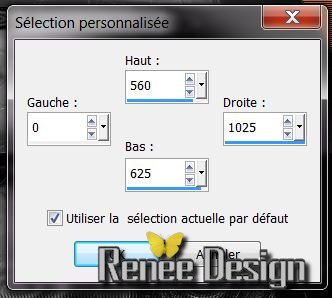
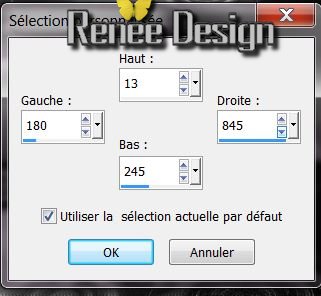
14. Selections-Custom Selection with these settings
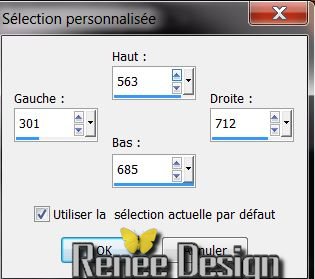
15. Selections-Promote selection to layer
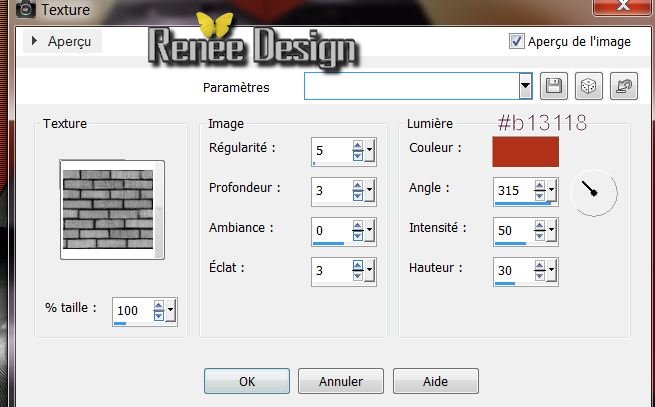
16. Effects- Textureffects -Textur Brick Wall
17. Selections-Deselect All
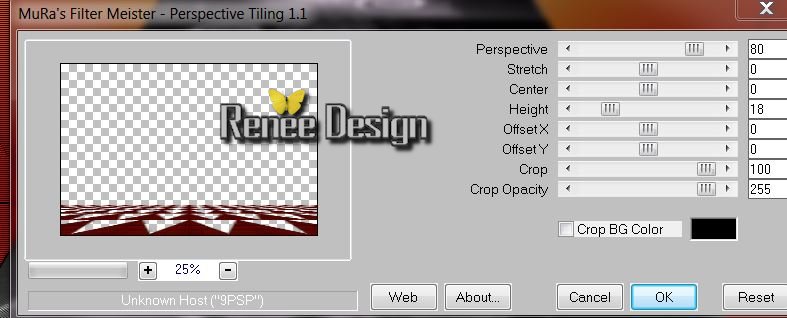
18. Effects-Plugins Mura's Meister -
Perspective Tilling
19.
Selections-Custom Selection with these settings
20. Delete
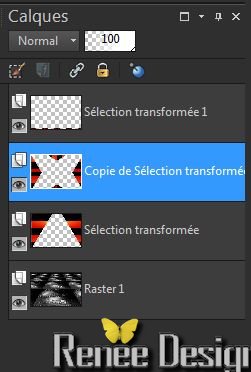
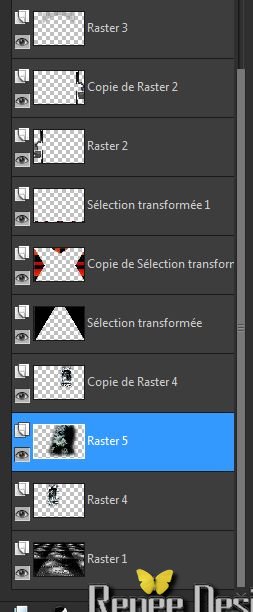
Your Layer Palette looks like this now
21. Selections-Deselect All
22. Layer-Palette : Activate the layer underneath (Copie de Sélection
transformée)/with your lasso tool to select the small triangle at the bottom / Delete
23. Selections-Deselect All
24. Activate the top of the layers palette
(Sélection transformée1)
25. Effects- Distortion Effects - Punch / 50
26. Effects -Plugins EyeCandy 5
Impact / perspective shadow/with these settings
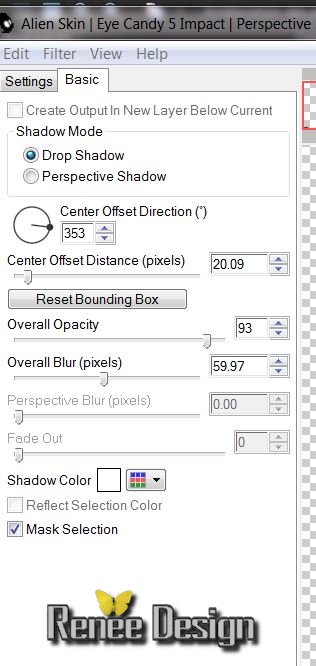
Repeat this filter
27. Layers- New Raster layer
28. Selections - load/save selection- load selection from disk and select my file ''larmes _de
_pierre_2"
29. Open tube ''larmes_pierre_barre''
30. Edit/copy-Edit paste into selection
/Selections-Deselect All
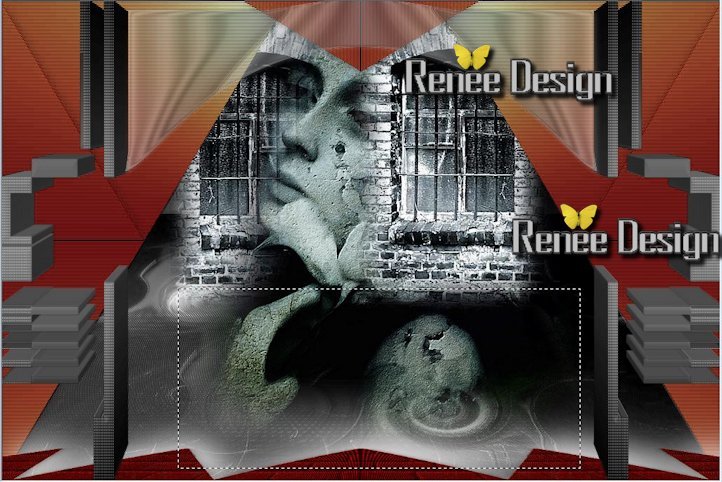
Your Layer Palette looks like this now
31. Layers- Duplicate - Image Mirror
32. Layers-New Raster layer
33. Selections - Custom Selections white these settings
34. Material-Properties: Foreground color to gradient and choose - ''ES Ocean
Breeze134'' Prepare a linear gradient like this
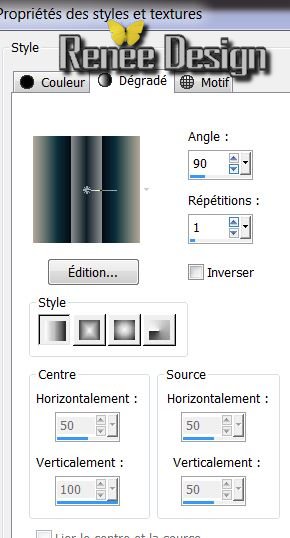
Pot of paint : Opacity 50 % Flood Fill Tool: Fill the selection white the gradient
Pot of paint 100%
35. Selection
- Deselect All
36. Effects- 3D Effects
-Drop Shadow 3/3/46/12 black
37. Effects -
Distortions Effects - Warp
38. Effects-Plugins Xero
XL- Titanium (depending on the version of your filter effect will be slightly different)

39. Layer-Palette-Activate the bottom of the layerpalette (raster1)
40. Open
tube ''scenery46-misted de dragonblu''/Edit/copy-Edit paste as a new layer and place
41. Layer-
Duplicate / Image Mirror
42. Place like this
43. Open
tube ''Art 1 8 -2011 misted tube of Devil'' Edit/copy -Edit-paste as a new layer . Layers-Arrange-Move down nouveau calque (move between the two parts of the wall )
The result
44. Your Layer Palette looks like this now
45. Selection Tool - Rectangle /select that part and-
Delete
46. Selection
- Deselect All
47. Layer-Palette; Activate the top of the layerpalette
48. Open
tube ""AR528'' Edit/copy-Edit paste as a new layer /Image Resize 80% all layers unchecked
49. Open
tube ''larmes_pierres_image_1'' Edit/copy-Edit past as a new layer and move
50. Open
tube ''larmes_pierre_bille '' /Image Flip /Edit/copy-Edit paste as a new layer and move and move
/Layers- Duplicate -twice
and place
51. Layers- Merge- Merge Down and Repeat (for one layer of balls)
52.
Effects - 3D Effects -Drop Shadow /black
53. Open tube ''larmes_pierre_loupe '' Edit/copy-Edit paste as a new layer /Image Resize 80% /all layers unchecked
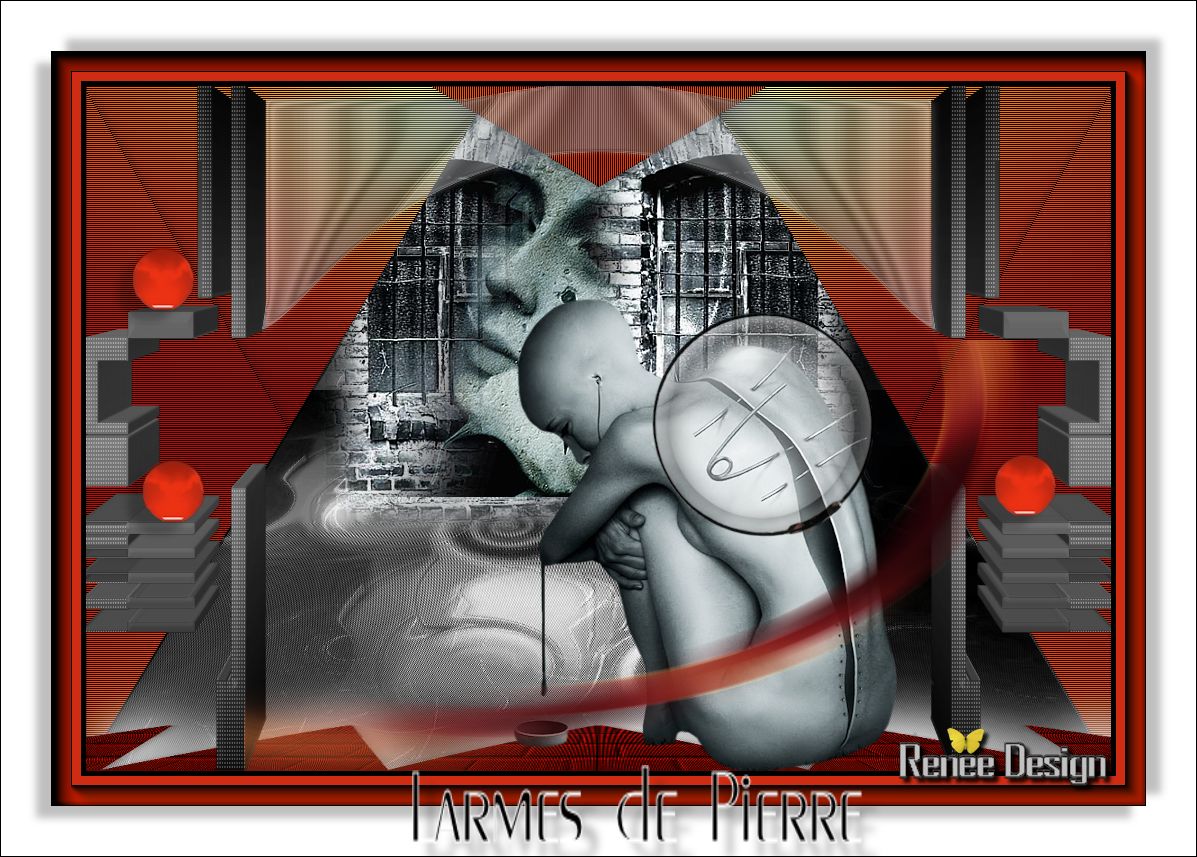
Everything is in place
54. Layers-Merge- Merge Visible
55. Image
Image - Add Borders - Symmetric checked:5 pixels black
56.
Image - Add Borders - Symmetric checked : 25 pixels color #cf2c13
57.
Image - Add Borders - Symmetric checked : 5 pixels black
58. Effects-Plugins AAA
-FRame / Foto Frame
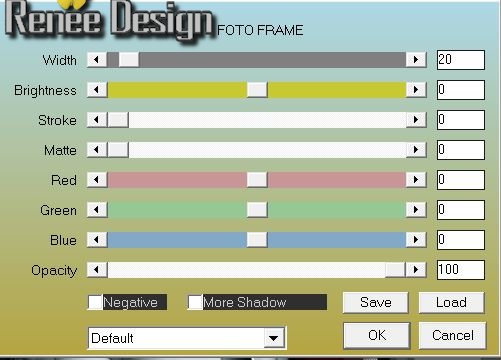
59.
Image - Add Borders - Symmetric checked: 50 pixels white
60.
With the magic wand -select the white border of 50 pixels
61.
Selections- Invert
62. Effects
- 3D Effects -Drop Shadow Ombre portée / still in memory and repeat negative -12 / 15
63. Selections
- Deselect All
64.Image-Add Borders-Symmetric checked: 1 pixels black
65. Open tube "Text" and place. Or write your own text
That's it !! You've done it !
Renée
This lesson was written by Renée 10/10/2013
Created the
22/10 /2013
Any resemblance with an existing lesson is merely a coincidence
| 

 Translations