|
Let's start the lesson.
Easter 2019

1. File-Open a new transparent image of 1056 x 655 Pixels
2. Flood Fill Tool
 flood fill the layer with #2b95b8=2
- Preparation
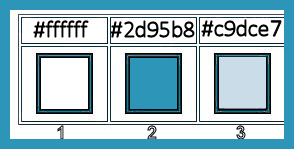
- Material Properties: Set your foreground color to color #ffffff = 1 – Set your background color to color #2d95b8= 2
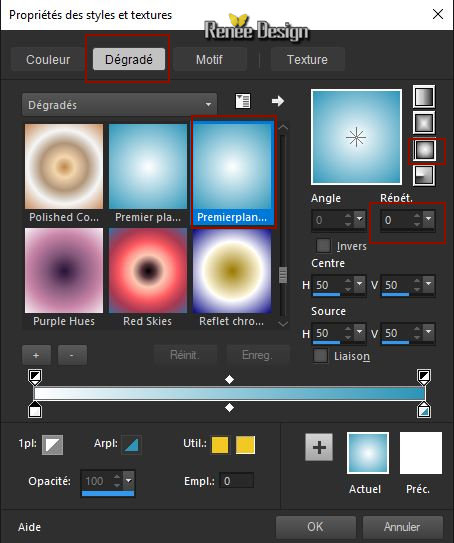
- Set your Foregroundcolor to foreground-background sunburst gradient configured like this
3. Layers- New Raster Layer
4. Flood Fill Tool
–
Flood Fill the layer with the gradient
5. Effects –Plugins-
Unlimited 2.0 - &<Bkg Kaleidoscope>- Cake Mix using the default settings :
169/169
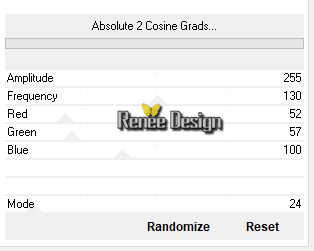
6. Effects –Plugins-
Unlimited 2.0 - Alf's Power Sines- Absolute 2 Cosine
Grads..use the settings below.
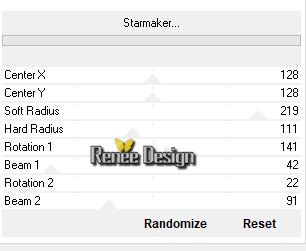
7. Effects –Plugins-
Unlimited 2.0 - VM Natural - Starmaker..use the settings below..
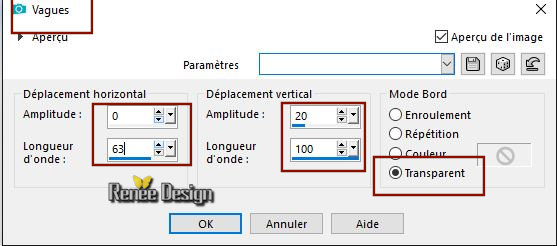
8. Effects- Distortion Effects- Wave with these settings
9. Selections- Select All- Selections-Float-Selections Defloat
10. Selections-Modify-Contract with 50 pixels
11. Selections- Promote selection tot layer
12. Effects – 3 D-Effects – Drop Shadow with these settings: 2/2/100/40 black
Selections- Deselect All
- Layer Palette : Activate the layer underneath=Raster 2
13. Effects – 3 D-Effects – Drop Shadow with these settings: 2/2/100/40 black
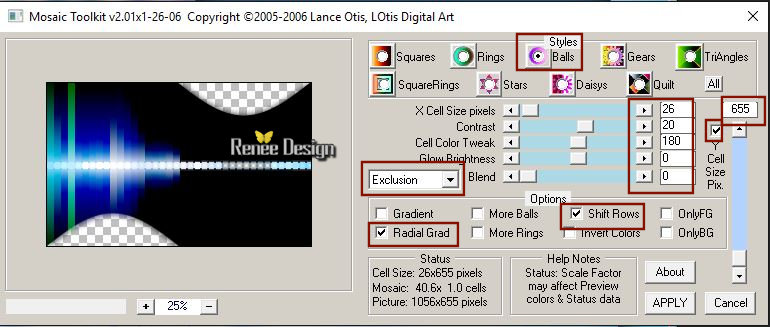
14. Effects- Plugins- Lotis Filters –Square-rings and balls–
Mosaic Toolkit use the settings below
- Layers- Arrange- Bring to Top
15. Effects –
Plugins– Transparency – Eliminate black
- Activate the bottom of the Layer-Palette=Raster 1
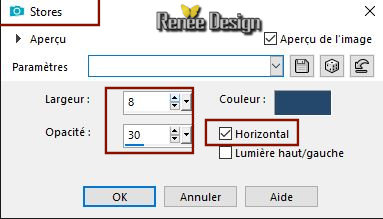
16. Effects- Texture Effects-Blinds with these settings -Color white
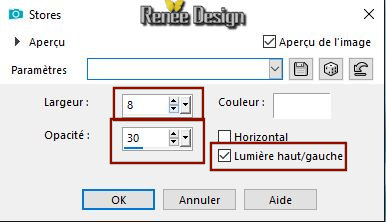
17. Effects- Texture Effects-Blinds with these settings-Color #264d74
18. Effects- Edge Effects- Enhance
19. Effects- Plugins– Graphic plus – Cross shadow using the default settings
- Activate the middle layer in the layer palette. (promoted selection)
20. Selections –load/save selection –load selection from disc and select my selection:’’paques_2019-1’’
21. Layers-Properties-Set the Blend Mode to " Screen "
DELETE
Selections- Deselect All
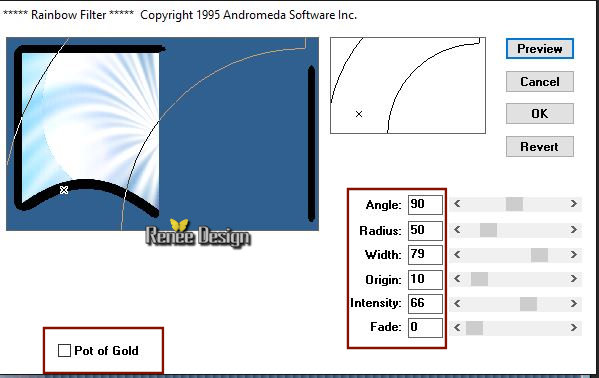
22. Effects –
Plugins– Andromeda Rainbow with these settings
23. Layers- Duplicate
24. Layers-Properties-Set the Blend Mode to " Normal " – Reduce the Opacity of this layer to 51%
- To replace the top of the layer-palette
25. Layers- New Raster Layer
26. Selections –load/save selection –load selection from disc and select my selection: ’’paques_2019-2’’
27. Flood Fill Tool: Flood Fill the selection with the foreground color #ffffff
Selections- Deselect All
28. Layers-Properties-Set the Blend Mode to " Overlay "
29. Layers- New Raster Layer
30. Selections –load/save selection –load selection from disc and select my selection:’’paques_2019-3’’
31. Flood Fill Tool
_
Flood Fill the selection with #c9dce7= 3
Selections- Deselect All
32. Open the tube ‘’ paques_2019_herbes’’
_ Edit - Copy- Activate your work -Edit - Paste as a new layer.
33. Objects –
Align -Bottom
34. Open the
tube ‘’ images _renee_paques 2019’’
- Edit - Copy- Activate your work -Edit - Paste as a new layer.(do not move it is in the right place)
35. Open the tube ‘’ Joyeuses_paques- titre rond.png’-Edit - Copy- Activate your work -Edit - Paste as a new layer and move
36. Activate the tube "titre "- Edit - Copy- Activate your work -Edit - Paste as a new layer- Or write your own text
37. Image - Add borders-Symmetric checked 1 Pixel #2d95b8 =2
38. Image - Add borders-Symmetric checked 20 Pixels #ffffff
39. Image - Add borders-Symmetric checked 1 Pixel #2d95b8 =2
40. Image - Add borders-Symmetric checked 40 Pixels #ffffff
41. Image
Resize to 995 Pixels width
42. Save as JPG
I hope you enjoyed this lesson
Renée
This lesson was written by Renée 27-01-2019
Edited and Update
2019
*
Any resemblance with an existing lesson is a coincidence
* Do not forget to thank the people who work with us and for us I have appointed the tubeurs and translators
Thanks
*
|


 Translations


 If a plugin supplied appears with this icon it must necessarily be imported into Unlimited