|
Let's start the lesson.
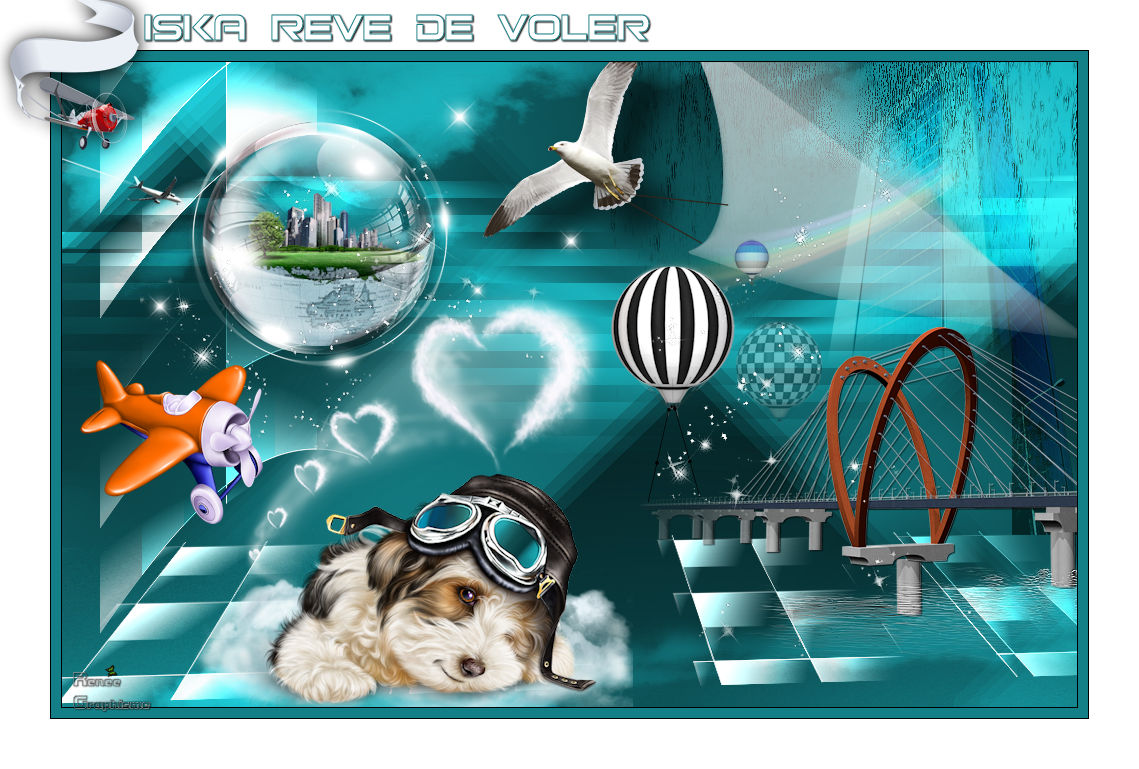
Iska dream of aviation
-Preparation
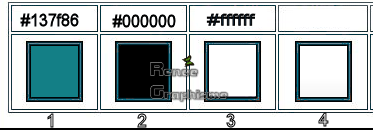
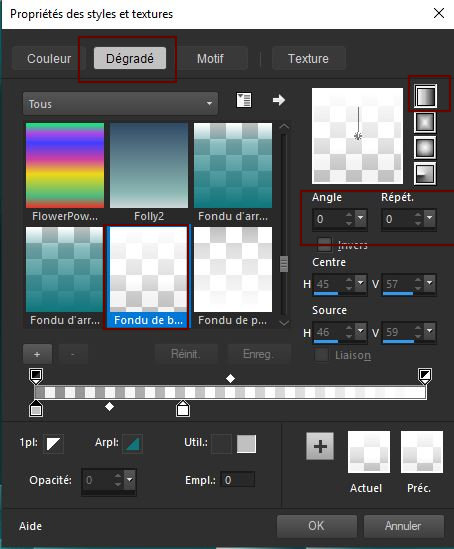
- Material Properties: Set your foreground color to color #137f86 = 1 – Set your background color to color black= 2
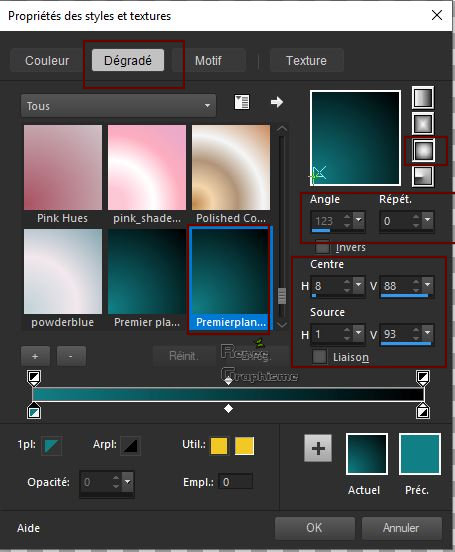
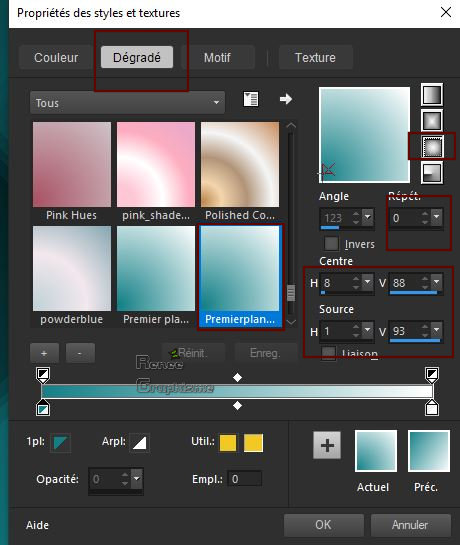
- Prepare a foreground/background sunburst gradient configured like this
1. File- Open a new transparent Image of 1015 x 645 pixels
2. Aktivate Flood Fill Tool
 –
Flood fill the layer with the gradient –
Flood fill the layer with the gradient
3. Effects –Plugins- Unlimited
2.0 - Filter Factory Gallery H – Jumble : 255/29
(this filter gives different effects it is not very important for the tutorial design)
- If necessary, make an adjustment variant - to lighten it (Effects- Plugins-Adjust Variation)
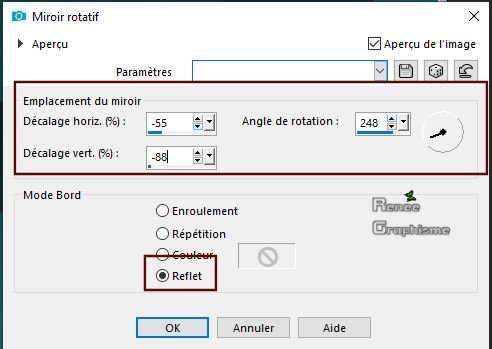
4. Effects – Reflection Effects –Rotating Mirror with these settings
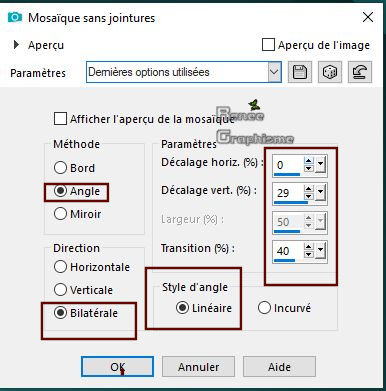
5. Effects-Image Effects-Seamless Tiling use the settings below
6. Effects –Plugins- Unlimited
2.0 - Filter Factory Gallery J - Drink To Me..: 7
- Set your Backgroundcolor to #ffffff
And use the same gradient settings
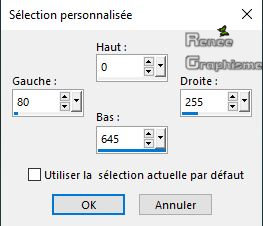
7. Activate Selection Tool -Custom Selection (S) -Rectangle with these settings
8.Layers- New Raster Layer
9. Activate Flood Fill Tool
–
Flood fill the selection with the gradient
Selections- Select None
10. Effects –Plugins-
Unlimited 2.0- It@lian Editors Effect - Effetto Fantasma
: 11/11
-Repeat this filter with the same settings
11. Effects –Plugins-
unlimited 2.0 - Kiwis Oelfilter – Setzboard : 132
12. Repeat this filter but put Setzboard :42
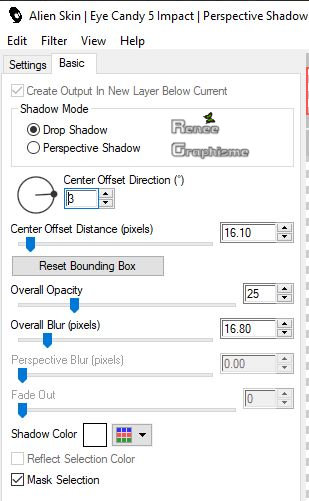
13. Effects – Plugins – Eyecandy 5 Impact – perspective shadow use the settings below
14. Layers-Properties-Set the Blend Mode to " Screen"
15. Layers-Duplicate
16. Image - Free Rotate - Right 90°( Do not move)
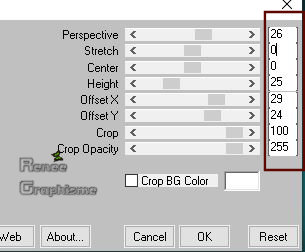
17. Effects – Plugins– Mura’s Meister – Perspective Tilling use the settings below
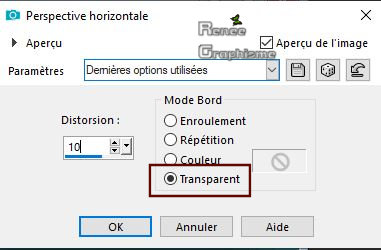
18. Effects – Perspective Horizontal use the settings below
-In the Layer-Palette: activate the layer underneath =(Raster 2)
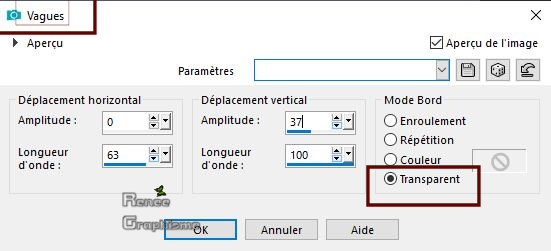
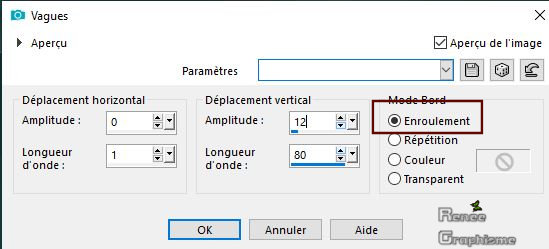
19. Effects-Distortion Effects Wave use the settings below
20. Layers-Properties-Set the Blend Mode to " Screen " – Reduce the Opacity of this layer to 63%
- To replace the top of the layer-palette
21. Open the tube
‘’ Iska_Aviation_image 1’’
- Edit - Copy- Activate your work -Edit - Paste as a new layer
22. Layers-Properties-Set the Blend Mode to " Overlay "
23. Layers- New Raster Layer
24. Selections –load/save selection –load selection from disc and select my selection: ‘’ Iska_rêve_d’aviation_1’’
- Material of the background: change material of the background into linear gradient select " Fading white" configured like this
25. Activate Flood Fill Tool
–
Flood Fill the selection with the gradient
Selections- Select None
26.Effects-Distortion Effects Wave use the settings below
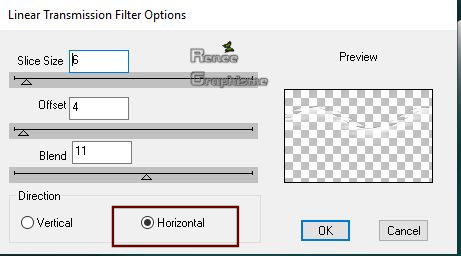
27. Effects –Plugins – Dsb Flux- Linear Transmission with these settings
28. Effects-Distortion Effects-Wind/Winddirection From right -Wind Strenght 100
- Repeat : Effects-Distortion Effects-Wind/Winddirection From right -Wind Strenght 100
29. Layers-Properties-Set the Blend Mode to " Overlay "
30. Layers- New Raster Layer
31. Selections –load/save selection –load selection from disc and select my selection: ‘’ Iska_rêve_d’aviation_2’’
32.Activate Flood Fill Tool
-
Flood Fill the selection with the gradient
Selections- Select None
33. Image - Rotate Right
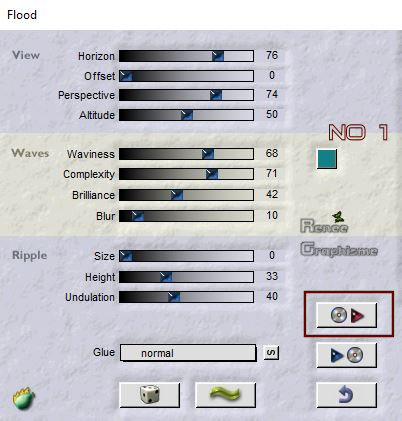
34. Effects – Plugins – Flaming Pear – Flood use the settings below
35. Image - Rotate Left
36. Selections –load/save selection –load selection from disc and select my selection: ‘’ Iska_rêve_d’aviation_3’’
DELETE

Selections- Select None
37. Layers- Duplicate
38. Image - Mirror - Mirror Horizontal (Image - Mirror in older versions of PSP)
39. Effects- Image Effects- Offset with these settings: H = 550 and V = 0
40.Layers- Merge- Merge Down
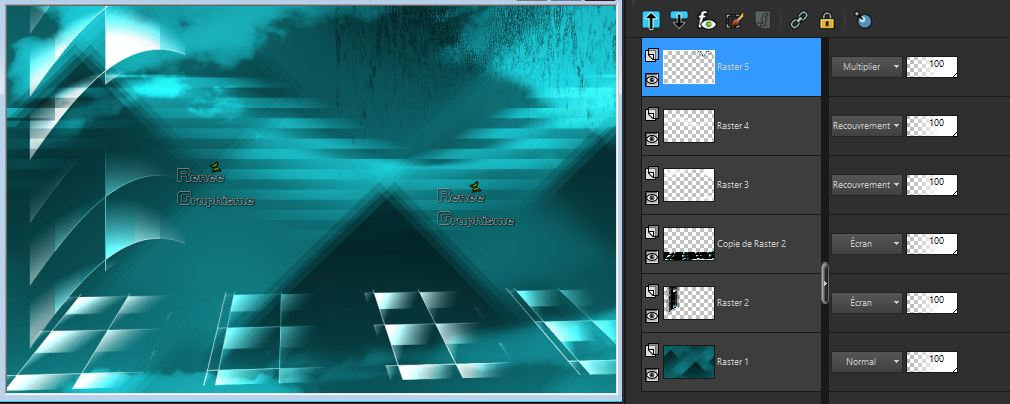
41. Layers-Properties-Set the Blend Mode to " Multiplikation "
42. Effects- Edge Effects- Enhance
-Your work and Layer Palette look like this now-You should have this result
43. Layers- New Raster Layer
44. Selections –load/save selection –load selection from disc and select my selection: ‘’ Iska_rêve_d’aviation_4’’
45. Activate Flood Fill Tool
– Flood fill the selection with the gradient
Selections- Select None
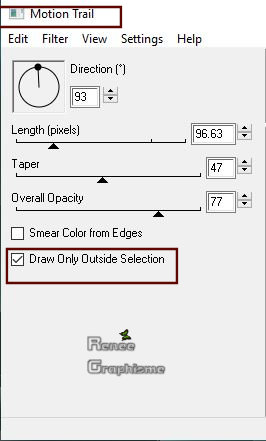
46. Effects – Plugins – EyeCandy 4000- Motion trail use the settings below
47. Lower the Opacity of this layer to 65%
48. Open the tube
‘’ Iska_Aviation_image 2.pspimage’’
- Edit - Copy- Activate your work -Edit - Paste as a new layer
- Move Tool (M) Move to the right
49. Layers- Arrange- Move 2x Down (leave in soft light and opacity 97)
-To replace the top of the layer-palette
50. Open the tube ‘’
Iska_Aviation_tubes_divers’’
Do not close, we need it
- Activate the layer ‘’oiseau’’ of the tube
- Edit - Copy
- Activate your work
-Edit - Paste as a new layer
- Move that tube in the in the right place( see finished image)
51. Back to the tube: activate layer ‘’rayon ‘of the tube
- Edit - Copy- Activate your work -Edit - Paste as a new layer
- Move that tube in the in the right place( see finished image)
52. Layers-Properties-Set the Blend Mode to " Screen" – Lower the opacity to 59%
53. Activate the layer
‘’pont’ of the tube
- Edit - Copy- Activate your work -Edit - Paste as a new layer
- Move Tool (M) Move to the right
54. Activate the layer
‘’Montgolfiere 1’of the tube
- Edit - Copy- Activate your work -Edit - Paste as a new layer
-Move that tube in the in the right place
55. Activate Pen Tool -Line Style-@qua22.PspStyledLine ’’ use the settings below

- Draw 2 lines to connect it to the bridge
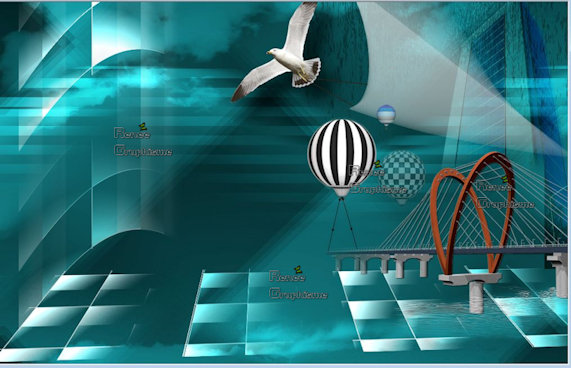
56. Activate the other 2 hot air balloons( montgolfières 2 and 3) and paste as a new layer. Move that tube in the right place
as shown in the example below ..The Result
57. Back to the tube. Activate the layer ‘’monde
‘ of the tube
- Edit - Copy- Activate your work -Edit - Paste as a new layer
58. Effects – Image Effects – Offset with these settings: H = -372 and V = 150
-
The tube can be closed
59. Layers- New Raster Layer
60. Selections –load/save selection –load selection from disc and select my selection: ‘’ Iska_rêve_d’aviation_5’’
61.Set your Background color to #ffffff-Activate Flood Fill Tool
Flood Fill the selection with te background color #ffffff
61.Lower the Opacity of this layer to 71%
Selections- Select None
62. Effects – 3 D-Effects – Drop Shadow with these settings: 1/1/100/25 color black
63. Activate the tube
‘’ Iska_Aviation_image 3.pspimage’’
- Edit - Copy- Activate your work -Edit - Paste as a new layer
64. Effects – Image Effects – Offset with these settings: H =- 250 and V = 145
65. Layers- New Raster Layer
66. Selections –load/save selection –load selection from disc and select my selection: ‘’ Iska_rêve_d’aviation_6’’
67. Activate Flood Fill Tool - Flood Fill the selection with te background color #ffffff
68. Layers- New Raster Layer
69. Selections –load/save selection –load selection from disc and select my selection: ‘’ Iska_rêve_d’aviation_7’’
70. Activate Flood Fill Tool
-
Flood Fill the selection with te background color #ffffff
Selections- Select None
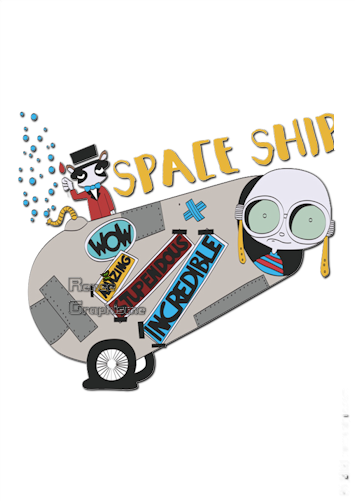
71. Activate the tube
‘’ Iska_Aviation_image 4.pspimage’’
- Edit - Copy- Activate your work -Edit - Paste as a new layer
- Do not move, it is in the right place
For once I can not offer the tube '' iska '' because this tube was not created by me
There is still a folder with tubes in the material)
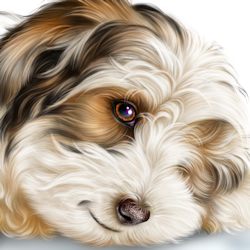
72. Open the tube with the children or with the dog and paste as new layer
73. Activate the tube
‘’ Iska_Aviation_image coeurs.pspimage’’
- Edit - Copy- Activate your work -Edit - Paste as a new layer
- Move that tube in the in the right place
74. Image - Add borders-Symmetric checked: 1 Pixel black
75. Image - Add borders-Symmetric checked: 10 Pixels #137f86 = 1
76. Image - Add borders-Symmetric checked: 1 Pixel black
77. Image - Add borders-Symmetric checked 50 Pixels #ffffff
78. Open the tube " texte"- Edit/Copy -Edit paste as new layer on your working image and move . Ore write your own text
79. Layers- Merge- Merge All (flatten)
80. Image resize to taste
Save as JPG
I hope you enjoyed this lesson
Renée
This lesson was written by Renée14-02- 2019
Edited and Update
2019
*
*
Any resemblance with an existing lesson is a coincidence
* Do not forget to thank the people who work with us and for us I have appointed the tubeurs and translators
Thanks
|

 Translations


 If a plugin supplied appears with this icon it must necessarily be imported into Unlimited *