|
HALLOWEEN 2019
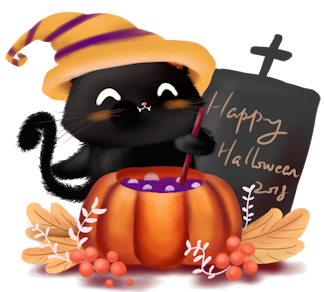
Let's start the lesson.
- Preparation
- Material Properties: Set your foreground color to color #c9cac5 =1 – Set your background color to color #4b4744= 2

1. File- Open a New Transparent Image of 1100 x 785 Pixels
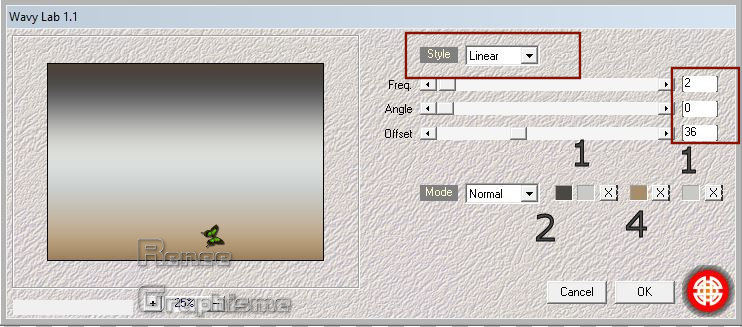
2. Effects – Plugins – Mehdi – Wavy Lab 1.1 use the settings below
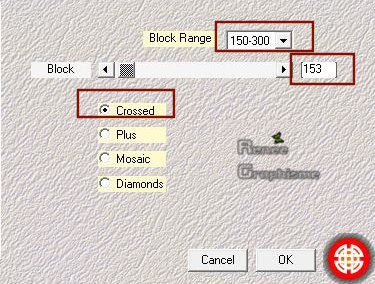
3. Effects – Plugins – Mehdi – Sorting Tiles use the settings below
4. Layers- Duplicate
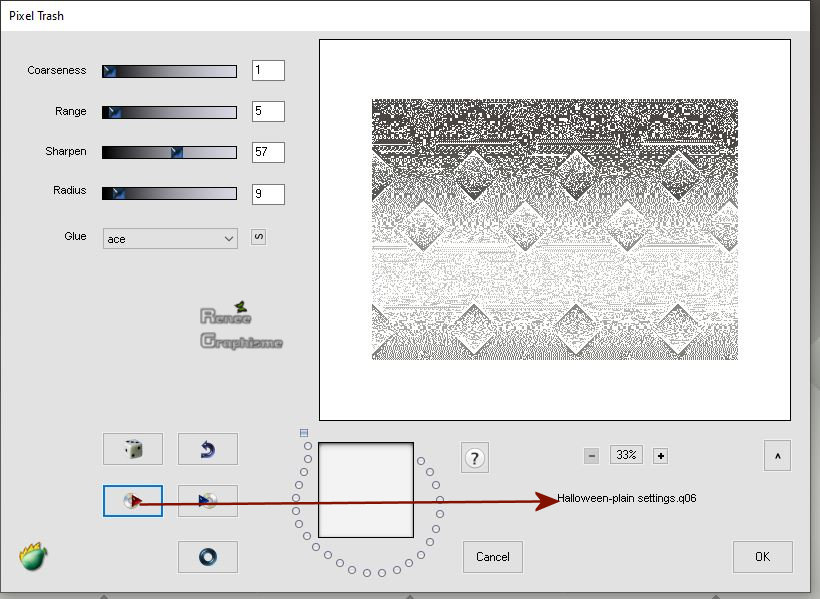
5. Effects – Plugins – Flaming pear – Pixel
Trash-click on the red arrow,select my file Preset ‘’ plain settings’ can be used in any folder of your choice by clicking it. -3 Open it will be ok in your filter ’
If your filter gives a slightly different effect it is not important for the continuation of the tutorial
Change the settings if necessary
6. Effects –Plugins – Simple – 4 Way Average
7. Image – Resize to 82 % - resize all layers not checked

8. Layers- New Raster Layer
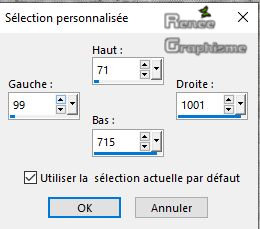
9.Activate Selection Tool -Custom Selection (S) -Rectangle with these settings 
10. Activate Flood Fill Tool
 – Flood fill the selection with the background color – Flood fill the selection with the background color
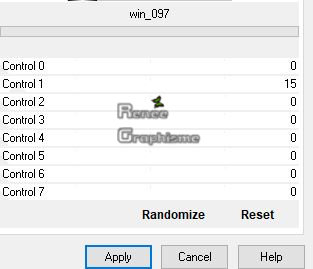
11. Effects –Plugins -Unlimited 2.0 - [AFS IMPORT]- win_097 use the settings below

Selections- Select None
12. Activate Magic Wand with these settings

–Click in the dark area
DELETE
Selections- Select None
13. Layers- Duplicate
14. Image - Mirror - Mirror Horizontal (Image - Mirror in older versions of PSP)
15. Layers- Merge- Merge Down
16. Effects – 3D Effects– Drop Shadow with these settings : 2/2/85/35 Color black
17. Layers- New Raster Layer
18.Activate Selection Tool -Custom Selection (S) -Rectangle - keep settings
19. Activate Flood Fill Tool
-
Flood fill the selection with the foreground color
20. Image - Rotate Right
21. Effects –Plugins Unlimited 2.0 - [AFS IMPORT]- win_097 with these settings
Selections -Select None
22. Activate your Magic Wand with these settings
–Click in the bright area
DELETE
Selections -Select None
23. Image - Rotate Left
24. Effects –Image Effects - Offset with these settings H = 0 and V = -2 -check custom and transparent
25. Layers- Duplicate
26. Image - Mirror - Mirror vertical ( Image - Flip in older versions of PSP)
27. Layers- Merge- Merge Down
28. Effects –3D Effects- Drop Shadow with these settings : 2/2/85/35 Color black
29. Layers- Arrange- Move Down
30. Effects –Plugins - Unlimited 2.0 – Two Moon - Wish it would
Rain with these settings : 255/243/64
In the Layer-Palette:
Activate the layer underneath
31. Effects –Plugins- Unlimited 2.0 – Twoo Moon - BlurChecks using the default settings
32. Layers- Merge- Merge Down ( twice )
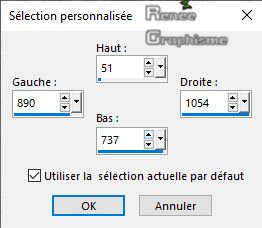
33.Activate Selection Tool -Custom Selection (S) -Rectangle with these settings
34.Edit-Copy- Edit Paste as new layer
Selections- Select None
35. Layers- Duplicate
36. Image - Mirror - Mirror Horizontal (Image - Mirror in older versions of PSP)
37. Effects – Image Effects – Offset with these settings : H -137 and V = 0-
check custom and transparent
38. Layers- Merge -Merge Down
39. Layers- Duplicate
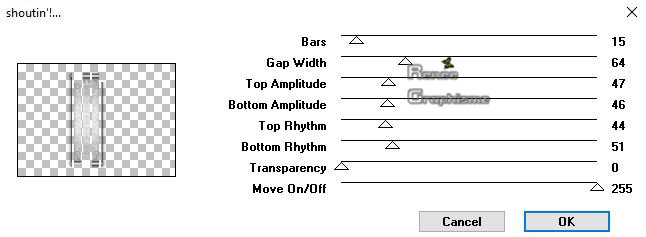
40. Effects –Plugins - Unlimited 2.0 (or effects-plugins ) – VM
Extravaganza- Shoutin’ ! use the settings below
41. Effects – Plugins - Simple – 4 Way average
42. Layers-Properties-Set the Blend Mode to " Multiply "
-
Color-Palette- Set your foreground color to color #251404= 5
43. Layers- New Raster Layer
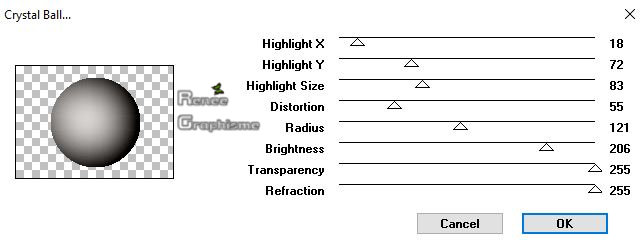
44. Effects –Plugins -Unlimited 2.0 (or effects-plugins ) – VM
Toolbox – Crystal Ball use the settings below
45. Image – Resize to 25% - Resize all layers not checked
46. Effects –Plugins – Alien Skin EyeCandy 5
Impact- Glasss-tab Settings/User settings choose my preset ‘’Renee_Glass_Halloween2019’’
47. Pick Tool: (K) on your keyboard
Enter these parameters for the X:126,00 and Y:308,00 positions on the Toolbar
-
Press any key to close the Pick Tool
-
In the Layer-Palette: activate Raster 1
48. Open the tube ‘’ Renee_Halloween-2019-Image 1’’
-
Edit - Copy- Activate your work -Edit - Paste as a new layer
49. Objects – Align -Bottom
-
To replace the top of the layer-palette
-
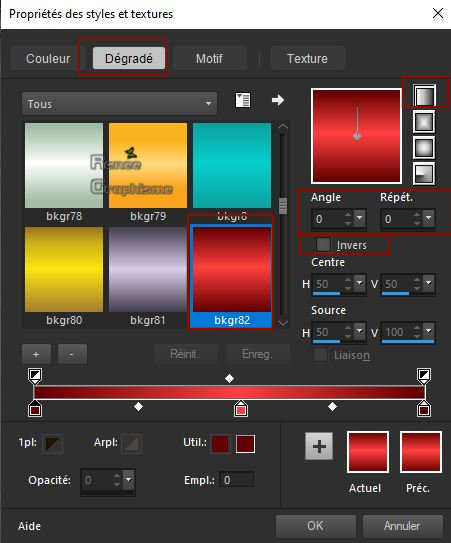
Color Palette: Set your foreground color to gradient and select :
‘’bkgr82’’
-
Prepare a linear gradient configured like this
50. Layers- New Raster Layer
51. Selections –load/save selection –load selection from disc and select my selection:
‘’Renee_Halloween-2019-1’’
52. Activate Flood Fill Tool
– Flood fill the selection with the gradient «’’bkgr82’’
53. Effects –Plugins- Unlimited 2.0 – Tramages -Tow The Line..using the default settings .
Selections- Select None
54. Layers- Duplicate
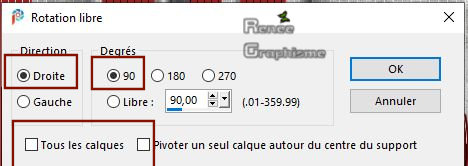
55. Image -Free Rotate -Direction Right -Degrees 90
56. Effects- Distortion Effects – Warp use the settings below

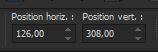
57.Pick Tool: (K) on your keyboard
Enter these parameters for the X:4,00 and Y:199,00 positions on the Toolbar
- Press any key to close the Pick Tool

58. Layers- Arrange -Move Down (twice )
59 .Layers- Properties-Lower the Opacity of this Layer to 89%
60. Objects – Align-Left
61. Effects –Plugins - Unlimited 2.0 – RCS Filter Pak 1.0 – RCS
Sequins
62. Effects –Edge Effects- Enhance More
-
In the Layer-Palette: activate Raster 1
63.Activate Selection Tool -Custom Selection (S) -Rectangle with these settings

64. Effects –Plugins- Unlimited 2.0 – RCS Filter Pak 1.0 - RCS
Negative Image Creator with tese settings: 235 / 87 /0
65. Selections- Invert
66. Effects –Plugins- Unlimited 2.0 – RCS Filter Pak 1.0 - RCS
NoiseMaker - B&W Noise : 58
Selections- Select None
-To replace the top of the layer-palette
67.Layers- New Raster Layer
68. Selections –load/save selection –load selection from disc and select my selection:
‘’Renee_Halloween-2019-2’’
68. Color Palette: Set your foreground color to color black
Activate Flood Fill Tool
–Flood fill the selection with color black
Selections- Select None
70. Effects- 3 D Effects Drop Shadow with these settings: 10/10/50/5 Color black
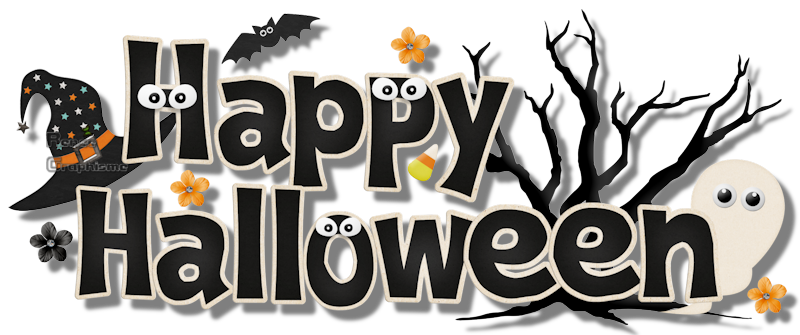
71. Open the tube ‘’ Renee_Tubes-Halloween –texte’’
-
Edit - Copy- Activate your work -Edit - Paste as a new layer
-
Activate your Move Tool (M) move it in the right place
-
In the Layer-Palette:Activate the second layer from the bottom ( Copy of Raster 1)
72. Open the tube ‘’Renee_Halloween-2019- Divers’’(Do not close)
-Activate the layer ‘’Sorcieres ‘’of the tube -Copy it and paste it as a new layer- Move Tool (M) Move to the bottom right
(Note the location of her shoes)
-
To replace the top of the layer-palette
73. Back on tube
‘’Renee_Halloween-2019- Divers’’
-I have 5 levels of decorations that you can use.Choose tubes to decorate your work of choice (or a tube of your choice), copy it and paste it as a new layer
Make sure everything is in the right place
74. Image - Add borders-Symmetric checked 1 Pixel Color black
75. Image - Add borders-Symmetric checked 30 Pixels Color white
76. Image - Add borders-Symmetric checked 1 Pixel Color black
77. Image - Add borders-Symmetric checked 40 Pixels Color white
78. Effects – Plugins- AAA Frame –Foto Frame use the settings as below
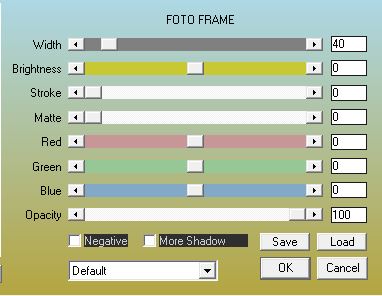
79. Repeat this filter with the same settings
80. Image - Resize to 999 Pixels Width.
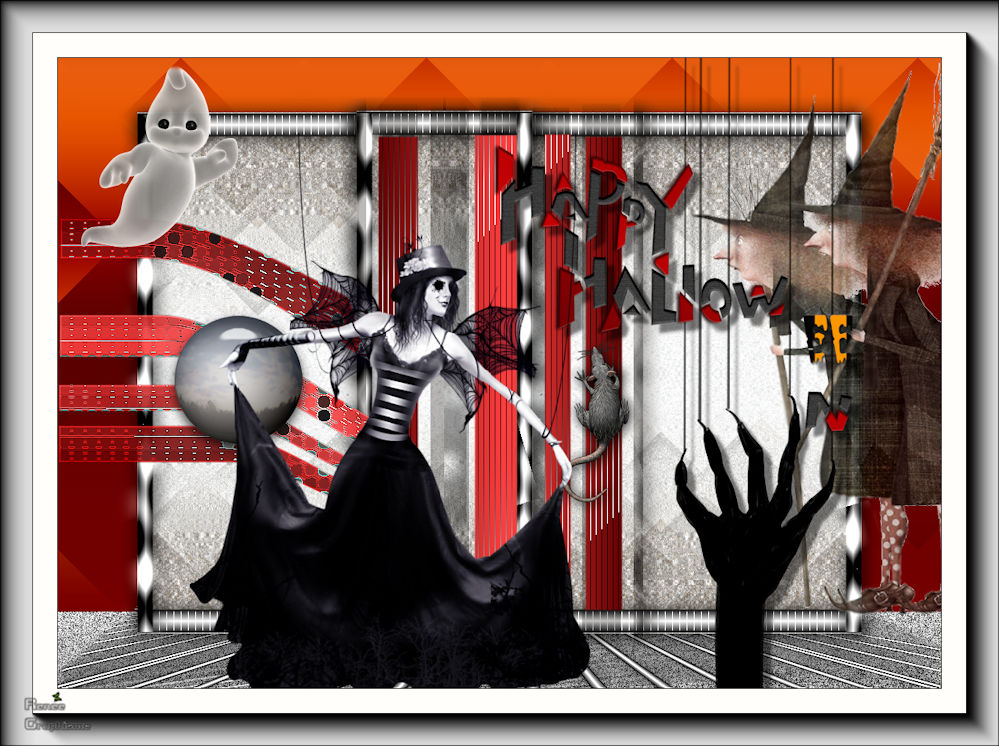
Save as JPG
That's it !! You've done it !!
Renée
This lesson was written by Renée
12-08-2019
Edited and Update
2019
*
Any resemblance with an existing lesson is a coincidence
* Do not forget to thank the people who work with us and for us
I have appointed the tubeurs and translators
Thanks
*
|

 Translations


 If a plugin supplied appears with this icon it must necessarily be imported into Unlimited *